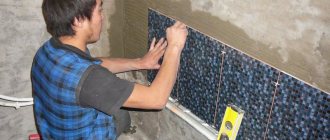
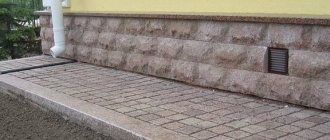
Thanks to the easy care of the surface and the ability to withstand heavy loads, the tiles have no equal in the field of tiling rooms with high humidity. To learn how to lay it correctly with your own hands, you just need to be patient and have the right tools and materials.
Be sure to read our article to the end to find out how to lay tiles on the floor several times faster and more accurately than hiring a professional.
Tools to get started
Before laying tiles on the floor, make sure you have everything you need:
- building level,
- pencil and tape measure,
- roller and brush,
- 10cm spatula and rubber spatula for rubbing joints,
- comb,
- mixer and glue bucket.
From the material we will need:
- the tile itself,
- tile adhesive,
- dividing crosses,
- primer,
- grout (fugue)
Repair of ceramic floor tiles
Under the influence of fluctuations in temperatures, loads and time, sooner or later repairs will be required. Let's look at common problems and options for solving them.
Repairing minor chips and scratches
You can easily fix such minor defects with your own hands. It is enough to take grout for the joints that matches the color. Dilute it with water to the consistency of thick sour cream and apply it to the surface of the ceramic tile with a rubber spatula (or just by hand).
Repair with replacement of one element
If one or more adjacent tiles are cracked or falling apart, repairs must be made to completely replace these areas. The most difficult thing is to remove the broken elements without touching the whole ones. There is a way to do this neatly:
- First of all, take care of yourself - put on safety glasses, a helmet or at least a cap, and take care of your hands and feet.
- Cover adjacent elements and joints with adhesive tape or masking tape to prevent damage to their surface.
- Using a grinder, make cuts along all four sides of the damaged tile. The cut should go as deep as possible so that our manipulations do not affect the adjacent plates.
- Drill several holes with a drill (without perforation mode).
- Using a chisel, pressing against the drilled holes, break the plate into pieces.
- Clean the surface of old tile adhesive. Apply a layer of deep penetration primer. Using a notched trowel, apply a layer of adhesive to the floor (or tiles).
- Lay the tiles. Use a building level to ensure the new element lies level.
- Let the glue dry completely, then use grout to go over the seams.
The video shows how to replace one tile on the floor (~ 3 minutes video)
Reasons for tile deformation
In any case, no matter what kind of repair you carry out, the most important thing is to understand the causes of such defects and try to correct the cause itself, and not deal with the consequences every time. If defects, and usually this is cracking of elements, occur due to temperature changes and, as a result, movement of the base structure, it is necessary to consider the possibility of thermal insulation of the floor. If the causes of defects are related to humidity, it is necessary to take care of waterproofing or selecting materials with the highest level (lower percentage) of water absorption.
These days they make floor tiles of amazing quality, so if you frequently repair tiles, you may have selected the specifications incorrectly. Contact your building materials supplier or find a new one.
Preparatory work
The surface for cladding should be as smooth as possible. For these purposes, the floor is equipped with a screed or a self-leveling floor is made. The first option requires more practice, but is suitable for leveling floors with significant slopes. Self-leveling flooring will be a little more expensive, but it does not require any special skill or skill.
A thorough inspection is carried out on the concrete base where the tiles are going to be laid. To avoid unstable areas, every centimeter of the floor is tapped. The level checks horizontalness. If the differences do not exceed 3 cm, the coating is quite suitable. If the conditions are not met, then pouring the screed cannot be avoided. The surface must not contain paint, parts of old coating or traces of petroleum products. Detected areas of crushed concrete or deep oiling are removed down to the “healthy surface”.
Wide cracks are cut to a width of up to 15 cm. All tubercles and protrusions must be removed, since the evenness of the tile laying depends on this. The surface is dust-free, and the areas to be filled with the repair compound are primed.
You can consider the option of a classic cement-sand mixture in proportions 1:3. This mixture will take quite a long time to dry. Cement-based tile adhesive can be used as a repair composition, but such a solution will only be reasonable for small defects; otherwise, a lot of it will be needed.
All cracks and potholes are sealed with mortar and leveled with the general surface. The point of leveling is not so much to accurately smooth the mortar, but to fill cracks and crevices as much as possible.
After the repair composition has hardened, the surface is primed in two layers, with each layer required to dry. This is done to ensure excellent adhesion and surface hardening.
But there are situations when, when repairing a small section of the screed, further delamination is observed, the so-called “avalanche-like process” occurs. In this case, remove all the old screed up to the floor slab and pour in a new one, about 300 mm thick. After hardening, the screed is primed.
How to lay tiles on the floor: stages and features of the work
No matter how diverse the range of available finishing materials pleases us today, ceramic tiles, although they are among the venerable “veterans” of the construction market, are by no means in a hurry to lose their leading position in popularity. It occupies a very specific “niche” - this material, thanks to its unique performance characteristics, is used for external and external work, for residential and technical premises, for finishing floors and walls, facades and hydraulic structures, adjoining buildings and even garden design elements.
How to lay tiles on the floor
Ceramic tiles have practically no competitors in the field of finishing rooms with a pronounced high level of humidity - bathrooms, bathrooms, kitchens, etc. The strength of ceramics allows it to withstand high loads, therefore, when tiling floors in such rooms, preference is most often given to it, since for all its positive qualities it is also very affordable. And another important advantage is the relative ease of installation: if you thoroughly understand the intricacies of how to lay tiles on the floor, get a little practice, and show diligence, then you can easily cope with such work yourself.
But before tackling the issues of laying tiles, it would be logical to consider the problems of its correct selection.
How to choose floor tiles
When going to the store to select and purchase the necessary material, the apartment owner should “arm” himself with basic knowledge of what kind of tiles are usually on sale.
Choosing floor tiles based solely on their decorative qualities is an extremely frivolous approach. In a good store, trained sales consultants can be of great help and can tell you which tile model is intended for what purpose. But it’s better to be able to navigate the icons and pictograms, which can tell a lot on their own. The most common symbols that may appear are shown in the table:
Pictograms on ceramic tile packaging
1 - This is a tile with pronounced frost-resistant qualities. It is suitable for the floor of a porch, veranda, balcony or loggia. There is no point in spending money on purchasing such tiles for further flooring in a heated room.
2 – A foot on an inclined plane is a symbol of the anti-slip qualities of the tile. For rooms with high humidity (bathroom, kitchen) or for hallways, where shoes often carry moisture from the street, this is a very important criterion. Often this icon is accompanied by a digital indicator - this is the friction coefficient. For the mentioned premises, the optimal choice would be slightly rough tiles with a specified coefficient of at least 0.75.
3 – A symbol in the form of a diamond (sometimes found with an image of a drill) – the tile has increased characteristics of surface strength and resistance to accentuated impacts. Good quality for kitchen floors - accidentally dropped dishes will not cause serious damage to the flooring.
4 – A similar pictogram is always accompanied by a numerical value - this is the thickness of the ceramic tile. For laying on the floor, a material with a thickness of about 7–8 mm is usually purchased.
5 – Ultimate bending strength of a single tile. This parameter is determined based on the results of bench tests, and the higher it is, the better the quality of the material (for example, for porcelain stoneware this indicator is much higher than for ordinary tiles). However, the tiles on the floor should be laid so that the bending load is minimal - tightly and evenly to the surface, without air bubbles, cavities, etc.
6 - The palm-shaped icon indicates that this ceramic tile is intended exclusively for walls. No matter how beautiful and durable it may seem, it cannot be purchased for laying on the floor.
7 – But the image of the shoe print speaks for itself - this tile is intended specifically for the floor.
8 or 16 are indicators of the resistance of ceramic tiles to abrasive and abrasive loads. In accordance with the international standard PE1 (EN ISO 105645.7), there are 5 wear resistance classes:
| Wear resistance class according to PE1 (EN ISO 105645.7) | Application area |
| I | Such tiles are suitable for rooms with minimal load, where there is never intense movement of people (for example, a bathroom, toilet). Street shoes are not worn in such rooms, and they are not close to the exit to the street. |
| II | This tile is for rooms where people also wear slippers, but the intensity of traffic is somewhat higher. |
| III | The wear resistance of this class allows the use of ceramic tiles in hallways or kitchens. |
| IV | High-strength tiles for rooms and halls with intense load - entrances, shops, public places, offices, etc. There is no point in using it in apartments or private houses. |
| V | The highest class of abrasive strength, applicable for coatings with extremely high intensity of movement of people and even some types of transport. Scope of application: train stations, large supermarkets, warehouses, industrial premises, etc. |
9 – This pictogram indicates that the ceramic tile has undergone a double firing procedure. This material usually has a glossy glazed surface and is more suitable for installation on walls. In addition, double firing technology implies increased porosity of the ceramic, which means a decrease in its mechanical strength and increased water absorption.
10 – The icon in the form of a chemical flask indicates the increased resistance of the tile surface to acids, alkalis, and other aggressive substances, including any type of household chemicals. The letter indicator of this material property is “AA”.
11 - If you come across such an icon, then you need to be careful in choosing tiles - there may be tiles of different shades in one box.
12 – Some expensive types of ceramic tiles can be produced with the inclusion of noble metals: silver (Ag), gold (Au) or even platinum (Pt).
Pictograms 13 ÷ 15 inform about the parameters of the factory packaging of ceramic tiles. So, in the example given, symbol 13 indicates that the gross weight of the box is 19.00 kilograms, icon 14 means that one package is enough for 1.42 m² of floor area, and symbol 16 means that there are 24 tiles packed in the box.
Some of the specific properties of the material will be indicated by the pictograms indicated in the table under numbers from 17 to 21. Such ceramic tiles are intended for special operating conditions. These can be train stations and airports, medical institutions, industrial enterprises, hotels, sports facilities. There is no point in purchasing such tiles for flooring in a private house or apartment.
What other points should not be overlooked:
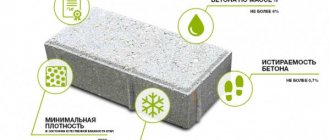
- If the tiles are planned to be laid on the floor of a bathroom, shower room, kitchen or other room with high humidity, then a material with a minimum (not higher than 3%) water absorption coefficient is required.
- The linear dimensions (length and width) of the tile also matter. Of course, the larger the tile, the faster it can be laid. However, for rooms with a small area and complex floor shapes, oversized tiles will not be suitable - there will be a lot of waste. And large tiles will look somewhat ridiculous in such rooms. In addition, we must not forget that carefully laying large tiles is much more difficult.
- If you purchase several packs of ceramic tiles, you must definitely select the product from the same batch.
When purchasing several packages of ceramic tiles, be sure to check the lot numbers.
This is necessary for two reasons:
— Firstly, even a completely identical model of tile, but from different batches, may have slight deviations in shade. In a store environment, it is quite possible that this will not even be noticeable. However, after laying such a covering on the floor and under normal lighting, such a difference can greatly spoil the intended interior appearance of the room.
Different batches may also differ in calibration - the linear dimensions of the tiles
— Secondly, fluctuations in the linear dimensions of the tiles cannot be ruled out. It is clear that cutting of material in production is carried out under the control of precision electronics. But still, ceramics remain ceramics, and there may be small errors, so calibration of finished products must be carried out. One batch should always contain tiles of the same calibration, and the difference between different batches can even be several millimeters. When laying such tiles on the floor, especially in large rooms, inconsistencies may occur that are noticeable to the naked eye.
- Be sure to check the packages for broken, cracked or chipped tiles on the surface. Sellers may convince you that marriage is an inevitable phenomenon, and you need to come to terms with it. No, it’s not necessary, you pay your money for a quality product.
- It is generally accepted that a certain reserve should be purchased, 10% more than the area of the room. This will be spent on “cuts” and in cases of compensation for any annoying misunderstandings. It must be remembered that it will not always be possible to buy additional tiles later to make up for the missing quantity - this has already been mentioned when talking about batches.
When laying tiles diagonally, the material consumption may be slightly higher.
By the way, if you plan to lay tiles diagonally, then the reserve can even be increased slightly - up to 15%. With this technology, it is more difficult to adjust the material along the walls, there is more waste left and, in addition, there is a much higher probability of making some mistakes due to inexperience.
Prices for ceramic tiles
Ceramic tile
How to lay tiles on a concrete floor
The process of tiling a floor with ceramic tiles can be divided into four main stages:
- Preparing the surface for installation.
- Carrying out the necessary markings, drawing up a work plan.
- Laying ceramic tiles with adhesive mortar.
- Grouting and finishing work.
Preparing the floor surface for laying tiles
The requirements for the base for laying tiles are, in principle, simple - it must be strong, stable, and provide good adhesion to the adhesive composition. How is this achieved?
If we are talking about a concrete base, then first it is necessary to carry out a thorough inspection of the old screed on which the tiles are planned to be laid. There is no need to be lazy - you should tap every centimeter of the floor to make sure there are no unstable areas.
- First of all, its horizontalness is checked - if this condition is not met, then pouring a new screed simply cannot be avoided. If the evenness is satisfactory (differences are no more than 2-3 mm), then the old coating can still serve, provided, of course, that it is stable.
- If, during a control inspection, places of screed peeling, concrete crumbling, or deep oiling are identified, it is necessary to remove them right down to the “healthy” surface, both in width and in depth. Wide cracks and crevices need to be cut to a width of 10 - 15 mm.
- There should be no traces of paint, oil products, fats, or remnants of the old coating on the surface - everything is cleaned off to clean concrete.
- All protrusions must be cut down - if you can sometimes look at a small depression “through your fingers”, since it will still be filled with glue during the laying process, then even the smallest bump will make even laying simply impossible.
- After this, a thorough cleaning is carried out with dust removal of the surface. In order for the repair suction to adhere well, it is necessary to prime all areas to be repaired and allow the primer to dry completely.
- A repair composition is being prepared - it can be a “classic” cement-sand mixture in a ratio of 1:3, but it will take quite a long time to dry.
Cement-based tile adhesive can be a good repair composition, but this approach will only be reasonable for small defects - in large or deep areas, too much expensive adhesive will be used.
Filling potholes and cracks on concrete base
- All potholes, dents, splits and cracks must be filled with repair mortar and leveled with the general floor surface. The point is not in perfect smoothing, but in filling the voids as densely as possible.
- After the repair compound has dried, the floor surface is completely primed with a special compound, which will strengthen the surface and ensure excellent adhesion.
Deep penetration primer for treating a concrete surface before laying tiles.
There are many primers on sale, and there is always the opportunity to purchase the best one in terms of price and quality. For example, “Cerezit СN94”, “Betonokontakt”, “Plitonit – soil-supercontact” have an excellent reputation.
Applying primer to the floor surface
It is better to apply the primer in two layers, with the first being required to dry. After the soil has completely absorbed and dried, the floor surface can be considered completely ready for laying tiles.
Any repairman will confirm that very often a situation occurs when, when repairing a seemingly small section of an old screed, an “avalanche-like process” begins - the detachment spreads further and further. In this case, there is only one way out - to remove all the old covering completely, up to the floor slab. The work, of course, is not the most pleasant, but you can’t do without it - tiles on an unstable floor will not last long.
Quite often this becomes inevitable - removing the old screed
After the old coating is removed, it is necessary to pour a new screed with a thickness of at least 30 mm. (you can read how to do this correctly in the corresponding publication on our portal ).
The finished and completely cured screed is also primed twice, after which you can proceed to further work.
Prices for various types of screeds and self-leveling floors
Screeds and self-leveling floors
Marking the floor for laying ceramic tiles
Ceramic tiles should become a decoration of the room, and this will be possible only if their location on the floor is planned correctly. A sloppy, slanted tile can completely decorate an interior.
There are many techniques and methods for placing ceramic tiles on the floor - it is impossible to consider all of them in the scope of this article - this is a topic for a separate publication. But even the simplest, “classic” method requires precision and accuracy.
Starting to plan installation from the wall is very risky, since the slightest defect will grow with each successive row, and it will be very difficult to eliminate it. Therefore, the reference lines and the first rows of tiles are usually located approximately in the center of the room.
Tapping reference lines on the floor
The first reference line is usually drawn along the room. To do this, in two places, at the beginning and at the end, carefully measure the distance between opposite walls and mark the midpoints. They are connected by a straight line (usually this is done using a coated cord), and a longitudinal baseline is obtained.
Now you need to draw a second one, perpendicular to the first, also approximately in the middle of the room. It is very important that strict perpendicularity is maintained. To avoid mistakes, and this is quite possible when using a square and a ruler, you should definitely check the right angle using the formula of the famous “Egyptian triangle”: 3² + 4² = 5². According to the Pythagorean theorem, it is a triangle with legs divisible by 3 and 4 and a hypotenuse divisible by 5.
For example, we measure 900 and 1200 mm from the intersection point of the legs. We connect the marked points with a segment, and its length should be exactly 1500 mm - no more, no less.
Once the lines are drawn and their perpendicularity is checked, you can think about how to place the rows of tiles and where to start the layout. We remember that the drawn reference lines are not at all a “dogma” for starting masonry - it will not be difficult to carry out a parallel transfer from them in any direction.
Options for the location of reference lines and starting rows of laying
For example, if the entrance door in a spacious room is located exactly in the center, then you can lay out the first rows of tiles - along the laid reference lines. The principle is this: so that when entering the room, a flat area is presented to the eye, without cuts or adjustments. (see item “a” in the figure).
But in a room with a small area, with the exit shifted to the edge (position “b”), and possibly having a complex shape or stationary obstacles, the beginning of the masonry can be shifted to a free “patch” - it will be much more convenient to work from here in all directions, but it is the entrance that will turn out to be “front”.
In any case, you should never be lazy - you should carry out a control laying of the central longitudinal and transverse rows of ceramic tiles “dry”, without using mortar, but leaving the planned gap between adjacent tiles.
Do not neglect the initial “dry” laying of the tiles - this will allow you to evaluate the options for its location
This simple procedure will allow you to visually assess the future picture, measure distances, and finally decide on the laying scheme, that is, settle on one of the principles:
Several layouts for placing tiles on the floor
1 – in a small room, for example, in a bathroom or kitchen, you can take two walls from the entrance (green arrows) as the “starting line”, provided that they are exactly perpendicular. In this case, the entire visible part of the room will be lined with intact tiles, and the cut edges will be hidden under furniture or plumbing equipment.
2 – the laying is carried out from the center in such a way as to place the maximum possible number of whole tiles on the floor, leaving narrow areas for addition with fragments (brown arrows). Beneficial in terms of material savings. However, for reasons of masonry quality, it is advisable to leave areas no narrower than ⅓ of the width of the tiles near the walls.
3 – the arrangement with a minimum number of whole tiles in a row, but with expanded fragments along the walls (blue arrows) looks a little more impressive. This coating looks more complete, and from an operational point of view it is more reliable than No. 2.
4 – laying diagonally – will help hide the curvature of the room. Among the disadvantages is a more complex design, especially in terms of preliminary marking and fitting of tile fragments, more material goes to waste.
If you have decided on this, then you should immediately outline what scheme the work will be carried out - from the far corner to the entrance, or with the space divided into several areas in straight rows, followed by filling them.
The sequence of laying tiles in zones is thought out in advance
You can also “fill” space in different ways. So, some masters do the styling in an orderly manner. Others prefer the “ladder” scheme with a sequential increase in the number of simultaneously laid rows.
“Filling” the space can be done linearly, or, as shown in the figure, in steps
By the way, there are supporters of laying ceramic tiles on the floor “at random” or even chaotically - sometimes this is part of the design intent of finishing the room. But in an ordinary home, they still prefer to limit themselves to a straight installation pattern, “seam to seam.”
Laying tiles on the floor
- So, we prepare the necessary tools and materials for installation.
— For work you will need spatulas, ordinary, with a width of 100 to 250 mm, and serrated, with a furrow height of 8–10 mm. To grout joints, it’s a good idea to get an elastic rubber spatula.
— You will need a construction mixer or a drill with an attachment for mixing tile adhesive, and an appropriate container for the same purposes.
— Always have a building level at hand.
— In some cases, you may need to use force to get the tiles into place. It is convenient to use a rubber hammer for this purpose.
— You should immediately think about how the tiles will be cut (more on this below).
— It is necessary to create a supply of calibration crosses of the required thickness, plastic wedges for leveling the height.
You should always have on hand a supply of calibration crosses of the same width and, if necessary, wedges for trimming the tiles in height
— In order not to carry dirt, you need to have a supply of clean rags and a sponge for wiping the solution from the front surface of the tile.
- Probably, nowadays no one thinks about making tile adhesive on their own - it can always be purchased in the store. When choosing, you need to check the purpose of the composition - in addition to the usual ones intended for most interior spaces, there are specialized mixtures intended for rooms with high humidity conditions, for the street, especially resistant or for the so-called “difficult surfaces”, for “warm floor” systems, etc. .P.
The glue is diluted by gradually adding the dry mixture to the amount of water specified in the instructions, with constant stirring using a mixer or drill. The composition should be absolutely homogeneous, without lumps, of a fairly dense consistency - so that the ridges created with a notched spatula do not spread.
After obtaining the consistency of the composition necessary for work, it is left to “ripen” for 5 minutes, then mixed again for 2-3 minutes - and you can begin laying.
You should not prepare too much mortar at once, especially if you have no experience in laying ceramic tiles. Its “life” is limited - this is necessarily indicated in its instructions. If the glue begins to noticeably thicken during work, you will have to throw it away - you cannot dilute it with water a second time - it will lose its qualities.
- Novice craftsmen, apparently having listened to old, irrelevant advice or read about it somewhere, soak the tiles in water before laying them on the floor. In this way they are making a grave mistake.
A similar approach is possible if the tiles are laid on a regular cement-sand mortar, and even then - not in all cases. And all modern building mixtures - adhesives for ceramic tiles - are designed for application specifically to a dry surface. Excess water will significantly reduce the performance of the glue, and the tiles will begin to “dance” and fall off over time.
Therefore, before laying the first tile, carefully read the instructions for using the purchased tile adhesive again - everything is probably indicated there.
- Where to apply the glue - on the floor or on the tiles? There is no consensus on this issue. Some people like to apply it to tiles - the marking lines on the floor remain intact.
Applying glue to the back surface of the tile
On the other hand, it is more convenient to immediately coat a large area of the floor, and then concentrate on laying out the tiles evenly (of course, if you have some experience, otherwise you may not have time).
Another option is to pre-coat the floor surface with glue.
There is a third tip - coat both here and there, but lay the tiles in such a way that the direction of the ridges made with a notched trowel on the floor and on the tiles is perpendicular - this ensures that all cavities are filled and maximum adhesion is ensured.
- After coating the tile with glue, it is laid on the surface in the right place, pressed tightly to the floor, its location relative to the reference lines is controlled, as well as the horizontalness of its upper plane in the longitudinal and transverse directions.
- The work continues in the same order, with the obligatory installation of calibration crosses - they will allow you to clearly maintain the required gap between the tiles.
Sometimes you have to apply force using a rubber hammer.
When adjusting each tile, be sure to check its horizontalness using a building level. The necessary adjustments are immediately made - adding or removing mortar, inserting a small wedge, etc.
Each laid tile must be inspected
- It is necessary to ensure that there is no excess glue left in the gap between the tiles - this space will be needed to fill the seams. So it is better to remove the glue immediately, as it will be very difficult to do later. At the same time, stains of mortar should be immediately removed from the front surface of the tile with a rag or sponge, without allowing them to dry.
- Spacer crosses are left between the tiles until the mortar initially sets. Then, when the tile has already become immobile, the crosses need to be removed - you cannot leave them in the seams until the glue has completely hardened, since then there will be difficulties with removal.
Video: visual lesson on laying tiles on the floor
- Modern devices for quickly laying tiles - the so-called leveling systems - are very convenient to use. The kit includes rack clamps (disposable elements) and wedges (can be reused).
Clamp and wedge of the floor leveling system
- After the first tile is laid on the glue, pressed well and inserted level, two clamps are installed on each of its sides so that their heel goes under the tile. The thickness of the clamp leg will determine the size of the seam. The clamps are installed at a distance of approximately 50 mm from the corner.
Clamp stands installed...
-Then the next tile is laid. The wide heel of the clamp also appears underneath it.
...then the next tile is laid...
-The wedge is inserted and threaded as far as possible into the clamp, where it is fixed with the ribbed surface on the hooks. It is very important that the wedges are always inserted from the side of the previously laid and leveled tiles.
... the wedges are inserted until they stop and are completely fixed.
— Thus, the lower, smooth edge of the wedge “pulls” the surface of the next tile ideally into the plane of the already laid one. True, no one can cancel control using a level.
After the glue dries, the clamps are knocked down with light side blows of a rubber hammer.
— The wedges should remain in this position until the glue dries completely. Then they are removed with light side blows using a rubber hammer. The design of polymer clamps is such that they can withstand tensile loads, but immediately break off when exposed to a fracture. Below, under the tiles, only the broken heels remain.
— Wedges, as already mentioned, can continue to be used, and broken holds can be disposed of.
Video: laying tiles using a tile leveling system
Tile cutting
Previously, we were talking exclusively about laying entire tiles, but in practice there are never cases where everything is limited to this. So now it's time to consider the problem of cutting tiles.
- It is recommended to install the fragments not immediately, but a day later after the main part of the floor. During this time, the glue will have set well, and it will be possible to accurately measure the required dimensions.
- When marking tiles for cutting positions, we must not forget about the joint interval - an allowance must be made for it.
- There are several ways to cut ceramic tiles:
1. The most convenient way is to use a tile cutter, a tabletop tool that gives an even and precise cut. It is enough to place the tile with a marking line along the central protrusion, move the roller away from you with force along the surface of the tile, and then, resting your paws on the surface of the tile on both sides of the drawn line, press the lever down.
The most convenient tool is a tile cutter
With even a little experience of the master, there are practically no defects in such cutting.
2. A manual tile cutter is a fairly convenient tool, but it requires more dexterity from the worker.
A simple but fairly reliable manual tile cutter
First, the roller is drawn along the intended risk line. Then the tile is clamped so that the tile cutter is exactly on top along the axis of the cutting line. Movement with your hands - and the tile should split into two parts.
Cutting is carried out similarly using a conventional glass cutter, with the only difference being that the breaking is carried out on the edge of the workbench, or using a metal rod (nail or wire) placed underneath the workbench along the cutting line.
With all the advantages of manual and tabletop tile cutters, they allow cutting tiles exclusively in a straight line.
3. Diamond blade sander - This approach is especially good when you need to cut tiles at an angle or create complex shapes. The main difficulty here is to ensure reliable fixation of the tiles when working with an angle grinder, so that they do not fly out or crack.
Tiles can be precisely cut to size using a diamond grinder
The tile can be cut straight through - when parts of a complex configuration are required. If straight, long sections are cut off, then the integrity of the top enamel layer can only be damaged - then it will be easy to break the tile along the intended line.
Particular attention to safety precautions - the eyes and face must be covered with a mask, as small hot fragments of ceramics may fly away.
4. Small areas of tile can be removed using pliers.
Ordinary pliers can also come to the rescue
In this case, on the area to be removed, it is advisable to apply a fine mesh with a glass cutter roller. Then, using pliers, they carefully break out very small fragments, gradually bringing the tile to the desired size.
If necessary, any minor unevenness left after cutting can be removed using a block wrapped in coarse (80) sandpaper. If the teeth are large, they can be “corrected” with pliers. If there is a pronounced sharp edge left, then it is better to first process it with a round file.
Refining uneven cuts using sandpaper
The process of laying cut fragments, in fact, is no different from what was described above.
When cutting tiles and laying their fragments, special care should be taken. Ceramics may crack not along the intended line, which means there is a high probability of getting a cut injury to your hand when pressed. In addition, the broken edges may have extremely sharp edges that can cause very deep cuts. All work should be performed only with protective gloves.
Sealing seams
After the entire floor area is covered with ceramic tiles, you can proceed to grouting the joints.
- First of all, you need to check the condition of the seams again - they must be cleaned to their entire depth and width.
- A solution for jointing is being prepared - grout. It can be cement-based or a two-component epoxy composition.
1. In domestic conditions, cement grouts are more often used (so-called class CG2 according to the EN 13888 standard).
Cement grout for joints
They are sold in stores in the form of hermetically sealed dry mixtures and can have different colors - you can always choose the color that best suits the overall design. They are most often mixed with water to the desired consistency. But for rooms with high humidity or for floors with a high level of load, it is still recommended to use a special latex additive to dilute the composition - the floor surface will only benefit from this.
To dilute the grout mass, it is advisable to use latex filler
2. Recently, epoxy-based grouts (class RG according to EN 13888) have been rapidly gaining popularity. These are two-component compositions that are prepared immediately before starting work on filling the seams.
Epoxy grouts are good for everyone, but very expensive
The “lifetime” of such a composition is short, so it is prepared in small portions to ensure that it is used before hardening.
Epoxy grouts are more durable, resistant to chemicals, they are much more flexible and will not crack over time. These compositions have a much wider range of shades (including bright, saturated colors), and in addition, many similar grouts are sold with special effects - sparkles, fluorescent glow, etc.
The only significant drawback of epoxy grouts (apart from a certain difficulty in properly preparing the working composition) is the still very high price, which greatly limits the scope of their use.
- The finished composition is scooped onto a rubber spatula or rubber float and applied with force to the seam area, usually in a direction of 45 degrees from the seam line. This trajectory will ensure the most complete and dense filling of the joint space.
Technique for applying grout to seams
- After the joints are filled, it is necessary to immediately remove the excess mixture from the surface of the tile - this will be much more difficult to do later. Usually this is started when a white coating appears on the grout remaining on the surface of the tile - it begins to dry out (usually after 20 - 30 minutes).
To do this, take a foam sponge, well washed and wrung out, and use it to remove the remains of the fugue. The movements are usually the same as when grouting - 45 degrees to the seam line. At the same time, you must try not to touch the seams, so as not to wash out the fugu from there. The sponge should be thoroughly washed as often as possible, with constant changes of water. By the way, water plays a dual role here - it both washes away contaminants and participates in the hydration of the cement composition of the grouting material.
After 3 - 4 hours, you can rinse the surface again using a foam sponge. Then, when the floor dries after washing, the remaining light cement deposit can be easily removed by wiping the tiles with a dry, clean, soft rag.
There is no need to delay removing the remaining cement deposits on the surface.
After this, the ceramic tiles will already take on their “ceremonial” appearance, and it will be possible to say that the process of laying it is completed.
Prices for grout for joints
Grout for joints
Video: option for grouting joints on a tiled floor
However, if the cladding was carried out in a room with high humidity or with intense loads on the surface, then it is recommended to carry out another simple operation - coat the seams with a water repellent.
It is useful to additionally treat filled seams with a water-repellent agent.
This is done very simply - the composition is generously applied to the seams with a thin brush. This treatment will give the fugue composition water-repellent properties, which will significantly increase the service life of the ceramic coating, prevent dampness from accumulating in these places, and make cleaning easier.
When the water repellent is absorbed and dries, you can restore the final order. You need to thoroughly rinse the floor with clean water - and we can assume that the entire multi-step process of laying tiles on the floor is over!
How to make a self-leveling floor
A completely cleaned surface of debris and dirt is treated with a deep penetration primer.
Mix the mixture with water according to the parameters indicated on the package. It is better to mix the solution in a large container using a mixing attachment. The prepared solution is poured onto the floor and spread with a needle roller with a long handle to remove air bubbles. For the self-leveling floor to dry well and harden, it must take at least three days. After this, the surface is primed with a deep penetration primer.
Preparing the base for installation
Before laying tiles or porcelain stoneware on the floor, the surface must be prepared. To do this they do:
- removal of debris and dust;
- wet cleaning;
- after drying, double pass with deep penetration primers.
Separately, it is worth considering concrete and the case when a new coating is placed on existing ceramics. In the first case (concrete), the second priming is recommended to be done with epoxy-based compounds. In the second (laying on tiles or other non-absorbent base), treat with concrete contact class mixtures to form a durable and rough surface to which the glue will adhere well.
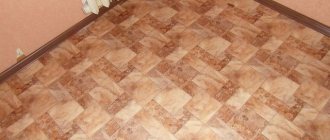
Tile layout options
There are many tile placement technologies. Let's consider only the main layout options:
- classic “seam to seam” layout;
- diagonal;
- in a run;
- "deck";
- "herringbone";
- modular;
- with contrasting inserts;
- combined.
Decide on the type of installation
From left to right and top to bottom: traditional, diagonal, staggered, herringbone, modular, offset
There are three main methods: traditional, diagonal and staggered. In addition, there are various combinations that are used for beauty.
- Traditional is the simplest and most common method. The tiles are placed in even rows parallel to the walls. Suitable for square and rectangular tiles.
- Diagonal is a more original and complex option. The tiles are laid at an angle of 45 °
to the walls. Looks better with square ceramics. Requires more trimming and increases material consumption. - Scattered - each new row of tiles is shifted relative to the previous one, as in brickwork. Well hides defects in tile geometry. More suitable for rectangular tiles.
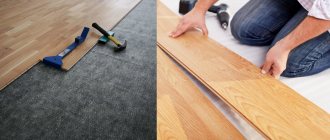
- Herringbone - imitation of a parquet board using rectangular tiles. Looks good with a wood finish. Produces minimal waste.
- Modular - the pattern is randomly assembled from tiles of different shapes and sizes to create a repeating, heterogeneous grid. Suitable for small rooms.
- Offset - small and large square tiles are laid in long rows to create a very interesting design. Definitely not for beginners.
For anyone working with tiles for the first time, the traditional laying method or staggered tiling is recommended. Other methods should be chosen only if you are confident in your abilities. Otherwise, it is better to entrust this work to professionals.
Where to start laying tiles
How to lay tiles on the floor correctly? Based on the selected type of layout, the floor is marked. Starting to lay the floor away from the wall is very risky. It is best to do this from the most visible area. Therefore, the reference lines are most often placed closer to the center of the room. The first support line is drawn along the room. In order to do this, you need to measure the distance between the walls and mark the connecting points. After which the points are connected with a coated cord. Then a second line is drawn perpendicular to the first, and also approximately in the middle of the room.
Don’t be too lazy to make a test laying of these two rows without using mortar. This way you can evaluate the future picture by eye and finally decide on the type of tile installation.
Pre-layout
Before laying the tiles on the adhesive, it is recommended to lay them out on a dry base surface. This will allow:
- Decide on the optimal layout option.
- Visually look at the final appearance of the flooring.
- If necessary, make adjustments.
- Understand where it is most convenient to start laying with glue.
Important! Dry laying of tiles is carried out after leveling the base with cement screed, sheet materials or other available methods.
Preliminary layout allows you to clearly see the appearance of the future floor covering.
During the dry laying process, the location of the rows of tiles is marked. A marker or construction pencil is used for marking so that the lines are not erased during preparation of the base. Marking makes it easier to glue the tiles and avoids skewing and moving away from a straight line.
Let's look at some of the nuances of how to make a straight (classic) tile layout the most attractive:
- It is calculated how many whole products fit into one row. One element is removed from this quantity, and the rest are laid out from the center.
- Along the edges near the walls, trims are used for laying, which with this option should yield at least half of the whole tile.
This scheme increases trimming waste by 10–15%, but makes the distribution of tiles uniform, without small trimming at the corners, which significantly spoils the appearance of the coating.
Even distribution gives attractive coverage.
In this case, the location of the plumbing should be taken into account. For example, if a bathtub or shower tray is being installed, the installation is distributed evenly between the free wall and the bathtub screen, and the undercuts near the second wall are closed after the plumbing fixtures are installed.
You can learn more about the secrets of laying out ceramic tiles in the video.
Differences from laying tiles in a toilet, bathroom, hallway, kitchen
If it is not necessary to apply a waterproofing layer in the hallway and kitchen, then in the bathroom and toilet you cannot do without it. The waterproofing layer will protect you from accidental flooding of your neighbors living below.
Waterproofing can be carried out in several ways:
- Pasting. Roofing felt or polyethylene film is glued to the base.
- Coating. The previously prepared floor surface is coated with a special liquid composition.
- Coloring. The floor is covered with special paint, and the walls of the room can also be treated.
Only after the waterproofing layer has completely dried do they proceed to further manipulations.
Surface preparation
Laying tiles on the floor is always carried out only on a carefully prepared surface - clean, primed, durable and dry. The best option is a concrete screed. If there are no complaints about its quality, then before laying the floor tiles on such a base, they should be cleaned of dust and primed with a deep penetration primer. If work is carried out in the bathroom, it is advisable to treat the screed with a waterproofing mixture - for example (Ceresit CR 65), which will serve as additional protection against water.
Priming the subfloor
If the concrete base does not have acceptable characteristics, any deficiencies must be corrected before laying tiles on the floor. You need to get rid of all the chips, depressions and cracks found. After this, the floor level is checked. If it is uneven, fill in a leveling cement-sand screed or mixture (self-leveling floor), which will ensure the reliability and durability of the future coating.
Tile work
If during work you need to cut a piece of tile, it is best to use an electric or manual tile cutter for these purposes. Initially, do not forget to mark the element to be cut.
We lay the tiles on the floor with our own hands. To work with the solution, you will need spatulas (regular, serrated, rubber for subsequent grouting).
Tile adhesive can be purchased at any store and diluted with a certain amount of water specified in the instructions. You need to stir the glue until you get a fairly uniform layer that will not spread over the tile. The finished composition is left to “ripen” for 5 minutes, finally mixed and application begins.
After which the tile is pressed tightly to the floor with your hands. Its positioning is performed relative to the reference lines. The work process continues in the same way with the obligatory fastening of crosses, which help maintain a certain gap between other plates. At the same moment, the necessary adjustments are made - removing or adding mortar, inserting new wedges, etc. Make sure that there is no excess glue left in the space between the plates. Excess glue is immediately removed. The solution stains that dry out on the tiles are washed off with water. The surface is wiped with a dry cloth. After the tiles have acquired good immobility, the crosses are removed. You should not wait for the solution to completely harden, since then it will be very difficult to remove the separators.
How long does it take for floor tiles to dry and when can they be grouted?
The period of complete hardening of the adhesive polymer-cement mass, regardless of the manufacturer of the material, lasts on average about a day, and this is stated in the product information written on the packaging. But it must be taken into account that the daily setting period of the adhesive solution is typical at room temperature, normal humidity and the thickness of the installation layer is up to 10 mm. Any changes to these parameters will affect the curing time of the tile adhesive. If the temperature is below +5 degrees and the mortar layer is 1.5-2 cm (this is quite possible if leveling the screed is neglected), the mortar will completely set in about 36-40 hours. When the tiles are glued to a minimum layer (3-5 mm), especially at a base temperature of 30-40 degrees (in the summer, or with heated floors working), already 8-10 hours after installation you can safely walk on the tiles and grout the intertiles. gaps (seams). It is clear that it is necessary to determine how long the tiles on the floor take to dry based on specific conditions.
If the flooring is done at a normal temperature for a living space (20 degrees and above) on a small layer of glue, grouting is done the next day after installation is completed. Before filling the gaps with grout, do the following:
- remove crosses and wedges from the seams;
- additionally clean the seams from dried tile adhesive (if necessary);
- do light wet cleaning of the surface.
Gaps between tiles should be filled only with specialized color mixtures. To save money, it is not recommended to do this with ordinary mounting adhesive. The reason is not aesthetics (the adhesive mass after drying is gray and nondescript). Grout is not only needed for beauty. This specialized mixture, even after drying, has residual elasticity, that is, the ability to compensate for the linear expansion of ceramics with temperature changes. Another function of the grouting material is to prevent moisture from penetrating under the tiles, which is important for bathrooms, bathhouses, and swimming pools. To grout joints in such rooms (structures), it is recommended to use a moisture-repellent mixture containing silicone.
Quick laying of tiles with the DLS system
The DLS tile laying system is a way to level the plane of laid tiles based on spacers and spacers for them. Using these tools allows you to largely automate the process and make it accessible even to beginners. With the help of the DLS system, a novice master can, for example, lay tiles in the bathroom several times faster and with better quality than using traditional crosses and wedges. This leveling system is also suitable for laying porcelain tiles.
The T-shaped lining is fixed under two adjacent tiles and acts as a spacer cross, only it additionally aligns the edges of the tile. The spacer is inserted into this element and tightens it, additionally aligning the tiles, creating pressure on them with its plane. Due to the large width of the system, it is possible to align 4 tiles at the same time at the intersection of the seam. To install the spacers, a special tool is used - clamping pliers. The spacers are removed after the glue has dried by simply knocking them down, but their bases remain under the tile.
The system compares favorably with older installation methods. When using crosses to lay tiles on the floor or wall, you cannot always level the plane: this is a feature not only of cheap types of ceramics, but even of expensive collections.
Features when working with the DLS system
This system is even better suited for installing expensive textured tiles - it allows you to align the tiles along the back, flat side.
Nobody canceled the level!
When using the system, one thing must be remembered - the initial leveling of the tile surface is also necessary. It is important to set the first row correctly. For a large plane, it is necessary to control its entire surface, so you can lay out two rows (on the long and short sides of the plane) using the traditional method: by level, using wedges and crosses. Otherwise, by “chasing” the tiles row after row, at the end of the plane you can accumulate an error and go beyond the level.
Whatever surface level you set with the first tiles, you will get the same level over the entire surface using the DLS system. Therefore, it is necessary to ensure that it is a strictly vertical or horizontal plane (depending on where the tiles are laid: on the wall or on the floor).
Glue – more is better than less!
It is also necessary to get used to applying the glue - in this case it is applied only to the surface of the base: wall or floor. If you apply little, the DLS system may tear the tiles away from the adhesive layer during the leveling process. This is especially important when laying tiles on the floor, because you may not feel this moment, and then after the glue has dried, when you first test the surface by simply walking, the tile can be loosened or broken.
In this case, it is better to apply a little more glue and then remove the remaining residue. If you apply less, there is a risk that the tile will stick to only part of its surface or not stick at all. To do this, be sure to stock up on a rubber mallet and, before tightening the wedges, carefully tap the tiles with it.
Operating procedure
- Apply glue to the surface with a notched trowel.
- Install spacers under the tiles of the previous row.
- Install the next row of new tiles on top of the spacers.
- Level the tiles to within 0.5...1 mm using a rubber mallet.
- Remove any remaining glue that has come out.
- Tighten the element using a wedge and clamp.
- Proceed with the installation of the next tiles, controlling the thickness of the adhesive applied.
Advantages and disadvantages of the method
Advantages.
- The speed of work, judging by the reviews and videos we watched, is really growing. A DIY tile kitchen backsplash will be ready in less than a day of work. And this is with a reserve - in reality, a day is also enough to choose the tiles and purchase all the materials =) It’s a joke, of course, but the complexity of the work, which consists in constantly monitoring the plane during installation, is really reduced to a minimum.
- Applying glue to the floor is actually easier and faster than applying it to each individual tile, holding it in your hands.
- The necessary tools for laying tiles using the new method are the same as before.
Flaws.
- Using a DLS system increases the cost of laying tiles, since the system itself is quite expensive.
- Only the wedges are reusable, the T-pad is a consumable item and must be purchased again.
- When installing the first elements, you need to feel the degree of tightening of the assembled element so as not to overtighten it and break it - there is no limiter.
Laying tiles on the floor without crosses using the DLS system is a progressive installation method. With skill, a tiler can lay up to 50 m2 without trimming, a beginner will at least meet the quality standard with laying up to 20 m2. The DLS system is only suitable for flat surfaces, so for complex wall shapes (radius) traditional inspection and installation methods are still required.
Step by step instructions
The service life and ease of use of floor ceramics depend on the quality of installation work. This axiom, unfortunately, is often neglected, and the result is a fragile, unaesthetic or defective coating. Therefore, we recommend that you follow all the rules, from preparing the base to the curing period of the grout.
The process can be divided into 6 stages:
Preparing the base
The quality of the subfloor should ensure the possibility of creating a layer under a tile covering made of adhesive cement mortar with a thickness of 2-15 mm, and under a mosaic – up to 20 mm. Therefore, the following actions are necessary:
- Checking the subfloor for compliance with standards (SP 29.13330.2011 “Floors. Updated edition of SNiP 2.03.13-88”, etc.);
Checking the concrete base for evenness.
- Elimination of defects and formation of expansion joints;
- Cleaning and degreasing the surface;
- Padding;
- Waterproofing device (if required).
There must be a basis;
- Level – the difference is no more than 2 mm for each meter of surface;
- Dry – residual moisture content of cement-containing bases – up to 6%, anhydrite – up to 1.5%, wooden or wood-containing bases – no more than 12%. At elevated rates, it is recommended to treat with moisture-proofing primers or special emulsions for wet substrates. The choice depends on how quickly you need to prepare the subfloor;
- Durable - at least 15 MPa or 150 kg/cm²;
- Monolithic - without cracks, depressions and bumps;
- Clean - without stains of oil, bitumen, glue, paintwork materials, soot and other compounds that prevent the adhesion of the glue to the base.
Repair of cracks in screed.
We recommend: Preparing the base for laying tiles.
Before the start of work, pipelines and other types of communications laid in the ceilings must have outlets in accordance with the design of the room. Don’t forget that large areas require uniform expansion joints to compensate for thermal and hygroscopic deformations of the base. When laying tiles on concrete or mineral screed indoors, it is recommended to install thermal gaps every 20-25 m² of area, for external cladding - 16 m².
In small rooms, the role of temperature-shrinkage joints is played by a gap of 4-5 mm wide around the perimeter between the ceramic coating and the walls.
Let us remind you once again that the floor must be monolithic. Many craftsmen believe that unevenness can be easily leveled out with tile adhesive - the layer will be thicker than expected. However, they forget that the cement-polymer mortar shrinks, so a perfectly even coating will not work. All recesses, cracks and bumps larger than 5 mm must be eliminated - filled with repair mixtures or chipped away, and dust and debris removed. Treat the surface with primers with the required properties - strengthening, adhesive, etc.
Applying a primer to a concrete base.
If you are thinking of laying tiles in a shower, bathroom or toilet, pay special attention to waterproofing. To create a reliable water barrier, you can use polymer paints, penetrating coatings, impregnations, membranes or any other material available to you. The main thing is to form a layer correctly, extending it onto the walls 10-15 cm in height and carefully sealing the corners.
Marking
When marking, the center lines of the room serve as the basis. Connect the midpoints of the closer walls to obtain the longitudinal axis, and the center points of the farther ones to calculate the transverse line. Make marks on the walls for the level of the future finished floor. This will help correct minor flaws during the tile laying process. It is better to apply the marking drawing with an alcohol marker or using a paint cord.
Marking cord.
First, check the correct geometry of the room. This will allow you to adjust the plan for tiling the floor with ceramic tiles and significantly speed up the work.
To make sure that the walls are mutually perpendicular, pull two cords diagonally from opposite corners and measure their length with a tape measure. If the angles do not correspond to the ideal 90°, and the sides have different lengths, then you can use various tricks to visually level the effect. For example, move the pattern or lay friezes around the perimeter, and between it and the wall - background tiles with trim.
The principle of marking formation depends on the chosen design.
Standard seam-to-seam or corner installation
If the room has an even rectangular shape, then installation begins from the corner. The first element is mounted in the corner of the room, the rest - in different directions from it.
Corner laying pattern.
In a run-up or with a shift
For tiles produced in the form of elongated planks, it is incorrect to use the simple corner method. Installation should be done from the center of the room. The method is quite labor-intensive and requires care and precision in work.
First, the reference point (central) is calculated, the first row is laid from it, then subsequent lines are formed as shown in the figure below.
Laying pattern with offset or from the center.
Scheme of laying tiles of different calibers from the center.
The displacement coefficient of each subsequent row relative to the previous one depends on your desire - by 1/2, 1/3 or more. Since this is not a laminate or parquet board, no seam taping is required. This is more of a decorative effect, allowing you to create a decking, brick or typical for laminate.
Grout, fugue
Grouting is the last step in creating a tile floor. And you need to buy it to match the color of the material being glued. Make sure the glue has cured well. Clean the seams from any remaining tile adhesive. Using a rubber spatula, apply the grout mixture into the joints. Remove the excess.
General work tips
Beginners are not recommended to cover a large area with glue. The optimal mechanics of action is to work one tile at a time. With increasing skill, you can increase the area covered with glue at a time.
Before rubbing the seams, it is necessary to wait a certain time for the adhesive composition to set and completely harden. It averages 48 hours for tiles and a minimum of 72 for porcelain stoneware. During the drying process, there should be no drafts in the room; you should not walk on the coating. For grouting, any compositions offered on the mass market are used.
The work ends by removing the remaining grout mixture and thoroughly cleaning the surface of the tile or porcelain stoneware. If everything was done carefully and slowly, the laid coating will last a long time, fully revealing the positive qualities of the selected finishing materials.
Can tiles be laid on a wooden base?
The tree does not tolerate unstable temperatures, constantly changing its size. It is not difficult to imagine what will happen to the ceramic tiles: the ceramics will begin to crack and move away from the base. However, there are times when it is vital to install tiles on a wood floor. In such cases, you have to make exceptions and painstakingly prepare the foundation, shelling out a lot of money for materials. You can create a strong and level base that will be suitable for ceramics by choosing a wet or dry leveling method.
Tips and tricks for laying tiles on a concrete floor
Experienced builders and specialists advise:
- To remove old tiles, use a chisel - with it, the old coating will easily come off the concrete floor;
- always work with gloves - this will prevent glue from getting on your hands and the possibility of injury;
- tiles should be laid in a room with closed windows and doors to avoid drafts;
- dilute small amounts of glue to use it within 10-15 minutes;
- you need to lay out the tiles from the far corner towards the exit;
- for small rooms it is better to use a modular option for laying tiles (you can use the herringbone method, diagonal and traditional, that is, parallel) methods;
- It is not recommended to walk on the laid tiles for 3-4 days, but it is better to clean it after 10-14 days.
Making your own flooring is not difficult. This is facilitated by a wide range of modern finishing materials that will make your home more beautiful and comfortable. The main thing is to follow all the above instructions - and then a strong and durable tile covering will delight you day after day.
Is it possible to tile a heated floor?
Can. The best option for laying ceramic tiles is an electrically heated floor. The rules for laying ceramic material on a heated floor do not differ significantly from facing a conventional base. The main feature is the choice of tile adhesive. For underfloor heating, adhesive with increased plasticity and thermoregulating additives is used.
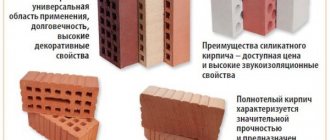
What to consider when choosing tiles
If when choosing wall tiles the main attention is paid to the decorative component, then for the flooring material the strength characteristics are more important. Ceramic floor tiles are produced in accordance with GOST 6787–2001. According to this regulatory document, the physical and mechanical characteristics of floor tiles must correspond to the values indicated in the table.
In addition to the indicators given in the table, the tile must have chemical resistance to certain types of solutions in accordance with GOST 27180–2001.
The size and thickness of the ceramics for the floor are of no small importance. According to current regulatory documents, floor tiles are available in the following shapes and sizes:
- Square: 150×150; 200×200; 250×250; 300×300; 330×330; 400×400; 500×500 mm.
- Rectangle: 150×200; 200×250; 200×300; 300×400; 300×500 mm.
Note! The minimum thickness of ceramic tiles intended for use as flooring is 7.5 mm. All products with a smaller thickness are intended for wall cladding.
As for choosing the size of the tiles, it is worth starting from the dimensions of the bathroom. For compact rooms, it is better to take ceramics of minimal sizes: such a design will look as harmonious as possible and visually increase the area. For spacious bathrooms, large square or rectangular tiles are suitable.
Advice! When choosing floor coverings, pay attention to the front surface. You should not choose smooth, glossy samples, as the floor will be very slippery and the risk of injury will increase, especially on a wet surface. The optimal structure of the front surface is slightly rough or embossed.
Often, ceramic granite tiles, manufactured according to GOST R 57141–2016, are used for tiling heated floors in bathrooms. It has less water absorption, greater strength and hardness. The physical and mechanical characteristics of porcelain stoneware slabs intended for indoor flooring are shown in the table.
Note! The dimensions of manufactured porcelain stoneware slabs are 300–1200 mm in width and 200–1200 mm in length. The minimum thickness of the slabs is 7 mm.
Prepare the glue
- Pour water into a basin or bucket and add the required amount of adhesive in strict accordance with the instructions on the package.
- Stir well until smooth using a hammer drill or drill at low speed.
- After 10 minutes, stir the solution again for a more uniform consistency and complete saturation of the settled mixture.
- Do not prepare a large amount of solution at once. If you don’t have time to use it, it will dry out and lose its properties.
- You cannot add water to already prepared glue: this will impair the strength.
How to lay tiles
There are several basic ways to lay tiles:
- Checkers
- Deck
- Network
- Herringbone
- Labyrinth
In this case, a sketch is drawn and transferred to the surface.
Installation steps:
- You need to start from the bottom rows. The prepared mixture is applied to the wall, approximately 2 rows
- The applied mixture is leveled using a spatula
- Then you can start laying, skipping the distance of one row from the floor level. Fill one row, check how smoothly the tiles are
- To ensure evenness of the seams, crosses are used, the main thing is to remove them in time, before the composition sets and the tiles stick
- Excessively protruding tiles can be deepened with a rubber hammer; if the tiles have fallen through, it is better to remove them and redo the work
Several rows are laid out in this way, after which the wall must be allowed to dry. After drying, work can continue. During the laying process, you need to monitor the evenness of the rows with a level.
Those elements that require trimming should be left for last, like the bottom row. It’s better not to rush into installation and not try to complete the job in one day, especially if the room is large.
Note!
- Mosaic from broken tiles: step-by-step instructions on how to lay it out with your own hands (140 photo ideas)
Mosaic for the bathroom: TOP-150 photos of new designs, as well as modern ideas for combining mosaic tiles
Do-it-yourself water heated floor under tiles step by step: installation instructions with photos and descriptions, installation and connection
Selecting Tools
Laying tiles is carried out with the following tools:
- Trowel and spatula required for applying glue to the base;
- Construction level to determine how smoothly the process is carried out;
- To cut the material, use a grinder with a diamond wheel of the required size, a tile cutter and wire cutters;
- Special crosses that help to correctly lay the product and create a gap of several millimeters between the tiles;
- Foam sponge. Use it to remove excess glue.
When laying, you should also use a tape measure, a hammer and other tools. The adhesive solution should be mixed with a special construction drill to obtain a homogeneous mass.
Preparation stages
- The old finish must be completely removed, even if it was wallpaper. Especially if there were already tiles on the wall before, you need to get rid of them completely, including any remaining adhesive.
- It is also important to check the plaster on the wall. There may be cracked areas somewhere or ones that may fall off. It is important to remove this place completely, carrying out preventive restoration work along the entire perimeter.
- The place where the tiles will lie needs to be checked for mold or mildew. Under no circumstances should they be left unattended, otherwise reproduction will continue under the new covering. Laying can only begin after the walls have been thoroughly processed.
- All existing cracks and cracks must be covered.
- Before laying gypsum tiles on the wall, you need to level the surface, otherwise the result will not be satisfactory.
- Most often, tiles are laid in the bathroom, where humidity is always high, so it is worth taking care of waterproofing.
- At the final stage, the wall needs to be primed. This will ensure that the glue will grip better and fix the tiles to the wall. If re-priming is required, it is carried out, but not earlier than after the first layer has completely dried. You can start laying tiles a day after completing this work.