These include aerated concrete and foam concrete. Particularly lively discussions are taking place around aerated concrete, its characteristics, advantages and disadvantages.
Despite conflicting opinions (any building material has pros and cons), aerated concrete has proven itself well in private construction.
Building a house from aerated concrete guarantees that such buildings will last at least a hundred. Despite the fact that building a house from aerated concrete is cheaper than from brick. Inexpensive does not mean bad, by the way, sometimes quite the opposite. Of course, such a service life indicator is only possible if standards and regulations are observed. And the recommended technology for building a house from aerated concrete has been taken as an axiom.
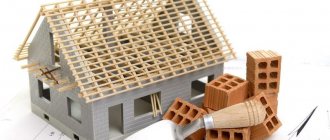
But, if professionals are guided by many years of experience, then beginners who want to do the work themselves need step-by-step instructions from A to Z, from the foundation to the roof.
Regulations for the construction of a house made of aerated concrete - GOST, SNiP
All processes of building a private house are regulated by such standards as:
GOST 31359-2007 “Autoclave-hardening cellular concrete”;
GOST 10884-94 “Thermomechanically strengthened reinforcing steel for reinforced concrete structures”;
GOST 9561-91 “Reinforced concrete hollow-core floor slabs for buildings and structures”;
SP 22.13330.2011 “Foundations of buildings and structures”;
These standards contain recommendations for the design of any of the structural or engineering components of the house.
What you need to know about adhesive for aerated blocks
Construction with aerated concrete blocks involves the use of not only special glue, but also a solution of sand and cement. Such a solution will be cheaper, but will reduce strength. In addition, this can cause uneven block laying. As for the glue, it may cost you a little more than the solution, but at the same time you will need much less of it per block.
According to the builders of aerated concrete blocks, the use of a solution can be destructive and is a violation of construction methodology. They advise using only glue that makes the masonry smooth and strong.
Next, we proceed to laying the glue, the thickness of which should be equal to the consistency of dry sour cream. Usually the adhesive mixture is applied with a special ladle with a curved edge and leveled with a comb. Once the glue has hardened, it is no longer possible to separate the blocks; they can only be demolished.
Construction time for a house made of aerated concrete
The construction period consists of the duration of its individual stages:
- foundation installation - can take from 2 weeks to a year (when pouring a strip foundation, it is recommended to wait a year for the concrete to gain strength);
- box – construction of load-bearing walls and partitions – 2-5 weeks;
- roofing work – rafter system + laying of roofing material – 2-6 weeks;
- formation of a warm contour - 3-4 weeks will be spent on installing all windows, doors, flooring and insulation;
- exterior finishing – 3-6 weeks;
- wiring of communications – at least a month, including approval at all levels;
- interior decoration - ad infinitum.
On average, according to user reviews, the construction of a house made of aerated concrete takes 5-6 months. Craftsmen will complete this work faster, from 2 months, depending on the complexity of the project.
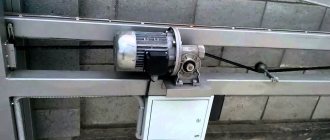
The duration of the work is significantly influenced by the complexity of the house design, the degree of mechanization of the work, the experience and number of performers involved in the construction.
Preparation
At the first stage of construction, it is impossible to do without performing preparatory work, which begins with studying the soil in the selected area. Based on the results of studies of soil parameters, freezing depth and groundwater occurrence, a foundation for construction is selected. After this, the top layer of soil is removed and markings are made in accordance with the design documentation. The necessary materials and tools are delivered to the construction site, and they move on to the next step - laying the foundation.
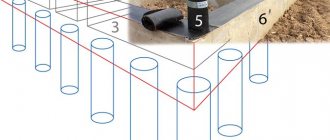
Foundation for a future house
The best option for a one-story and two-story building is a strip-type base. To create it, a pit is dug (along the perimeter if the house does not have a basement, or along the area of the entire building if there is a basement) and formwork is installed to shape the concrete mixture. Before pouring the solution, reinforcement is performed using steel or glass composite rods. The mixture hardens for 6–14 days, after which the formwork elements are removed. Sometimes columnar foundations are used for aerated concrete houses, but they can only support light and low buildings. If the building, on the contrary, is high (3 floors or more), you should choose a monolithic slab base - expensive, but durable. The slab foundation is usually made shallow, which makes it possible to do without heavy construction equipment. Its advantage is the absence of subsidence of individual parts of the house and the appearance of cracks on walls and ceilings.
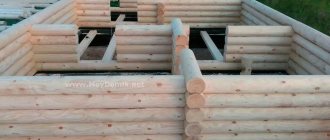
We build walls. Laying the first row of blocks
The construction of the walls of an aerated concrete building begins with laying the plinth along the perimeter of the building and along the load-bearing structures, which will also be made of blocks. The material for the plinth is usually red brick. The technology used does not differ from the methods of laying conventional brick walls. The height of the base part depends on the level of precipitation in the region (the more often and heavily the rains, the higher the base will be) and is on average 500–1000 mm or 6–10 bricks. The process of preparing for laying the first row of gas blocks consists of the following stages, which you can get acquainted with using the video:
Video: Laying the first row
1. Using a laser level, the highest point of the base part is determined, into which the first block is laid. 2. The remaining elements of the first row are distributed to other corners of the contour. 3. A special marking cord is stretched between the blocks, which is used to guide when laying other products. 4. If the walls are long enough (8–10 meters or more), “beacons” are placed between the gas blocks at a distance of 2–3 m from each other. After the preparatory work, the first row is installed. When laying the lower elements, cement mortar is used, which increases adhesion to the base. You can simplify the work by simultaneously laying blocks on different sides of the same wall - elements.
Laying the second and subsequent rows
When laying the next rows, other solutions are used - in most cases, specialized compositions for aerated blocks are selected. The amount of displacement of vertical joints is taken equal to 1/3 of the block or 150 mm. Every second or third element of the row and every corner of the building is subject to reinforcement. The masonry is carried out sequentially. New elements are laid only after the bottom row is completely completed. Before applying the adhesive solution, the block is thoroughly cleaned of dirt and dusted - an important detail for reinforced elements. A video will help you get acquainted with the masonry process in more detail.
Video: Second and subsequent rows
Reinforcement of aerated concrete masonry
Reinforcement of the walls of a building made of aerated concrete is required to increase their resistance to soil heaving. The reinforcement process consists of cutting one longitudinal groove in the blocks - two parallel grooves are made in the outer thick gas blocks (parallelism is checked using a board). The distance from the groove to the edge of the element must be at least 60 mm.
Reinforce every 4 rows of blocks
Dust is removed from the finished recesses by placing the selected reinforcement inside - mainly steel rods with a diameter of 0.8 cm. It is advisable to install whole rods in the corners. If this does not work, the corner rod is bent. The joints of the reinforcing elements must be located in the middle of the block - the rods are not placed end-to-end, but overlapped by 100 mm. You can avoid protruding ends of the reinforcement by bending the protruding parts inside specially made additional grooves.
An example of laying reinforcement for load-bearing walls
Having laid out the rods along the grooves, perform the following actions: 1. Remove the reinforcement back. 2. Wet the recesses with water and fill them halfway with adhesive. 3. Clean the rods from dust and also moisten them to increase the degree of adhesion to the glue. 4. Embed the rods in glue.
Cover the groove with the fittings with glue
5. Remove excess adhesive solution with a spatula, leveling the layer covering the groove.
Video: Reinforcement of aerated concrete masonry
Reinforcement must be performed for the first row, and then for every fourth. However, it is not only the supporting structures that will have to be strengthened. The reinforcement should strengthen the building in the locations of doors and windows.
Jumper arrangement
To reinforce window and door blocks, U-shaped structures with one thick wall and a second thinner wall are purchased. During installation, they are turned towards the street and the room, respectively. Choosing ready-made elements simplifies the work, but increases costs.
Reinforcement of window and door openings
Window openings are reinforced using the same reinforcement that was used to strengthen the entire frame. The grooves surround windows and doors at a distance of about 300 mm. The process of laying and securing the rods is no different from similar actions when reinforcing walls. Having completed the installation of jumpers, the last stage of reinforcement is performed - filling the armored belt.
To do this, make formwork from a block 100 mm wide, lay rods in it and fill it with cement mortar. For a one-story building, the studs with which the roof will be connected are reinforced in the armored belt.
Video: Arrangement of jumpers
Interfloor ceilings
The walls are followed by the installation of interfloor ceilings, the material for which is selected in accordance with the load on the building. The structure can be made in the form of a slab, characterized by maximum strength and load-bearing capacity, good sound insulation characteristics and ease of installation. The slab is installed by a crane, increasing costs but reducing time. Sometimes monolithic and prefabricated monolithic floors are chosen for buildings made of aerated concrete. For the first option, which is considered the most expensive and is used for houses with high loads on enclosing and interfloor structures, you will need cement mortar. Prefabricated monolithic ones involve installing blocks on a pre-prepared frame of beams; they take more time, but are cheaper than most other options.
Roof installation
The installation of the roof completes the work. The stages of constructing the last element of the frame of a residential building are as follows: 1. Installation of the rafter system. 2. Installation of heat and waterproofing materials. 3. Fastening the sheathing and counter-lattice. 4. Laying roofing material.
The type of roof is selected from three possible options - single-pitch, gable and hip. The last type is a roof with 4 slopes perpendicular to each other. Shed roofs are practically not used for residential buildings - only for adjacent outbuildings such as a garage or covered terrace.
Reinforcement
The construction of cottages from aerated concrete often involves reinforcement. All buildings are subject to constant stress, which can lead to negative consequences. The appearance of the walls may deteriorate due to uneven laying, temperature changes, subsidence of the earth or strong wind exposure.
The reinforcement protects walls from cracks and protects aerated concrete blocks.
If you initially follow all technologies according to the rules, you can avoid the occurrence of cracks in the future. Therefore, with a high-quality reinforcement design, the house will be reliably protected even from external influences. It is necessary to pay special attention to walls that experience constant wind loads.
The reinforcement is placed in special armored belts. Moreover, only the first installation line, which lies on the base, the areas where the lintels are supported, parts subject to heavy loads, every fourth line of walls, as well as the walls located at the bottom of the windows are reinforced.
The reinforcement under the windows lies 900 mm in each direction. To put it into a strip of blocks, you need to cut the grooves using a special wall cutter. After removing dust and sand from the grooves, the adhesive mixture and reinforcement are placed in the blocks. If the walls are thicker than 200 mm, it is better to use two rods with a diameter of 8 mm.
If already at this stage you are confused about the work that needs to be done, order construction from aerated concrete, the cost of which will suit you.