Features of dry screed
The main difference between dry screed and wet and semi-dry screed is the absence of the need to mix gypsum or cement mortar. Leveling the floor in this case is carried out using sheets of gypsum fiber board, OSB or chipboard.
The resulting base is quite reliable, durable and even. Almost any finish can be placed on top of it without restrictions. Moreover, laying the coating can be done immediately after the completion of the formation of the dry floor screed. This concrete or bulk liquid mixture requires from several days to a month to harden. GVL and wood boards are ready for further work right after installation.
Features of dry screed
Dry screed is approved for use in:
It should not be done only in rooms with high humidity. The weakness of dry screed is the tendency of the laid slabs to swell from water. Even if moisture-resistant gypsum fiber boards or OSB are chosen, they can still swell from moisture.
Backfilling (laying) of insulator
Depending on the required heat and sound insulation parameters, an underlying layer is created from fine-grained expanded clay, expanded polystyrene, mineral wool or a combination of the materials considered.
It is worth noting that when using polystyrene foam or mineral wool as an insulator, the base must be ideal in plane and level. If there are significant differences and unevenness, it is recommended to first level the base with a backfill insulator (sand, expanded clay).
When using expanded clay as the main insulator for a dry screed, you should consider:
- The minimum backfill thickness is 20 mm.
- The maximum thickness depends on the specific floor design.
- The use of coarse expanded clay is not permissible. It significantly reduces the area of contact with the top sheet material, which in turn can lead to pushing and deformation of the gypsum fiber sheets.
- Leveling the backfill layer is impossible without installing beacons.
The beacon installation process includes the following steps:
- Determination of the upper backfill level.
- Using a level (preferably a laser), marking lines on the walls around the perimeter of the room.
- Focusing on these lines using a large rule, you need to place beacons on the solution. The process is controlled by the level.
- The pitch of the beacons should be 20 - 30 cm less than the length of the rule used. For example, if the width of the room is 2.5 meters, and the two-meter rule is used for work, then you can get by with two beacons located at a distance of 1.7 meters from the walls.
You can completely abandon traditional lighthouses. However, for an unprepared person, alternative methods may seem complicated.
Beacons from the rules for dry screed
Let's consider one of the ways:
- We begin to pour expanded clay along one of the walls.
- Using a long rule (2 -2.5 meters) inverted flat, we form a plane along the line marked on the wall. We leave the rule on this plane and additionally check the level.
- We form the next strip - an expanded clay beacon - after 1 - 1.5 meters (depending on the working rule) and also lay a long rule on it.
- The space between the beacons is gradually filled with expanded clay and leveled using a short working rule.
- The short rule is that the fry additionally needs to cut out notches. The depth of the excavation should be equal to the thickness of the expanded clay rule laid flat on the beacon.
Advantages and disadvantages
The distinctive pros and cons of dry floor screed in comparison with other leveling options are few. When choosing a thermostat for a gas boiler or a caisson for a well, you have to weigh the many advantages and disadvantages of their various variations. With a rough layer using prefabricated technology, everything is much simpler.
Advantages of dry screed
The advantages of dry screed are as follows:
- absence of wet processes and associated dirt;
- improved sound insulation;
- possibility of laying communications under the screed;
- low weight of the prefabricated structure;
- ease of installation;
- minimum time for assembly.
To do this type of floor screed yourself, you don’t need to look for a concrete mixer or a grinding machine. The only tools you will need are a screwdriver, a jigsaw and a level with a tape measure.
Among the disadvantages of dry floor screed are:
- relatively low strength;
- swelling with high humidity in the room.
In terms of the price of materials, wet and semi-dry floor screeds outperform the technology under consideration. But if you take ready-made quick-drying mixtures, then the cost of the dry version may be cheaper. Everything must be carefully considered for a specific situation. At the same time, in terms of ease of doing it yourself and the time spent on installation, the prefabricated structure clearly outperforms other alignment methods.
Dry screed options for different surfaces
Expert advice
- Although this coating has many advantages, it also has certain disadvantages. Most often, when installing a dry screed with their own hands, home craftsmen make a grave mistake - they do not cut off the fold at the first sheets adjacent to the wall, and this leads to the fact that in such places the floor begins to sag over time.
- If you leave the beacons after backfilling, then after some time the expanded clay gives, albeit a small, sediment, while the beacons remain in place, which leads to problems with the coating. It is recommended to either remove the beacons after leveling the backfill layer, or pour a layer of it slightly above the level of the beacons.
- Be sure to pay attention to the quality of expanded clay ; if there is dust or sand in it, then over time such a floor will begin to creak. It is better to buy bulk material, so you can visually check its cleanliness. The material must be well dried; if it has high humidity, over time this will lead to deformation of the sheets.
In order for expanded clay to sag minimally, it is necessary to use a fine-grained fraction, the dimensions of which do not exceed 4 mm. The bulk material must not just be thrown on with a shovel, but compacted and compacted well, then you will not have problems with the floor settling.
- Sometimes, careless construction companies recommend laying such floors in any room, since it is simple and can be installed quickly, so if you decide to do a dry floor screed yourself or invite specialists to do it, first decide whether it is suitable for your room.
Dry screed device
The classic prefabricated floor screed cake consists of three layers:
- Waterproofing.
- Backfill to improve heat and sound insulation.
- Plates made of gypsum fiber board, OSB, chipboard, etc. in two layers overlapping.
The role of waterproofing is usually performed by a thick polyethylene film. Expanded clay, expanded vermiculite or perlite are used as backfill. On the one hand, this material performs the function of sound insulation and insulation, and on the other hand, it helps to level the floor, which has strong differences in height.
The third top layer of this cake can also have a layer of mineral wool or foam polystyrene. Then leveling wood and gypsum fiber boards are laid in two separate layers, between which the insulation is laid.
Dry screed device
To calculate the consumption of materials for screeding, you need to focus on the area of the room where the floor is leveled. It is better to take polyethylene wide throughout the room so that it fits without holes. If there is no such film, then you will have to take a narrower one and lay it in overlapping strips of 10–15 cm. But then you will additionally need adhesive tape to seal the joints. The backfill can have a thickness of 20 mm or more. Accordingly, its consumption in cubic meters will be equal to the product of the area and the height of the filler. Top slabs are usually laid in a couple of layers (each covering the area of the room), but other options are also possible.
Types of dry backfill
Why "dry"?
Traditional types of cement screeds have been successfully used in practice for many decades. The classic components for such screeds were necessarily:
- cement;
- sand;
- water.
Only their ratio and the quality of individual components changed. But specialists from the German company Knauf took up the implementation of a new project suitable for leveling the floor - it was they who came up with the joint use of materials such as dry screed and gypsum fiber sheets (gypsum fiber sheets). The technology turned out to be so simple that it became accessible to everyone. Here, in addition to GVL, expanded clay sand will be required as the basis of the screed.
First, bulk material is poured onto the subfloor - expanded clay, which is sprinkled with sand or perlite, and then tile materials are laid on top: gypsum fiber board, fiberboard, chipboard or plywood. The modules of the upper fastening layer are fastened with self-tapping screws and glued.
Technology and step-by-step instructions
Make a standard dry screed with gypsum plasterboard in four steps:
- Preparing the base.
- Laying damper tape along the walls and plastic film along the floor.
- Backfilling of insulation with alignment along the beacons.
- Installation of gypsum fiber sheets.
GVL can be replaced with OSB or chipboard. However, it is best to take regular or special moisture-resistant gypsum boards with cellulose fiber. They are more resistant to moisture and do not contribute to the spread of fire.
Dry screed installation technology using German technology
Preparing the floor surface
To prepare the interfloor ceiling, it is enough to remove the old flooring and any debris from this base. There is no need to be particularly zealous with its alignment. If there are deep and wide cracks in the concrete, they should be repaired. But various potholes can be left under a dry screed without repair. The backfill will level everything out later.
Step-by-step instructions for dry screed with vermiculite
Laying vapor and waterproofing, damper tape
Waterproofing should be spread to the walls above the subfloor being created. And the main thing when laying polyethylene film is not to leave gaps in the waterproofing substrate. If you have to join it, then this must be done using tape. Plus, at this stage, edge tape is installed along the walls to compensate for the expansion of the screed and reduce the risk of cracking.
Laying dry screed with expanded clay
Backfill
The dry backfill is first poured onto the floor and lightly leveled so as to simply remove the bumps. Then, using beacons or guides made from drywall profiles installed under the level, the main alignment is carried out. As a result, a smooth surface without slopes should be formed. The profiles can then be removed and will no longer be needed.
How to properly make a dry screed on perlite
Installation of gypsum fiber elements
GVL installation is carried out in two layers laid on top of each other and fixed with self-tapping screws. In this case, the upper insert should lie at the junction of the lower ones. If the seams at the top and bottom end up in the same place, the screed will definitely fall apart.
Laying the sheets should not cause any difficulties. Replacing electrical wiring in an apartment or plumbing yourself is even more difficult. The main thing is not to step off the laid slabs and not to trample on the backfill. And finally, you will need to putty the joints and screw heads with plaster compound.
Floor fixing
DIY dry floor
It will be very difficult to even approximately estimate how many people were simply afraid to undertake high-quality repairs of the floors in their apartment for the banal reason that they did not know and still do not know how simply and quickly you can make a dry floor with your own hands. It is not difficult to understand their fears - not everyone wants to turn their home into a construction site for a long time. But when constructing classic screeds, this, alas, is inevitable. High humidity, cement dust, dirt spread throughout the apartment, plus the long hardening time of concrete surfaces - this will scare away anyone.
DIY dry floor
So it turns out that the repair is limited only to relaying linoleum or laminate onto an old, already worn-out, not always smooth and high-quality floor, with the repetition of the same mistakes already made earlier. This becomes only a temporary measure, since without high-quality preparation and leveling of the base, the service life of such a coating will not be long.
But it turns out that all these troubles - dirty and time-consuming repair stages - are not at all difficult to avoid if you turn to the technology of dry floor screeding. This publication will talk about the components of such a floor design and provide step-by-step recommendations for independently performing such a task. Answers to some of the most frequently asked questions on this topic will be given - Sergey Vladimirov (Khimki), a builder with 30 years of experience, who has laid hundreds of thousands of square meters of floors of any complexity in his practice, will share his thoughts.
The undeniable advantages of dry screed technology
In order to finally break the prejudice against dry screed or possible distrust of it, you can briefly go through its main advantages, compared to traditional methods of leveling floors with cement-sand compositions:
- To carry out the work, you do not need any additional devices, specialized equipment - concrete mixers or mixers, bulk containers for solutions, etc.
- Much less effort and money will be spent on delivering the material and lifting it to the upper floors - if necessary.
- The work itself of installing a “dry” floor in one room can be completed in literally 1 - 2 days. It is clear that this requires certain skills, and work performed for the first time may take a little longer (but no more than 2-3 days). But, nevertheless, in principle, there is no tedious waiting for the screed to fully mature - the entire process of repairing the apartment does not stop there.
- With the “wet” technology of screeding floors in an apartment, it is recommended to fill all rooms at once. Willingly or unwittingly, life and work in such an apartment is completely paralyzed for quite a long period of time. Dry screeding can be done in stages, from one room to another, or even, if the area of one of the rooms is too large - by dividing it into zones - the quality of the work performed will not suffer from this, and in the remaining rooms of the home their functionality at this time will not be significantly affected decreases.
- What many fear most, an abundance of dirt and moisture, simply does not exist when using a dry floor. For people suffering from asthma, other diseases of the respiratory system, and a predisposition to allergies, the absence of harmful cement dust will be very important.
- One of the key advantages is the relatively low weight of the dry screed. This criterion is extremely important when carrying out repairs in multi-storey residential buildings, and especially in old buildings. The strength of interfloor floors is not unlimited, and dry screed often becomes the only possible option. By and large, it can be installed even on an old wooden surface - of course, if it has the required strength and static properties.
- Despite its lightness, dry screed creates a durable coating that can withstand significant mechanical loads. If all technological conditions are met, then such a floor is capable of withstanding a consolidated force of the order of a ton per square meter, or a targeted application of force up to 350 - 400 kg.
FAQ
People often wonder whether it is possible to later build some additional interior partitions on such a floor?
“Of course, if we mean a wall made of brick or, for example, gypsum boards, then this should be planned in advance, even before installing a dry screed. However, if you want to build a lightweight structure from a metal profile covered with plasterboard or OSB sheets, everything is in your hands.”
- A floor leveled with a dry screed acquires very significant thermal insulation and noise-absorbing qualities, even without the use of additional insulation.
- It is very easy to hide electrical cables or utility lines in the thickness of a dry screed.
- The resulting perfectly flat surface is completely ready for further work on installing the finishing decorative coating, which can be started immediately.
FAQ
Are there any restrictions on the choice of finishing floor covering after installing a dry screed?
“The answer is simple and categorical - there are no prohibitions in this regard. Laminate and linoleum, parquet and solid wood, cork and ceramic tiles can be used with equal success on such a coating. The whole difference is only in some technological features of the installation of a particular material.”
Can all rooms be dry screeded? No, it turns out there are certain restrictions on this:
- This type of screed is not suitable for premises if the design provides for even a slight slope.
- You should not resort to installing such a coating if constant strong dynamic loads are expected (high intensity of human flow), and especially if vibration effects are possible.
- H6e will be a very good option in rooms with high humidity or where there is a high probability of a water spill on the floors.
- The installation of such a screed in extremely cramped spaces is impractical - great difficulties are inevitable with high-quality compaction of the backfill and its leveling - simply due to lack of space.
In residential premises, the installation of such a screed is not limited in any way.
What is included in the dry screed system?
By dry screed it is customary to understand not only a loose composition. This is an integral set of various materials, which in a strictly defined sequence and in compliance with certain requirements are arranged on the surface of the floor and walls:
Approximate general diagram of a dry floor screed
Such a system must include:
- Film for primary waterproofing of the leveled subfloor.
- A special damper tape that will create the required gap along the walls around the perimeter of the room to compensate for possible expansions.
- Dry backfill that acts as a leveling floor covering. For these purposes, expanded clay sand or fine gravel, slag pumice, and perlite (expanded sand) can be used. In some cases, when there is no need to level the base of the floor, instead of bulk materials, block-type insulation can be used - high-density extruded polystyrene foam or even slabs of dense mineral basalt wool.
- The structure is completed by a top layer made of a certain sheet material. OSB or moisture-resistant plywood, asbestos-cement sheets or even chipboard are used for these purposes. However, the best option is to use special gypsum fiber waterproof sheets (GVL), which, after laying, become an excellent base for laying any finishing coating.
Some well-known companies involved in the production of building materials have mastered the production of fully balanced and complete “dry floor” systems. A typical example is the Knauf product line of dry screeds. There are several varieties of such kits (they are named after the letters of the Greek alphabet), intended for various types of premises. For residential premises, the “Vega” system seems optimal. So, it includes:
- Special vapor barrier film for the substrate.
- Required amount of damper edge tape.
- The filling composition is the “Compevit” mixture packed in bags, which is an expanded clay screening of a fine fraction.
Pre-packaged dry filling "Kompevit"
- The so-called “Knauf” floor elements are two-layer gypsum fiber sheets equipped with a special locking part for interfacing with each other.
- , characterized by a countersinking head and a double-threaded part.
- Assembly adhesive for joining sheets - similar to the well-known PVA.
The homeowner who begins the renovation only needs to correctly calculate the area of the floor to be laid and the thickness of the dry screed - and all the materials required for the work are included in the kit.
Expert advice:
“More than once we had to redo the floors because when laying them the owners decided to save money and use slag from a nearby boiler room or solid expanded clay for backfilling. Such penniless savings cannot but result in the appearance of local floor subsidence, and squeaking is 100% guaranteed. Remember, the largest fraction that can be allowed with a dry screed is no more than 5 mm!”
When calculating materials for flooring using this technology, the following must be taken into account. The thickness of the backfill should not be less than 30 mm - otherwise the required evenness, strength, and durability cannot be achieved. The upper limit of thickness has not been established, but if it exceeds 60 mm, then it will be necessary to lay an intermediate gasket made of gypsum fiber board sheets, approximately in the middle of the backfilled layer. When making calculations, you must not forget that the top coating of the dry screed itself has considerable thickness - it will raise the surface by another 20 mm.
Sequence and order of work on installing a dry screed
To lay out a dry floor efficiently, you need to complete several stages of work:
Preparatory work
They begin work by revising the base for the future dry screed. It would seem, what difference does it make what condition the surface is in - after all, it will still be covered with dry mixture? No, it's not that simple. The concrete base itself may not be in perfect condition, but there should be no significant defects on it.
- It is necessary to remove all protruding areas - the film backing may rupture on them and disrupt the overall waterproofing.
- No less important is the sealing of significant depressions, pits, and wide cracks with a repair compound. The fact is that after filling the screed onto the film, in these places there will be some kind of pockets - voids. Sooner or later, the backfill here will sag, it may break through the film, and this will result in the appearance of zones of instability of the floor, which will certainly reveal themselves over time - a creaking will appear.
- After the repair of the defects is completed, the composition has completely hardened, these “patches” are leveled with the general floor level, after which the surface is thoroughly cleaned of small fragments that could damage the membrane. It is best to thoroughly vacuum the entire floor area.
- If the installation of a dry screed is planned to be carried out on an old wooden base, then it will be necessary to carry out inspection and repair, possibly even replacing its individual elements. The floor must be completely stable and there should be no wide cracks larger than 1-2 mm.
Expert advice
“A very common mistake of novice builders is that when they bring the surface of the base for a dry screed into proper condition, they forget about the importance of straightness and evenness of the adjacent walls. But this is a very important point with such technology. The top sheet covering must fit tightly along its entire length to the edge strip - only then will the strength of the floor be fully ensured. And this will be possible only with a flat wall. Thus, you need to not be lazy and bring the surface of the wall “to mind” at least to the planned floor height.”
Laying the waterproofing layer
Often this layer is simply neglected - this is possible if the concrete base of the floor has already received previously known reliable waterproofing. However, an additional membrane will never hurt, and its cost is low, because for these purposes you can use ordinary polyethylene film with a thickness of about 0.2 mm.
If possible, it is covered with a whole canvas, or an overlap of adjacent strips is provided for at least 120 - 200 mm with obligatory sizing with tape. The membrane should extend onto the walls of the room over the entire thickness of the future screed with a small margin.
The next step is to apply damper tape around the entire perimeter of the room. It should also be slightly higher than the planned general floor level. After laying the tape, it is advisable to immediately fix it for greater reliability by pressing it against the wall with a small pile of dry backfill.
Polyethylene film on the surface and damper tape around the perimeter of the walls
In the case where a dry screed is placed on a wooden base, it is better to use special construction paper impregnated with tar as waterproofing.
How to lay a layer of dry backfill
We will proceed from the assumption that the markings to determine the zero floor level have already been made, the required line has been marked along the entire perimeter of the room. How to do this is described in more detail in the corresponding article on the site.
A characteristic feature of the dry screed is a removable beacon system. For it, metal profiles for drywall are most often used, although you can even get by with even boards. The guides must be removed from the screed - there is no escape from at least a slight shrinkage of the bulk material, and then, if the beacons are left in place, the top covering will not be adjacent to the backfill with its entire area, resting against the metal profiles. And this is the obligatory deformation of the floor, creaks, etc.
Dry backfill is scattered over the floor area in slightly excess quantities and roughly distributed over the surface. Then you need to set the guide beacons. You can do this in two ways:
The guides are recessed into the backfill layer. Leveling can be carried out using the usual rule
- The profile can be placed with the side shelves down, drowning it in the dry mixture so that its upper plane is exactly at the level of the zero mark. In this case, leveling the expanded clay mixture is carried out using the usual direct rule. When the area is leveled, the guides are removed, and the resulting grooves are filled with dry compound and leveled to the general level.
The guides lie on the surface. A special rule is required for leveling
- You can do it differently. The metal profile is placed at the zero level with its plane down. You can pour a little dry compound inside the profile to make it somewhat heavier - it will lie more securely. In this case, the work will require a rule with different levels of guide and leveling planes. Such tools, with the possibility of adjustment, can be purchased at the store. However, it won’t be difficult to make it yourself, from a flat board.
However, such a rule is not difficult to make yourself.
This method is somewhat more convenient, since after removing the guides there are no grooves left on the surface.
As the area of the room is leveled, the beacons are moved to the next areas.
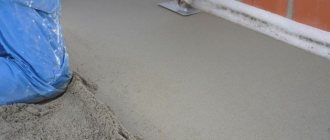
If the height of the screed is large enough, it is advisable to tamp it, for which it is enough to use a large plaster float.
Different craftsmen have their own methods for laying such a floor. It is more convenient for some to install the top covering in sections, immediately after leveling, and only then move on. Others prefer to completely backfill and level the entire room, and then move on to the final stage. In this case, however, it will become necessary to construct a kind of walkways for movement on a leveled surface.
FAQ
Is it possible to hide the heating circuits of a heated floor in the thickness of a dry screed?
“Expanded clay is an excellent thermal insulator, so laying a heating cable or laying a water circuit in its thickness is an absolutely pointless exercise: heat simply will not reach the floor surface in the required volume, and energy costs will become enormous. A warm floor with a dry screed is only possible in the form of infrared film elements, which will be placed on top of the sheet layer, under the finishing floor covering.”
Installation of dry floor sheet elements
The final stage of installing a dry screed is laying sheet floor elements.
- Installation usually starts from the corner of the room. Again, the masters did not develop a consensus on where to start. You can choose the direction from the entrance into the interior of the room. Another option is sometimes to choose a sequential flooring from the far wall to the exit.
Before installing the next sheet, the connecting pads are coated with glue
- The sheets are joined along the grooves and protrusions of the locking parts. First, the joint is coated with glue, and after joining, it is fixed with self-tapping screws in increments of 150 - 200 mm. The screw caps must be recessed into the gypsum plasterboard.
The sheets should be laid carefully, without disturbing the evenness of the backfill.
- Each subsequent row is laid with a “bandaging” of at least 250 mm. The presented diagram clearly shows how cut out fragments of GVL can be used.
Possible layouts for laying floor elements
- If dry screed is being done in several adjacent rooms, you should never allow two sheets to meet in the doorway - it should be spaced about 300 mm.
- When the top layer of a dry screed is made from other sheet materials (OSB or plywood, for example), then two layers must be laid, in the longitudinal and transverse directions, with “bandaging” of the joints. Fixation is also carried out with glue and self-tapping screws.
- The installation is completed by cutting off the film protruding above the floor surface and the damper tape around the perimeter of the room.
FAQ
What additional preparation for laying the finishing coatings will the completed dry screed require?
“If a “dry floor” system with gypsum fiber board was used, then the resulting surface is a completely ready-made basis for almost any coating. All that remains is to apply a layer of regular primer to proceed to further steps. True, if you plan to lay elastic coverings, for example, linoleum or carpet, it is recommended, for greater confidence, to first putty the joints of the sheets and the holes from the screw heads.”
Video: master class on laying dry screed
Characteristics of the screed
The strength of a dry floor screed is inferior to that of a concrete layer. But if the technology is followed, such flooring can withstand up to 200–220 kg/cm2 point load. This is quite enough for heavy furniture in the house and even a car in the garage. At the same time, the weight of a square meter of the created coating with a thickness of 5 cm will not exceed 35 kg. The concrete counterpart weighs 2–4 times more.
The level of sound and heat insulation depends on the backfill layer. For example, if you make it from expanded clay 10 cm thick, then such a layer will dampen up to 40 dB of noise. And the flammability of such a screed will correspond to class G1.
Independent screed device
There is no secret to how dry screed is made, and the process is so simple that even someone who has never done such things can handle it.
Material calculation
In order not to miscalculate the financial issue with dry screed, before purchasing the necessary materials you need to calculate the required quantity. This is done quite simply. Three values will be required - the width and length of the room, as well as the height of the planned layer. For example, length – 6 m, width – 3 m, height – 10 cm or 0.1 m.
- 6 * 3 = 18 m2 - so much sheet material needed + 1 sheet in reserve;
- 18 * 0.1 = 1.8 m3 – volume of required filler. Calculating how many bags you need is quite simple. The required volume is indicated on the label;
- It is better to purchase a vapor barrier film with a reserve. In addition, such material will always be useful on the farm;
- One roll of damper tape is enough for one such room.
Preparation
Before making a regular dry floor screed, you need to thoroughly prepare the base for it.
Stage 1. The old floor is carefully removed, and the entire area is cleared of debris and dirt. If there are cracks, they must be covered. For these purposes, special putty or cement paste is most suitable.
If there are cracks in the wooden floorboards of more than 1 cm, then they need to be dismantled. This floor cannot be repaired.
Stage 2. After the “patches” have dried, a film is laid with an overlap of the strip on the strip by about 20 cm. The joints are taped. It should also extend onto the wall to a height greater than the thickness of the layer by about 5 cm.
Stage 3. Damper tape is glued around the perimeter. It is mounted quite simply using regular PVA glue or a protected self-adhesive layer.
Installation of beacons
The layout of the room is very important. The evenness of the future floor will depend on the correctness of its implementation.
Stage 1. A self-tapping screw is screwed into any corner to the height of the screed and a rule is installed on it. The laser level determines the point of contact. The indicated value is transferred to the wall.
Stage 2. Do similar manipulations in all corners of the room.
Stage 3. Then pull the cord between them and, for greater convenience, screw in more screws at a distance of 50 cm.
Stage 4. When everything is done, check again that the beacon levels match.
Stage 5. Attach the screws to the concrete mortar, wait until it sets and you can continue working.
If the screed layer is too thick, then it is best to use profiles or wooden slats as beacons. Based on the level, they are placed parallel to the wall at a distance of 40 - 50 cm. If you plan to remove the beacons after backfilling, then take their length close to the distance between the walls and simply install the slats. If the frame remains in the screed, then the beacons are mounted on self-tapping screws or, in the old fashioned way, on concrete mortar.
Filling of aggregate and installation of sheet material
Stage 1. Pour out all the filler and, armed with the rule, level the layer. It is best to start from the far corner and gradually move to the exit from the room. This will help keep the layer even.
Stage 2. If you used profiles or bars as beacons, then after smoothing they are removed, and the resulting voids are filled up and leveled.
Stage 3. When the backfill is completed, you can proceed to the installation of sheet material. This process starts from the door to the far corner. There is nothing complicated about this - a sheet of GVLV or OSB is laid, PVA is applied to the fastening points and a second one is applied.
Stage 4. Upon completion of work, putty the seams between the sheets and sand them. Now you can safely lay down any finishing material.
Dry floor screeding is done quite simply with your own hands, and the video will best answer your questions and share some installation tricks.
Related publications:
What are the benefits of dry floor screed?
Upon careful analysis of the pros and cons of dry screed, it is immediately clear that its main advantage is a significant reduction in the time from the start of installation to the readiness of the rough subfloor for laying the finishing coating. In this case, there is no need to wait several days for the solution to harden. Immediately after the installation of the gypsum plasterboard is completed, further work can begin. Yes, and leveling the floor yourself is much easier than mixing and pouring concrete.
Watch also the video on how to make a dry floor screed:
Read about our other materials:
Which is better to choose a septic tank for your dacha and home?
Electric boilers for heating a private house