Mounting methods
Specialists use different methods to attach polystyrene foam.
- Glue method.
This is a quick and convenient way to attach. It is enough to choose the right adhesive composition and then apply it to the insulation. Based on their initial state, adhesive compositions are divided into types:
- dry mixes are bulk materials packaged in bags. They contain cement with binding additives. To prepare the glue, just dilute the solution according to the instructions;
- liquid formulations are always ready for use. These include the adhesive composition “liquid nails” and cheap PVA glue. If PVA glues foam plastic well to metal surfaces, then “liquid nails” glue different materials, however, the glue is very expensive, so it is used on small surfaces;
- foam - this type includes special adhesive compositions developed for foam plastic. First of all, these include:
- Polyurethane adhesive that has good adhesion to foam. It is packaged in cans, so it is used with a special pistol.
- Adhesive - foam provides reliable adhesion to various materials. A special gun makes it easier to use glue.
- Fastening method.
Dowels with a wide head are intended to strengthen the fastening of slabs. They are used for external wall insulation, as well as when there is an increased load on the heat insulator.
There are several types of dowels, but they all necessarily have a sleeve, a core and a wide head. If the dowel is hollow, then a nail or screw is used in the spacer zone. The plate is fastened in the corners and in the center. Compared to gluing insulation, this method is more labor-intensive.
- Combined method.
The simultaneous use of two methods of fastening the insulation allows you to achieve high quality installation. The adhesive composition isolates the surface from external influences, and the dowels increase the reliability of fastening.
Video instruction:
Thickness of polystyrene foam for wall insulation
For those who encounter this method of insulation for the first time, it is difficult to determine how thick the expanded polystyrene slabs should be. The choice depends on the type of structure and the thickness of the walls. The presence of insulation in the past also matters. You can measure the thickness at the moment you open the window. Depending on the material from which the house is made, a certain thickness of insulation is selected:
- for aerated concrete houses, a layer of 25 mm is sufficient, since in combination with the wall of the house the maximum level of warmth and comfort inside the room is achieved.
- the walls of brick buildings are made of different thicknesses: if it is 250 mm, the insulation layer should be 50 - 100 mm, if 380 mm - 50 mm, and if 500 mm, 25 mm is enough.
- It is enough to insulate houses made of shell rock with slabs from 25 to 50 mm.
- The thickness of expanded polystyrene for insulating walls outside cinder block buildings is 50 mm.
The main condition for high-quality insulation is the precise execution of the technological process.
Fastening to concrete and brick walls
Often, to insulate concrete and brick walls, a special sheathing is made that holds foam plastic slabs. Unfortunately, it is not always possible to install it, and in addition, additional costs arise. In practice, other fastening methods are in demand.
- Using adhesive.
This method has its own peculiarities. Firstly, individual components of the adhesive can destroy the foam, and secondly, not every stickiness of the adhesive composition will bind the foam to concrete and brick.
The insulation boards are fastened in a certain sequence:
- the surface is leveled, then dirt and oil deposits are removed from it;
- The glue components are connected according to the instructions. The resulting composition should not contain water, then it will not come off for a long time;
- the adhesive is placed on the slab in separate sections so that there is space for air to escape;
- the insulation is pressed and held.
- Using dowels.
Where is extruded polystyrene foam used?
Thermal insulating material is almost always used for thermal insulation of floors. It does not raise the level of floors in the room, so it is also used when installing underfloor heating systems. This option is used in rooms where the floors are laid on the ground or on a subfloor.
Extruded polystyrene foam boards can be installed directly on concrete surfaces, but care should always be taken to ensure that the insulating material boards do not intersect with the joints of the concrete surface .
Extruded polystyrene foam is also used for thermal insulation of concrete walls of houses. Installation of the material can be carried out both outside and inside, but it is best to do this from the outside of the building. They insulate from the inside only if it is impossible to do this from the outside or if there is not enough time for installation. Expanded polystyrene is also used to insulate basements and building foundations. When constructing a monolithic foundation, polystyrene foam can be used as permanent formwork, which reduces the amount of reinforcement and concrete used. This method of using insulation can significantly extend the service life of reinforced concrete foundations and basement walls.
Extruded polystyrene foam can also be used to insulate balconies and loggias to increase the average temperature in a living space. During installation, a frame is first erected, into which heat-insulating material is laid, and then the material is covered with plywood. Due to its ability to withstand mechanical loads and low temperatures, polystyrene foam is sometimes used to extend the life of highways in the city of Moscow and some other regions.
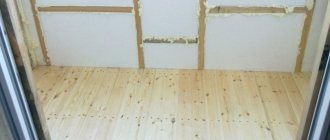
Attaching to wood
Polystyrene foam is attached to wood in different ways.
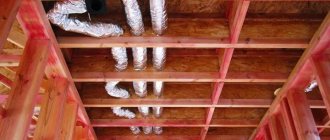
- It has long been known that wood must “breathe”, otherwise rot will appear. Only thanks to the air flow, the tree retains its characteristics for many years.
To protect the wooden wall from rotting, foam plastic is laid with a ventilation gap. For insulation, a lathing is made from wooden blocks. The slabs are inserted between the bars. A vapor barrier layer made of foil film protects the insulation from condensation.
- Special metal nails can securely hold slabs on wooden surfaces. Unfortunately, cold bridges appear at the fastening points, so high-quality putty is required.
When plastic nails , the thermal insulation of the slabs is improved.
- Fastening with adhesives is simple and reliable. The main thing is to choose the right glue that is resistant to changes in ambient humidity and temperature. A solution containing cement and glue has worked well.
What you need
In order to properly insulate your home and then live peacefully in warmth and comfort, you will need the following materials:
- Expanded polystyrene sheets. Their number is equal to the wall area, not taking into account the windows. If the thickness turns out to be very non-standard, then two layers will be required. And the second of them should be attached only after this glue has dried.
- Mineral slabs. They are laid for safe purposes, to avoid fires. Place around doors and windows. The slabs must be high-strength and dense, the same in thickness as the foam sheets. There are as many windows as there are slabs.
- Reinforcing mesh.
- Primer. If the surface is porous, two coats will be required.
- Glue presented as a dry mixture.
Tools and materials for insulation - Metal corner with perforation.
- Hammer drill with 10mm drill bit.
- Mixer for construction.
- Level.
- Stationery knife.
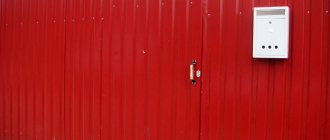
Fastening to metal
During insulation work, it may be necessary to attach to metal surfaces. There are several convenient ways.
- The familiar PVA glue is a good adhesive for metal and foam.
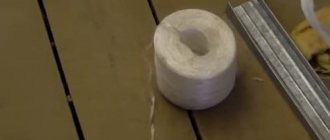
First of all, the burlap is impregnated with the adhesive composition. After that, it is glued to the metal, and insulation boards are laid on it.
- Polyurethane foam has good adhesive properties. The adhesion to metal is not very strong, but it lasts a long time.
The foam is packaged in cans, so it is applied to the stove using a special gun. An experienced specialist should work with the foam, as it dries quickly, which means that the installer’s actions must be confident.
- Polyurethane glue is well suited for joining polystyrene foam to metal . It is used in a certain technology:
- the adhesive composition is applied to the surface of the slab in strips or dots;
- after the composition has dried a little, the plate is pressed against the metal;
- In order for the slab to stick better, a wooden spacer is installed, which is removed after 20 minutes.
- Using an adhesive "liquid Nails" allows you to increase the speed of work. This composition instantly connects the plates and metal, but the adhesion strength is worse than with polyurethane glue. To achieve good and quick adhesion, it is recommended to use these two adhesives simultaneously.
- For small amounts of work, double-sided tape . The connection is fast, but does not withstand heavy loads. In addition, this method is more expensive than using other adhesive materials.
Advantages and disadvantages of the material
Any insulation is characterized by a number of signs, both positive and negative. Expanded polystyrene for facade insulation is no exception.
Figure 8. Facade insulation scheme
The benefits include the following:
- affordable price;
- ease of handling;
- minimizing the spread of bacteria;
- high moisture resistant qualities;
- light weight;
- hygienic properties: resistance to mold growth, as well as other forms of bacteria;
- good thermal conductivity;
- durability;
Negative aspects:
- flammability;
- toxicity;
- prone to damage by small rodents.
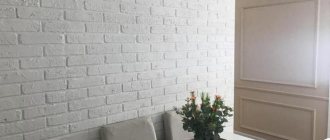
As you can see, there are more positive aspects than negative ones. This material does not lose its properties over time, like mineral wool, and does not change its size under the influence of negative environmental factors. As a result of completing all the stages of insulating the facade with polystyrene foam, the entire structure resembles a “sandwich” as in the photo.
Ceiling mount
The main condition for such fastening is high-quality preparation of the ceiling, which includes cleaning of whitewash and dirt, as well as laying electrical wiring.
The foam is attached in one of the following ways:
- Frame method.
The sheathing or frame for the ceiling is made of wooden blocks. In order not to cut the slabs, it is recommended that the size of the sheathing cells be shaped to match the size of the sheets.
Inside the cells, foam is attached with glue or fungi. All gaps are sealed.
We seal the gaps with foam
A vapor barrier film is placed on top of the insulation, which is held on the sheathing.
At the final stage, plasterboard sheets are attached to the ceiling.
- Glue method.
This method is much cheaper than the one discussed earlier. The main thing is to choose and prepare the adhesive composition correctly.
When preparing the ceiling surface, in addition to cleaning, it is coated with a disinfecting solution and primer. When it is not possible to completely remove the whitewash, the entire ceiling is covered with an adhesive composition.
Glue is applied to the slab in broken lines. The slabs are laid from the middle of the ceiling with a shift.
Dowels are used for additional fastening.
A reinforcing mesh is attached to the laid insulation on top, which is then puttied and processed.
Construction of houses
185 votes
+
Vote for!
—
Vote against!
The question of whether to insulate your home often becomes relevant before the cold weather. Nowadays, saving has become very popular, whether this is caused by economic factors, or people just want to save money somewhere, leaving an extra penny for their vacation, but the fact remains a fact. It’s true that external insulation is now being installed not only for the sake of saving money. This need is often caused by the technical characteristics of housing, where, for example, there are very thin walls - laid in one brick, or strong drafts, when even metal-plastic windows do not save. Whatever one may say, insulation will always be beneficial.
Table of contents:
- Expanded polystyrene for external cladding
- Do-it-yourself wall insulation with expanded polystyrene: surface preparation
- How to insulate walls with foam plastic with your own hands: step-by-step instructions for attaching insulation
- DIY polystyrene foam installation video
Expanded polystyrene for external cladding
Each owner, before taking on the work of insulating a house, will find out what materials are used for this task, what advantages they have and will decide to use one of them.
So, the following materials are most widely used for exterior cladding:
1. Expanded polystyrene - styrene granules filled with gas, soluble in the polymer mass (simply “foam plastic”).
2. Mineral wool - formed after spraying molten glass by interweaving such fibers.
3. Polyurethane foam is a gas-filled plastic obtained by foaming and hardening (in simple terms - “foam rubber”).
4. Basalt slabs - fibers from molten rocks, slabs are formed using a synthetic binder.
5. Cellulose insulation - paper-based, loose and fibrous material.
Today, the most common type of external insulation is polystyrene foam. It is used by both professionals and independent craftsmen. If it is clear to a professional why this particular material is worth taking for work, then a person who decides to carry out the work himself still needs to become familiar with its advantages.
Do-it-yourself insulation of walls with polystyrene foam begins with the study of the material that will be used. Expanded polystyrene, otherwise “foam plastic”, has a number of features that distinguish it from the above materials - “insulation materials”:
- cost - a very “economical” insulation, which gives it the right to be in first place among insulation materials, because there are a lot of people who want to save money;
- easy to cut and install - this advantage also gives you the right to first-line purchase among other materials, because cladding walls with foam plastic with your own hands, without the help of a professional, will be much easier if the material you are working with is easy to use;
- reliable and durable - this is what is important for any building material, because you want to make repairs as rarely as possible, and not waste interesting life moments on construction.
Do-it-yourself wall insulation with expanded polystyrene: surface preparation
In order for all work to be completed successfully, you need to start it wisely. Familiarization with the material that will be the main one during installation has already been made, its advantages and some disadvantages have been studied, all that remains is to prepare the surface and begin insulation.
Whatever installation option you choose: with glue, with “fungi” fasteners, or with the help of a frame, you must first clean the walls of various contaminants, previous cracked and partially fallen off layers of plaster, and various objects that may interfere with the installation of the insulation. All this is combed, knocked down, leveled.
There are times when a wall being prepared for insulation requires more attention in preparation. These are the cases when it needs to be puttied in some places where differences exceed 2-3 cm. Such “gaps” on the wall must be leveled, otherwise the insulation may not be attached correctly, and accordingly, it will not perform its function well enough.
Important! Putty for external work comes in different types; when purchasing it, you need to consult with the seller, be sure to indicate that it will be used for external work.
After these manipulations, it is necessary to prime the surface of the wall (do this after the plaster has completely dried). It is especially necessary to prime if you have putty on the wall, and if adhesive mass will be used in further work. A primer (necessary with deep penetration property) will provide better adhesion between all layers when working on insulation.
For more precise fastening of insulation, further plastering, and possibly fastening siding, you can make a whole system of beacons and plumb lines. These manipulations are not difficult to perform, but they help to do everything efficiently and facilitate installation, since the outer edge of the insulation is visible from them.
You need to attach anchors along the upper edge of the wall, tie a strong thread or a special plumb cord to them, to which weights will be attached to the floor. It is important to also make threads located horizontally, then a mesh will come out, with the help of which you can really navigate when installing the insulation blocks and frame.
So, preparing the wall for the subsequent installation of polystyrene foam requires the following materials and tools:
| Material/tool: | Application: |
| putty knife | With its help you get rid of excess old plaster, use it in the future for puttying the wall |
| putty | Building material for leveling the wall if necessary |
| primer | Construction material used for better adhesion of different layers when finishing walls |
| Roller | Construction tool, used for applying primer |
| Anchor | A fastener used to attach a thread to it for plumb lines (weights) |
| Plumb cord | A special mounting and marking thread, with its help markings are made for further fastening of the insulation |
All materials should be at hand in order to quickly complete the preparatory work and begin the actual insulation work. But do not forget that surface preparation is one of the most important stages, which should not be treated negligently.
How to insulate walls with foam plastic with your own hands: step-by-step instructions for attaching insulation
As already mentioned, polystyrene foam can be attached in various ways: with special glue, with “fungi” or with the help of a frame. We will consider the option that is the most reasonable and worthy of attention. Fastening with glue, but also using the second method, fastening with “fungi”, has been tested by professionals and many years of using this technology. Each owner will be able to carry out such installation without special expenses, because double reinsurance will cost only a couple of packages of fastening material in the form of “fungi”, and they are inexpensive, especially in comparison with the scale of the entire home insulation.
When purchasing polystyrene foam, you need to take into account the characteristics of your home and buy the material of the correct thickness. After all, when external insulation with polystyrene foam is done with your own hands, this moment is the most common mistake, which entails ineffectiveness of the work, or consequences in the form of fungus and moisture collection in the room.
It is known from practice that the required sheet thickness for a private house must be at least 50 mm, then the insulation will be truly effective. An even better solution would be to install two sheets of 50 mm each with an overlap, which in total will give 100 mm. Such an installation will be ideal both in terms of thickness and thermal insulation, because in this way all cold bridges at the joints will be eliminated.
The work will require not only foam plastic of a certain thickness, but also other building materials: a starting profile, construction adhesive, dowels called “fungi” (their length varies depending on the thickness of the foam and the type of wall, from 90 to 120 mm), a metal perforated corner profile , external mesh, metal profile with mesh for slopes, plaster, paint or siding, depending on the decision on the final finishing of the facade.
1. The first thing that is necessary is to install a perforated metal profile at the bottom along the perimeter of the wall, which will later serve as a kind of “shelf” in order to evenly align the first layer of polystyrene foam sheets. The width of the corner should correspond to the width of the foam sheet.
2. After attaching the perforated corner, you need to dilute the special glue with water in accordance with the instructions. There is also a more modern and easy-to-use foam adhesive; it comes in cylinders like assembly glue and is applied ready-made. The glue must be purchased in advance and be specifically designed for such work. The first option, diluted with water, is found in practice more often and costs several times less.
3. The third stage is applying glue. This must be done with great care, first laying the foam block on a flat surface so that not one edge of it is hanging, otherwise the material may break off under the weight of the glue, because foam is an airy building material and very fragile. It is also necessary to apply the glue correctly: not in stripes or blots, but on the entire surface of the joint with the wall. Of course, it is not necessary to “cover” the entire block, but do it with a notched trowel, using wave-like movements. If the wall is not perfectly flat, then use the method of applying glue along the edges and in blots along the rest of the perimeter.
4. How to put polystyrene foam on the wall - it would seem that this is the question, but there is no need to rush with this, because the fragile material is with a large load - glue on the surface, so it is important even just to pick it up correctly, it is better if two people do this person. To install polystyrene foam, select the farthest wall to practice fastening, and start from the bottom corner. The thread markings done during surface preparation will help. Subsequent rows are laid offset (similar to the type of laying tiles and bricks).
5. Afterwards, additional fastening is used using “fungi”. Their number on each foam block is five - four in each corner and in the middle. This is one of the options; some builders install differently, fixing “fungi” along the edges of the sheet.”
When installing dowels, they should not protrude, but rather go deeper into the foam sheet. Later, the joints and the place where the dowels are attached are sealed with glue using a spatula.
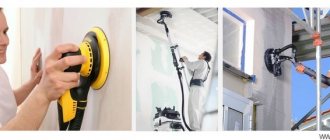
6. Do-it-yourself external insulation with polystyrene foam requires a careful approach to all the nuances, so the next step is cutting off the protruding parts of the foam sheets at the corners and grinding the surface of the sheets with a special grater. In the case when more than half a month has passed since the foam was attached, you will have to sand the top layer of the foam around the entire perimeter, since it is damaged by weather influences.
7. Do-it-yourself corners of a polystyrene foam house need to be provided with a shockproof perforated corner with a mesh. Moreover, it will not be possible to cut the foam perfectly at the joint, but with the help of a corner it will be possible to create a beautiful corner. The corner must be secured using the same glue as the foam sheets. It is advisable to check with a level how evenly such a corner was glued, because until the glue has dried, everything can be corrected.
8. At the previous stage, the installation of insulation and the main finishing were completed. But there remains an important home stretch. At this stage, you will need to cut the reinforced mesh to the required size, apply glue to the top of the wall and gradually lay the mesh, covering it with glue. With such manipulation, the main thing is that the mesh overlaps slightly with the subsequent stripes, and does not shrink, creating unevenness; they are unacceptable. If such problems have already arisen, before the glue has dried, it is worth fixing it with a spatula or manually, so as not to make it even worse. Next, the reinforcing mesh is covered with two layers of putty, which are applied after the previous layers have dried. They need to be applied using a spatula, drawing in even lines without leaving streaks.
After carrying out the above work, there should not be a single gap in the foam; all areas must be carefully treated with plaster. After this, everyone decides for themselves whether to use the most affordable option for finishing the facade - this is ordinary painting on plaster, or to resort to more expensive, but certainly chic-looking siding.
DIY polystyrene foam installation video
Sometimes it is better to see once than to hear a hundred times, and for such cases we suggest watching a video on this topic:
Indoor mounting
Insulating indoors is a simple process, so it can be done on your own. To ensure high-quality fastening, work with foam plastic is carried out in a certain sequence.
- The wall surface, insulation and adhesive composition are being prepared. The walls must be smooth and free of cracks and peeling. Polystyrene foam is easily cut with a hacksaw or a sharp knife. The adhesive used is a dry mixture or adhesive foam in cans.
- The finishing of windows and doors is dismantled. Subsequently, higher quality finishing elements are installed.
- The adhesive is applied along the edges of the slab, in the center and at the ends.
- Fastening the slabs to the walls is done in one of the following ways:
- in rows - the insulation is laid with a shift in rows along the entire perimeter of the room;
- pyramid - the first row is laid around the perimeter of the room, and then the corners are laid in the form of a pyramid.
- Using a spatula, remove the layer of glue squeezed out from the joints of the plates.
- The surface of the insulation is covered with a mounting mesh, and plaster is produced.
Preparatory activities
When installing polystyrene foam wall insulation with your own hands, you will need the following tool:
- fine-toothed hacksaw or string;
- sharp knife;
- scissors, rubber and metal spatula;
- paint roller;
- paint brush;
- construction mixer;
- measuring container for preparing glue;
- tape measure, metal ruler;
- plumb line;
- construction level.
Thermal insulation of walls from the inside with polystyrene foam includes the following main stages: preparing the wall surface, attaching polystyrene foam to the wall, applying finishing coatings. The entire technological process can be seen in the video. At the preparatory stage the following activities are carried out:
- Preliminary preparation. Insulating a house begins with thoroughly cleaning the surface of the walls. It is necessary to remove the previous coating, especially paint and varnish materials. This is important because the solvents present in such coatings can destroy polystyrene foam. A complete inspection of the condition of the wall surface is required, and if necessary, large damages are repaired; large cracks can be filled with polyurethane foam.
- Surface leveling. A smooth wall is an important condition for high-quality finishing of a room. In the case of brickwork, plastering will be required, but if there are concrete walls, you can do without it. In any case, preliminary preparation includes fine leveling. It is provided in the following order. An acrylic primer is applied to the wall surface, for which you can use a paint roller. After drying for 21-24 hours, all irregularities on the surface are eliminated using a putty composition. Surface preparation ends with the application of another primer layer. An antifungal ingredient is usually added to the finishing primer.
Features of the work on insulation with polystyrene foam from inside the house
Insulating walls with foam plastic from the inside of a house has its advantages and disadvantages. The work on fastening to the wall is not affected by external weather factors; the area of the insulated surface is relatively small, which eliminates unwanted sliding of the sheets. As a disadvantage, one can note the reduction in the internal volume of the building.
The additional thickness of the insulating structure further reduces the area of the rooms. For internal installation of insulation, the thickness of the foam sheets can be no more than 40 mm, and fastening can only be done with glue. The use of profiles for laying foam plastic and additional fastening with dowels can be abandoned.
It is quite possible to do this work yourself. How to attach polystyrene foam to the wall. There are two ways to attach foam to the wall - using glue and mechanical fastening with dowels “fungi”. Mechanical fastening is usually used as additional fixation of glued foam. To fasten using this method, it is necessary to profile the wall with thin wooden blocks or special profiles.
They are aligned in a plane; this determines how evenly the polystyrene sheets can be strengthened. Holes are drilled in the profile according to the diameter of the dowels used, usually 8 mm. Using dowels and these holes, the material is attached to the bars. We will not consider fastening with drilling directly into the wall as extremely inconvenient.
How to properly insulate a wooden house?
When insulating stone walls, you can choose any of the above methods and implement it. But you should be especially careful with wooden buildings. The fact is that wood, a breathable material, cannot simply be taken and wrapped in film. As a result, it will simply rot in a few years. Wooden walls urgently need to constantly receive fresh air.
What to do? For such surfaces, creating a ventilated façade is suitable. What does it mean? There must be a ventilation fence between the wall and the insulation. That is, first the sheathing is attached to the walls using bars, and the insulation is already fixed on them. Do not forget to treat all wooden components with an antiseptic that fights mold and fungi.
The availability of the above methods of attaching Penoplex allows everyone to independently choose the most acceptable option. At the same time, the relative simplicity makes it possible, if desired, not to resort to the services of specialists.
You can purchase Penoplex and other types of extruded polystyrene foam for various purposes. Visit our catalog and choose the appropriate option. And in case of difficulty, we are always ready to help!
Self-installation of polystyrene foam
As can be seen from the two descriptions, insulating walls using polystyrene foam yourself, both on a regular concrete and brick surface and on wooden beams, does not present many difficulties. The main condition for good masonry is step-by-step execution, high-quality materials used, strict adherence to recommendations and instructions, as well as desire and patience in the work. Any installation of such material will reliably protect the house from adverse conditions, protect the wood from rotting and deterioration, and also ensure good ventilation of the room and insulation.
This material is safe, non-toxic and will last for many years without repair or restoration. It has good thermal insulation, steam does not condense on it, and fungi and mold do not multiply. As an addition, you can treat the walls with a solution and disinfect the area before laying. This will help get rid of existing fungus and microorganisms on the surface of the wall. But this is done if necessary. There is no need to spend money and effort for prevention if the surface is normal.