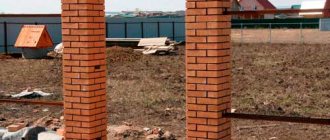
The need for cladding
The base is the lower part of the external walls, which are located at the foot of the house and protect the space under the floor from the influence of the external environment. In some buildings this is a separate element that rises above the foundation, in others it is one whole. Cladding the foundation of a house solves two problems at once - decorative and practical.
Taking into account the nature of their location relative to the plane of the facade, plinths are divided into:
- Falling ones are the easiest option to use. There is no need to install drains; exposure to mechanical factors is minimal. Visual characteristics are good.
- Protruding – coming out from under the walls, they are the best choice for buildings with thin walls. The basement often has a warm, heated room. The presence of a drain is necessary, otherwise melted snow and water will begin to penetrate the foundation and destroy it.
- Flush with the wall is the most rare type of structure due to the lack of normal waterproofing.
You will find out further how you can finish the foundation of a house from the outside. Options are available in a wide price range. The ideal solution from a practicality point of view is natural stone, baked brick or monolithic concrete, but they are expensive.
Finishing the foundation for log houses and timber - the best combination
The architectural image of a wooden country house is ideally matched by a stone foundation, which can be successfully made from a stone-like material. The disadvantage of artificial stones is significant water absorption - 4-9%. This indicator can be reduced by treating surfaces with water repellents. The choice of siding for the foundation of log houses and timber houses is wide. These are imitations of wild rocks - granite and dolomite; arthouse designs with grass and butterflies are possible. If the foundation of the house is columnar, then you can effectively decorate its individual elements with siding. Using corrugated sheets for wooden houses is not the best solution. But it can be used, for example, for the foundation of a country house, choosing a natural shade.
Insulation of the base and blind area with extruded polystyrene foam
Our website presents a number of log house projects, for example: Or you can see all prices for log houses. You can calculate the house or bathhouse you need with maximum accuracy using our log house cost calculator. To order and buy a log house, call:
- Vologda
- Moscow,
Comments
No comments yet.
What material to choose for cladding the foundation
Different materials are used to finish the foundation - there are many options
At the moment, there are many different options - all of them, to one degree or another, are suitable for cladding the foundation (its visible part). But stone is, without a doubt, the most preferable solution. This applies not only to natural material, but also to its artificial counterpart. That's right: today, facing the foundation with stone can also be done with artificial material, many do so.
What is good about natural stone?
Why should you choose it? There are reasons for this:
- Natural stone in finishing the foundation of a house is the optimal solution for suburban structures built of brick;
- Also, this option is suitable for houses whose external design will be ideally combined with stone finishing;
- Before buying a stone for cladding the foundation of a house, you need to know something about this material.
- Of course, the cost of such slabs is far from modest (not every family will be able to afford such expenses), but this solution is for developers who want to do the job once and no longer worry about the foundation of their home (at least in the next fifty years) ;
- When finishing the foundation with stone, it is necessary to have auxiliary materials so that the work is done efficiently. For example, a special glue is perfect as a fastener;
- Its peculiarity is that it responds well to shrinkage of the house structure - which cannot be said about other possible methods of fastening;
- If you choose a stone that is heavy to finish the foundation, you need to think about the supporting frame - it will serve as an additional fastening.
Covering the foundation with natural stone is a rather expensive solution, but the result is worth the investment
Why should you use artificial stone?
If natural material is not suitable, you can always use artificial material to cover the foundation
Artificial stone is often used to cover the foundation of a house. This option is more profitable in terms of cost, but compared to natural material it is less preferable.
What advantages are worth noting? They are:
- The material has an impressive range of textures and colors (the range is much more extensive than that of natural stone);
- It’s also nice that the pattern, which is an imitation of the structure of the stone, is almost impossible to distinguish from the pattern on natural material;
- Another undoubted plus: the mass of products. Artificial products do not require additional fastenings: you just need to level the surface of the foundation. Plaster will always help in this matter;
- Afterwards, the finishing material is glued without any problems - a special adhesive will help with this work.
Installation of basement cladding imitating masonry
The starting bar is mounted at a distance of 2 cm from the ground surface. The presence of a gap is necessary to change the geometric parameters during linear expansion under the influence of temperature fluctuations, to ensure the ventilation process, and the movement of the blind area.
All elements of the plinth panels have a device that allows installation from left to right. The additional panel, which differs from the standard one in being smaller in length, is used to space vertical seams. This method of fastening allows you to mask the connecting seams. Like other parts, they have elements of a tongue-and-groove locking connection. In cases where to complete a row it is necessary to close a small area, it is advisable to trim the running panels; this will be more economical. On the corner additional element, the groove for the connection is only on the left side; there is no locking connection on the right. This feature is due to the fact that the last section of the row is almost always cut to the required size. To attach the sheathing elements to the sheathing, self-tapping screws with press washers or nails with large heads are used. Before installation, holes are drilled in each panel several millimeters larger than the diameter of the hardware used. Such a gap is necessary for free movement during thermal expansion; for the same purpose, the fasteners are not tightened until they are firmly fixed by 1 turn.
Installation of basement cladding
They begin finishing the base as a stone by installing the corner element, aligning it in accordance with the vertical and horizontal directions. They are fixed with self-tapping screws in the top and side parts. The next panel is aligned along a horizontal line, secured with a locking connection, after which the self-tapping screws are screwed in. All other elements of the row, except the last one, are fastened in a similar way. Before installing the last element in the row, an angle is set, aligned horizontally and vertically. The remaining uninstalled panel is often the wrong size, and it must first be cut to the required dimensions. The distance is measured along the top edge of the row. To apply the markings, use a template that exactly repeats the connecting seam of the corner element, then cut it with a grinder and install it in an empty space. In this case, they are fixed with hardware only in the upper part.
Gluing when installing the last element
In cases where the architectural feature of the structure requires the presence of internal corners, they can be made independently from whole sheets, bent at the required distance. In order to bend the panel, it is heated from both sides with a stream of hot air. Use a regular hair dryer for this. For ease of work, it is fixed on a flat surface and pressed on top with a flat strip, which is fixed with self-tapping screws. The heated part can be easily bent without much effort; a rail installed on top allows you to get an even bend. This angle is convenient to install, since both sides have locking elements. In this way, all elements are mounted around the perimeter of the building. The second row also begins with a corner element, but the second row is not installed as a whole one, but as an additional one to create a run-up. The upper row has an additional locking connection in the lower part, the presence of which allows for coupling with the row located below.
Performing priming
All surfaces that need to be protected from plaster, such as window frames, must be covered with masking tape.
A durable and high-quality plaster coating can be obtained only with the correct use of a deeply penetrating primer in two layers. If the base part is to be painted, then only a façade primer with maximum drooping properties is used for processing. Only the use of high-quality materials and compliance with technological requirements for the preliminary preparation of the base for applying plaster can significantly increase the service life and improve the appearance.
Silicone quartz primer ST 15 Ceresit
If you plan to further perform decorative finishing work, then it is advisable to give preference to a façade adhesive or acrylic-based primer.
Type of primer composition
Features and Specifications
Plinth design features
The appropriate design (especially for industrial buildings) of the plinth is given by the choice of facing lining, material for drip and decorative elements. It all depends on the taste of the homeowner and the money he wants to spend on the appearance of the house and basement. Types of design:
- Its actual absence. Everything is simple, practical and economical.
- Elementary design. The color of the walls and base are chosen to match or, conversely, in the opposite color scheme. There are no decorative elements.
- Unprofessional design. The choice of a base mutula with a designer look. A skillful combination of color, composition, structure, masonry (brick, marble, etc.), the presence of decorative elements.
- Professional design. Very creative and extremely expensive.
Stages of work on the plaster foundation
- the entire area of the concrete base (on the bricks do not require) a sharp metal object (solid screwdriver) incisions are made;
- are aligned and primed surface;
- crack (masonry joints) and recesses are wetted with water and filled with cement-sand mortar;
- with dowels or staples “shoot in” chain-link fencing with a fine mesh;
- Beacons are installed. To do this in every corner of the basement and through the 1.5-2 m between them, the following work:
Driving the various forms of the cap.
- With gidrourovnya find and is drawn on the ground along the wall of a flat strip. It should go almost right up to the base, at the same time aligning it, but no closer than 2-3 cm to the most protruding part of it.
- At the point of intersection of the angle (the wall) and the strip vertically mounted peg length equal to the height of the plinth.
- The distance (gap) between the peg and the foundation “thrown” solution so as to obtain a vertical hill, attached to a building level to align it. At the same time it shall be verified vertical. Along the wall should be several of these lighthouses.
- The pegs in the corner beacons are driven by 3 nails, between which stretched lace. It will be a guide for plastering. You should now have 3 lines of shoelaces: the bottom of the cap at the top and in the middle. By the cords and beacons should be a gap of 1 mm.
- after cement mounds beacons dry, produced obryzg foundation. First, the surface is moistened with water, then with her ladle, trowel, brush with long bristles sprayed creamy mortar. The layer thickness - 5.9 mm;
- on the dried up (not dried) “scratch coat” applied primer. It consists of the same cement slurry, but a liquid;
- after “curing” the primer proceed to the next stage of plaster and a covering layer is applied. He performed more dense and plastic mixture. In this composition the ingredients are added waterproofing;
- completion - rubbing surface to give it optimum flatness and smoothness. To do this, use a grater to set them fine mesh, special float concrete with a relief surface, the usual foam. It is important to choose the right moment to wipe: I must have “grab”, but its surface should be still quite wet.
Finishing materials used
Popular materials for finishing plinths:
- plaster;
- flat slate;
- siding (cladding panels);
- tile;
- brick;
- stone (natural, artificial).
Which material is better can only be said by comparing their characteristics.
| Material | Advantages | Flaws |
| Plaster | low price, easy to use | the surface will first have to be leveled |
| Siding | light weight, work with any surfaces | need mounting frame |
| Clinker | attractive finish, durability, strength | labor-intensive preparation |
| A natural stone | labor-intensive finishing, high cost | significant weight |
| Brick | strength, durability, beauty | labor-intensive work, a sharp increase in loads on the foundation |
Which solution is needed to plaster the foundation
If indoors, you can use the compositions with the addition of gypsum, lime or clay, it is unacceptable for external works.
The circuit finishes plinth plaster.
The solution is allowed to enter only waterproofing components or plasticizers. Trade network offers many compositions for the exterior. For example, a manufacturer Knauf mixtures there are several options for the foundations. By and large, they are not much different from each other: only the percentage of the components and the admixture.
However, in this sense it is: a plastic composition is much easier to plaster the foundation for the subsequent butchering it “under a rock” or apply a decorative layer. Dry wipe with optimal sealing effect in regions with humid climate and in conditions of frequent flooding of the site. If you decide to prepare a solution on their own, in a water-repellent component can be used “Latex Professional”. This aqueous dispersion of synthetic resin is well compatible with the cement compositions. This liquid is discharged in containers of 11 liters and a weight of 10 kg is added to water when mixing the solution.
There is an opinion that the plaster is enough to cap 1: 5, but it is wrong. Such a composition quickly “fall down”. The optimum proportion for cementitious compositions is 1: 3. The sand must be sifted and certainly a career, not a river. The amount of water in the process is selected. For the layer of soil can be used more grout than a covering. The latter should resemble in consistency and cream so as to be flexible, but non-flowing.
Preparation grout
The proportions of materials in the preparation of the cement slurry.
- through a large sieve or metal net with fine mesh sieved sand, freed from stones, mud and dirt;
- if a cement brand M400, the percentage of sand - 1: 3, if the marks M500 - the 1: 4;
- a mixer (or container in which the solution will get involved) first laying the dry ingredients, mixing them;
- in water, prepared for mixing, add liquid formulations: waterproofing and plasticizing. Not so long ago, very popular for outdoor plasters used PVA glue. His was added in a small amount in the water and cement slurry took on plasticity and better adhesion.
- water is added gradually, constantly controlling the density of the mixture. If necessary, add a colored pigment.
What solution is needed for plastering the foundation?
While compositions containing gypsum, lime or clay can be used indoors, this is unacceptable for external work.
Scheme for finishing the plinth with plaster.
It is permissible to introduce only waterproofing components or plasticizers into the solution. The retail chain offers many compounds for outdoor use. For example, the manufacturer Knauf has several options for foundation mixtures. By and large, they differ little from each other: only in the percentage of components and the additives introduced.
However, there is a point in this: with a more plastic composition it is much easier to plaster the base for subsequent cutting it “to look like stone” or apply a decorative layer. Dry mixtures with a waterproofing effect are optimal in regions with a humid climate and in conditions of frequent flooding of the site. If you decide to prepare the solution yourself, then you can use Latex Pro as a water-repellent component. This aqueous dispersion of synthetic polymer is highly compatible with cementitious compositions. This liquid is produced in 11 liter canisters weighing 10 kg and is added to water when mixing the solution.
There is an opinion that 1:5 is enough for plastering a plinth, but it is wrong. This composition will quickly crumble. The optimal proportion for cement compositions remains 1:3. The sand must be sifted and certainly from a quarry, and not from a river. The amount of water is selected during the work process. For the primer layer, you can use a more liquid solution than for the covering layer. The latter should have a consistency similar to sour cream and be just as plastic, not runny.
Preparation of cement mortar
Proportions of materials when preparing cement mortar.
- sand is sifted through a large sieve or metal mesh with a fine mesh, freeing it from stones, clay and dirt;
- if M400 grade cement is used, then the percentage ratio with sand is 1:3, if M500 grade is used, then 1:4;
- First put the dry ingredients into the concrete mixer (or the container in which the solution will be mixed) and mix them;
- Liquid compounds are added to the water prepared for mixing: waterproofing and plasticizing. Not long ago, PVA glue was especially popular for exterior plaster. It was added in small quantities to water, and the cement mortar acquired plasticity and better adhesion.
- water is added gradually, constantly monitoring the thickness of the mixture. If necessary, add colored pigment.
Features of decorative finishing
Decorative plaster of the foundation adds completeness to the appearance of the entire building. To finish the foundation, the base can be tiled, painted or decoratively plastered.
To create various effects, the following compositions are usually used:
- textured;
- structural;
- pebble (mosaic plaster).
The base covered with pebble plaster looks elegant. For the base it is better to use compositions with a large fraction of filler. If you want to decorate the foundation using an imprint method, using figured rollers, stamps or a matrix, choose textured mixtures.
Popular finishes that can be made from structural plasters:
- “bark beetle” (ready-made mixtures are called that);
- “lamb” (performed with simple techniques);
- "fur coat".
The fur coat and lamb can be made from textured or structural plaster. Finishing the foundation with stone gives a private house a fundamental, significant look. The love for stone - strength, reliability and durability - has been preserved among mankind since the Paleolithic.
Decorative plaster of a stone base can be done in several ways. For example, you can imitate torn stone using structural plaster, or you can use a matrix. But the most impressive decorative effect is achieved with 3D plaster.
Next, how to make a 3D imitation of masonry.
- The prepared solution is applied to the wall without particularly leveling it. You can even apply it with your hands.
- Using a knife, a palette knife or a homemade cutter with a corner, select grooves that will imitate the seams of masonry.
- When the solution has set a little, smooth the edges of the seams with a brush, trying to give them a natural look. The brush can be slightly moistened. The surface of the “pebbles” can be slightly smoothed so that they look like smooth cobblestones, or they can be left uneven – “ragged”.
- To make them completely smooth, smooth them with a dampened sponge.
- After the solution has dried, before painting, you need to coat the “masonry” with a primer. Allow to dry overnight.
- The dried “masonry” is painted with paint using a sponge to match the color of natural stone. It is better to use two or three colors close to natural tones. To obtain a natural color, add a little black tint to the paint, which will reduce the brightness. Use the dry brush technique to apply local whitish spots on the raised parts, which will give an “antiquity”. The seams are painted in dark colors.
Applying the solution to the surface
Imitation of masonry with a knife
Smoothing the edges of the seams with a brush
Applying primer
Painted “stone”
Do not make the stone design look like fish scales. There are no such forms in nature.
Additional foundation sheathing tips
What else does a craftsman need to know and take into account during work, so that finishing the foundation of a house with stone (or directly with this material) not only looks perfect, but also successfully performs a protective function?
It's time to pay attention to some tips:
- Experienced craftsmen recommend working only from left to right. It is recommended to lay the stone from the corner (or from some specific element that divides the foundation) - and this is quite logical;
- To achieve maximum reliability, it is better not to abandon the use of reinforcing mesh. It is customary to attach it to the base of the house - due to such an element, the adhesive base acquires additional strength, the stone will now last an order of magnitude longer: this has already been tested several times;
- Before attaching the reinforcing mesh and finishing material, you can lay a thermal insulation layer - this will provide protection from the cold;
- Sometimes steel reinforcement is used in the work (you should choose only thin rods). Also, during the selection process, you should make sure that there are no traces of rust or corrosion on these elements;
- There are different types of plinths; there are a number of types: there are protruding ones (used for structures where the walls are thin), there are also sinking ones (thanks to these, moisture is guaranteed not to end up under the facing stone);
- A protruding plinth is an excellent solution for a house located in a cold region;
- This type of base needs protection. A special metal canopy is usually installed for it;
- You should always remember about ventilation of the foundation - if it is being finished. You don’t need to try hard for this – a couple of holes are enough (ideal diameter is 130-180 mm). But, such “windows” are made on all sides of the house at once - then the base can be used for a very long time (it’s also worth reading about how to decorate the base with stone).
The facing stone can be different - you can choose a material that fits perfectly into the overall concept of the landscape
- A very important point: you need to choose high quality material for the work. Especially if you decide to finish with artificial stone. In this matter, much depends on the manufacturer and his integrity;
- If the price of a product is too low, you should not draw premature conclusions and immediately make a purchase. It is quite possible that there is a discount on the facing material precisely because of its low quality;
- Can good finishing materials be cheap? This is quite possible - but it happens rarely. If there is some kind of marketing campaign going on;
- That's all the advice. There are very few of them, but each is very important in its own way. If you follow these simple recommendations, the foundation will last a long time, and repairs will not be needed soon.
Results
Finishing the foundation with artificial stone is a good option today
Now every reader can imagine how to finish the foundation of a private house or a luxurious country cottage.
What material is suitable for this, why it is worth using stone, what advantages do natural and artificial stone have.
Today it is not necessary to work with your own hands - especially when there are no difficulties in terms of finances. You can always contact some construction company whose specialists will do everything you need in the shortest possible time, with a quality guarantee.
Do-it-yourself stone plinth finishing technology
A strong, reliable foundation ensures the building's durability and safety. The part of the house foundation that protrudes above the ground surface is called the plinth. It is the base that is most susceptible to the influence of natural adverse influences. In addition, the upper part of the foundation of a private house performs an aesthetic function and should be finished with decorative material with high protective properties. As practice shows, stone is best suited for finishing the base. And although the cost of such cladding will not be cheap, it will be the best option in terms of price – quality – durability.
Only stone will provide effective protection for the base of a private house from all kinds of mechanical, temperature and other undesirable influences. Finishing the base with stone is very popular in our country and abroad. This is explained not only by the operational benefits, but also by the aesthetics of such cladding. In the video and photo below you can see the aesthetic advantages of this material. People have been covering their homes with wild natural stone since ancient times, which made it possible to optimize indoor temperature, balanced humidity and high mechanical reliability.
So what is better to start with when decorating with natural or wild stone? Which stone is right for your home? What is the technology for doing the work yourself? How effective will it be to cover the foundation with artificial stone? You will get the answers in this lesson and the video below.
Where to start facing the base and how to choose a stone
Considering the fact that the price of this material, even if artificial stone is used, is relatively high, you will first have to determine the cladding area. Using a tape measure, measure the height of the base protruding above the ground and its total length along the perimeter of the house (if the entire foundation is intended to be finished). The resulting values are converted from centimeters to meters and multiplied. This will be the area that needs to be covered with natural or artificial stone. Approximately 10-15% should be added to this area, since when finishing the foundation of a house with your own hands, such an amount of material will turn into waste when trimming and adjusting.
It should be mentioned that stone is often replaced by other alternative finishing materials, among which the most popular are: textured plaster, clinker tiles, metal and vinyl siding, ceramic tiles, natural wood. All these materials can also be used to decorate the basement and walls of the house with your own hands, however, each of them has a number of disadvantages. At the same time, the stone has only one drawback - it is heavy, and in all other characteristics, finishing with artificial and natural stone is significantly superior to all other cladding methods. In this case, we do not take into account cost as a criterion for comparison, since high-quality imported siding and natural wood are not much cheaper than stone.
The stone for facing the foundation may differ in thickness, texture and color. To finish the base, you can use granite, marble, limestone, sandstone, onyx, quartzite, slate, travertine, as well as artificial stone made from concrete. The most commonly used stone for exterior cladding of houses is sandstone. The cost of sandstone is relatively low, this stone is quite thin and has an attractive appearance. To finish the base with sandstone, only sand-cement mortar is used. It should be noted that the cost of sandstone will largely depend on its thickness and color. You can see options for this finishing in the photo.
Preparing to finish the base with stone
There are several ways to cover a plinth with stone yourself. However, no matter what technology is used, preparation in all cases comes down to cleaning the foundation surface from dirt, dust, and mortar residues. It is also necessary to repair cracks in the brickwork or concrete if any are noticed. The surface of the base is leveled as much as possible, concrete deposits and pieces of brick protruding outwards are knocked off it.
After dry cleaning, it is advisable to wash the base and, if necessary, degrease it with special products. Then, after drying, the foundation of the house is treated with a deep penetration primer. To do this, you can use a brush or roller, although if you have a sprayer, the work will be significantly faster. It is better to prime the base with a ready-made solution. This will significantly increase the adhesion strength of the finishing material to the surface. To calculate the primer, you can use the approximate ratio: 250-300 grams of solution per 1 square meter. It is also necessary to wait until the primer is completely dry from 2 to 7 hours. All work must be done with your own hands at an ambient temperature of +5 to +40 degrees.
Pre-dry styling
This is the next stage of preparation before finishing the base with natural stone with your own hands. It consists of making a drawing or mosaic. For greater accuracy, you can first draw a sketch on paper, marking all the lines, boundaries and shapes. It is best to lay out the stone on a clean, dry area, adjusting the elements to fit and filling the gaps with small pieces of stone. This technology will allow you to display the desired pattern as accurately as possible and adjust its shape and size. If it is necessary to adjust the size, you can use a 125 or 150 mm grinder, installing a circle on it for cutting stone. How to do this correctly - watch the video for the lesson.
At this stage, it is necessary to take into account the technological gaps between artificial and natural stone. The stone should not be laid end to end, maintaining a distance of at least 3-5 mm on each side. This technology allows you to avoid distortion of the upper rows of stone and compensate for thermal expansion. This way the installation will always remain level. When facing with natural stone, wide joints and large gaps between large stones can be filled with small pieces. In this case, the stones should be glued to the base with the smooth, even side, and not vice versa.
What to choose: glue or cement mortar
The traditional technology of cladding the facade and foundation of a house with natural stone with your own hands involves the use of cement-sand mortar. However, as an alternative, a mixture of glue and cement is also used. The industry also produces special frost-resistant mixtures that are characterized by increased elasticity and adhesion. How to properly use substances of this type for finishing the foundation and walls of a house is indicated on the packaging. It should be noted that the use of ready-made mixtures ensures more reliable retention of the stone. Here the technology will also depend on the type of material itself. All stones are usually divided into three categories, differing in the degree of water absorption:
- Low porosity (moisture resistant) - slate, quartzite, dark granite. Due to the small number of pores on the surface of such stones, they are equally suitable for laying on adhesive mixtures and cement mortar.
- Medium-porous stones - black marble, sandstone and light-colored granite. These materials are characterized by an average degree of water absorption. Do-it-yourself installation of them is carried out using a mixture of a light shade or a colorless adhesive composition. In this case, the amount of water should be limited.
- Porous stones - they all do not tolerate moisture well. These rocks include limestone, travertine, thin white granite and white marble. When laying the foundation with your own hands, these stones can only be laid on a dry, light-colored mixture. If you use cement mortar for finishing, it will leave dark traces in the pores, which will then be impossible to remove.
Sandstone cladding technology
As an example, let’s consider the process of finishing the foundation with light sandstone, since it is not necessary to construct formwork to cover it with this stone. Finishing should begin from the corner of the base. When doing work with your own hands, you first need to divide the surface into separate sectors with a pencil. After this, the bottom rows of sandstone are laid. Glue should also be applied to the ends of the stones to completely fill the gaps between the stones. The stone, lubricated with glue or mortar, is laid almost flush against the base and the previous stone. In this case, you need to leave a small seam. To correct the position, the stone is lightly pressed and shifted with a vibrating movement of the hand.
The seams between the stones must be filled before the cement or adhesive mixture has completely dried. In this case, the seams should be filled equally. In places where the compound protrudes outward from the seams, it must be carefully removed and the seams themselves smoothed out. To fill the seams, depending on the design, a special grout, the same adhesive solution or putty can be used. To ensure increased resistance to moisture, the stone can be coated with a special varnish, and a small canopy can be installed on top of the base.
Technology of finishing the base with heavy stone
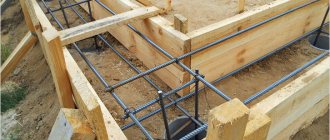
The process of finishing the base with natural stone, which is heavy, involves the construction of a frame that contains additional fasteners that serve as support. To do this, you will need a reinforcing metal grid, hooks and wooden pegs. The thing is that a heavy stone can fall off over time under the influence of its own weight. An ordinary chain-link mesh with small cells is suitable as a reinforcing mesh. It is nailed with dowels to the surface of the foundation base.
Heavy natural stone is glued over the mesh so that the adhesive mixture adheres simultaneously to the mesh and the surface of the foundation. Before laying the stone, the gap between the mesh and the plinth can be filled with a cement mixture.
Large fragments of stone are additionally attached to the foundation using hooks, for which holes are sawed in the stones. In this case, the distance between the stones is fixed by installing wooden pegs or pieces of cardboard folded in several layers into the gaps.
As in the previous case, the stones of the first row are laid first. The entire cavity between the mesh and the foundation must be carefully filled with an adhesive or cement mixture so that a monolithic structure is obtained. Pegs and cardboard can be removed only after two days, after the mixture has set. Then they begin to fill the seams and clean the base from any accidental contamination. To do this, use a damp sponge. It is not recommended to use sandpaper, as the surface of some stones can be scratched this way. The completely cleaned and dried stone base trim can be varnished if desired. Good luck with your renovation!
How to prepare the foundation for the application of the plaster
Driving insulating plaster.
- if the foundation is laid of blocks or bricks must be cleaned seams. The narrow spatula or other suitable instrument from each well is removed cracked cement-sand mortar. After this brush with stiff bristles to be carefully “sweep” fragments, sand and dust;
- if the house is on a concrete ribbon that during its operation on the foundation can be formed small and rather deep cracks. Here the preparation for the application of the plaster is somewhat different: all clearances should proshtrobit, that is, to destroy the edge of the slots as far as it lends itself to concrete. Thus, all the loose places will be eliminated and will be a solid foundation. Next, carefully crack “swept” dry brush;
- preparation of any foundation assumes obligatory priming deep penetration of the composition. These liquids are available in containers of different sizes and are inexpensive. But if you can not buy a primer for the treatment of all of the foundation, will be enough to put structure on the slit and place chips. Make it a must as more reliable plaster “grab” to the surface of the base;
- if over time the foundation was deformed and there were projections (small, not requiring radical measures - tightening and installation of concrete cages), the tape using the plaster can be leveled. But first protrusions are required to remove as much as possible.
How to prepare the foundation for applying plaster
Scheme of thermal insulation plaster.
- If the base is made of blocks or bricks, the seams should be cleaned. Using a narrow spatula or other suitable tool, remove the dried cement-sand mortar from each recess. After this, you need to carefully “sweep out” the fragments, sand and dust with a brush with stiff bristles;
- If the house stands on a concrete strip, then during its operation small and rather deep cracks may form on the foundation. Here, the preparation for applying plaster is somewhat different: all the gaps should be grooved, that is, the edges of the cracks should be destroyed as much as the concrete can be done. In this way, all weak points will be eliminated and a strong foundation will remain. Next, the cracks are carefully “swept out” with a dry brush;
- Preparation of any foundation requires mandatory priming with a deep penetration compound. These liquids are available in containers of various sizes and are inexpensive. But if it is not possible to buy a primer to treat the entire foundation, it will be enough to apply the composition to the cracks and chipped areas. This must be done, since the plaster solution will “grab” more reliably on the surface of the base;
- if over time the foundation has deformed and protrusions have appeared (small ones that do not require radical measures - tightening and installing concrete frames), then the tape can be leveled using plaster. But first you need to remove the protrusions as much as possible.
Plastering the basement of a house with your own hands
The basement is the lower part of the building down to the floor of the first floor. As a rule, it protrudes beyond the plane of the load-bearing wall, forming a step. Often it acts as an enclosing structure for basements or semi-basements.
In cottage construction, the base is assembled from reinforced concrete foundation blocks, monolithic concrete or red ceramic bricks. These materials need protection from rain, snow, seasonal temperature changes, and they should not stand out against the background of the facade. Therefore, in most cases, plastering the foundation of a house is done with your own hands.
Technology for plastering the basement of a private house
Now about how to plaster the foundation (basement).
Features of the technology for plastering the basement floor of a house:
- optimal air temperature +20°С (possible to work at +5,+35°С);
- humidity – 60% (it is impossible to work during precipitation; for normal hardening, it is recommended to choose a weather “window” of several days without precipitation, without wind, or to protect fresh plaster with film);
- the base must be protected from direct sunlight;
- plastering the foundation is carried out in several stages;
- at each stage of plastering, a solution of a certain consistency (composition) is used, two or three such layers - spray, primer, covering (in the case of painting, for tiling or decorative plastering, it is not needed);
- observe the minimum layer thickness – 10 mm;
- when leveling, beacons are used;
Preparatory work
The features of foundation preparation in special cases were discussed above.
General principle of work:
Old unusable foundation plaster is removed. Cracks and potholes are repaired with cement mortar, using reinforcing mesh for large damage. The base for applying the solution must be cleaned of grease stains, grease, rust, and salt protrusions.
Do not leave pockets of mold or mildew. Foreign stains are washed away, dried, and treated with special means. Excess metal parts are removed, the remaining ones are insulated with oil paint. Apply notches to the concrete surface (sufficient depth - 2 mm). The surface is cleaned of dust.
Application of primer
After drying, the prepared base is primed by applying two layers of a suitable primer.
Typically, deep penetration compounds are used for porous substrates, such as brick. The primer is applied with a roller or brush (brick, hard-to-reach places). Dry after applying each primer coat. Before painting, the plaster coating is also primed, but another product (usually acrylic based) is also used that is water-repellent and has deep penetration.
The façade primer is used.
Fastening the plaster mesh
To plaster the foundation of a house, it is necessary to take into account the fact that the result is a multi-layer structure. If it is composed of different materials, then the linear temperature stretch of the materials may differ, which leads to delamination and disruption of the integrity of the entire structure. Therefore, they apply plinth plaster over a mesh.
The mesh is also needed when the plaster thickness is > 20 mm, as well as when using insulation. It is recommended to use galvanized low-carbon steel mesh, which has an expansion coefficient similar to concrete, or stainless steel wire mesh 20x20 mm. The mesh is secured to the base with special dowels or nails (nails can be driven into the seams of the brickwork). The mesh panels are overlapped.
Installation of beacons
After installing the grid, the beacons are installed. To do this, measure the curvature of the surface using a cord. Find the most prominent point. Focusing on it and installing the slats, they build a vertical plane. Mark the lines of the beacon strips. Along the edges of each line, stepping a little to the side, hammer in dowels so that the caps lie in the same vertical plane.
Also, the upper edges of all beacons should be located in the same plane. A cord is pulled between the dowels (along the caps), along which mortar marks are applied over the intended line (not protruding above the lace). Apply beacon profiles to the marks and press them in slightly so that their top coincides with the lace. Allow the mark solution to dry, after which you can begin plastering.
Splash
Plastering the foundation of a house with your own hands begins with spraying. This is the very first layer of mortar, which is needed so that the main plaster, thrown onto the wall of the plinth, adheres to it easily and firmly. The solution becomes more liquid. When applied, it fills small cracks and depressions. Throw it on with a ladle or trowel.
If necessary, level it a little (only so that no air bubbles remain under the beacon strips). If a break in work is planned, then the spray layer is outlined with the corner of a spatula (horizontally) for better adhesion of the next layer to it. Only after this is allowed to dry. Usually, without waiting for setting, the next layer is applied - primer.
Plastering
Soil is the main plaster layer. The solution for it is made of normal viscosity (thicker than for spraying). Sequence of work:
- The composition is applied with a trowel or spatula, throwing cake after cake in rows. Their height should protrude above the lighthouses.
- Having spread the solution (between two beacons) a meter and a half in length, level the layer using the rule. The rule is pressed against the beacons, and, moving it left and right (with shuttle movements), it is guided from bottom to top. On the rule, excess solution is collected, which is thrown into a container with a spatula or sent to the base where there is not enough solution. After applying the rule from bottom to top several times, leveling the solution in the area, apply it from top to bottom. After this technique, the mortar on the wall will not slide.
- Continue adding mortar and leveling it with the rule until the entire side of the base is plastered.
- If plastering is carried out in two layers (under subsequent tiling or decorative plaster that hides minor irregularities), then after the solution has set, the beacons are removed by prying them off with a spatula. Places of lighthouse strips are sealed with mortar, leveling with a wide spatula.
- If painting or thin-layer decorative plaster is planned, then a third layer is applied - a covering. The covering has the same composition, only sand for the solution is taken up to 1.5 mm in size (sifted through a sieve with cells of the same size). The consistency of the coating is the same as that of the spray. Apply with a spatula or trowel in a layer of up to 2 mm.
Leveling the solution using the rule
Application of additional solution
Retrieving Beacons
Applying the coating
To plaster the corner part, special reinforcing corners are installed on the corners.
Grout
For subsequent painting, the top plaster layer must be properly rubbed and sanded. Grouting is done with a trowel, starting from the moment the solution sets (but has not yet hardened). Readiness is determined by adhesion test. As soon as the solution stops sticking to your finger, start rubbing. The technology is not complicated. The purpose of the operation is to level and smooth the surface, eliminating residual protrusions.
The area to be treated is moistened with water (it is enough to spray it with a brush or moisten it with a sponge). Apply a grater to the surface and, making circular movements (called circular grouting), rub it. You don't need to press hard. Slightly increase the pressure by moving the grater over the bumps, decrease it over the depressions. When the solution is collected on the side of the grater, it is removed into a bucket.
Stages of foundation plastering work
- notches are made over the entire area of the concrete base (this is not required on bricks) with a sharp metal object (a strong screwdriver);
- the surface is leveled and primed;
- cracks (masonry joints) and recesses are moistened with water and filled with cement-sand mortar;
- using dowels or staples, the chain-link mesh with a fine mesh is “targeted”;
- beacons are installed. To do this, the following work is performed in each corner of the foundation and 1.5-2 m between them:
Diagram of various plinth shapes.
- Using a hydraulic level, an even strip is found and drawn along the ground along the wall. It should go almost close to the foundation, simultaneously leveling it, but no closer than 2-3 cm to its most protruding part.
- At the point of intersection of the corner (wall) and the strip, a peg with a length equal to the height of the plinth is installed vertically.
- The distance (gap) between the peg and the foundation is “filled” with mortar so that a vertical mound is formed, to which a building level is applied to level it. At the same time, the vertical is verified. There should be several such beacons along the wall.
- 3 nails are driven into the pegs at the corner beacons, and a string is pulled between them. It will serve as a guide for the plaster. There should be 3 lines of laces: at the bottom of the base, at the top and in the middle. There should be a gap of 1 mm between the cords and the beacons.
After the cement mounds-beacons have dried, the foundation is sprayed. First, the surface is moistened with water, then a creamy cement mortar is sprayed onto it with a ladle, trowel, or brush with long bristles. Layer thickness – 5-9 mm; A primer is applied to the dried (but not dried) “spray”. It is the same cement mortar, but more liquid; After the primer has “set”, proceed to the next stage of plaster and apply a covering layer. It is made with a thicker and more flexible mixture. Waterproofing ingredients are added to this composition; the final work is rubbing the surface in order to give it optimal evenness and smoothness. For this purpose, graters with a fine mesh installed in them, special graters for concrete with a relief surface, and ordinary polystyrene foam are used.
It is important to choose the right moment for rubbing: it should already “set”, but its surface should still be sufficiently wet.
you can do it in different ways: embroider it “like a brick or stone”, make the surface embossed (decorative), leave it smooth. You can lay tiled or porcelain tiles on a concrete surface. All these technologies are worthy of attention and are selected depending on the aesthetic compatibility of the facade. But each of them is able to give the house individuality and decorate it.
Covering the base with siding: pros and cons
Advantages:
- durability. Due to its resistance to most negative influences, the material retains its performance characteristics for a long time - 50-100 years;
- siding has high vandal resistance;
- immunity to microorganisms;
- mechanical strength. The material can withstand various impacts due to the built-in metal base and dense finishing coating;
- weather resistance. Snowfalls, rains and fogs do not harm the siding. Operating temperature range from -50°C to 50°C;
Installing basement siding is not a particularly complicated process.
- weightlessness. The lightness of the material eliminates additional costs for strengthening the foundation and simplifies the installation process;
- possibility of additional insulation of the facade. Thermal insulation materials, including bulk mineral wool and thick foam plastic, can be easily placed under the coating;
- a wide range of. The variety of colors and textures leads to the possibility of creating a unique look. The most common option is siding the base with stone, but there are other types of imitation. Modern production technologies create a realistic pattern that is difficult to distinguish from the natural one;
- quick and easy repair. When comparing the time required for plastering, laying stone over siding will speed up the work by 2-3 times. Repair is carried out by simply replacing the strip;
- ease of work even with walls with complex geometry. Work with rectilinear facades is extremely simple; round or multifaceted buildings are a little more complicated.
If you install basement siding yourself, there are several disadvantages to consider:
After the cladding, the dimensions of the building will be increased. The losses are 10-40 cm, depending on the presence of irregularities, the type of insulation and the design of the panels. If complex cladding with metal siding is performed, the parameter is of little importance, but when processing the base separately, a further method of leveling should be considered; it is important to buy all additional accessories exclusively from branded manufacturers: fasteners, corners, starting levels
Be sure to purchase the material in reserve to eliminate the need for constant trips to the store; cutting panels should be done confidently, but with caution. It is recommended to use shears with a hydraulic element, a grinder or a hacksaw. It is better to practice beforehand so as not to cause damage to large pieces.
Please note that facing a private house with siding involves the use of a large number of screws or nails
Plaster cladding of the plinth: advantages and disadvantages
The base of the house is regularly moistened by rain, melt water and snow. Finishing with plaster makes this part of the building as resistant to negative factors of this type as possible. Here we can talk about resistance to chemical corrosion and direct exposure to ultraviolet radiation.
A thick layer of plaster provides additional thermal insulation. The cement base makes the coating moisture resistant, and the reinforcement eliminates the possibility of cracking during subsequent use. Multi-layer finishing guarantees that this coating can be used for a very long time.
Characteristics of plastering plinth
no need to use special equipment for installation;
wide selection of colors and textures;
ease of installation;
high maintainability of the coating;
affordable price.
insufficient degree of insulation;
moisture permeability;
insufficient strength (compared to other finishing options);
gradual decrease in strength level.
Important! To ensure the maximum service life of such a coating, it is very important to follow the established rules for installation work
Choosing a stone base cladding
According to manufacturers, the service life of such panels reaches 50 years. But it is worth remembering that there are many counterfeits and counterfeits on the market, and there is no single GOST for production; each company uses its own technologies. Therefore, you should take the choice of product seriously. Each sales representative, including online stores, must have a package of permits including:
Selection of basement cladding
- certificate of conformity;
- expert opinion;
- certificate of state registration;
- fire safety certificate.
If the product is manufactured abroad, it is desirable to have international certificates. The packaging must contain information in Russian. This is a guarantee of a quality product that can last for decades. The prices of certified products are slightly higher, but their service life is appropriate. Also, the price range depends on the size, material of manufacture, color saturation, manufacturer, and quality of the locking connection.
Important. When purchasing plinth panels, to prevent inconsistencies during installation work, additional elements should be purchased from the same manufacturer.
Etapi robot on plaster foundation
- all over the entire area of the concrete plinth (nothing is needed at all) using a sharp metal object (a screwdriver) to make notches;
- the surface is verified and primed;
- cracks (seams of masonry) and grooves are wetted with water and filled with cement-stained soil;
- with the help of dowels and staples, the chain-link mesh with a split edge is “adjusted”;
- Beacons are installed. For which steps are placed in the skin foundation and 1.5-2 m between them:
Scheme of different forms of the base.
- For additional hydraulic levels, find out and climb along the ground along the walls and along the smudge. You must walk right up to the foundation, immediately checking it, but not closer than 2-3 cm to the most protruding part.
- At the point of the webbing of the corner (wall) and the smudge, a pin is installed vertically, equal to the height of the plinth.
- The space (gap) between the joint and the foundation is “filled” with a split so that there is a vertical mound, before which heavy rhubarb is applied for its alignment. The vertical suddenly vibrates. There must be a handful of such lighthouses.
- At the pin of the heel beacons, 3 pins are hammered in, between which the lace is stretched. This will serve as a reference point for plastering. There may be 3 lines of laces: at the bottom of the base, at the top and in the middle. Between the cords and beacons there is a gap of 1 mm.
- After the cement hump-beacons dry out, the foundation is sprayed. Wet the surface of the surface with water, then sprinkle creamy cement grit on it with a ladle, trowel, or brush with long bristles. Thickness of the ball - 5-9 mm;
- primer is applied to the dry (not dry) “brush”. Vin is of the same cement grade, but more rare;
- After “flashing” the primer, proceed to the next stage of plaster and apply a paintball. The wine turns out to be thicker and more plastic. Hydroisolating ingredients are added to this warehouse;
- The final steps are to rub the surface to achieve optimal evenness and smoothness. For this purpose, vikorist graters with a fine mesh inserted into them, special concrete graters with a relief surface, and standard polystyrene foam are used. It is important to choose the right moment for grinding: you are guilty of “shopitis”, but the surface is guilty of buty sche dosit voloyu.
can be carved: embroider it “under the whole or stone”, make the surface embossed (decorative), make it smooth. Behind the concrete surface you can lay tiles or porcelain tiles. All these technologies are carefully chosen and selected in accordance with the aesthetic appearance of the façade. They can also be used to add individuality and beautify your home.
How to tile a base with your own hands
Let's take polymer mutula as an example. Preparatory work for the installation of an insulating layer and reinforced mesh are discussed above. Mutulu should be chosen as large as possible, given that it bends well and even cuts.
Installation technology:
- The corresponding measurements determine the number of tiles that will be used for cladding without trimming and with trimming (individual non-standard mutul configurations are determined locally).
- To ensure an even bottom edge, a metal profile is temporarily mounted on the ground and checked with a plumb line.
- The frame will be a reinforced mesh, to which the mutula is attached with self-tapping screws or to a pre-applied primer with glue. Using a puncher, holes are made to attach the mesh with screws, and the mesh is put on them. Don’t forget to secure the appropriate layers of insulating materials underneath.
To ensure the stability of the reinforced mesh and the strength of its fastening, it is necessary to put washers of the appropriate width on the screws.
You must constantly ensure that the new row falls without deviations from the original one. A deviation of 1 mm can subsequently result in several centimeters, which will already be noticeable.
Advantages and disadvantages
Finishing the base with plaster is the most popular method, but like any construction technology, it has a number of advantages and disadvantages:
Advantages
- Plaster can be applied both on a clean base and on insulation.
- The plaster mixture is easy to prepare at home; you can buy it ready-made in bags. Application does not require special and expensive tools. All work can be done with your own hands.
- Huge selection of dry textured plaster mixtures. The finished surface can be painted in any color, which allows you to create a unique facade for each home.
- High coefficient of vapor permeability. The walls breathe without accumulating moisture in the thickness of the building structure.
- Affordable price. Reasonable prices for materials and work per square meter.
Flaws
- The service life of a plastered plinth is much shorter than that of a stone one.
- In some cases, the plaster layer is not strong enough. It can be destroyed or damaged. Even a small chip or crack gets water, which gradually destroys the plaster layer.
- Ordinary cement-sand mortar absorbs moisture. Ready-made complex plaster mixtures have a lower moisture absorption coefficient, but still not sufficient. Therefore, the finished surface is painted with special façade water-despresion paints.
- In its pure form, plaster freezes. There are heat-insulating types of plaster mixture, but they do not give a good result without the use of sheet insulation.
What is the best plaster for the plinth. There is no direct and unambiguous answer to this teenager. Plastered mixtures can be divided according to composition and texture of the finished surface.
Example of textured plaster
They are divided according to their composition:
- Plaster based on Portland cement and sand. An inexpensive material that is used for the first leveling layer, exclusively on a clean stone or concrete base. It is also possible to plaster the base using a mesh and then apply a second finishing layer or paint it with façade paint. You can buy a ready-made mixture or mix the solution directly at the construction site.
- Portland cement-based plaster with additives that allow it to be applied to surfaces lined with basalt mineral wool or polystyrene foam. Used to obtain a base layer or as the only finishing material.
- Plaster based on acrylic resins. It can be applied either to a clean concrete or brick surface or used for “wet facade” technology. It is moisture resistant and does not crack due to seasonal temperature fluctuations. Due to the presence of mica, small stones or flax fibers in the composition, it is suitable for creating a decorative textured surface.
- Silicone plaster. The most expensive and high quality material. It is elastic and durable, does not collapse due to shrinkage deformation and seasonal temperature fluctuations. It has a high coefficient of vapor permeability, which allows the base to “breathe”. Used only for the final decorative coating of the facade.
Classic smooth
The first base leveling layer is made of cement-sand plaster or plaster with additives. The second layer of finishing facade putty. Then the base is painted.
Decorative
A more effective option. Due to additives in the solution or mechanical action on the surface, a relief pattern is obtained. There are several types:
- "Bark beetle." A popular mixture for finishing the base. After application, an original surface is obtained, covered with small grooves;
- A composition that imitates a surface covered with granite or marble chips;
- "Lamb." The surface of the base becomes rough to the touch;
- “Venetian”, After application, the effect of cladding the base with large pieces of marble is created.
Options for facing the basement of a house
Summer resident with 20 years of experience
Cladding is necessary for the plinth due to direct contact with the ground. Waterproofing this part of the building protects it and the walls of the house from moisture, dampness and rotting. But it alone may not be enough to constantly resist bad weather (rain, snow and the dampness that accompanies them). High-strength and moisture-resistant facing tiles used for the basement of a house can serve as good additional protection.
It is stronger and slightly thicker than facade tiles. In frame-type houses, in which the base protrudes beyond the boundaries of the walls, it is mandatory to make a drip to protect the base of the wall and the base from the accumulation of water. For a private homeowner who has construction skills, it will not be difficult to finish the base with tiles and make a base flashing (if necessary) on their own.
Under no circumstances should you use tiles (except polymer ones) for cladding the wooden base of a house.