This option has many advantages, but if ventilation openings were not taken into account during its construction, this situation can lead to problems in the future - both the wooden and concrete coverings in the room will collapse due to an excess of moisture combined with a lack of air.
Floors on the ground in a strip foundation help to avoid troubles of this nature.
What is it: concept, application, device
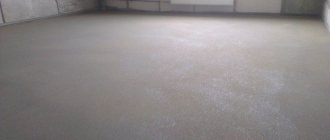
The installation of floors on the ground on a tape is a monolithic concrete screed, which helps prevent heat leakage and reliably serves for a long time.
This solution is relevant for any type of soil . The created concrete or dry screed is in no way connected to the foundation, and therefore does not experience loads from load-bearing walls or roofing.
Floors on the ground will be an excellent solution for a modern energy-saving house, which is equipped with a “warm floor”.
The damper layer, for which slab-type insulation is used, is installed so that the floor screed does not come into any contact with the base tape, which provides additional strength to the floor structure.
Wooden or concrete floor in a private house
Recently, even in private homes, concrete floors have become increasingly common. It's all about the capriciousness of wood. The first thing that is important is that wood needs regular care. If larch or oak is not used, after a few years the appearance leaves much to be desired. Again the floor has to be sanded and covered with oil/wax/paint/varnish. The second drawback is squeaks. A squeak-free wooden floor is a rarity. The third point: of course, it is possible to lay tiles on a wooden floor, but the solution is not cheap - you need elastic glue, but it costs a lot. In general, after living with a wooden floor for some time, they decide to replace it with a concrete one. It has its own “charms”, but it is easier to use. Only if it's done correctly.
This is not at all what one imagines when hearing the words “wooden floor”...
The first thing to remember is that you can make a concrete floor in a private house only if the foundation can bear the additional load. If a wooden floor was laid when calculating the foundation, all you can do is a reinforced screed on the rough wooden floor. And that's in question. Most likely, you will have to simply make a dry screed on expanded clay or lay sheet material over the joists. This is, of course, not a concrete floor, but not wood either.
Advantages and disadvantages
This design has a number of advantages. The following are distinguished:
- does not require large financial costs;
- withstands significant mechanical loads;
- does not increase the load on wall structures;
- can be easily repaired and lasts a long time;
- suitable as a base for any finished floor option;
- allows you to install a “warm floor”.
A fairly simple solution to construct can answer a number of basic tasks during the construction of a building. However, you need to take into account some nuances:
- requires high-quality insulation;
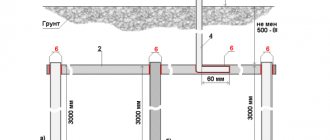
- not suitable for large backfill layer thicknesses (it cannot exceed 60 cm);
- the floor is dependent on the groundwater level - not recommended for use in areas where it is high.
In addition, the floor on the ground requires a serious approach and attention to detail. However, existing technologies are well established and, if strictly followed, problems usually do not arise.
The depth of the aquifer can affect the condition of the finished floor, so the area must be surveyed first.
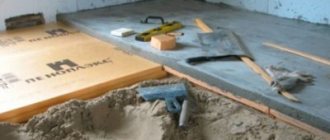
The right “pie”: layer-by-layer guidance
If wooden subfloors do not require much effort - a sand backfill with a layer of geotextile is enough for them, then for a concrete screed you will need to create a more multi-layered “pie” .
Experts advise reinforcing the finishing layer, as this helps prevent cracking after hardening. In the finishing layer you can place communications of the “warm floor” system.
Experts recommend following this technique:
- The first layer is compacted sand.
- Next, a gravel cushion is poured.
- A reinforcing mesh is installed, which can be made of either fiberglass or metal.
- A ten-centimeter layer of concrete mortar is poured.
- A waterproofing layer is created.
- A layer of insulation is laid, for which expanded clay or penoplex, or other insulating materials can be used.
- Another layer of waterproofing is laid.
- A clean concrete screed is poured.
The last layer of the “pie” can hide any utilities, for example, sewerage or water supply , but it is recommended to provide a backup system that will help avoid destruction of the concrete layer when repair work is required.
Arrangement of floors on a strip foundation
All work is divided into several stages. When performing each task, it is necessary to follow the algorithm - so the structure will be strong and reliable.
Backfilling the sand layer
Before starting the activities, you need to take into account the need to compact bulk raw materials - manipulations will compact the sand cushion. The tasks are performed in stages:
- Sand is laid in a layer of 10-15 cm and compacted dry with a vibrating plate.
- The compacted material is watered with a hose equipped with a spray nozzle. It is important not to oversaturate the material with moisture, because... Do not compact it further.
- Reconsolidation is carried out. The vibrating plate is used twice, changing the direction of movement.
- Sand is poured again.
You need to walk over the moistened material several times with a vibrating plate and wait until the layer dries.
Construction of reinforcement frame
It is difficult to reinforce strip-type foundations - the process is labor-intensive. Experts advise following a step-by-step work technique:
- Lay several smooth crossbars with a diameter of 6-8 mm, lengthening them by 100 mm.
- Calculate the pitch - the distance over which the cement mortar will be poured.
- Place ribbed longitudinal reinforcement with a diameter of 12 - 16 mm on the transverse pins. Form the bottom belt.
- Mount the upper rods at the mating points in a vertical position.
- Place 2 longitudinal rods on the elements. Form the bottom belt.
The connections of the reinforcing frame are welded and tied with clamps or wires.
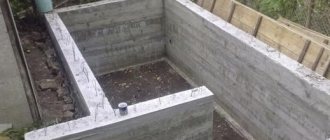
Pouring the foundation on a pillow
The base foundation is created on a ready-made cushion of crushed stone and sand. The concrete mass is made in proportions 1:3:6 based on M200 cement and other materials. Self-concreting consists of the following steps:
- Filling the starting layer with a thickness of 10 cm.
- Secondary pouring of the mixture to a height of 40-50 cm.
- Compacting the mass with a vibrating rammer or piercing with a reinforcing pin.
To reduce work time, the cement mortar is poured in one go.
Laying a waterproofing layer. Vapor barrier
The work is intended to protect the underground structure from moisture. Pre-made concrete footing will ensure even application of materials for fusing or gluing. The pre-concreting procedure is relevant in conditions where groundwater is close or when constructing basements. The waterproofing process is carried out according to the construction algorithm:
- A polyethylene film 150 microns thick is laid with an overlap of 15-20 cm, and then the seams are taped.
- To ensure reliable protection against the penetration of moisture and condensation, a second layer of waterproofing is laid in the same way.
- Insulation is carried out with polystyrene foam or extruded polystyrene foam. They are placed in a layer of 10 cm.
Using polyethylene film, protect it from contact with the cement mortar.
Preparing for work
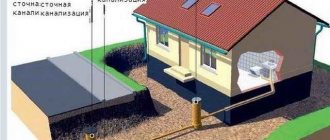
The preparatory stage includes studying the soil on the site, calculating the depth of the aquifer and possible fluctuations throughout the year. It is necessary to provide the building with a drainage system, thanks to which moisture from the ground will drain to a safe distance.
During the preparation process, the thickness of the backfill is calculated. The sand and gravel cushion should have good density, and the greater the thickness, the more difficult it is to compact the layer.
Experts recommend carrying out the rough screed over geotextiles , this way the concrete solution will retain moisture, which is needed to ensure normal hardening. If pouring is carried out on the preparatory layer, it will absorb moisture, which will ultimately weaken the strength of the resulting screed.
The amount of shrinkage of the preparatory layer is usually proportional to the selected thickness.
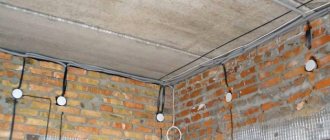
Before starting work, it is recommended to introduce all communications that will be located below floor level; at subsequent stages this will be much more difficult to implement.
When pouring concrete layers, it is necessary to withstand the entire hardening layer in order to prevent deformation or complete destruction in the future. Otherwise, there is a risk that the overall pie will lose strength or geometry defects will appear.
How to do it yourself?
There are three main methods for creating floors on the ground if the building was erected on a strip foundation. Each of them has its own advantages and nuances, but they all have good load-bearing capacity.
Wood flooring
The simplest method that requires the least financial costs . To support the structure, you will need columns placed on the surface of the ground so as to create a support system for wooden logs.
Expanded clay must be poured between the posts; sometimes you can leave the space empty, but then you will need holes for ventilation.
The logs must be leveled so that the plane of the supports is absolutely level , after which the subfloor is laid. A film is placed on it, providing vapor and waterproofing, and a standard substrate.
Laminate, linoleum can be used as a final floor covering, or a floor made from a material at the owner’s request can be installed.
Dry screed
This option provides good results in the shortest possible time. Work required:
- A sand and gravel cushion is poured, where the components are arranged in layers twenty centimeters thick, carefully compacted, after which a sheet of geotextile material is laid on them.
- A reinforcing mesh is installed onto which the concrete mixture for the rough screed is poured.
- The next layer is a waterproofing film - the canvases are placed ten to fifteen centimeters above each other, the joints are sealed with construction tape, the edges are brought out onto the wall to a height of twenty centimeters.
- Plaster profiles or other structures are installed that will act as beacons allowing the formation of a flat surface.
- Expanded clay is poured in and leveled according to the previously installed beacons.
- The subfloor is being installed. Drywall or plywood sheets are used for it. Experts consider tongue-and-groove plasterboard to be the most suitable, which is reliably connected into a single sheet thanks to a special profile.
Next, all that remains is to install the finished floor covering, using any materials that the owner likes - from laminate to tiles.
Concrete screed
This method turns out to be more labor-intensive than others. It is recommended to use it if the air temperature does not drop below five degrees, the sun will not shine on the surface, and the site is prepared for work.
The screed algorithm is as follows:
- About ten to twenty centimeters of sand are poured out to create a pillow. The layer can be larger, but not exceed 60 cm. Compaction is carried out for maximum density, for example, like on a well-traveled road.
- A layer of gravel or crushed stone is formed on the resulting cushion, the thickness of which is similar to that of sand. Compaction is being carried out.
- The geotextile fabric is laid overlapping, with an overlap of fifteen centimeters. The same is done on the foundation walls.
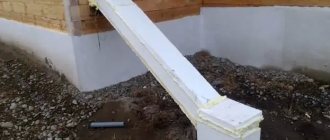
- A damping layer is installed around the perimeter.
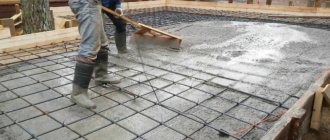
- Reinforcement is carried out with a special mesh of fiberglass or metal reinforcement, after which the concrete composition is poured. Now you will need to wait until the mixture completely hardens.
- Waterproofing is being installed. Suitable as roofing felt in combination with bitumen mastic, or modern impregnations.
- A layer of insulation is laid. Experts recommend penoplex, as it is dense and copes well with loads.
- A steam-waterproofing film is placed with an overlap on the walls. Overlap up to fifteen centimeters, on walls - up to twenty. All joints are sealed with construction tape.
- A reinforcing mesh is installed for finishing pouring. The concrete layer does not exceed ten centimeters.
If the owner of the building has planned to install a heated floor, then pipelines and other necessary communications are laid before pouring concrete. It is necessary to make sure that all connections can withstand the load and are made with the required safety margin.
Features of floors on the ground
Flooring on the ground is a multi-layer structure that promotes high-quality ventilation and stability of the structure. Overlapping in the form of a strip is justified for buildings with low basement floors and the impossibility of installing a monolithic base. Concrete floor structures located on the soil include the following elements:
- bedding in the form of sifted river sand, which is compacted;
- a layer of medium-fraction material - crushed stone or expanded clay;
- rough screed made of cement mixture;
- layers of hydro-, steam- and thermal insulation;
- finishing screed made of cement mortar;
- final floor finishing.
A building cake organized in layers protects the structure from freezing and the appearance of condensing sediment. The floor design is durable, strong, and easy to implement, but requires financial investment.
Tips from the experts
To avoid adverse consequences, you should remember some points:
- drainage protection protects against excess moisture, which cannot be avoided after melting snow or heavy rainfall;
- a floating concrete screed not fixed to the foundation will help you forget about the negative aspects associated with soil shrinkage;
- The geotextile fabric does not allow the sand cushion to absorb moisture from the concrete, which ensures complete hardening of the layer.