Just as a theater begins with a coat rack, a cozy home cannot do without a beautiful, high-quality ceiling. It is quite possible to make it like this with your own hands and without extra costs. In this article, we’ll look at how to prepare a ceiling for painting, what tools and what actions are needed to properly finish the surface, depending on the type of paint you choose.
Preparing a concrete ceiling
At first glance, it seems that painting the ceiling is simple and quick - no significant effort is required. Many people do just that - they start painting over the paint that has already been applied, ignoring the preparatory stage. The result is a white painted ceiling.
However, the quality of such work negates the cost of replacing flooring and re-wallpapering - it's like a woman in a beautiful dress with perfect makeup, but no hairstyle.
Why preparatory work is necessary
Violation of the order of painting the ceiling occurs for several reasons:
- lack of knowledge of work technology;
- saving time;
- reluctance to stir up dirt;
- basic laziness.
Painting the ceiling over the old paintwork wets the existing paint layer, as a result of which it loses its integrity and comes off the ceiling in different places. Somewhere there are large spots, and somewhere the size of a penny. All this has to be removed: repainted or puttied and also repainted.
No matter how the owners try to hide this defect, it will still be visible either against the background of a window or under electric light for several years, until the paint turns yellow. In addition, we should not forget that volatile fats from the kitchen settle on the ceiling. Applying paint over them leads to the fact that the ceiling quickly darkens, and the paint soon begins to crumble in some places.
Painting over dark or rusty spots requires applying several layers of paint, which is also easily visible in daylight. Therefore, if the owners are not confused by the different layers of paint that stand out at the top of the room, they can paint without any preparatory work.
If you want to complete the repair work with a beautiful ceiling, you should follow the instructions. How to prepare a ceiling for painting with water-based paint?
How to choose the right paint?
The choice of paint for the ceiling is largely determined by the properties of the room being renovated. Inexpensive water-based paints are perfect for an ordinary room. For the kitchen and bathroom, where the ceiling is often exposed to moisture and there is a high probability of mold or mildew, acrylic and silicone paints are suitable.
Most of the paints on the market are environmentally friendly, moisture-proof and abrasion-resistant. Knowing the basic characteristics of the most popular paints will help you decide:
- Water-based - almost odorless, non-toxic, applies well to different surfaces, can be easily washed off or painted over it with another paint;
- Acrylic – odorless, excellent abrasion resistance. Increased moisture resistance, which allows you to frequently wash the ceiling and use it in rooms with high humidity. Retains color for a very long time, even under sunlight;
- Latex is the most expensive, but also the highest quality emulsion paint. When painted, it can hide defects and cracks up to 1 mm in size. Can be applied both to a prepared surface and to textured wallpaper for painting. Excellent resistance to abrasion and moisture. The dense and relatively porous coating is “breathable” and at the same time has a water-repellent effect;
- Silicate – mineral paint with a liquid glass base. Has antimicrobial properties. It is used in technical rooms: swimming pools, basements, saunas. Requires additional safety measures during operation, as it contains about 10% alkali;
- Silicone - combines the best qualities of organic and mineral paints. No smell. Excellent elasticity allows you to hide cracks up to 2mm. High resistance to contamination will allow you to clean the ceiling less frequently, and its antiseptic properties prevent the formation of fungus and mold. Silicone resin as a base increases the durability of the coating.
Stages of preparatory work
In the structure of labor costs for painting the ceiling, preparation takes the lion's share of time. Its quantity, as well as the effort, depend on where the painting is carried out:
- in a new building with a virgin concrete floor and a finger-sized seam between the panels;
- in a lived-in apartment, where it is necessary to remove the old layer of paint or wallpaper, as well as remove all kinds of stains;
- in a wooden house with a whitewashed ceiling;
- in an apartment or house with a plasterboard ceiling.
Regardless of the conditions in which you have to work, preparing the ceiling for painting with water-based paint has a strict sequence of work:
- the old layer of paint (wallpaper) is removed, traces of rust and discoloration are removed;
- the floors are inspected and defects are identified;
- chips and peeling are removed, small cracks are repaired;
- problem areas are repaired;
- the ceiling is primed;
- the surface is completely putty (when using universal putty, once is enough, specialized putty - starting and finishing - twice);
- the dried putty is sanded;
- in places where the putty has shrinked, the process is repeated.
Attention: in case of large deviations from the horizontal, the ceiling is plastered or suspended (suspended) ceiling systems made of plasterboard (GCR) are used.
How to paint the ceiling
To paint the ceiling, use water-based mixtures. Water emulsion has gained wide popularity due to its advantages:
- low price,
- quick and easy to apply,
- no pungent odor,
- non-toxic,
- dries quickly,
- has good adhesion (adhesion) to different surfaces,
- it is easy to give the paint composition any color by adding a special pigment to it,
- Tools and hands can be easily washed after painting.
Water-based paints contain different polymers and thanks to them, emulsions are divided into several types. The technical characteristics, places of their application and cost depend on these additives. To find out how to choose paint for the ceiling, you need to get acquainted with its varieties.
Required materials and tools
Preparing the ceiling for painting with your own hands begins with purchasing the necessary materials and providing the technological process with tools and devices.
Materials. To carry out preparatory work you need to buy:
- any deep penetration primer for concrete under gypsum (Betonokontakt, Ceresit ST 17, etc.);
- repair mortar for concrete (purchased if necessary to repair floor defects), you can use the cement remaining after plastering;
- any ready-made starting gypsum putty, “Vetonit”, “Ceresit”);
- ready-made finishing putty from the same manufacturers;
Attention: the starting and finishing putty can be replaced with a universal gypsum mixture.
- painting canvas “gossamer” based on fiberglass;
- serpyanka for sealing the joint between panels in a new building;
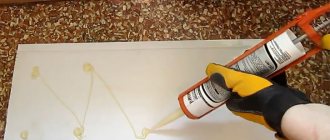
- glue for fiberglass (wallpaper glue for fiberglass holds well, for example, QUELYD, Bostik-70, GOLDBASTIK, etc.);
- sandpaper or a special sponge with sandpaper for sanding putty;
- plastic film or special construction tarpaulin to protect the floor, walls and windows from dust, dirt and paint during painting.
In addition, there must be access to water - this will be needed when removing old paint or wallpaper.
Tools and accessories. You don't have to buy the entire set of tools to get the job done. Some are in the pantry or at the dacha, some can be found from friends, some can simply be rented, which will save the family budget. The set should contain:
- a stepladder, but if possible, it is better to use a sawhorse or a strong table - it is much more convenient to work with them;
- a set of spatulas (necessarily wide, 15-20 cm, and narrow, 5-7 cm);
- construction ditch (bath) for primer;
- paint roller (brush, spray) for soaking the old layer of paint or wallpaper and applying a primer;
- electric drill with a set of attachments (perforator);
- metal brush;
- hammer;
- chisel;
- construction knife;
- flashlight - ideally highlights all the unevenness of the ceiling.
In addition, you need work clothes (an old T-shirt and jeans) and glasses. When working with a grinder, you must wear a respirator.
What tools and equipment should I use?
It is very important to choose the right tool, because the final result depends on how and with what paint is applied.
The roller is the main tool. Choose a roller up to 25 cm wide with a comfortable long handle. If you paint the ceiling only with a long-nap roller, you can get a textured finish that looks a lot like the skin of an orange. For a smooth surface or finishing coat, use a short-nap roller. It is strictly not recommended to use foam rollers - a layer of paint with air bubbles is placed on the ceiling, which greatly spoils the appearance of the finished surface.
A brush is needed to paint difficult places - protrusions, corners, cornices. Choose a brush with well-set, soft bristles. To test, make the first few strokes on a “draft” - a hard surface, which will allow you to check the quality of the brush and remove loose hairs.
Be sure to use a plastic bath for painting work. This will make your work much easier.
You will also find it very useful to have a lightweight aluminum stepladder with a shelf for tools, protective clothing and goggles to protect your eyes.
Preparing the premises
According to building regulations, renovation work is carried out from top to bottom: from the ceiling to the walls, finishing with the floor. According to Russian tradition, renovations in apartments proceed in reverse: half-wall-ceiling. Therefore, before painting the ceiling, you should remove the lamps, turn off the power to the room, and remove the furniture.
If for some reason it is not possible to move the sofa or wardrobe to another room, they are tightly covered with plastic wrap and sealed with tape. In new houses, the installation of doors and windows is being completed.
Since the work of cleaning the ceiling is dirty and dusty, you should protect the walls, floor, windows and neighboring rooms from the results of cleaning the ceilings from old paint (wallpaper) and putty particles during sanding.
To do this, the floor is covered with cardboard from packaging boxes or construction tarpaulin, and the walls, windows and doors are covered with plastic film. Along the top and bottom, the film is attached to the wall with construction tape (plain tape can damage the wallpaper).
The doorway is curtained so that there is a passage, but dust does not seep into the corridor.
Primer: how to apply correctly?
When the ceiling surface is cleaned and dried, a primer is applied. It will strengthen the bottom layer and improve adhesion to the paint. The strength and durability of the coating will increase significantly.
Article on the topic: “Methods of priming the ceiling”
The ceiling is primed using a paint roller. It is advisable to apply the material in two layers. Do not begin processing until the first coat of primer is completely dry. At the end of the work, the tools are thoroughly washed.
If drops of primer get on the floor, it is recommended to wash them off as soon as possible. Otherwise, the substance will become so ingrained that it will be impossible to wipe it off.
Surface cleaning
In new apartments (houses) there is no first stage of preparatory work; here work begins immediately with the second - identifying defects and eliminating them. During renovation work, the most unpleasant process is cleaning the ceiling surface from the previous finish: water-based or acrylic paint, lime whitewash, wallpaper, polystyrene tiles.
Water-based paint. The old layer of paint is moistened generously with warm soapy water, using a roller (spray), twice, at intervals of half an hour. After re-wetting, some experts create a draft for 10-15 minutes, as a result of which the paint will fall off on its own in many places. Residues are removed with a spatula.
If there is no ventilation, then the removal of the water-based layer begins 5-10 minutes after re-wetting. If the paint does not lend itself or is difficult to remove, such places are additionally moistened with a sponge. The work is continued in another place, and difficult places are returned to after they have swollen.
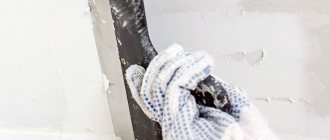
You can also remove the paint layer mechanically, using special attachments on a drill, grinder or hammer drill. However, in this case, personal protective equipment is needed, and you should be prepared to encounter dust in places where, by definition, it should not have been. After treating the surface with a power tool, you need to manually go over the ceiling again with a wire brush.
The ceiling, cleared of paint, is washed thoroughly, and the water must be constantly changed.
Acrylic paint. One of the most unpleasant types of coatings to remove:
- with the mechanical method, using electrical devices, there is a lot of dust;
- using special removers for acrylic paint (Aqua-Color, VX-90000) is harmful to health - they are very toxic.
When using chemicals, the paint is removed with a spatula, after which the ceiling, as in the first case, is treated with a metal brush and washed.
There is a third way to remove acrylic paint - with a hammer and chisel. But this is very labor-intensive and time-consuming. If you have the time and desire, then this method is the cleanest and safest.
For reference: regulatory and reference literature in recent years gives preference to the mechanical method - there are many cases of poisoning with washes.
Lime whitewash. Lime can be removed for a long time using water, or you can use the old, proven method: spread the entire surface of the ceiling with homemade paste. The recipe is simple: a couple of tablespoons of potato starch (can be replaced with flour) are stirred in cold water and then poured into boiling water (1 liter).
Stir with special care so that there are no lumps and leave to cool. After this, apply it to the ceiling with a brush - the hardened glue can be easily removed with a spatula along with the lime. As in previous cases, the ceiling surface is washed.
Wallpaper. As a rule, paper wallpaper is glued to the ceiling. Removing such finishing is not difficult - the ceiling is wetted, and the wallpaper is removed by hand using a spatula. The remaining pieces of trellis are scraped off with a spatula or wire brush.
The glue is washed off with a damp sponge. The process will go faster if the water is heated to 40-50 degrees. The water must be changed frequently.
Plastic tiles. This type of decorative ceiling covering is removed with a spatula. The process is labor intensive and requires patience. In places where the tiles do not lend themselves to a thin spatula, a hammer and chisel (chisel) come to the rescue. Remaining glue is removed mechanically - with an electric drill with a special attachment. After this, the ceiling is manually wiped with a wire brush and, as in previous cases, washed.
Removing dirty stains and rust. The process of removing any type of contamination is not very complicated:
- oily stains are removed with a 2-3% solution of hydrochloric acid - applied with a brush several times to the stain, after which it is washed off generously;
- rusty stains can be removed: copper sulfate (10%); a slurry of lime, denatured alcohol (alcohol) and water; a mixture of lime and drying oil; sodium hypochlorite (the well-known cleaning agent “Belizna”);
- The efflorescence is cleaned with a metal brush.
Leveling the ceiling surface
- Leveling the ceiling for painting
One of the stages of designing ceiling coverings is...To watch photos "
After the primer with the painted over rusty areas has dried, you can proceed directly to the screed. Its first stage is called leveling. The goal here is to create a perfectly level base for finishing.
Required tools:
- set of spatulas. There should be at least two of them: one (narrow) is used to apply the material to a wider tool with which the screed is made. The dimensions of a wide spatula are selected individually: the wider it is, the faster you can putty, with increasing effort expended;
- clean container for solution;
- mixer attachment for drill.
As for which putty is better to putty on the ceiling before painting, it is better to use dry gypsum mixtures; they are cheaper than ready-made solutions and make it possible to make any consistency. Specifically for leveling, coarse-grained materials such as Isogypsum or Rotband are suitable. Preparation of the mixture looks like this: warm water is poured into a clean container (about half of the total volume), then, creating a whirlpool with your hand, the dry mixture is poured. It should completely cover the water. If the ceiling is more or less flat, the putty is applied directly to the concrete base, evenly stretching the solution with a large spatula. Work begins from one of the corners, gradually moving towards the center. Ideally, alignment should be implemented in one layer.
♥For your attention: an article on the website “How to lay tiles yourself.”
If the ceiling is uneven
If there are differences, use the rule and beacons, since such defects cannot be corrected with a spatula.
Do-it-yourself ceiling plaster for painting will differ from a simple screed:
- The lowest point of the plane is determined. To do this, mark a horizontal line along all walls using a water level. Using a tape measure to find the most underestimated area is not difficult.
- Installation of beacons. Special beacon strips that are fixed to alabaster are suitable for this work. The first of them is mounted at the lowest point, and the rest - in increments of 30 cm from the first. To check the horizontal installation of beacons, use a long, level rod or rule.
- Screed. It is better to first throw the starting solution into the gap between the two planks, then tighten it with a rule.
Having plastered the entire base in this way, give it a little time to set. After this, the beacon strips are removed so that there are no problems with metal corrosion, which is subsequently damaged by rusty spots on the coating. The beacon planting sites are sealed with the remainder of the mixture. These areas should completely merge with the general plane.
Sometimes, for plastering ceilings along beacons, it is allowed to use sand-cement mortar, which reduces costs. However, if there are no financial restrictions, it is better to use gypsum starting putties. Seams and cracks are sealed separately, filled with the same solution (sometimes PVA glue is added to it for strength). It is advisable to glue a strip of sickle mesh over the dried seam.
Applying finishing putty
After the plaster layer has dried, the final filling of the coating is carried out. To do this, finishing material is purchased, preferably from the same manufacturer as the starting material. The procedure for preparing the solution is not much different from the starting putty, except that it should be more plastic. The finishing screed is applied in at least two layers. The first of them usually has a thickness of 2-3 mm, the second - no more than 1 mm. It is convenient to work with two spatulas, placing a bucket with the prepared mixture next to you on the table surface. Using a smaller spatula, apply the solution onto a wide instrument and move it at arm's length away from you. Next, placing the tool at an angle of 30° to the surface, they begin to pull towards themselves, gradually increasing the angle.
Ceiling repair
In a new apartment, the first thing to seal is the joint between the floor panels. Serpyanka is glued onto it, and then the gap is sealed with putty using a narrow spatula (the gypsum solution easily passes through the mesh). After drying, with large shrinkage, again with a small spatula, apply another layer of putty.
If the shrinkage is small, use a wide spatula to cover the serpyanka with a thin layer of gypsum. Considering that the surface of the ceiling will be completely puttied, after passing a wide spatula, it is allowed to show through the fiberglass (serpyanka).
Important: gypsum-based putty should not be used in the bathroom. The right choice here is cement or polymer mortar.
Then the concrete floors are inspected to identify chips, shells, peeling, and microcracks. This is where the repair of floors in residential apartments begins.
All damage to concrete with peeling of cement stone is cleaned with a hammer and chisel. Microcracks expand, otherwise the repair solution cannot be rubbed into them, and large ones are reinforced with self-tapping screws. To do this, grooves about 10 cm long and 15-20 mm deep are cut across them at a distance of 3-5 cm from each other with a grinder.
If there is cement, “cement laitance” is made. The solution consists of water and M400 cement in a ratio of 2:1. All damaged areas are treated with this mixture in order to saturate the concrete with moisture and create an adhesive film. The treatment must be repeated several times until the ceiling is completely saturated with moisture.
If the wetting process goes poorly, rub the milk into the surface with a brush. This is especially important for microcracks. Then “wet on wet” (on undried cement laitance) a repair mortar of cement, sand and PVA glue is applied in a ratio of 1:3:1 and 3 parts of water.
When using deep penetration primers, they are also rubbed into microcracks, but repairs are carried out “wet on dry”, i.e. over a completely dry primer layer. You can use a cement-sand mortar, or you can buy a ready-made mortar in tubes.
How to putty a ceiling for painting: simple detailed instructions
In most modern apartments and houses, the ceilings are decorated with plaster made from thin putty compounds, with whitewashing, painting or even without them. However, in order for, for example, the painting to be perfect and the surface to remain smooth, it is necessary to carry out work to prepare the ceiling plane, and this is a rather complicated process for a beginner. When starting these activities, you need to have a very good understanding of how to putty a ceiling for painting.
How to putty a ceiling for painting
For those who have not yet decided on the choice of ceiling finishing, I would like to clarify why putty with further painting has remained popular for residential and public premises for many decades.
The advantages of such finishing
A ceiling leveled with putty and then painted in the desired shade has many significant advantages compared to other finishing materials.
A smooth painted ceiling has many advantages
So, the following points can be noted:
- Attractive prices for materials necessary for plastering and painting work.
- Savings on the plastering and painting process, since it is quite possible to do it yourself, having carefully studied the technology and practiced its practical implementation.
- Buying materials of different quality and shade will not be difficult, since today construction stores have a wide selection of them - for every taste and budget.
- Due to the fact that environmentally friendly materials can be selected from numerous coloring agents and putties that have different performance characteristics, their use is possible in any room, both in children's rooms and in rooms with a high level of relative humidity.
- Such finishing materials help to increase the fire safety of the room, since they have low flammability characteristics or are not flammable at all.
- Both plaster and painting compositions, after complete drying, become absolutely safe for human health.
- The aesthetics of the ceiling after finishing with these materials is important, and sometimes even the determining factor for the design of residential and public premises. If the ceiling is puttied and painted with high quality, it will look no worse than a suspended or suspended version, which will cost much more and last a much shorter period of time.
If someone wants to create sound or thermal insulation using this coating, then this will not be possible. Putty is to some extent capable of muffling quiet sounds, but it will not be able to completely warm up and soundproof a room to any significant extent, to the extent that materials specially designed for this can do this.
Finishing materials and tools for work
Construction Materials
In order to make a high-quality ceiling covering, you need to select the right materials for this process. You will need not only putty and paint, but also surface preparation compounds, without which it is impossible to obtain excellent adhesion of the materials used.
The first thing that is required for finishing is a primer, which is used to treat the ceiling, cleared of the old coating, more than once - both before the initial leveling of the crooked ceiling and before the final application of putty.
High-quality puttying and painting are impossible without thorough priming of the surface
If you have to level a crooked ceiling, you will need a plaster (putty) mixture, which can also be purchased at a hardware store. For this purpose, you need to select the starting composition of the plaster. It should be noted that it is imperative to choose finishing materials made on the same basis - then there will be good adhesion between them. But sometimes they choose a combined finishing option.
One type of starting putty
You will also need starting and finishing putty. Both types of material are easy to apply, distribute and level over the surface. The starting mixture is coarser and is used for primary finishing. This material, if necessary, can be applied in a fairly thick layer - up to 15 mm. The starting material is not designed to make the surface extremely smooth, but it will be an excellent base for finishing putty.
The finishing putty is characterized by a much finer grinding of the components
Finishing putty is used to bring a rough surface to perfect smoothness. This can be achieved by the finest grinding of the powder that this mixture has. The finishing layer is applied with a thickness of 0.5 to 2 ÷ 3 mm. It sands well, and then you can apply paint or attach decorative elements to it.
Experienced builders recommend buying the starting and finishing mixture from the same manufacturer, as they will fit together organically, thanks to the good adhesion of the materials.
When choosing materials, you need to consider the specific conditions of the room where the finishing will be carried out. For example, for rooms with high humidity, you need to choose water-repellent compounds, otherwise the putty under the paint will become saturated with water and eventually peel off from the base. In order not to make a mistake with your choice, when purchasing, be sure to look at the labeling of the composition - putty for rooms with normal humidity is designated KR, and for rooms with high humidity - LR+.
Prices for mixtures for leveling walls and ceilings
Mixtures for leveling walls and ceilings
Tools for work
For finishing work such as leveling, priming, puttingtying and painting the ceiling, you will need some tools. So, you need to prepare:
Ceiling tools
- An electric drill and a mixer attachment for it - for preparing putty mixtures.
- A roller, preferably one with a long handle for convenience - it is necessary for applying primer and paint.
- Metal spatulas of various widths and thicknesses, as well as a rubber spatula and trowel.
- A grater for leveling the surface, abrasive mesh or sandpaper in a wide range of grits.
- Construction level, nylon cord with colored tint for marking straight lines.
- A container for mixing the solution and a tray for working with primer and paint.
- A grinder for widening cracks and cleaning the ceiling surface.
- Brushes of different sizes for touching up paint and for removing dust from the surface.
- To protect your respiratory tract while working, you must have a respirator or at least a protective mask.
How to carry out ceiling putty work
Cleaning the ceiling surface
To make the ceiling perfect, it must be cleaned down to the base from old whitewash, plaster or paint.
The ceiling surface must be thoroughly cleaned
- If the surface is whitened, then it is generously moistened with water and left to soak in moisture for 20 ÷ 25 minutes. After this time, the whitewash should come off easily. If this does not happen, then the wetting process should be repeated. After this, using a spatula to pick up the whitewash, it must be removed from the plastered surface. Sometimes, after soaking with water, the whitewash can simply be wiped off or washed off with a soft damp cloth or sponge.
You can try to wash off old whitewash with plenty of water.
- Paint is more difficult to remove, but this process must be carried out, since putty or plaster will not have proper adhesion to the painted surface.
The paint can also be removed with a spatula if it begins to peel off. The tight-fitting composition is removed using a hair dryer, and then the surface is cleaned with sandpaper attached to a grater.
- If wallpaper is glued to the ceiling, it will be easy to clean it off with a wide spatula, after thoroughly wetting the surface with water.
Removing wallpaper residues from the ceiling surface
- If, after washing off the whitewash, areas of the plaster that do not adhere well to the base are found, they will also have to be removed from the ceiling in whole or in part, to healthy, completely stable places. This is done with a medium-width spatula made of thick metal - so that the working surface does not bend much when force is applied.
Be sure to clean off all damaged areas of old plaster
Sealing cracks
After cleaning the ceiling, cracks may appear on it, which must be repaired, otherwise they will certainly soon appear through new layers of putty and paint.
Even small cracks in the ceiling are completely unacceptable
In order for the sealing material to be recessed deeper into the crack and held securely in it, it must be expanded as much as possible. This is done with a spatula, a grinder with a stone wheel, a hammer drill, or even manually, using a hammer and chisel. The cutting is carried out at least to a width and depth of 3 ÷ 5 mm.
All cracks must be thoroughly “cut” before filling.
Further, before sealing these widened cracks, it is recommended to treat them with a primer impregnating composition for better adhesion of the surface with putty or polyurethane foam.
You can use sealant or even polyurethane foam to seal cracks.
Polyurethane foam is used to seal very wide openings or openings. For narrow and shallow areas, a starting putty or sealant is used. The sealing material must completely dry, and then these places must be cleaned and leveled.
If necessary, a sickle reinforcing mesh is glued on top of the repaired crack or pothole, directly onto the putty.
Surface priming
A well-cleaned and “repaired” surface is covered with a primer before further work. This material is applied in two to three layers, and each layer is applied only after the previous one has completely dried.
The most convenient way to prime the ceiling is with a roller.
It is recommended to carry out priming before applying each subsequent layer of putty or plaster. The primer layers must be dried and only after they have dried, further work must be carried out.
Prices for different types of primer
Primer
Mixing the mixture
When preparing the mixture, you must strictly follow the instructions for use.
Each type of putty has its own proportions, so the solution must be mixed in strict accordance with the instructions, usually located on the packaging of the dry construction mixture. However, the general principle of operation remains the same for all compositions:
- A certain amount of water is poured into the container for mixing the solution, and then the dry mixture is poured into it in portions.
- Next, an electric drill with a special attachment is used - a mixer, which is lowered into a container with water and a dry mixture, then turned on at medium speed and the solution is mixed until it is completely homogeneous.
- To level the ceiling, a thicker solution is needed; a creamy mixture is mixed for the starting and finishing putty.
The composition is stirred until a completely homogeneous mixture of the desired consistency is obtained.
- Gypsum-based mortar is made in limited quantities, as it hardens quite quickly. Therefore, it is very important to clarify the setting time of the mass by looking at the same instructions. It is necessary to prepare as much solution as the master is guaranteed to be able to use immediately, during the “life” of the putty.
Ceiling leveling
Before buying materials for work, you need to check the surface of the ceiling for evenness, and if strong deviations are found, then this flaw must be corrected. Otherwise, if you make a smooth surface on a curved ceiling, then when it is illuminated, the unevenness will immediately be evident.
To determine this parameter, you need to identify the lowest corner in the room and put a mark with a simple pencil at the junction of the ceiling and wall. Then, starting from this mark, using a meter level, draw a line to the next corner, and so you need to connect all four corners. Sometimes evenness is determined using a painted nylon rope, which is used to beat out an even line. After carrying out these activities, it will be immediately clear how great the curvature of the ceiling is.
If the curvature is less than 10 mm, then the surface is leveled using starting putty. If the difference is 15 ÷ 20 mm, you will have to add a layer of plaster before filling. If this parameter is significantly larger, then leveling the surface will only be possible using sheets of drywall.
You need to know that a too thick layer of plaster or putty material, 25 ÷ 30 mm, applied to the concrete surface of the ceiling will not last long. Over time, it will peel off and begin to fall off, as it will actively absorb moisture - especially in wet rooms.
To level a crooked ceiling, traditional cement-based plaster is most often used. After leveling the surface and drying it completely, it is also primed and dried again.
Applying a starting layer of putty
On the leveled and dried ceiling, you can apply the prepared starting putty, mixed to a paste using the method already mentioned above.
- The mass is taken from the container using a narrow spatula, spread on a trowel or wide spatula and applied to the ceiling surface from the corner.
Applying the composition to a wide spatula
- The spatula is pressed firmly against the surface, and the putty is literally pressed into it, filling and hiding all the depressions. The first layer should be thin so that the base can be visible through it. The purpose of this initial treatment with putty is to cover and smooth out minor surface imperfections.
Applying putty starts from the corners
- The mass applied to the ceiling is leveled as much as possible - it should not have burrs or protruding stripes at the boundaries of the zones.
- Starting puttying from the far corner, you must immediately carefully remove the joints between the wall and the ceiling, also evenly distributing the material over the vertical and horizontal surfaces.
- When the first layer is applied, it must be rubbed with a trowel with an abrasive mesh installed on it. Grouting occurs in a counterclockwise circular motion. The process must be carried out very carefully, without missing a single ceiling section.
Direction of movement of the grater
- For better control over the evenness of the areas being rubbed, it is recommended to carry out this procedure by illuminating each area with a light bulb. Some craftsmen apply putty in the same way, so as to initially leave as few flaws as possible. This process is especially important if the next layer is not planned to be too thick.
Using special lighting to control the evenness of the ceiling surface
- After grouting, if necessary, apply another layer of starting putty to finally eliminate significant surface defects. The layer can be quite thick, but the total thickness of the starting putty should not exceed 10 ÷ 12 mm.
- This layer must be given time to dry completely. Drying time depends on the selected material composition and the thickness of the applied layer. Then even more thorough grouting is carried out, as it ensures the evenness of the surface.
- After finishing the grouting and sweeping away the dust from the surface, the ceiling must be primed again.
The attached video shows an example of layer-by-layer application of starting and finishing putties. Let the reader not be confused by the fact that in the video the work is carried out on slopes - but all stages of surface leveling are very clearly visible.
Video: layer-by-layer starting and finishing surface filling
Final puttying of the ceiling
When mixed, the finishing putty is more flexible than the starting putty. This composition should bring the ceiling to ideal smoothness - “eggshell”, so it cannot be made very thick. So, the consistency of the finishing mass should resemble very thick sour cream.
Applying the finishing layer of putty
It is also applied to the ceiling starting from the far wall using straight and circular smooth movements, without pressing the spatula too hard against the surface. If necessary, after the first has dried, you can apply a second thin layer of plaster, grouting each of them. The last finishing layer is not only rubbed down, but also sanded using a grater with fine-grain sandpaper (about 400) attached to it.
The result should be a perfectly flat surface.
To achieve perfect smoothness, many craftsmen prefer not gypsum, but acrylic putty for the final finishing layer. It should be very thin, no more than 1 ÷ 1.5 mm. It is recommended to apply acrylic putty with a spatula that does not have sharp corners - in this case, the risk of leaving noticeable stripes is reduced.
Ready-made acrylic finishing putties are very easy to use.
After all layers of finishing have dried, the surface is sanded again and coated with a primer, which should also dry well. Primer is the last layer before applying paint or whitewash to the ceiling.
After puttying, you can proceed to priming and final painting of the ceiling.
On a well-leveled and primed ceiling, the paint will apply easily; it is applied using a roller with a low-pile velor attachment. In hard-to-reach places on the ceiling and at the joints of surfaces, brushes of different widths are used for painting.
To make painting a leveled surface an easy task, and to ensure that the quality of the work done is beyond doubt, you need to know how to choose the right paint for the ceiling. How to do this is covered in the corresponding publication of our portal.
Prices for popular types of putty
Putties
Video: how to properly putty a ceiling for painting
If you approach the process of preparing the ceiling for painting seriously and take it slowly, then even a beginner can most likely cope with it. To learn how to hold a spatula correctly and apply plaster to the surface with it, you can practice on a piece of plywood or a wall, if necessary, erasing the applied layer and applying a new one.
Primer
The next stage of preparatory work is priming the surface. The operation is mandatory. It is on the floor or on the walls that you can think about the feasibility of this work; on the ceiling, the putty will stick very poorly, and under the influence of moisture from the water-based emulsion, it may even begin to fall off immediately.
Work begins after the repair solution has completely dried. Using a roller on an extended handle, the primer is evenly applied to the entire surface of the ceiling. The junctions between the ceiling and the walls and the areas where the heating pipes pass are treated with a brush.
The second layer can be applied after about half an hour, without waiting for the first layer to dry. And they putty on a completely dry surface.
Professionals mainly use the following primers:
- Ceresit ST 17 is a deep penetration primer. Located in the highest price segment. However, the price matches the quality. It provides the best adhesion between dissimilar materials: concrete and gypsum;
- GF-012. General purpose primer. Binds dust, increases adhesion between the base of the ceiling and the putty, reduces the suction of moisture from the putty solution by concrete;
- Hydroscope concentrate. Used in the bathroom, kitchen and toilet - it has waterproofing properties.
Ceiling primer for further painting
If water-based paints are used for walls, then a preliminary primer is indispensable. The composition is selected depending on what type of ceiling is being processed. Different types of primer impregnations are suitable for concrete and wood, drywall.
The sequence will be like this:
- The joints and corners in the room are carefully processed using a regular brush.
- Apply the first layer of the composition using a roller. The overlap should be small, then dry areas will not appear. We put the extension rod on the roller to make it easier to use.
- The process is repeated when the first layers are dry.
The adhesion of wall coverings improves if the impregnation is double. We move on to the next stage when the primer is completely dry.
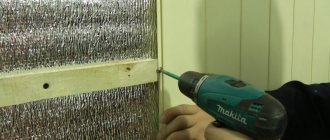
Surface reinforcement
If there are a large number of microcracks on the surface of the ceiling, the ceiling is reinforced. Note that under normal conditions such work, as a rule, is not performed. But this is the case when “you can’t spoil the porridge with butter.” It's not very expensive and it's quick.
How to prepare a ceiling for painting if it needs to be strengthened? The instructions provide for the following procedure for performing work:
- Using a roller with an elongated handle, so as not to climb a stepladder, glue for glass wallpaper is applied in an even layer to the size of the fiberglass (in extreme cases, special glue can be replaced with PVA);
- The “web” is applied to the glue and pressed tightly against the surface of the ceiling in several places;
- Using a wide spatula, moving along and across the canvas, it is pressed into the glue over the entire surface of the ceiling (no swelling or bubbles should remain);
- The next area is smeared;
- Fiberglass is glued with an overlap of 2-3 cm with the previous canvas;
- The second web of the “web” is also pressed tightly against the ceiling;
- Take a rule or a long metal ruler and apply it in the middle of the overlap. Using a construction knife, both canvases are carefully cut along the entire length, resulting in a perfect seam between the two “webs” (the trimmings are removed, and the joint is again pressed against the ceiling with a spatula);
- Another layer of glue is applied to the pasted surface.
Stage 4. Apply putty
Putty, which is suitable for application to the ceiling surface, can be produced either in finished form or in dry mixtures with water. Accordingly, the dry putty must be diluted with water in the required proportions and act strictly according to the instructions. A mixing attachment for a drill is suitable as a device for high-quality dilution of the mixture.
When discussing the question of how to prepare a ceiling for painting using putty, you should consider what surface the ceiling covering is made of.
Attention! Plasterboard slabs are quite straight on their own, so putty can be applied in one layer, while concrete slabs should be puttyed twice.
What is important at this stage is how we prepared - to putty the walls yourself, you need several types of spatulas of different sizes, including corner spatulas.
What you should know about puttingtying the ceiling yourself:
- the process is actually not as complicated as it seems, but it requires some experience and care;
- the putty mixture is taken from a special container with a small spatula and distributed evenly over the working surface of a larger spatula, and after that it is applied to the ceiling surface at a slight angle;
- it is important to maintain not only uniformity, but also the thickness of the applied layer - no more than 3 mm;
- the movements with which the putty is applied should be cross with equal pressure on the spatula itself, this will ensure a more uniform application;
- the drying of the surface should be controlled according to the instructions supplied with the materials; you should not begin any actions before the putty has dried;
- when carrying out double putty work, the first irregularities should be identified after the first application of putty; depressions and irregularities will be visible if you shine a flashlight or light bulb on them - small shadows will form in places of defects;
- After the finishing layer of putty mixture has dried, it is necessary to smooth out the nicks and irregularities with sandpaper or a sanding machine, which will make the ceiling coating perfectly smooth and ready for applying the selected type of paint.
Attention! Experienced craftsmen recommend priming the surface after the final stage of applying putty, this will ensure stronger adhesion to the applied paint.
Putty
For putty, you can use a ready-made solution in buckets, or you can buy a dry mixture. In this case, you will have to prepare the putty yourself using a mixer in a bucket (drill or hammer drill with a special attachment). Compliance with the instructions printed on the packaging is mandatory.
Important: since the solution sets quickly, kneading should be done in small portions first. As skills develop, the amount of solution prepared increases.
The small difference in price between the ready-made solution and the dry mixture has led to the fact that for small spaces, such as an apartment, ready-to-use putty is purchased, and for large areas of processing, a dry mixture is purchased.
The speed and quality of work largely depend on the platform from which the work will be carried out. If it is a stepladder, then inconvenience is guaranteed - you will have to go down and rearrange it very often. In addition, it is very inconvenient to control the quality of the applied layer of putty. The exit is by constructing a temporary portable platform or using a table.
When doing the work yourself, it is better to use a universal solution. In this case, the ceiling is putty only once (there is no need to apply the starting putty first and then the finishing putty). Naturally, you will only need to sand it once.
Properly organized work is performed in the following sequence:
- the voids and cavities that remain after the repair are sealed (if this is done in one pass, the solution will shrink) and only after drying the main work is carried out;
- use a narrow spatula to apply the solution onto a wide one and bring it to the ceiling at an angle;
- by moving towards you, the mixture is applied to its surface, while the layer of putty being laid must be perpendicular to the primer;
- after the first pass, the solution is fed with a narrow spatula to the edge of a wide tool and the operation is repeated, while the forces on the spatula must be controlled and not allowed to fluctuate significantly;
For information: each master has his own approach to applying putty to the ceiling. Some do this with a wide spatula, others with a narrow one, and still others with other tools altogether.
- after laying a portion of the mortar, the quality of the work is checked; to do this, you need to look at the putty area against the light, but it is even more effective if the newly putty area is illuminated with a flashlight - in this case, the smallest errors are clearly visible;
- If clumps of the mixture or differences in height are detected, everything is leveled with a spatula.
The thickness of the applied layer should not exceed 2 mm. Corners are sealed separately, after completion of work on the main surface.
Leveling and priming the ceiling
After all the old coating has been removed from the ceiling, you can begin leveling and priming it.
Step 1. First, you should carefully inspect the ceiling for any irregularities.
Step 2. If there are seams on the ceiling, you need to tap them for loose plaster and putty, if any. All voids must be well primed and filled with putty.
Prices for putty
putty
Step 3. Using a screwdriver or any narrow object, check all joints between the ceiling and walls for voids. If necessary, they are also filled with putty.
Step 4. If there are large and wide cracks on the surface, they can be sealed using reinforcing mesh.
Step 5. After the ceiling has been leveled as much as possible, a primer (water or acrylic based) should be applied to its surface. It is applied in two layers - the process is conveniently carried out using a brush. The primer takes at least 10 hours to dry.
Leveling the ceiling before painting
Nowadays, construction stores have a large selection of different water-based primers. It’s a good idea to use an antiseptic primer, which will subsequently provide protection against mold and mildew. This is especially true for rooms with high humidity. As a last resort, you can use a chlorine solution in addition to the primer: for example, dissolve regular “Whiteness” in water and coat the surface with this product.
While priming the ceiling, the air temperature in the room should be maintained at a temperature suitable for this procedure. Ideal conditions are from +5 to +30 degrees. If the room is too cold, the primer will harden quickly, but in a hot room it will crack. Both of these can have a negative impact on the quality of work.
Applying primer to the ceiling
Grinding
The final stage of work is grinding the putty, which allows you to create a perfectly smooth surface for painting. Performed manually or with a grinder.
Experts manually grind “to look like a light bulb” (you can also use a simple flashlight with the same effect). By highlighting, it allows you to see the smallest defects, which are eliminated during grinding. Small defects are removed with zero-grade sandpaper, large ones - with a grater with a mesh.
Grinding scheme.
The work is carried out in a circular motion from wall to wall, which is clearly visible in the diagram. It is important to constantly monitor the quality of work. The machine method greatly simplifies the process. Otherwise, everything is done in the same way as with manual grinding.
Before painting, the ceiling is primed again.
DIY ceiling painting
You can paint the ceiling using a roller or spray gun.
Using a roller
When choosing a paint roller, it is better to choose a sheepskin attachment. This will prevent lumps from appearing and will help you use less composition. The only drawback is the high price. Budget options include terry and plush rollers. The most unsuitable are tools with a foam attachment.
Before work, it is better to roll out a roller moistened with paint on a tray so that it is well saturated. A piece of linoleum is also suitable for this purpose. Paint is applied to the ceiling in parallel stripes, the width of which should not be more than 1 m, and the areas where they are cut should not be less than 10 cm. Painting begins from the window. The second layer should be applied perpendicular to the first.
You can also visually divide the ceiling into squares with a side of 80-100 cm and paint them vertically or horizontally. When a layer is subsequently applied, the squares move, so their borders will not be visible. If the paint is applied quickly, the surface will remain streak-free.
Painting with a spray gun
Beginners using a spray gun will have a better finished work than those using a roller. The painting speed is higher when using a sprayer, with which the paint is applied without streaks, in an even thin layer. The latter circumstance leads to more layers being applied than with the classical method.
When using a sprayer, the paint suspension enters the human respiratory system. Therefore, a respirator is necessary in such cases.
Before using the spray gun, it must be adjusted and configured. Another disadvantage is the high price. Mechanical spray guns are inferior in the quality of material application to electric and pneumatic tools.
Spray paint requires dilution: for water-based paints, water is used, for others, solvents 646 and R-12, and white spirit are used. Before work, you need to check how the composition is distributed and what the shape of the spray gun torch looks like. A large sheet of plywood or cardboard is suitable for this.
Before work, you need to visually divide the surface into squares with a side of about 1 m. It is necessary to ensure uniform coloring. On average, 1 m should take 5 seconds.
Preparing a gypsum board ceiling
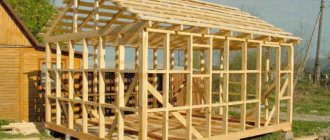
Preparation for painting a suspended ceiling made of gypsum plasterboard differs significantly from work on a concrete floor. How to properly prepare a gypsum ceiling for painting? It all depends on whether the dye will be applied to a newly installed ceiling or whether an existing suspended structure is being repaired.
The following work is performed on the new suspended ceiling:
- Use a construction knife to open the joints of plasterboard sheets (3-4 mm of plasterboard is cut from each edge at an angle of 45 degrees);
- the seams and screw heads are puttied (the work is performed in the same sequence as sealing the joint between concrete floors, which can be seen above);
- the surface of the drywall is primed;
- after the primer dries, it is puttied;
- Finally, it is sanded and primed again.
Preparing a plasterboard ceiling for painting during renovation work includes cleaning the ceiling from water-based paint, sanding and priming. Here, the step of applying putty is eliminated, since it was applied under the previous topcoat, and sanding only removes the old adhesive mass.
You can remove old paint using the same methods as from a concrete base - mechanically or using a wash. The main thing is not to put too much pressure on the ceiling, so as not to damage the drywall. But you can’t wet the wallpaper - the cardboard holding the plaster will get wet. Here they do things differently: they buy cheap wallpaper glue, dilute it to a creamy consistency and spread it on the ceiling.
After some time, the wallpaper will swell and be easily removed from the drywall. Before painting, the ceiling is primed.
What needs to be done to prepare the ceiling for painting
Regardless of what kind of paint and how you plan to paint the ceiling surface, in all cases approximately the same amount of preparatory work is performed:
- The ceiling surface is freed from dust and dirt. At least five hours should pass between washing and cleaning the ceiling surface and further preparation, provided the room temperature is at room temperature. The surface should dry well;
- Repair and cleaning. Most modern ceilings are made of floor slabs, so there will always be cracks and cavities, which must be hidden under putty before painting;
- Next, you need to prime the ceiling, and this part of the preparation causes the most controversy and discussion.
Important! Whether it is necessary to prime the ceiling before painting is decided by each owner individually. Smart and experienced professionals prefer not to take risks if they need not just a painted ceiling, but a truly beautiful coating.
All that remains is to paint the ceiling correctly and tidy up the room. Before you begin, you need to prepare two types of protective material. The first is paper, usually old newspapers, wallpaper, packaging, everything that can be thrown away without regret after finishing the preparation and, in fact, the painting itself. The second type of protection is a film, preferably transparent, thick, with a width of at least three meters.
Correct technique for laying putty
The first coat is always applied in a direction that is perpendicular to the application of the primer. During operation, the spatula turns slightly to avoid the appearance of pits.
- Apply a second coat perpendicular to the first.
- Finish the corners separately, carefully cut off any resulting irregularities.
- Sand the surface with coarse sandpaper.
- The finishing putty is applied in any direction. This is explained by the fact that the processed plane is almost flat.
- Once again we check the quality of application, sanding small scratches with sandpaper.
- Immediately before starting painting, you will need to wipe off dust from the ceiling surface. A vacuum cleaner will help you cope with this task.
Article on the topic: “How to putty the ceiling yourself”
High-quality work on cleaning and preparing the surface is the key to comfortable and high-quality paint application. Paint shedding, cracks, stains - all these problems can be avoided if you properly prepare your ceiling. Although the process turned out to be multi-stage, it is absolutely uncomplicated and can be done by any home owner.
Removing old coating from the ceiling surface
If there is old finishing on the ceiling, it should definitely be removed.
The method for cleaning the ceiling before painting depends on what materials were previously used:
- When it is chalky whitewash, it is washed off with water. First, the roller is dipped in a container of water and, using it, the entire ceiling area is evenly wetted. This procedure is repeated several times, taking breaks between them. After the whitewash layer is well wet, they begin to remove it with a metal spatula. Next, wipe the surface with a damp cloth, periodically dipping it into a bowl of water to wash off any remaining whitewash.
- If polystyrene foam tiles were used for finishing, a simpler method of preparing the floor for painting is used. To do this, the tile is torn off using a spatula and the remaining adhesive is removed from the surface.