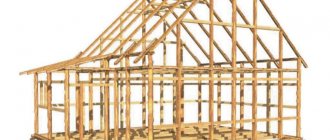
Thermal protection device for the base is a necessary stage in the construction of any facility for residential and industrial purposes.
Thermal insulation with polystyrene foam is an energy-saving measure. High-quality and modern thermal insulation “Penoplex” professionally protects the base and foundation from freezing.
Similarly, the energy efficiency of the building increases, which enhances the structural protection of the building, leads to careful use of energy resources and significant savings on heating costs.
We will tell you about insulating the base with Penoplex with your own hands in the article.
Pros and cons of foundation insulation with polystyrene foam
Advantages of the material:
- low thermal conductivity, good thermal insulation properties;
- frost resistance;
- almost no vapor permeability;
- water resistance;
- ease of processing;
- light weight;
- ease of installation: no careful leveling of the base is required;
- affordable price.
Flaws:
- flammability from G1 to G4. When finishing protruding parts (basement, etc.), external cladding with non-combustible materials is necessary;
- combustion toxicity;
- to avoid damage by rodents, it is necessary to install reinforcing mesh on top of the slabs;
- The material itself is waterproof, but does not provide the necessary waterproofing. In combination with insulation, treatment with waterproofing materials is required;
- It is necessary to protect the material from mechanical damage with asbestos-cement or reinforced concrete slabs and wooden panels.
Materials and tools
First of all, you need to prepare the following materials:
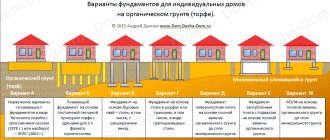
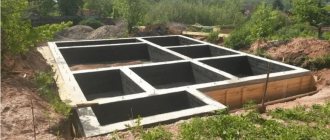
Impact of natural phenomena on the foundation
- foam boards;
- glue in a tube or balloon glue-foam (needed to close the mesh);
- umbrella dowel;
- mounting foam for sealing seams (despite the fact that penoplex panels are fastened together with grooves, which seems to eliminate the appearance of through joints, if the sheets cannot be joined, seams are formed that must be sealed with your own hands so that cold air does not penetrate through them);
- bitumen mastic;
- reinforcing mesh made of polymer or metal.
In addition, to insulate the foundation with polystyrene foam you will need the following tools:
- a vessel for diluting glue and a mixer for mixing;
- penoplex cutting knife;
- building level;
- putty knife;
- brush for lubricating with waterproofing mixture;
- drill or hammer drill.
Preparatory stage
Expanded polystyrene PSB-S
First you need to calculate how many insulation boards will be needed for the foundation. The dimensions of a standard polystyrene foam board are 600x1200 mm, thickness from 20 to 100 mm. For the foundation of a residential building, slabs 50 mm thick are usually used, laid in two layers. To find out how many slabs will be needed, the total length of the foundation is multiplied by its height and divided by 0.72 - the area of one sheet of polystyrene foam.
For example, if a 2 m high foundation is insulated in a 10x8 m house, the thermal insulation area is equal to 72 square meters. Dividing it by 0.72, we get the number of sheets - 100 pieces. Since the insulation will be carried out in two layers, it is necessary to buy 200 slabs 50 mm thick.
This, however, is a very average calculation, based on the fact that the insulation thickness will be exactly 100 mm. But this value can be greater - it all depends on the climatic conditions of the region, the foundation material, and the type of insulation.
There is a special system for calculating thickness, which requires knowing the R index - this is a constant value of the required heat transfer resistance established by SNiP for each region. You can check it with your local architecture department, or take it from the table below:
Calculator for calculating the thickness of foundation insulation
In order not to bother the reader with calculation formulas, below is a special calculator that will allow you to quickly and accurately find the required thermal insulation thickness. The result obtained is rounded up, leading to the standard thickness of the panels of the selected insulation:
Go to calculations
In addition to polystyrene foam you will need:
- mastic or roofing felt;
Ruberoid
- gravel;
- glue;
Adhesive for polystyrene foam
- mushroom dowels;
Fungus dowel
- putty or polyurethane foam;
- level;
- notched spatula;
- cement mortar;
- sand;
- reinforcing mesh;
Reinforcing mesh
- roller
When all the materials have been prepared, a trench is dug along the perimeter of the foundation. You need to dig to the freezing level, that is, to a depth of 1.5-2 m. To make it convenient to work in the trench, its width should be 0.8-1 m. Of course, soil excavation is carried out exclusively by hand, since equipment can damage the foundation. The walls of the base must be thoroughly cleaned of soil, unevenness and cracks must be repaired with mortar.
Calculation of quantity and selection of the “right” penoplex
If high-quality material is used for insulation work, you can count on a good result. By appearance, you can determine whether the material is suitable for insulating the support of a house.
The surface of high-quality material is smooth without signs of destruction, and when broken, the penoplex cells have a polyhedron shape.
To insulate the foundation, a special series “F” material is used. This type of insulation is more resistant to biological decomposition, mechanical stress and wetness. The material is ideal for external insulation of the base, basement or basement, so when purchasing, be sure to pay attention to the markings.
To simplify the process of selecting penoplex, you should pay attention to products from well-known manufacturers, which are used not only in the construction of private buildings, but also for insulating apartment buildings.
Among domestic manufacturers, preference should be given to products. Which is not inferior in quality to European materials, and the cost will be noticeably lower than that of imported insulation materials.
Before purchasing polystyrene from any trade organization, you should correctly calculate the amount of material that will be used to insulate the foundation and basement of the house.
- To determine the area of insulation, it is necessary to measure the perimeter of the base, multiply the resulting value by the sum of the depth of the foundation and the height of the base.
- For example, if the perimeter of the building is 36 m, the depth is 1.5 and the height of the above-ground part of the base is 0.5 m, then 36 * (1.5 + 0.5) = 72 m2.
In this way, you can easily calculate the amount of penoplex that will be required for work.
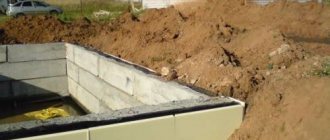
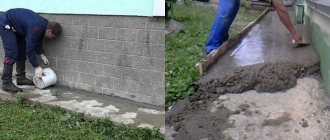
Preparation and waterproofing
The preparatory process has its own nuances for each type of foundation. A “tape” of standard depth should be manually dug into a trench up to one meter wide and to the freezing depth. No technique is used in this case, so as not to accidentally “injure” the foundation. The surface is cleaned and leveled - the protrusions are chipped off and cracks are sealed with cement.
Waterproofing
Then a waterproofing layer is applied: bitumen mastic using a roller or liquid rubber from a spray bottle
It is important that the waterproofing material is applied in a continuous layer and does not contain organic solvents that have a destructive effect on XPS
Even more effective protection for strip foundations will be provided by a combination of bitumen and rolled material. Ruberoid, fiberglass, etc. are applied to the mastic in a heated state with an overlap of up to 150 mm, the joints are coated with bitumen. In the same way, a slab foundation can be insulated from moisture.
If the foundation is on stilts
With a pile foundation, a combination of a waterproofing compound and a drainage system is required to protect against groundwater. The drainage is installed in the following sequence:
- a shallow trench is dug;
- the bottom of the trench is covered with crushed stone;
- geotextiles are laid on top of the crushed stone;
- pipes for drainage of water are laid at an angle from the house;
- on top of the pipes there is another layer of geotextile;
- a top layer of crushed stone is laid.
What is extruded polystyrene foam
Not everyone clearly understands what polystyrene foam actually is. In general, this is nothing more than ordinary and well-known foam plastic, used in everyday practice, mainly for packaging fragile items. This is a durable, lightweight, heat-saving, biodegradable and almost insoluble material obtained by filling styrene granules with gas and then heating them.
When exposed to temperature, the granules “swell” until they occupy the entire volume available to them and sinter together.
Extruded or extruded polystyrene foam is distinguished by a special manufacturing technology. For ordinary polystyrene foam, polystyrene granules are simply heated with water vapor, while to obtain EPS, several processes are used at once: the granules are mixed and heated, a foaming agent is introduced, and then extruded under high pressure, i.e. pushed through the molding hole.
This technology provides greater uniformity and, therefore, greater strength of EPS compared to foam plastic.
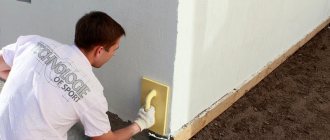
Basement insulation with penoplex
Technology for insulating the base in the same plane as the walls of the house:
- Marking. Since the insulation boards should be several centimeters higher than the waterproofing layer, horizontal markings should be made with a pencil along the entire surface of the wall.
- Cleaning the outside of the wall. The wall surface is pre-prepared for gluing with polystyrene foam. To do this, it is thoroughly cleaned from the outside of dust and dirt. After this, the surface is primed. After the primer has dried, you can proceed to the next step.
- Connecting slabs. Pasting the walls of a house with polystyrene foam is done using special glue, starting from the corner. The slabs are marked and cut with a sharp wallpaper knife.
- Applying glue to the wall and slabs. Using a special notched trowel, the adhesive is applied to the surface of the base. Pre-prepared fragments of slabs are smeared with glue and attached to the wall, the joints between the slabs and the ends outside the house are carefully sealed.
- Next, using a hammer drill, dowels are drilled and inserted, followed by driving in nails. After covering the entire surface of the outside of the house with slabs, a special primer layer is applied to provide the basis for all subsequent layers.
- Strengthening the slope angle. A metal corner is attached around the entire perimeter of the wall. For installation, the same adhesive is used as for the slabs.
- Installation of reinforcing mesh. The reinforcing mesh is pre-cut to the size of the slabs, lubricated with adhesive and glued on top of the polystyrene foam. The technology for strengthening the reinforcing mesh is the same as for installing the corner.
- Finishing work and installation of drip linings. Materials for external work are used to putty the base area. It is left to dry and primed again followed by painting. To prevent moisture penetration, flashings are installed.
Technology for insulating the base with polystyrene foam
If coating defects occur, they can be easily eliminated by re-priming and painting.
The technology of thermal insulation with foam plastic is the same as that of penoplex.
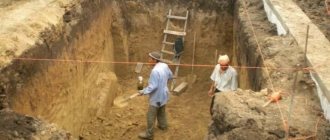
Freeing from the soil
The owner of a residential building has a lot of work to do. Initially, the underground part of the foundation will have to be completely excavated. Important: some construction experts do not recommend carrying out the procedure along the entire perimeter at once, as this will significantly weaken the structure. It is enough to dig up to 10 meters at a time.
How to perform the work, simultaneously or in parts, is up to the owner to decide. But in the second case, the insulation process risks becoming endless. An additional problem is that the optimal trench width should be at least 1 meter. Otherwise it will be difficult to work.
Excavation of the foundation is used for another purpose - installation of a drainage system. This is relevant for coastal settlements and areas with high groundwater levels. The drainage pipe is laid at a distance of up to half a meter from the house at the level of the sand and gravel cushion. A slope (2 cm per 1 meter of pipe) and discharge into a storm sewer or well are required.
The cleared foundation is thoroughly cleaned of soil and debris using an iron brush with stiff bristles. The surface must be absolutely clean. Otherwise, you cannot count on good adhesion.
If there are irregularities, cracks, or chips, they must be carefully repaired and leveled with plaster mortar. There should be no reinforcing mesh exposed to the surface that could tear the waterproofing membrane.
To prepare the plaster mortar, one part of cement is mixed with four parts of sand. Important: the composition should not be liquid, but plastic. This will help prevent the composition from spreading over the surface. And the setting period will decrease. The work is done from top to bottom. The composition is “thrown” onto the wall using a construction trowel. Alignment is carried out using a rule. Excess solution is removed. The pressure on the rule should be the same along its entire length. The drying process takes at least a week. It is better to wait two and then move on to the next stage of work.
Expanded polystyrene as EPS or XPS insulation
Today, mainly two types of expanded polystyrene are used as thermal insulation: foamed (EPS) and extruded (extruded, XPS). They differ not only in production technology, but also in properties. For foundation insulation, it is preferable to use XPS. Compared to it, EPS has a higher heat transfer coefficient (less effective as a thermal insulation material), is hygroscopic, and less durable. But at the same time, foamed polystyrene foam stands out for its comparatively low price. Its shortcomings can be mitigated by installing an additional layer of waterproofing that protects the material from wet soil, as well as foundation drainage, which helps lower the groundwater level.
Insulation of the foundation from the outside with polystyrene foam
The foundation of the house, as is known, directly interacts with the external environment, as it is located on the ground. Therefore, just like waterproofing, foundation insulation is an important stage in construction and repair work, on which the comfort of housing during the cold season will depend. In addition, thermal insulation is of great practical importance, since it prevents the penetration of dampness into the basement floors and does not allow the resulting condensation, which appears due to the temperature difference between the outside and the inside of the house, to adversely affect the laid communications and the supporting structure as a whole.
Foundation insulation scheme.
There are varieties of this material, for example, penoplex or expanded polystyrene, but in essence these are identical insulation materials, therefore the same technology is used to thermally insulate a strip foundation.
Due to the fact that such insulation is produced in the form of slabs with ready-made grooves, the installation of this material is very simple, and provided that you have construction skills, any adult can cope with this. The heat insulators listed above have the property of not being exposed to water, so the slabs do not deform.
It should be noted that insulation of the base can be done both from the inside and outside. The choice of option depends on many factors. So, if it is planned to insulate the foundation from the outside, then this will allow it to be laid to a shallower freezing depth, which reduces the costs allocated for building a house. In addition, in the case when the building stands on heaving soil, thermal insulation of the supporting structure from the outside will neutralize the impact of sub-zero temperatures on it, which will prevent movement of the foundation, and this greatly affects its durability and strength.
Also, having carried out insulation in this way, this material will serve as additional waterproofing. In other words, this option is the most optimal. Now, having understood all the nuances and decided on the material, before starting work, it is necessary to study the process of insulating the foundation from the outside with either polystyrene foam, penoplex, or expanded polystyrene. Let's look at everything in order.
Types of expanded polystyrene
There are two main types of this insulation on the modern building materials market: foamed and extruded polystyrene foam. Let's take a closer look at them.
Extruded polystyrene foam
This material is also designated by the letters XPS. It should be noted that this type of coating has slightly better qualities, and therefore many people prefer to use extruded polystyrene foam to insulate the foundation. Its main advantages include:
- good ability to retain heat;
- high level of compressive strength, this indicator for this material varies within 0.25-0.5 MPa with surface deformation of 10%;
- extruded polystyrene foam has a uniform porous structure, and its pores are closed, which ensures good water-repellent function of the material;
- due to the fact that such a coating does not absorb moisture, it is not susceptible to freezing;
- Another advantage of this insulation is its durability; according to some manufacturers, the service life of the material is about 50 years.
Expanded polystyrene foam
It is also called polystyrene foam and is designated by the letters EPS. This material is also often used as insulation for foundations. Like the previous type of coating, foam plastic has a low level of thermal conductivity. Among its main advantages is its low cost, however, in terms of its qualities, EPS polystyrene foam is significantly inferior to XPS polystyrene foam. The difference between these types is as follows:
- Polystyrene foam can absorb a significant amount of water, which reduces its thermal insulation properties. Because of this, after covering the foundation it is necessary to create an additional waterproofing layer.
- The compressive strength of expanded polystyrene foam is 3 times lower than that of its extruded counterpart. In this regard, there is a need to protect the coating from soil pressure.
Taking into account the above characteristics, the technology for insulating the foundation with expanded polystyrene foam should include the following types of work:
- creating a waterproofing layer of bitumen, rolled roofing felt or any other suitable material on top of the insulation;
- erecting a brick wall around the foundation or covering the structure with profiled polyethylene membranes.
Construction of houses
160 votes
+
Vote for!
—
Vote against!
Until recently, no one thought much about the thermal insulation of the foundation, and all heat losses were compensated for by more powerful heating. Today, the policy of saving energy resources forces us to take a fresh look at the problem. It turns out that insulating the foundation will not only avoid almost 20% of heat loss, but will also provide the foundation with comfortable conditions, increasing its service life. As practice has shown, properly waterproofed and insulated foundations are not subject to destruction longer, which means they “live” longer. In the question of what is the best way to insulate the foundation, a new material - extruded polystyrene foam - has taken the lead from the good old polystyrene foam. Despite the fact that this material costs almost twice as much as polystyrene foam, insulating the foundation with Penoplex is becoming a widespread fashion. And all thanks to its unique qualities and durability.
- Meet Penoplex
- What is the best way to insulate the foundation - from the outside or from the inside?
- Calculation of Penoplex thickness for foundation thermal insulation
- Foundation insulation technology with Penoplex
- Do-it-yourself foundation insulation with Penoplex
- Excavation
- Preparing the foundation surface
- Foundation waterproofing
- Insulation of strip foundations with Penoplex
- Leveling the surface
- Backfill and warm blind area from Penoplex
- Foundation insulation with Penoplex: video
Meet Penoplex
Extruded polystyrene foam is a whole type of material made from expanded polystyrene by foaming it at high temperatures. Seven of the gases freon and carbon dioxide are added to the composition as a foaming agent. The result is a durable material with a dense, uniform structure containing granules of 0.1 - 0.2 mm.
Penoplex is the name of one of the Russian brands that produces extruded polystyrene foam for various needs, be it insulation of roofs, pipes, road surfaces, walls of a house or its foundation. Each of them has its own unique features that are relevant for a specific application. To insulate foundations, Penoplex Foundation slabs and, less commonly, Penoplex 45 are used.
The advantages of using Penoplex for foundation insulation are obvious:
- Low thermal conductivity (λ=0.03-0.032 W/(m×°K)). This indicator is the lowest among publicly available insulation materials, which means that slabs of smaller thickness will be required.
- Exceptional compressive strength - 27 t/m2, which is very important, since colossal loads act on the foundation.
- Practically does not absorb moisture. As experiments have shown, over 30 days spent in water, Penoplex slabs absorbed and filled with moisture by only 0.6%. Considering the constant influence of groundwater and rainwater, the low water absorption of the material guarantees protection of the foundation from moisture, and the insulation itself will not deteriorate or change its properties from constant contact with water.
- Wide temperature range – from -50 °C to +75 °C. The material can withstand both severe frosts and heat.
- Light weight facilitates installation work and avoids additional load on the foundation.
- Penoplex is not afraid of mold, does not rot or decompose. There are no mice in it.
- Resistant to many aggressive substances that may be in the soil.
- The material does not emit harmful substances or fumes and is safe for use in residential construction.
- Penoplex boards are easy to install, as they are made with a tongue-and-groove system; they are easy to cut, glue and fasten.
- The material is extremely durable (up to 50 years).
Thermal insulation of the foundation with Penoplex slabs will ensure the durability of the structure and material of the foundation, as well as the basement or basement. I would like to note that Penoplex Foundation has a fire resistance class of G4, i.e. burns. But taking into account the fact that the material will be hidden by a layer of plaster and primer, this is not scary.
Penoplex Foundation is produced in slabs with dimensions 600x1200 mm and thickness 20 - 100 mm (20, 30, 40, 50, 60, 80, 100). This allows you to select the material of the required thickness for each specific case.
What is the best way to insulate the foundation - from the outside or from the inside?
The location of the insulation on the foundation - outside or inside - is very important. In order to protect the foundation as much as possible from the negative influence of the environment, it is necessary to insulate the foundation from the outside. But this is easier to do during the construction process than during the operation of the house. For example, those who want to insulate the foundation of an old house really don’t want to dig up the foundation walls, as this is labor-intensive, difficult and time-consuming. But know that insulating the foundation from the inside is actually insulating the basement or ground floor, but not the foundation, since the structure and material of the foundation remain unprotected and are susceptible to the influence of moisture, frost and soil heaving.
Advantages of insulating the foundation from the outside:
- The foundation is protected from freezing, the cold does not penetrate inside.
- The foundation concrete is protected from moisture and numerous defrost-freeze cycles, which extends its service life.
- Serves as an additional barrier for ground and storm water, presses and protects the waterproofing layer from mechanical stress.
- Copes well with seasonal temperature changes.
- An optimal microclimate is created in the basement or ground floor.
- The dew point shifts, which has a beneficial effect on the foundation material.
If you decide to insulate from the inside, be prepared for the fact that the foundation remains unprotected from frost, soil heaving and water. As a result, seasonal temperature changes, frosts and soil heaving will lead to the appearance of cracks in the foundation and its deformation. Think, maybe it’s worth doing everything right once, rather than limiting yourself to half measures.
Calculation of Penoplex thickness for foundation thermal insulation
The first question that interests you when insulating a foundation is what thickness of material to use. To determine this, you will have to perform a series of calculations. Although the manufacturer indicates the minimum thickness of Penoplex for different construction regions, it is still better to calculate everything yourself.
R – heat transfer resistance for a specific region. For Moscow and the Moscow region it is equal to 3.2 m2x°K/W;
H1 – foundation thickness;
λ1 – thermal conductivity coefficient of the foundation material;
H2 – thickness of the insulation material (Penoplex);
λ2 – thermal conductivity coefficient of Penoplex.
If we are going to insulate a reinforced concrete foundation (λ=1.69 W/m*°K) with a thickness of 400 mm (0.4 m), we get:
3.2=0.4/1.69+H2/0.032;
3.2=0.24+ H2/0.032;
2.96= H2/0.032;
H2=0.0947 m. This is approximately 95 mm.
In total, it turns out that to insulate a foundation 400 mm thick, you will need a 100 mm layer of Penoplex. You should not round down, it is better to take it with a reserve. For foundation insulation with Penoplex, the price depends on the area that needs to be covered with slabs and on the thickness of the material.
For example, the insulation height is 2 m, the length of the walls is 10+8+10+8 m (for a house 10x8 m). It turns out that the insulation area is 72 m2. The area of one Penoplex slab is 0.72 m2. To insulate the foundation we will need at least 100 slabs of material.
In order to avoid cold bridges as much as possible when insulating with Penoplex and to cover all joints and cracks, it is recommended to lay the insulation in two layers offset, in a checkerboard pattern. If 100 mm of insulation is required, then two 50 mm slabs must be used. In total, we need 200 Penoplex slabs with a thickness of 50 mm. There are 8 slabs in a package, which means we buy 25 packages. In total, the insulation material will cost 930 – 950 USD.
To insulate the foundation with Penoplex, the cost of the insulation material makes up the lion's share of the budget. To this it will be necessary to add the cost of waterproofing, bitumen mastic for gluing insulation, umbrella dowels, and cement for plastering the surface. All this is just a small thing compared to the total cost of insulation work.
Foundation insulation technology with Penoplex
Penoplex is a very technologically advanced material. But to take full advantage of its benefits, it is better to follow the technology of its use for different cases.
Insulation of a strip foundation with Penoplex (insulation cake from the inside out):
- Foundation wall.
- Waterproofing.
- Penoplex slabs.
- A layer of cement-sand plaster.
- Backfilling with soil or sand, expanded clay.
- Penoplex slabs (horizontally) under the blind area.
- Blind area.
Insulation of a slab foundation with Penoplex (pie from bottom to top):
- Sand.
- Penoplex slabs.
- Concrete slab.
- Waterproofing.
- Floor screed.
- Waterproofing the end part of a concrete slab.
- Penoplex slabs on the end part of the slab, laid from the depth of the sand bedding to the very top - 40 - 50 cm above ground level.
- Penoplex slabs under the blind area.
- Blind area.
Please note that Penoplex slabs can be laid on the foundation slab directly under the floor screed.
Do-it-yourself foundation insulation with Penoplex
All work on insulating the foundation with Penoplex can be done independently, without the help of construction organizations. At least you can save money on this. Of course, it is much more convenient to do insulation at the construction stage, even before filling the pit around the foundation. But if the moment is missed, and now there is a need to insulate the foundation of an old house in use, then you will have to work hard. Please also note that repeated excavation of the foundation may lead to the appearance of cracks in it, as the house will sink unevenly. This is dangerous, so it makes sense to calculate the loads before starting work.
Let's consider this more labor-intensive option.
Excavation
The first task is to dig out the foundation. A trench is dug around the perimeter of the entire house, deep down to the sand, i.e. to the entire depth of the foundation, and a width of at least 1 - 1.5 m. The depth of the strip foundation usually drops to the level of soil freezing in winter; this indicator can be found in the local geodetic service.
Despite the fact that Penoplex does not allow or absorb moisture, it still makes sense to equip it with high-quality drainage. It is especially necessary if there is a high groundwater level or heavy floods in the construction area. We arrange drainage at the level of the sand cushion under the foundation. Along the perimeter of the entire house, at a distance of 50–60 cm from the foundation walls, we dig a shallow trench for drainage pipes. At the bottom of the trench we pour sand in a layer of 5 - 10 cm, then crushed stone 5 - 10 cm, then we spread geotextiles, the edges of which are placed over the edges of the trench. Inside the trench, we lay drainage pipes with holes directly on the geotextile sheet. The slope when laying drainage pipes should be at least 2 cm per 1 m. Then sprinkle everything on top with a 10 cm layer of crushed stone, wrap the edges of the geotextile so as to wrap them around the pipe. The pipes must be drained into a well for storm drainage.
Preparing the foundation surface
The foundation and plinth walls must be cleaned of soil residues, broken pieces of concrete and other dirt. To do this, you can use a brush with hard synthetic fibers. After the surface is completely cleaned, it must be leveled. A smooth surface is the key to the durability of the waterproofing coating, which can be damaged by any sharp protruding edge or piece. It is extremely rare that after some time of operation the foundation walls remain perfectly smooth, so it is necessary to plaster them.
Leveling foundation walls:
- We install and secure the beacons at a distance of 1 - 1.5 m from each other. You can use perforated guides. We install the beacons at the entire height at which we are going to attach the insulation - from the very bottom of the foundation to a level of 50 cm above the ground.
- Mix the solution: 4 parts sand and 1 part cement, add water and knead until thick, but the solution should not be dry. The liquid solution will immediately drain from the surface.
- Using a trowel, we spread the mortar onto the foundation walls. We make sharp movements with our hands and begin to throw from bottom to top.
- When the entire surface is filled with solution, take a rule 2 m long, apply it to the beacons and stretch it from top to bottom, removing excess solution. It is advisable not to pull straight down, but to make slightly wave-like movements.
- After the first layer has dried, you can apply a second layer - leveling.
Important! If there were differences of more than 2.5 cm on the foundation walls, then additional reinforcement must be used for plastering. You can use a chain-link mesh secured with staples.
Do not continue work until the leveling solution is completely dry. This will take from 7 days to 20 if the foundation was poured a long time ago. If we are insulating a new foundation, then we need to wait a month until the moisture is completely removed from the concrete.
Foundation waterproofing
It is better to carry out high-quality waterproofing of the foundation in two layers: the first is bitumen mastic, the second is Technonikol sheets.
bitumen mastic ready-made - unpack and spread it, or you can prepare it yourself from a purchased bitumen block. If you bought dry bitumen, then you need to melt it in some container, then add used oil (motor) to it at the rate of 50 liters of oil per 120 - 150 kg of bitumen. The oil will add plasticity to the bitumen and then it will not crack in cold weather.
Using a roller, apply bitumen in a layer of 2–4 mm to the entire surface of the foundation and plinth. We try to fill all the cracks and small pores. When the bitumen dries, glue the Technonikol sheets. We glue the sheets from bottom to top, melting their back side using a gas burner. Keep the burner at a distance of no closer than 20 - 25 cm, otherwise TechnoNIKOL will burn. We smooth out each glued sheet, releasing air from under it. We glue the sheets with an overlap of 10 cm, then coat the joints with mastic.
Important! Many people waterproof the foundation only using Technonikol sheets. This is not the best solution, as it does not fill small cracks and pores. And if moisture gets under the sheets, they will quickly peel off. But coating with mastic protects the surface better, although the process itself is very dirty and labor-intensive.
Insulation of strip foundations with Penoplex
After completing the waterproofing work, you can begin attaching the insulation.
Important! A very important nuance - you may come across recommendations that in order to fix the Penoplex slabs, you need to reheat the bitumen waterproofing and glue the material onto it; in fact, you should not do this. There is a high probability of damaging the waterproofing.
We attach the Penoplex slabs to the foundation in a vertical position, starting from the bottom up. To secure it, we need acrylic glue or any other adhesive based on inorganic solvents. Apply glue to the Penoplex board pointwise - 5 - 6 points. Then we press the slab to the surface of the foundation and press it down to secure it. We wait 1 minute. All subsequent Penoplex slabs are fastened in the same way, only they must be connected to the already fixed ones using a tongue-and-groove system. We fill the gaps between the plates with polyurethane foam or acrylic glue.
We attach the second layer of Penoplex slabs in the same way - with glue, but with an offset to cover the joints between the slabs of the first layer.
Important! Fixing Penoplex slabs on the part of the foundation that will be covered with soil cannot be done using mushroom dowels, as this can damage the waterproofing layer.
Dowels can only be used on the base part; there, 5 dowels (120 mm long, 10 mm in diameter) are fastened to each slab. The depressions from the dowels must be covered with acrylic glue. We continue further work only after the glue has completely dried.
Leveling the surface
Now the Penoplex insulation needs to be protected from the effects of soil; to do this, we plaster the surface again.
We attach a reinforcing fiberglass mesh on top of the Penoplex, joining the sheets with an overlap of 10–15 cm so that cracks or chips do not form at the joints where the mesh is attached.
Some sources recommend that all leveling be done using only one acrylic glue, applying it in several layers until the surface is level. But you can perform classic leveling using a cement-sand mixture. After the layer of plaster has completely dried, you can fill the foundation pit.
Backfill and warm blind area from Penoplex
Instead of soil removed from the trench, sand or expanded clay can be poured under the house to improve thermal insulation. Although you can fill up the soil that was there. But not completely. The final stage of foundation insulation is a warm blind area.
Approximately at a depth of 30 cm from the top, pour a 10 cm layer of sand and compact it thoroughly. Then we spread waterproofing material from the foundation itself, 1 - 1.5 m wide from it. It can even be ordinary roofing felt, the joints of which are carefully coated with bitumen. After hardening, Penoplex slabs are laid on top, the joints are coated with acrylic glue or filled with polyurethane foam.
When the insulation layer is laid on the ground, you can build a blind area on top. To do this, a concrete screed is poured at a slope from the foundation of the house to drain waste and storm water away from it.
The base of the house, on which Penoplex is also attached, must be decorated with stone, clinker tiles or any other method.
Remember - a high-quality protected foundation is the foundation of your home. Do waterproofing and thermal insulation on time, and you won’t have to regret it, and you won’t remember about major foundation repairs for a long time. Penoplex is an excellent technological material that is very convenient to use for foundation insulation, it is easy to install and does not require special treatment. It is important to know only one thing - extruded polystyrene foam is destroyed by contact with acetone, benzene, alcohol and other organic solvents.
Foundation insulation with Penoplex: video
Insulating the foundation using polystyrene foam
Polystyrene foam is not capable of collapsing when in contact with asphalt or paving slabs.
Among the many insulation materials for foundations, including mineral wool, glass wool and expanded clay, the most suitable material should be noted - polystyrene foam. Due to its ability to maintain its functions in any climatic conditions, the product has gained incredible popularity among builders.
The characteristics of polystyrene foam are reliability, low cost and ease of use. In addition, its main component is air, which itself has excellent thermal insulation properties.
Foam plastic for foundation insulation has the following properties:
- stability when interacting with asphalt and concrete;
- resistance to water and fire;
- ability to retain heat;
- resistance to temperature fluctuations;
- maintaining shape and volume when exposed to external factors.
A significant disadvantage of polystyrene foam is fragility. To prevent the formation of various defects on it, the surface should be treated with glue.
Polystyrene foam is recommended for insulation of foundations built on clay soil. In addition, it is an excellent insulation option designed for underground use. This is due to its good moisture resistance and resistance to sudden temperature changes.
Types of foam plastic for insulating the foundations of houses:
- press - plate, foam thickness - from two centimeters;
- tiled polystyrene foam, parameters – 1*1*0.05 m;
- polyurethane foam (liquid);
Most often, foam is used for insulation. The reason for this choice is its size, which has a beneficial effect on installation and finishing procedures.
Getting to know the material
The name of slab extruded polystyrene foam comes from the manufacturer. Currently, two equivalent names are accepted - “penoplex” and “penoplex”, obtained from the English transcription. The structure of the material is slabs of dense consistency, consisting of micropores filled with a gaseous mixture.
Depending on the purpose, mechanical and operational properties, Penoplex insulation is available in several versions:
Penoplex options
- Standard is a slab heat insulator with a wide range of applications from insulating utility networks to improving the thermal insulation of floors, walls, and foundations.
- Penoplex 35, which is also produced under the name penoplex foundation, is used for finishing strip and slab types of building foundations for both vertical and horizontal use.
- Penoplex 45 is the densest type of foamed polypropylene foam, which allows it to be used for insulating heavily loaded structures and structures, such as highways, railway tracks and even airfield runways.
Due to its homogeneity and density, the material is well suited to mechanical processing methods such as sawing and drilling. Professionals recommend cutting foam boards at medium speeds to avoid melting of the insulation and sticking to the cutting parts of the tools.
Depending on the conditions in the construction area and the required indicators, the dimensions, density and thickness of the penoplex for insulating the foundation must be correctly selected. The slabs generally have standard parameters: width - 600 mm, length 1200 mm. The thickness of the material varies from 2 to 10 cm in increments of 1 cm. Naturally, upward changes in certain indicators also affect the cost of the material.
Foundation insulation process
Selection of slab thickness
Today, slabs of material of various thicknesses are available for sale, this figure ranges from 3 to 12 cm. To decide which option is best for you, you should consider some factors, including:
- purpose of the basement, if any;
- the material from which the foundation and basement are made;
- thickness of the basement walls;
- the prevailing climate of the area in which the building is located.
For example, if a house is built in the middle zone and has a basement, then it is best to use extruded polystyrene foam about 5 cm thick for insulation. In the case where it is planned to create a sauna or living area in the basement, it is better to give preference to slabs 10 cm thick. I should also add that the corners of the building freeze the most, so in these places the foundation needs to be insulated with a thicker layer of material.
Work process
Insulating the foundation with polystyrene foam from the outside consists of the following steps:
- The first step is to dig a foundation around the entire perimeter of the house. The depth of the trench should reach the lowest point of the base, and the width of the hole should be such that it is convenient to work in it.
- Adhered soil, fragments of building materials and other debris should be removed from the surface cleared of soil. It is desirable that the wall be as flat as possible. If there are overly noticeable protrusions or depressions on it, they need to be eliminated.
- The next step is to waterproof the foundation. It can be made from coating, roll or sprayed products - the option depends on your desire and budget.
- Determine the depth of soil freezing. If the lowest point of the foundation is below this indicator, then the distance from the base to the freezing line of the soil will need to be filled with sand. It is not necessary to insulate the wall in this place, but waterproofing will have to be done.
- After the foundation is protected from moisture, you can begin installing polystyrene foam boards. It is best to secure the elements using adhesive mixtures. As mentioned earlier, the use of compositions based on organic solvents and hot mastics is strictly contraindicated, since they damage the material and reduce its thermal insulation properties.
- The glue should be applied to the sheet of polystyrene foam pointwise. One fragment measuring 1x0.5 m will need to be smeared in 6-7 places.
- After applying the composition, the insulation must be pressed against the wall surface and held in this position for 30-60 seconds.
- It is best to start insulating the base from any lower corner, moving along the structure. If you plan to cover the foundation with several layers of material, then the second layer should overlap the previous one in a checkerboard pattern. This way you will close the joints of the first level of slabs and improve thermal insulation.
- The corners of the building should be insulated more carefully, because it is through them that the most cold enters the room. The layer of polystyrene foam in these problem areas should be somewhat thicker, so it is recommended to stick an additional piece of insulation on each side of the corner.
- The outer side of expanded polystyrene, as a rule, does not require additional treatment, unless the foundation protrudes above ground level. After the process of insulating the base is completed, the trench around the building must be filled with sand and earth. It is better to add soil in layers, gradually compacting it.
- If, in addition to the foundation, you are also insulating the basement floor, then it is better to fix the material using special plastic umbrella dowels - they will hold the slabs more securely than glue.
Insulation of the foundation with polystyrene foam, video:
How to insulate the foundation of a wooden house
Many owners of wooden houses believe that to ensure favorable living conditions it is enough to insulate the walls and floors. However, this is not true, because serious heat loss can occur through a wooden floor - up to 20%. Therefore, thermal insulation of the foundation is mandatory, especially if the house is located in an area with harsh weather conditions.
Insulating the foundation of a wooden house from the outside will not only create favorable conditions indoors, but also prevent adverse effects on it. For this purpose, polystyrene foam and its varieties, as well as expanded clay, are usually used.
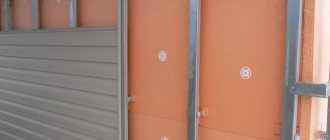
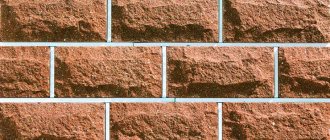
Stone finishing
Insulation of the foundation of PPS or EPS
Expanded polystyrene has excellent consumer properties, such as low thermal conductivity and moisture absorption, resistance to negative weather conditions, affordable cost, ease of installation, etc.
These and other characteristics have made this material one of the most relevant and in high demand among many consumers.
To insulate only the above-ground part of the foundation or plinth, a fairly simple installation is required. PPS sheets are simply attached to the surface using glue or special fasteners.
After this, cladding or plastering is performed. However, you should know that installing insulation does not mean complete waterproofing, so it should be carried out separately to avoid groundwater from penetrating under the floor.
At the summer cottage
In this case, it is necessary to completely waterproof the walls. For this purpose, a trench is dug around the wooden house, then the foundation is cleared of soil and debris. Next, EPS panels are attached to the surface, after which the whole thing is backfilled and compacted.
The insulated base can additionally be finished with brick or other types of cladding that can withstand adverse weather conditions.
Foundation insulation with expanded clay
Often a wooden house is insulated from the outside with expanded clay. However, it has increased moisture absorption.
To avoid the negative effects of this phenomenon, a trench is dug around the house and formwork with waterproofing is installed, after which the expanded clay itself is filled.
Blind area
This method is no less effective, but requires special attention and the need to adhere to all installation rules.
What you need to know about foundation insulation
Carrying out such work will allow you to achieve the following results:
- ensuring a comfortable stay in the room;
- reducing building heating costs;
- protecting the soil around the base of the house from swelling and freezing and, as a result, protecting the foundation and the building itself from destruction;
- creating comfortable conditions in the basement of the house, thanks to which the room can be landscaped and used for various purposes.
You should know that the material for insulating the foundation must have certain properties. Among the main requirements are the following:
- Low thermal conductivity, which will allow you to maintain an acceptable temperature in the room.
- Waterproof. If a material absorbs a lot of water, its thermal insulation properties deteriorate. In addition, moisture turns into ice in winter, which leads to damage to the insulation, its deformation and destruction.
- High strength. Since the material is used to insulate the part of the house that is underground, it will constantly be subject to soil pressure.
Features of installing insulation on the foundation
As a rule, the foundation needs insulation in the same way as the walls. Various methods of insulating the base of a building with penoplex are used.
- Vertical method.
Along the entire foundation there is a lower level for laying insulation.
The slab is covered with adhesive and pressed in the right place.
The entire foundation is covered with insulation using the same method. An exception may be places that are in the ground. The slabs in this place are pressed tightly against the foundation with soil.
- Horizontal method.
In this way, the foundation from below is protected from freezing. The work is carried out at the initial stage of construction, when the foundation is just being laid.
The slabs are tightly placed on the concrete base of the formwork.
Waterproofing is laid on the insulation, and then the foundation is poured and reinforced.
After removing the formwork, the sides of the foundation are insulated.
- Thermal protection around the house.
In this case, the foundation and the surrounding area are simultaneously insulated.
First of all, the foundation is insulated vertically.
Then formwork is made around the foundations with an indentation of 100 mm, and the blind area is prepared.
Insulation is laid in a dense layer on the compacted surface between the foundation and the formwork.
A waterproofing film is installed on top of the insulation, overlapping the foundation, after which the formwork is filled with concrete.
Is it possible to insulate the foundation with polystyrene foam?
Expanded polystyrene and polystyrene foam are synthetic heat-insulating materials, almost entirely consisting of air bubbles, which explains their extremely low thermal conductivity. Insulating the foundation with polystyrene foam is beneficial in many ways:
- low cost in comparison with analogues;
- low degree of water absorption;
- very wide operating temperature range;
- low density;
- availability of technology for insulating foundations with their help.
The disadvantages include only some fire hazard and modest mechanical strength
However, in practice they can be ignored, since the risk of fire on the outside of the foundation is extremely small, and it is very difficult to mechanically damage the material covered with decorative finishing or soil
Meanwhile, polystyrene foam and polystyrene foam have slight differences in characteristics:
- expanded polystyrene has one and a half to two times lower thermal conductivity;
- polystyrene foam is several times stronger than polystyrene foam when compressed;
- expanded polystyrene is somewhat heavier than polystyrene foam and has the property of vapor permeability;
The need for thermal insulation of the foundation
Insulating the foundation of a basement
Insulating the foundation of a private house with polystyrene foam from the outside is mandatory. This also applies to other buildings, especially those containing a basement. To achieve high-quality results in installing thermal insulation, many use foam plastic.
A poorly insulated building loses up to 50 percent of heat through holes in the insulating coating, causing additional economic costs for heating. A fatal mistake when installing house insulation is neglecting the thermal protection of the foundation, believing that it will be enough to just finish the walls of the structure.
Good thermal insulation of the base is characterized by two functions:
- minimizing heat consumption;
- Preservation of the foundation from freezing and deformation.
The fact is that the predominant type of soil in our country is heaving. Due to the effects of cold, the depth of soil freezing can be several meters. During a thaw, the volume of soil changes, which in turn negatively affects the structure of the foundation of the house.
Before starting installation work, it is necessary to take into account that the installation of the thermal insulation coating must be complete. The presence of any cracks, defects and parts in the insulation layer has a detrimental effect on the building’s ability to maintain a temperature suitable for comfortable living. Only a dense air layer containing an insulation ball can completely contain the loss of warm air.
Installation of EPS
When the waterproofing is finished and the bitumen has finally cooled down, insulation of the foundation with polystyrene foam proceeds to the main stage. The thickness of the insulation is determined in accordance with the parameters of the foundation and the climatic characteristics of the region. For example, if the winter in the area where you live is harsh and long, it would be reasonable to lay the thermal insulation in two layers, five centimeters each.
Foundation insulation with extruded polystyrene foam
Expanded polystyrene sheets are available both corrugated and smooth. To ensure optimal adhesion to glue, the former are better suited. But if you nevertheless purchased smooth slabs, immediately before installation, treat them with a needle roller.
How to attach?
Fastening polystyrene foam below ground level requires the use of exclusively special glue that does not contain organic solvents. It is applied to the insulation with dotted strokes in the corners and in the center of the sheet. Then the insulation sheet should be firmly pressed against the foundation and held until the glue sets.
Under no circumstances should you fix the thermal insulation in the basement using dowels, as they will damage the moisture-resistant layer. Above ground, the sheets are attached to the wall with hardware three days after installation, when the glue has completely dried. Each sheet contains approximately five dowels, which are driven into holes drilled through the insulating material.
How to lay it?
EPS sheets should be laid from the corner of the house, checking the correct installation using a level. At the corners, it would be better to lay the material in two layers, with a meter extending in each direction from the corner. The slabs are mounted to each other using a connecting locking system at the edges. If there are gaps between the sheets, they are sealed with polyurethane foam sealant.
Thermal insulation protection
Thermal insulation must be protected from rodents and unexpected ground movements. There are two main protective technologies: using geotextiles and roofing felt or reinforced fiberglass mesh. The cost of the glue on which the mesh is attached is quite impressive, so it is permissible to use cement mortar instead.
Backfilling the trench
The trench dug around the perimeter of the house, after completing the insulation work, should be filled in only when all the materials are dry, including the cladding of the basement floor.
This process occurs in several stages:
- the bottom of the trench is covered with a layer of sand up to 150 mm thick;
- the sand should be moistened, leveled and compacted well;
- Expanded clay or gravel is laid on top of the sand layer, the layer thickness is from 200 to 300 mm;
- the excavated soil is poured on top of the gravel cushion and compacted very carefully;
- The trench should not be completely buried; approximately 300 mm should remain to the ground level for the blind area.
Finishing
Contact of insulation with open ground can lead to loss of consumer properties. To prevent this from happening, all surfaces are treated with plaster. An alternative is several layers of acrylic-based glue.
A fiberglass mesh for reinforcement is first attached to both the foundation and the plinth using a construction stapler. At the junction of the sheets there is an overlap of at least 10-15 cm.
Once the plaster or glue is completely dry, backfill the trench. For additional thermal insulation, replace part of the soil with expanded clay. Important: leave at least 30 cm to the surface for arranging the blind area.