Recommendations for planning a veranda
A cozy and beautiful veranda will decorate any home. Unfortunately, most people do not think about it when creating a project plan for their future home, so they have to build on it in the future.
Construction begins with design. The project plan is created by qualified specialists, everything is thought out to the smallest detail: the dimensions of the building, construction materials, design, shape, communications. Without experience in this field, it is not recommended to design on your own. It’s better to trust specialists who will accurately calculate everything and put it on paper. This will save free time and unexpected costs during construction.
How to properly attach a veranda to a private country house with your own hands
It is possible to add a veranda to a private house with your own hands. To do everything correctly, you need to take into account its type, material of manufacture, select a suitable foundation, create a project and collect all the necessary documentation.
Glazed extensions are made from various materials: wood, brick, even plastic.
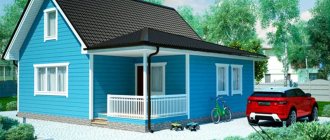
Adding a veranda to a wooden house is the easiest thing to do. This type of material is environmentally friendly and allows you to perform any design experiments.
A veranda attached to a house made of timber is divided into several types:
- façade – located along the façade;
- end - attached to the end of the building.
- corner - located on the corner.
During construction, it is necessary to take into account the size of the house itself, and when choosing the dimensions of the veranda, also take this into account.
Additional Information! If polycarbonate is used in the construction of the veranda, you should do the following: take the length of the slope equal to the length of the sheet. This way costs will be reduced.
Types of attached verandas
According to location, the veranda can be:
- Angular.
- Tortsevoy.
- Facade.
By degree of closure:
- Open. This option is suitable for use in the warm season.
- Closed. Used all year round as additional living space.
According to the design features, the veranda can be:
- Built-in (has a common foundation with the house);
- Attached (has its own base).
The shapes of such extensions are: oval, rectangular, square, polygonal or round. In other words, owners have ample opportunities to make the design of their home exclusive and original. The simplest solution would be to attach a rectangular or square building. A rounded or curved design is more difficult to implement.
Attention: if the house is built of brick, it is also recommended to make the veranda from this building material. Sometimes architects allow a combination of different materials that harmonize and combine with each other.
It is advisable to attach the veranda so that it covers the front door to the house. But architects also allow other options, when this part of the house is completely unconnected with the main entrance. Its dimensions are calculated individually. For a family of 4-6 people, an extension measuring 3 by 4 meters is sufficient. As for the appearance, for large two-story houses it is worth making a spacious room, and for small houses you should add a veranda the width of the entire wall of the house. It will look aesthetically pleasing and noble.
Attention: the extension to the house, no matter what materials it is made from, will need to be legalized. Otherwise, you may have problems when selling or re-registering your home.
Do I need permission?
The addition of a wooden veranda to a brick house refers to the reconstruction of the house and requires official registration. As a rule, this procedure takes 2-3 months.
To obtain permission to build a veranda, you need the following documents:
- a document confirming that you are the owner of the site,
- house design with a wooden veranda,
- written consent of all residents registered in the house,
- statement.
This package must be provided to the architecture department.
If the veranda is built without permission, problems will arise when selling, renting or inheriting the house.
Preparation for construction
The construction of a veranda begins with the preparation of the construction site. To achieve this, the following work is carried out:
- The visor above the front door is removed.
- The porch is being dismantled.
- The area is cleared of bushes and debris.
- The top layer of soil is removed.
- The location of building materials is being considered.
Construction site marking
Construction begins with marking the site. All work is carried out in the following sequence:
- The top layer of soil up to 15 cm is removed along the perimeter of the construction site.
- The ground is leveled.
- Marking in progress. Pegs are driven in at the corners along the entire perimeter and a rope is pulled over them. The foundation will be laid according to this marking.
Making the foundation
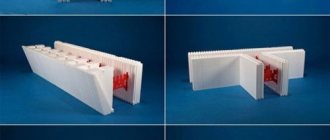
To build a light wooden veranda, it is enough to make a strip or columnar foundation. Its depth should be equal to the depth of the foundation of the house. For brick structures, a monolithic base is laid.
Important: when choosing a foundation, it is necessary to take into account the type of soil and the total weight of the building. If the soil on which the house is located is heaving and the veranda is built of brick, it is better to choose a strip base. And for light wooden structures you can make a columnar foundation.
Tape base
A strip foundation is perfect for building an extension from different blocks or bricks. Its thickness should correspond to the thickness of the foundation of the main building. The process of laying a strip foundation is as follows:
- A trench is made along the perimeter of the building.
- The bottom and walls of the trench are leveled.
- Formwork made of boards is being installed.
- A cushion of sand and gravel, 10 cm thick, is placed on the bottom and compacted.
- A reinforcing mesh is made to obtain a more durable base.
- It's all filled with concrete.
- The foundation is drawn up until completely dry for 3-4 weeks.
Columnar base
For a veranda made of wood or polycarbonate, a columnar foundation is perfect. It fits in the following sequence:
- Holes for posts are dug in 4 corners. Their depth should vary between 80-110 cm.
- The bottom of the pits is filled with sand, 20 cm high.
- All this is being compacted.
- Next, concrete is poured.
- The base is expected to dry completely.
- Concrete supports are coated with bitumen.
- The gaps between the ground and the supports are filled with sand.
- The ground part of the pillars is built from brick. Its height should be equal to the height of the base of the house.
That's the whole simple process of laying the foundation, which you can do on your own.
Types of terraces
Terraces are divided into the following types:
- Attached - built together with the main house. A foundation is needed, supports and connection to the building are desirable.
- Freestanding - installation takes place on a concrete base. The materials used are wood, stone or brick.
- Envelope around the perimeter - a high quality foundation and connection to the building are required.
- Wooden - construction is possible without a foundation, its weight is very small, and is optimally combined with wooden buildings.
- Brick or stone - expensive, long installation, does not require special care, is strong and durable.
- Open – looks like a platform without walls and roof. The flooring must be resistant to water and sunlight.
- Semi-open - in addition to the frame, there is also a roof that serves as protection from precipitation. There are no windows, but there are supports, which may look like a pillar, and a frame.
- Closed - has a roof, walls and windows.
- Covered - has a canopy and supports made of metal, with the help of which the roof is supported.
- With fences - made of the same material as the main structure.
In a simple folk or rustic style, you need to focus on rough materials, using stone and wood for construction.
Each type has its own finish. The choice of construction depends on the preferences of the home owners. But initially you should think through and weigh everything.
If the exterior of the house is made in high-tech style, then the veranda must be made equally high-tech: with large frameless windows.
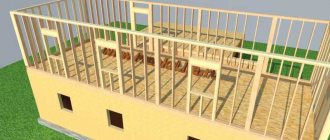
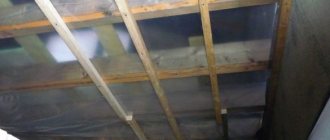
Arrangement of the subfloor
After the foundation has been erected, it is necessary to begin arranging the subfloor. To do this, the support is covered with a double layer of roofing material. Floors can be made of concrete or wood. For a frame building, it would be appropriate to build floors made of wood, but for a brick building, concrete floors are most often made.
The structure of a rough wooden floor looks like this:
- The beam is fixed to the foundation using suitable fasteners.
- Next, wooden logs are attached.
- The free space between the joists is filled with expanded clay.
- Flooring is made from unedged boards, which is attached to the joists with self-tapping screws.
Concrete screed is carried out as follows:
- The prepared base is covered with sand in a layer of 10 cm.
- The same layer of expanded clay is poured on top.
- Reinforced mesh is laid.
- Concrete is poured.
Attention: concrete floors on the veranda must be at least 30-50 cm thick. When working, it is necessary to use a laser level to obtain the most even surface possible.
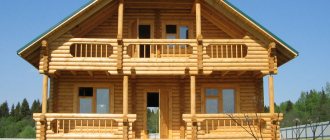
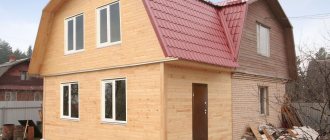
Construction of a wooden veranda
Wood is widely used in the construction of houses, as it has many advantages: durability, ease of use, high technical characteristics, and reasonable cost. You can build a frame wooden veranda on your own if you stock up on the necessary tools and have a little experience in construction.
Basic properties of materials
Natural wood is environmentally friendly, has good breathability, and is lightweight. You can build a veranda from solid wood of any shape, design and size. Modern architects offer quite interesting and original solutions that can highlight the impeccable taste of home owners and make their estates real masterpieces of art.
The only drawback of wood is its fire hazard. But thanks to pre-treatment with various compounds, this problem can be easily and simply dealt with. Also, when using wood, it is recommended to pre-treat the material with antiseptics to prevent rotting of the material.
Necessary materials
To build a wooden room, you need to prepare:
- Lumber (timbers, boards, slats).
- Fastening elements.
- Protective compounds for wood.
- Crushed stone, concrete and sand.
- Ruberoid, bitumen or drying oil.
- Windows and doors.
- Roofing materials.
Construction order
To build the frame of the veranda, high-quality timber with a section of 10 by 10 cm is used. After the bottom frame and subfloor, you can begin to build the walls:
- Grooves are cut into the beam of the lower trim into which vertical supports are installed.
- Next, vertical posts are mounted and secured with self-tapping screws or nails.
- After this, the upper trim beam is mounted.
- After creating the top trim, we proceed to laying the rafters for the roof. To install the rafters, a beam with a section of 10 by 20 cm is used.
- Next, the frame is sheathed. The internal cladding is done with clapboard, and siding is used for the external cladding. Hydro- and vapor barrier is laid between the inner and outer cladding. At this stage, insulation is laid, which is fixed with transverse slats.
- The last stage is finishing.
Project development
It is important to correctly position the wooden veranda attached to a brick house. It should not be in direct sunlight and in constant shade, so it is better to place it on the east or west side of the house, although in regions with cold climates it can also be built along a wall facing south. The shape of the extension can be semicircular, rectangular, polygonal.
The size of the wooden extension should be proportional to the dimensions of the house. Usually it is made along the entire wall, and its width is from 2.5 to 7 m. You can make a wooden veranda along two adjacent walls.
You also need to consider the entrance. It can be either from the street or from the house; you can make a through passage from the street to the house through the veranda.
Advice! It is better not to place the doors opposite each other, otherwise there will be drafts.
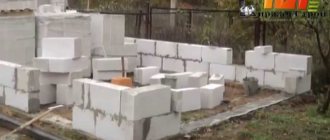
Brick verandas
You can also make a veranda out of brick. This option is suitable for concrete and brick houses. This material has excellent technical characteristics:
- Fire safety.
- High heat and sound insulation qualities.
- Long service life.
Buildings made of brick are always cool in the hot season and warm in winter. Such a veranda will be unpretentious in maintenance. Its only drawback is its heavy weight and long installation time. To build a brick extension, you will need to make a solid monolithic foundation.
Construction order
After laying the foundation and pouring the concrete screed, it is necessary to begin pushing out the walls. First you need to decide on the type of masonry. The most popular options are:
- Spoon masonry, the thickness of its walls is 12 cm.
- Tychkovaya, wall thickness - 25 cm.
- Chain, wall thickness - 38 cm.
The process of forcing brick walls looks like this:
- A cord is attached to the opposite ends of the foundation along the edges of the base.
- Corner bricks are placed along the cord. The space between the corners is filled with brickwork. The building elements are fastened with ordinary cement mortar.
- The first row of masonry is checked with a laser level, all subsequent rows are laid out in the same way.
- After laying the last brick row, a reinforced belt is installed. Formwork with a height of 7 cm is fixed on the upper surface of the walls. Anchor bolts are placed in the corners, reinforcement is laid, and all this is filled with concrete.
- After the concrete has completely hardened, a frame is made of timber with a section of 100 by 100 mm.
- Next, we set up the rafter system.
Attention: if the veranda will be used as a living space in the winter, it is recommended to lay it in two rows.
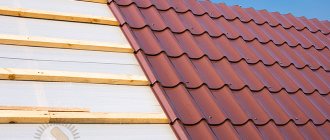
We are building a roof
The construction of the roof is the final stage of construction. By design, the following types of roofs are distinguished:
- Single-pitch.
- Gable.
The pitched roof is considered the most common. It is characterized by ease of installation and operation, favorable cost, and low consumption of building materials. The rafter system with such a roof is mounted at an angle, which is good for the drainage of precipitation.
A gable roof is most often built over a terrace. It is also distinguished by its aesthetic appearance, practicality and ease of use.
As roofing materials, it is recommended to pay attention to metal tiles, onlulin, and soft tiles.
Important: the roofing material of the veranda must be the same as the house or match it.
In modern construction, transparent roofs are often made of polycarbonate or glass. They visually increase the free space and make the extension bright and cozy.
What are the differences between verandas and terraces attached to a house?
The terrace and veranda are different from each other. The first is always located outside the main building. The second one looks like a small building with a roof. But they have one thing in common - both are additional buildings.
The veranda has all the same functional parts as a residential building: doors, windows, walls, roof, even its own foundation.
The location of the terrace is on an elevated area and has a fence. Simply put, it is an open area located on the street. The veranda and the main house share a common foundation. It can be attached in addition to the structure or together with it.
An “open veranda” is a terrace, and nothing else.
Interior arrangement of the veranda
The last final stage is the interior arrangement of the room. When creating its design, the general wishes of the owners, the size of the extension, and the general style of the house are taken into account. With the right approach, this part of the house can be made as comfortable and cozy as possible. As finishing materials, preference should be given to wear-resistant materials. If the room will be heated, you can paste wallpaper on the walls, paint them or cover them with wall panels.
Laminate, linoleum, parquet boards are laid on the floor. When arranging furniture, it is not recommended to clutter up the free space. It is better to place it near blank walls. It is practical to use folding furniture in such rooms - it will help save free space.
In conclusion, I would like to note that an attached veranda can give owners additional living space. Here you can organize a wonderful recreation area. By decorating the windows with beautiful plants, you will turn the extension into a beautiful and cozy part of your home.