A cellar is an underground room for storing gardening supplies and various household preparations. The air humidity in it is always high due to soil moisture and the “breathing” of vegetables. Effective ventilation in the cellar will help to avoid constant dampness, which is fraught with the appearance of rot on the fruits and mold on the walls, and therefore preserve not only the harvest, but also building structures.
Types of cellars
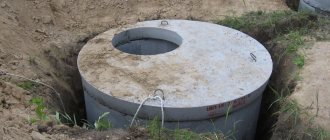
The storage room can simply be a hole in the ground with an insulated roof and a hatch. But more often it is built of brick or concrete. This is a more expensive option, but durable, easy to maintain, clean and disinfect.
Depending on the depth of the cellar, there are:
- earthen, located entirely in the ground;
- semi-buried - with a superstructure over the pit;
- aboveground - located completely above the soil level.
The laying depth is selected taking into account the height of groundwater. If the groundwater level is below 3 meters from ground level, an underground storage facility can be built. In other cases, preference is given to a partially buried or above-ground cellar. For any basement design, the groundwater level in the wettest season should be at least 50 cm.
It is important to insulate the cellar well and provide high-quality waterproofing. Equally important is to organize effective ventilation. In addition to moisture, dangerous gases accumulate underground - methane, radon, carbon dioxide in high concentrations, and without regular ventilation there is a risk to human health.
Installation of forced ventilation of a cellar with two pipes and one
As a rule, a forced air circulation system is installed in two cases. The first of these is the presence of a large storage area of over 40 m². The second option is a basement, which is used not for storing food, but as a gym, game room or other similar room.
In both cases, installing a forced ventilation system will not only ensure air flow and maintain the set temperature, but will also get rid of excess humidity and dampness. The last point is very important if sports or other expensive equipment is installed in the basement.
Automatic supply and exhaust ventilation device
Unlike natural, the forced ventilation system in the cellar is characterized by the following advantages:
- Air circulation does not depend on the temperature difference in the basement and outside.
- It is possible not only to cool, but also to heat the air in the room, as well as filter it.
- Using special devices, you can easily regulate the intensity of air circulation.
The disadvantages of this option include the need for regular maintenance, more complex installation compared to a natural system, as well as the high cost of components. In addition, the operation of the forced system depends on the availability of electrical power, which means that you will have to install additional wiring. And if there is a power outage, the system will stop functioning altogether.
Options for arranging a forced ventilation system
There are several types of forced air circulation systems in underground storage. The first of them involves the use of electric fans.
Helpful advice! If you decide to use fans, be sure to take care of protecting them from moisture and other adverse influences that affect equipment underground.
Ventilation grille to protect exhaust fans
When installing forced ventilation in the cellar, there can be two or one fans. One fan is mounted on the exhaust pipe on the storage side, and the air should be blown out with its help. Two fans are an option for large rooms. In this case, the second one is placed in the supply pipe and serves to pump air into the storage.
Fans can operate in several modes, so you can control the inflow and outflow of air and maintain the required temperature in the basement. The power supply can be supplied from the main electrical network if the basement is located under a residential building or garage, as well as from a separate electric generator.
If you are installing forced ventilation in a cellar under the house, then providing power to the fans will be easier than in a separate underground storage facility. In the latter case, the wiring and equipment must be additionally insulated from moisture.
The second version of the forced system involves the use of wind energy instead of electric energy. To do this, a special device is mounted on the exhaust pipe - a deflector, which catches air flows and transfers energy to the fans. It’s worth taking a closer look at the deflector.
Cellar ventilation system using deflectors
Premises requirements
To keep the cellar warm, dry and safe, you must comply with certain requirements for the following parameters:
- location - you cannot build a cellar in a low-lying area, next to a compost heap, a well, a barn where animals are raised, fuels and lubricants or toxic substances are stored;
- depth - the bottom of the pit should rise 0.5 m from the groundwater level;
- thermal insulation - if the cellar is earthen, a thick layer of earth plays the role of insulation, expanded clay, foam plastic, a mixture of clay with sawdust, slag, etc. are also used;
- air exchange - provided by supply and exhaust ventilation, designed to replace the entire volume of air over a certain period of time;
- area - calculated based on the amount of stored stocks, taking into account their layout on shelves, racks, containers;
- layout - the pit can be of any shape, the optimal height of the room is 1.8-2.2 m, the entrance is equipped with an insulated hatch or door, and a strong, stable staircase.
All materials for constructing a cellar must be moisture-resistant and safe, and not emit harmful substances. Wooden parts are treated against rotting, metal parts - against corrosion.
How to determine pipe diameter
The decisive aspect for the effective operation of the hood is the diameter of the pipes, corresponding to the volume of air space in the room where it is installed. Therefore, it is so important to correctly calculate the required cross-section, which, in general, is not difficult to do on your own. When making calculations, experts recommend adhering to the following algorithm:
- It has been established that per 1 m2 of cellar area there should be 25 cm2 of channel cross-section. It turns out that a room with an area of 10 m2 will require an air duct cross-section equal to the product 10 × 25 = 250 cm2.
- Then we take the formula for a circular cross-section (the air duct has a round shape) S = nR2, according to which the radius of the ventilation channel is calculated. Here it will be 250: 3.14 = 79.6 cm2, we extract the numerical value from the square root, we get 8.9 cm. Therefore, the diameter of the pipe will be equal to 17.8 cm.
- To reach the standard size, we find out the cross section from the table, equal to 16 cm. In order to calculate another area in the cellar, the calculation method will be similar.
The above calculation scheme is very simplified, since it does not take into account air circulation in the basement. For a more accurate calculation, you need to take into account that the air exchange in the basement should be approximately 2 times per hour.
Materials for ventilation in the cellar
Air ducts operate in fairly aggressive conditions - high humidity, large temperature fluctuations. Therefore, when choosing materials, you need to pay attention to resistance to moisture, frost and corrosion.
To organize the ventilation system, air ducts made of stainless or galvanized steel, frost-resistant plastic, asbestos cement, and boards are used. The cross section is selected during the calculation.
To avoid freezing of pipes, it is recommended to insulate them. Foil mats, Penofol, as well as shells in the form of cylinders made of foamed polymers or glass wool with an outer lining with foil are used as thermal insulation. There are ready-made, already insulated air ducts on sale, but they are more often used at large facilities.
The principle of operation of natural hood
The functioning of the air circulation system is based on the laws of physics. The difference in temperature outside and inside the house constantly causes the movement of air masses. The cold air coming from the supply pipe is heavier in specific gravity, and, accordingly, being at the bottom, it gradually displaces warm, lighter air.
An important point when installing a cellar hood with your own hands is the selection of the optimal pipe diameter. Because with a large cross section there is a risk of decreased humidity and, accordingly, lethargy of vegetables. If the diameter is selected insufficiently, then dampness and rotting of vegetables may form in the cellar.
How ventilation works
The microclimate in a room is determined by 3 parameters - air temperature, humidity and mobility. Insufficient ventilation leads to stagnation with all the ensuing consequences. But excessive air exchange is also unfavorable, during which most of the heat is released into the atmosphere, which causes freezing of the room and spoilage of supplies.
Air circulation diagram in the cellar
Ventilation is the replacement of treated air with clean air. There are no gaps in the cellar for natural air exchange. Therefore, a system of supply and exhaust channels is organized, creating the necessary draft, due to which air masses circulate.
According to the method of stimulation, ventilation can be:
- natural - air moves due to the pressure difference between the supply and exhaust ducts, located at different heights;
- forced - to stimulate movement, fans are used that are installed in pipes, often in exhaust pipes;
- combined - if natural ventilation is not enough and you need to quickly dry the room, forced ventilation devices are turned on.
In private cellars, a natural or combined system is often installed as the most economical means of ventilation.
Ventilation control
In order to properly make ventilation in the cellar, you need to remember a few terms from physics.
Important Concepts
- Absolute humidity is the weight of water vapor in a cube of air. It does not change when the temperature decreases.
- Relative humidity is the percentage of the actual amount of water to the maximum possible. Changes when air cools.
- Dew point is the temperature below which water vapor begins to condense.
Hot air can absorb a lot of moisture. Released when passing through the dew point. It can be calculated using an online calculator.
Practical value: the dew point at 23°C and 70% relative humidity is 17.2°C. This makes the air outside seem dry. We decide to ventilate the cellar. Let's let this air in.
If the indoor temperature is below 17.2°C, the warm outside air will be dehumidified. The moisture released by it will increase the humidity in the room to 100%, and condensation will appear. This is the main mistake when operating underground storage facilities.
For reference: the maximum moisture content in the air at 23 degrees is 23.1 g, at 0 – 5.2 g/m3.
Practical advice
Natural ventilation works best in the cold season. Actually, that’s what the cellar is for. To reduce temperature and humidity, air access is provided on cold autumn nights.
Therefore, in the summer they dry it with substances that absorb moisture: they bring in boxes with coarse salt, ash, sawdust, quicklime, and charcoal. If it is necessary to quickly drain the cellar, buckets of hot coals are brought into it to increase air circulation.
After this, they go inside with a burning candle: if it goes out, you can’t go further, because the concentration of CO2, carbon dioxide, is high and poses a threat to life. You should go in with a candle even when the storage area with the stored vegetables has not been visited for a long time.
Visible moisture is collected with a dry cloth. Condensation and drips can be removed from the ceiling using galvanized metal umbrellas and plastic film. They are installed so that the water flows into the container provided for this purpose.
Adjusting the air flow at different times of the year is necessary. In summer, air exchange in the cellar is stopped.
In winter, during severe frosts - in order to avoid negative temperatures in the cellar - the inflow is blocked by 2/3 or stopped completely. If there are vegetables under the inlet pipe entrance, they should be moved.
Kurzhak - a plug of frost that forms on the exhaust pipe is periodically removed. To do this, in warm weather, a wire with a hook at the end is hung on the pipe. Diameter 6 – 10 mm, length from 1 m. Place a container inside the pipe to collect snow, and use a hook to clean the inner surface.
These worries can be avoided by making the above-ground part of the hood removable (to tap off frost), or by insulating it well.
Cellar under the house or in the garage: ventilation features
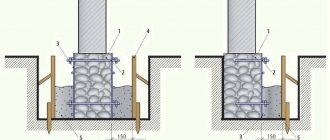
A free-standing basement does not pose a danger to surrounding buildings, but if the cellar is in a house or garage, precautions must be taken. Moreover, they concern not only the safety of the above-ground structures themselves, but also the supplies directly stored in the cellar.
A cellar in the house is convenient and practical. It is installed under non-residential premises and with maximum insulation to prevent the penetration of excess heat into the pit, and from there humid air into the house. It is not allowed to combine basement ventilation with home ventilation, only a separate riser.
Construction of a cellar under a residential building
The cellar in the garage requires double attention. Ventilation should solve the problem of not only removing air from the storage, but also sufficient air exchange in the room for the car. The interpenetration of gases can cause the accumulation of toxic substances in food products, and excessive humidity can cause accelerated rotting of the metal parts of the machine. Ventilation ducts should also not be combined to avoid air mixing.
Setting up a cellar in the garage
The supply pipe in basements should not be placed directly above the vegetables, as this will cause them to freeze in winter frosts. You can organize a primitive mixing chamber and place a small partition in the path of cold air so that it warms up and mixes with warm air.
Cellar under a residential building
Ventilation of a cellar under a private house or a separate one is different in that the room underneath will require powerful thermal insulation of the ceiling and entrance area. This is the only way to achieve minimum positive temperatures.
The exhaust pipe is led into a common ventilation duct with an exit above the ridge. In this case, the draft increases significantly: in summer, masses of incoming warm, humid air fill the room. Hence the ceiling damage and mold on the vegetables.
To avoid this, a damper on the hood, as well as its insulation, is mandatory. The street should be the only source of inflow.
Entering from a warm room is also undesirable - it is worth setting up a vestibule.
Natural ventilation systems
Air can move around the room and be replaced with fresh portions only if there is draft in the air duct. It occurs as a result of the difference in pressure and temperature between indoor and outdoor air. Accordingly, to ensure this, the room must have 2 channels - supply and exhaust. But in some cases, you can settle on a system with only one hood.
Single-pipe
This method of ventilation is used in small storage facilities if the flow of fresh air is possible through a leaky entrance hatch. Usually these are cellars under the house, located under the veranda, kitchen or other non-residential premises.
Since there is no need for external thermal insulation of the hatch, it can be made partially permeable. Air will enter through the gaps and exit through the exhaust pipe. But it is worth noting that a single-pipe system does not always eliminate stagnation. It can only be used on dry soils and where there is no likelihood of seasonal flooding.
Two-pipe
This is a more efficient system, since full circulation of gases is organized. But it only works in the following cases:
- the lower opening of the supply channel is located 50-70 cm from the basement floor, the upper one is as close to the ground as possible, but taking into account the height of the snow cover;
- the exhaust vent is located as close as possible to the ceiling of the cellar, and the top of the air duct is above the roof level;
- ventilation pipes are spaced at different ends of the room so that the flow captures as much air as possible;
- the sections of the system are selected correctly;
- there are protective covers on the pipes;
- cleaning, protection from ice, debris and rodents, and external insulation of pipes are carried out.
If at least one of these conditions is not met, ventilation in a cellar with two pipes may not cope with its task, and the air in the storage will constantly be polluted.
The supply pipe can be located outside, inside the room or in its walls. In the last 2 cases, there is no need for thermal insulation of the air duct, but if it is laid outside, it must be insulated. The external air duct should be located no further than 50 cm from the basement wall.
It is recommended to install dampers on the supply and exhaust pipes to be able to regulate the flow intensity (anywhere - bottom, top, middle). In severe frosts, the access of cold air can be completely closed.
Do-it-yourself cellar ventilation: diagram and work process
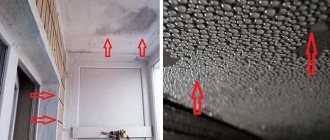
Not a single basement room can do without a ventilation system, since in the absence of a constant flow of fresh air, dampness cannot be avoided. In basements and cellars, not only canned supplies are usually stored, but also fresh vegetables and fruits, which “breathe”, causing moisture to accumulate in the room. In addition, the walls can absorb dampness from the soil located on the outside if the waterproofing of the foundation and basement was poorly done during construction.
DIY cellar ventilation
Do-it-yourself cellar ventilation is quite simple. Moreover, it is possible to install and organize the operation of this constant air exchange system not only at the construction stage, but also in a finished storage facility.
How the system works
The operation of the ventilation system is based on the laws of physics, and if you carefully examine its circuit diagram, you can see that its structure is very simple and understandable.
The general principle of ventilation is extremely simple
There are two ventilation holes in the cellar, through one of which fresh air enters the basement, and through the second it is exhausted along with all fumes. But the system would not be effective enough if pipes of a certain diameter were not connected to the ventilation holes.
Also, the quality of ventilation highly depends on the correct location of the exhaust and supply pipes and on their elevation above the ground surface above the cellar.
Ventilation pipes can be installed in the walls of the basement if it is located under a house or garage, or through the ceiling if the cellar is located in the yard as a separate building.
Another important point when calculating and installing the system is the height of installation of the pipes from the basement floor and their discharge to the street, since too much cold air may enter the room, which will be dangerous for vegetables stored fresh in chests. You cannot make the holes too small, since the musty air will not leave the room completely, which means that the products stored in it will definitely begin to deteriorate.
Recommendations for cellar ventilation
Before you begin installing any type of ventilation system, you need to familiarize yourself with some recommendations that must be taken into account during design and construction work:
- It would be correct if the ventilation system begins to be laid during the construction of the cellar - in this case, channels are left in the masonry walls into which ventilation pipes are installed.
Of course, the best option is to install a ventilation system during the construction of the cellar.
In order to avoid guessing later where it is better to install the pipes, ventilation must be immediately included in the cellar design.
- The installed pipes must have the same diameter - this parameter will make air circulation uniform. If it is necessary to speed up the removal of stagnant air saturated with dampness, the exhaust pipe can be taken with a slightly larger diameter than the supply pipe. However, under no circumstances should you install an exhaust pipe with a diameter smaller than that of the supply pipe, since under such conditions air may begin to linger inside the room. This will negatively affect the products stored in the cellar, but the main danger is still different - it creates a certain threat to human health when descending into a gas-filled underground room.
- Never place both ventilation pipes next to each other, since in this case the room will not be well ventilated. They must be mounted on opposite walls or in opposite corners. This is done so that the fresh flow, before going outside, passes through the entire room and pushes the stagnant air to exit into the exhaust pipe.
- The exhaust pipe opening must be mounted near the ceiling, since the warmer exhaust air rushes upward. This location will contribute to constant air purification, without stagnation in the ceiling area, and therefore to good preservation of food.
- To ensure good draft, the ventilation pipe of the hood rises above the ridge or embankment above the ceiling of the cellar, at least 1500 mm.
- For the ventilation system, plastic pipes intended for sewerage are most often used. For small rooms this diameter is usually sufficient.
- If the cellar is located under a garage or under another utility room, then the entrance hatch can be used as an exhaust vent.
In this case, two doors are made, one insulated for winter, and the other in the form of a frame, with a small grille attached to it. The grate is necessary to prevent small rodents from sneaking into the basement.
The insulated hatch is removed in the summer for constant ventilation of the cellar. If the room above the basement is insulated, then ventilation sessions can be carried out in winter.
Option - cellar in the basement under the house
- When installing ventilation in a cellar located under a house or garage, you need to ensure that there are as few bends and turns in both the supply and exhaust pipes as possible. Ideally, it is better to achieve such an arrangement that the pipe is absolutely straight.
- The pipe along its entire length must have the same diameter, without expansions or contractions.
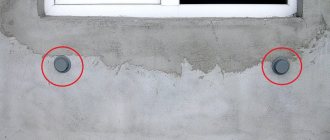
- On the street, the supply pipe, if it is located not high above the ground, must be covered with a mesh (grid) to protect the cellar from the penetration of rodents or other small animals and birds.
Supply pipe covered with a grill
- It is recommended to install dampers in both pipes that regulate the inflow and outflow of air, which are especially necessary in winter. They help control the flow of cold air in severe frosts and, accordingly, the outflow of warm air to maintain the necessary microclimate in the cellar.
Umbrella for the exhaust pipe head
- If the pipe heads are located strictly vertically, they must be protected from precipitation, dust and debris getting inside by installing a metal umbrella or deflector on top.
A deflector is more profitable, since it creates an artificial vacuum and increases thrust.
When using a deflector, a vacuum area is created around it, and this phenomenon helps to increase thrust.
- The section of the exhaust pipe located outdoors must be well insulated to avoid condensation during the cold season.
Types of cellar ventilation systems
There are two basic types of ventilation systems - natural and forced. And one or another option is chosen depending on the volume and layout of the basement.
Natural ventilation system
Natural ventilation is based on the difference in pressure and temperature indoors and outdoors. Effective operation largely depends on the correct location of the pipes. Thus, the supply opening should be located at a height of a maximum of 250 ÷ 300 mm from the floor, and the exhaust opening should be 100 ÷ 200 mm below the ceiling level. It is not permissible to place it even lower, otherwise the ceiling will begin to become damp.
This ventilation system may be clearly insufficient for a large cellar room, or if it consists of several rooms.
Video: Natural ventilation in the cellar under the garage
Forced ventilation system
The forced ventilation system has the same channels (pipes), but fans are built into them to create forced air movement.
In the simplest forced-type systems, the fan is installed in the exhaust duct. Thus, an artificial vacuum is created in the room, facilitating the active flow of fresh air into the cellar through the supply opening. The power of the selected fan will depend on the volume of the room.
Duct fan in casing
They do it differently - they install fans on both the supply and exhaust ducts. This can be true in voluminous, complexly configured basements. Here you will definitely need the help of a specialist to calculate the consistency of air intake and outlet, that is, the diameters of the channels and the power (performance) of the fans installed in them.
Video: example of homemade forced ventilation of a cellar
Calculation of ventilation duct diameters
For any type of ventilation, it is very important to correctly determine the diameters of the pipes. The calculation algorithms used by professional designers are very complex, and it makes no sense to present them in full. However, when installing ventilation in a small private cellar, you can use a simplified calculation method.
So, with some assumptions acceptable under these conditions, we can assume that for one square meter of cellar area, 26 square centimeters of cross-sectional area of the ventilation duct is required. So, as an example, you can estimate what pipe diameter will be needed for a cellar measuring 3 × 2 meters.
Finding the area of the room:
S = 3 × 2 = 6 m²
According to the indicated ratio, it will require a pipe with the following channel cross-sectional area:
T = 6 × 26 = 156 cm²
It remains to find the radius of the pipe:
R = √ (T / π) = √ (156 / 3.14) ≈ 7.05 cm
Therefore, the diameter of the supply pipe is:
Dп ≈ 14 cm = 140 mm.
Provided that only supply ventilation is installed in the basement, and the hatch will play the role of exhaust, then you can slightly increase the cross-section of the inlet channel by installing a pipe with a diameter of 150 mm.
To guarantee air exchange, it is customary to install a pipe on the exhaust duct with a diameter 10 ÷ 15% larger than at the inlet. In the example under consideration, you can install on the exhaust duct:
Dв = Dп + 15% = 140 + 21 ≈ 160 mm
Ventilation installation
Having carried out the necessary calculations, taking into account all the nuances described above, you can proceed to the installation of ventilation.
Approximate location of supply and exhaust pipes
- If the ventilation system is installed after the construction of the cellar, then a hole must be made in its ceiling for the air duct to pass through.
- Then, a pipe is lowered into the cellar through the hole, which will work for the hood; it is fixed under the ceiling, no more than 100 ÷ 150 mm below its surface.
- On the street, the exhaust pipe is raised to a height of at least 1500 mm above the ground or above the roof surface.
The supply pipe is always located below
- In the opposite corner of the cellar, a hole is also made in the ceiling or wall, and a supply pipe is installed and secured into it, which is lowered low to the floor. It should be located no lower than 200 mm from the floor and no higher than 500 mm.
- On the street, the supply pipe should not be made very high. If it comes out through the ceiling, it is enough to raise it by 200 ÷ 250 mm. It should be taken into account that the lower the intake opening of the supply pipe is located, the higher the difference in pressure at the inlet and outlet, the stronger the natural draft will be, and therefore the flow of air.
- If the supply pipe is discharged through the wall, then a ventilation grille or plastic deflector is placed on it.
Possible location of the supply pipe
- In the case when the installation of ventilation for the cellar is carried out in a house where a fireplace or stove is installed, it is recommended to raise the exhaust pipe next to the chimney, as this activates the removal of exhaust air from the basement due to the large temperature difference.
The dampers on the pipes will help you accurately regulate the ventilation process.
- It is recommended to install dampers on the pipes inside the cellar to regulate the strength of air flows. By opening them to the required light in the room, the intensity of circulation, humidity and air temperature are regulated. It is the presence of a damper and proper regulation of the microclimate in the cellar that will determine whether the workpieces will be kept in proper condition for a long time.
After the system is assembled, be sure to check it for normal traction.
- To check the air flow pressure at the inlet, you need to attach a piece of thin paper to the supply pipe. If it begins to clearly sway, it means that the air flow rate is good.
- Another way to check the operation of the system is to direct the smoke that may come from burning paper in a metal bucket. A couple of old newspapers will be enough, which needs to be lit, allowed to burn to half, and then extinguished until smoldering.
Additional actions to maintain a normal microclimate
To maintain a comfortable microclimate for storing food in the cellar, you should periodically carry out the following actions:
In order to help reduce humidity in the basement, it is necessary to ventilate it regularly. So, in the summer, all doors or hatches are opened and the dampers on the openings are fully opened. The hot summer wind will do its job - dry and ventilate the cellar. Other, more effective methods for forced drying of the cellar will be described below.
There are times when it is necessary, on the contrary, to increase the humidity in the storage room. Then, in the cellar, use a spray bottle to spray water, sprinkle the floor with wet sawdust, or install a box filled with wet sand. Sawdust and sand are moistened with water as needed.
Drying the cellar
The process of drying the cellar can also be classified as ventilation measures, so you should also have a sufficient understanding of them. Moreover, there are several ways to perform this procedure.
As mentioned above, all drying processes are carried out in the summer, but it is additionally recommended to perform them one more time immediately before storing vegetables in the cellar.
If the room is very damp, then all items of “basement furniture” and boxes (chests) for storing vegetables should be removed from it. It is advisable to dry them in direct sunlight - their ultraviolet component will be an excellent “cure” for mold and mildew.
All doors and hatches open wide, and if a fan is installed in the basement, then it can also be turned on. Thus, the cellar should be ventilated for 3 ÷ 5 days, and this will become a preliminary preparation before the main drying activities.
The first method is boxes with a hygroscopic substance
During the drying process, sometimes you can get by with a very simple method. A box filled with quicklime or coarse table salt is brought into the cellar. These components are inexpensive, highly hygroscopic and perfectly absorb moisture. Not only that, they also disinfect the air and walls of the room.
The second method is the old method with a candle.
A very old, popular, extremely simple and affordable way of drying is to install a burning candle near the exhaust pipe. It must be installed in an iron container and on a stable stand.
A simple and effective way to dry - using a candle
The candle helps create more intense draft in the exhaust pipe, so the air circulation in the room accelerates, and its exchange occurs much more often than with normal ventilation mode.
In addition to a candle, a regular alcohol lamp with liquid or dry fuel can be used for the same purpose.
It will work just as well using dry alcohol.
Drying in this way continues for several days, depending on how humid the room is. The candle or fuel in the burner is replaced several times as necessary until the desired result is obtained.
The third method is a metal brazier
A more troublesome, but no less reliable way to quickly dry it is to use an improvised roasting pan, which can be made from a metal container, for example, from an old bucket.
Drying scheme using a homemade roaster
Several holes are made in it to increase draft, and then firewood is loaded into the container, preferably birch, as they can create a favorable disinfectant smoke.
You can create a more complex structure using a cast iron grate, which is installed on bricks placed at its corners. A bucket without a bottom is placed on top of the grate, into which firewood is also placed and set on fire. The advantage of this method is that the grate can become red-hot and then slowly cool, releasing heat into the room. At the same time, draft increases and, accordingly, air exchange accelerates.
The fire must burn continuously for at least 12 ÷ 14 hours, so you need to set aside a whole day for these procedures and prepare quite a lot of birch firewood.
Raising the brazier to reload firewood and lowering it through the hatch using a cable with a hook. The place for such an improvised “fenced fire” must be prepared in advance so that no preconditions for a fire are created.
The fourth method is the use of electric heaters
The method using electric heaters is not too troublesome. Any of the commercially available devices will be suitable for this purpose, but it is best to use convector or “wind-blown” models.
Electric heaters can help with drying, but it will be quite expensive
The heater is installed in the middle of the cellar so that the heat is distributed evenly throughout the entire area of the room.
When using this method, you need to fully understand that such a drying process is quite long and, therefore, expensive, so you need to immediately calculate your financial capabilities.
Drying the cellar with a powerful heat generator is quite popular, as this method is very effective. It is even used to dry out the basements of houses that have survived a flood.
A heat gun will be more effective
Due to thermal radiation and the powerful flow created by the fan, the cellar dries out quickly enough. The device also runs on electricity, but such drying will be cheaper, as it will happen much faster. However, you can try to find a heat gun that also runs on propane.
Prices for popular models of electric heaters
Electric heaters
Fifth method - a regular home fan
Since fans are found in almost every home, they are also often used to remove excess moisture from the cellar. The fan is installed in the center of the cellar and turned on for three to five days. In this case, all existing openings, doors or hatches must be wide open.
The sixth method is a portable stove
Conventional potbelly stoves are also used for drying procedures in basements.
In this case, the chimney pipe of the stove is brought to the exhaust vent, and the potbelly stove is heated for three to five days. At the same time, air exchange in the cellar rapidly increases, which leads to effective drying of the room.
You can install a small potbelly stove in the cellar for drying time
If there is no exhaust pipe in the cellar, then this method does not make sense, since there will be a lot of smoke in the room, but the drying effect will be very small.
Waterproofing treatment of the cellar
After drying the cellar, in order to preserve the achieved state of the room for the longest possible time, it is recommended to cover the surfaces of the walls and floor with waterproofing compounds.
- If the walls are made of concrete, then deep penetration impregnation is used, which is used to treat the surfaces in several layers.
With each layer, it penetrates deep into the concrete slab, closing all the pores inside it, thus creating a waterproof but breathable surface.
- The dried cellar is also covered with roofing felt, which is an excellent waterproofing agent.
Waterproofing a basement floor with roofing felt
In this case, you can get the desired effect if the material is laid on a flat surface. Mastic is applied to it, which is then heated, and then roofing felt is glued to it, creating waterproof walls and floors.
- An excellent waterproofing environmentally friendly material is clay.
This method of waterproofing a room is called padding. The only requirement for natural material for flooring and walls is a high percentage of fat content.
Clay floor padding and grouting
— The process will require stones that will strengthen the cellar floor. They are poured onto its surface, then a solution of clay with the addition of sand is laid on top of them. This layer must be at least 100 ÷ 120 mm. The consistency of the clay solution should be quite thick.
— The clay is spread over the surface and compacted among the stones, creating a mixed coating.
— Having completely compacted the surface to an even state, a layer of coarse sand is poured onto it, the thickness of which should be 40 ÷ 60 mm. The sand is also compacted with a tamper - this makes the surface even denser. The remaining sand is then simply swept off the floor. If you want to achieve a neat, even surface, then the top is finally smoothed using a special grouting tool.
— Clay floors take a long time to dry, from 20 to 40 days, so this work needs to begin in early summer. Then the cellar will be fully ready for use in the fall.
- Earthen walls can also be waterproofed with clay. A chain-link mesh or ordinary soft wire is attached to them using small metal staples. Then a clay mortar is poured onto this base. When it dries, another layer is applied, which is leveled manually or using grout in a circular motion.
In addition to these waterproofing materials, others are used, but the ones listed above can be called the most affordable and safest for the room where food will be stored.
A ventilation device in the cellar is necessary, and it is better to think about it in advance by installing it during the construction of the storage facility. If the system is installed correctly, then serious and long-term drying processes can be avoided, since ordinary ventilation will be sufficient.
Video: how ventilation can be arranged in the cellar
Prices for ventilation units
Ventilation units
Forced ventilation: basic elements and design rules
Unlike natural ventilation, where air moves due to pressure differences, in forced ventilation, gas movement is created by electrical appliances. These are fans of various types, some of which are very technologically advanced. They maintain a given temperature and humidity regime, purify the incoming air, and also carry out recovery - transferring heat from heated air masses to cold ones.
In home basements, all these complex devices are not necessary. As a rule, the simplest manually operated devices are used. More advanced installations with control sensors are relevant for large vegetable stores, wine cellars and other objects where it is necessary to maintain certain conditions. For a private cellar, the main thing is efficiency and safety.
Forced ventilation can be organized in various ways:
- install the fan in the exhaust duct;
- install 2 fans in two pipes at once;
- use a rotating diffuser-vane, which is attached to the top of the exhaust pipe and operates from the wind pressure;
- place an incandescent lamp inside the hood; when heated, the air will rise to the top faster, thus stimulating the evacuation of contaminated gases from the cellar.
Since the basement is a room with high humidity, when installing and operating electrical appliances, you must carefully monitor compliance with electrical safety rules. It is prohibited to use 220 V sockets. It is necessary to install a step-down transformer so that the supply voltage does not exceed 12 or 36 V. Accordingly, the electrical equipment must be designed for these loads.
Some tips for arranging a ventilation system
Every owner of a summer cottage tries to preserve the harvest for a long time, and nothing can cope with this task better than a cellar.
What to pay attention to:
- A basement with high humidity cannot be used for these purposes, as this will lead to unusability of the products in a short period of time.
- Therefore, you need to know how to properly make a hood in the cellar. After all, not a single cellar can do without ventilation, especially one that stores fresh and sealed food for the winter.
- Based on the above, it is clear that the main task of the cellar is to create the necessary microclimate in which vegetables and fruits will be favorably stored, preserving useful components and properties for a long time.
Note! As a result of inaccurate calculations, non-compliance with construction technology and saving personal funds on building materials, the cellar is often not used for its intended purpose.
- It is impossible to preserve food there due to dampness, which results in the development of mold and fungus.
When the cellar is an integral part of the building, ventilation is designed in the base of the foundation, maintaining vents above the cellar:
This ventilation method is the most primitive, but it can be used for cellars with an area of no more than 5 m²
- The vent is blocked with bars from all kinds of pests and domestic animals.
- With the onset of frost, the vent is covered with rags or impermeable material, thereby protecting the basement from excess moisture.
If everything is done correctly, the cellar will be able to withstand the required temperature for storing food.
Calculation of ventilation for a cellar
Calculations for large storage facilities are carried out in accordance with SP 60.13330.2012 and SP 105.13330.2012. System parameters are determined that provide a favorable microclimate for storing different types of vegetables. The calculations take into account climatic conditions, design solutions of system elements and economic efficiency. For home basements, there is little need to use such a precise and complex technique.
The simplest option is to calculate the ventilation for the cellar based on the standard air exchange rate. According to SNiP, it is 4-6, that is, the air should be completely replaced 4 to 6 times in one hour.
Let's look at the example of a cellar measuring 3x3 m and height 2 m. The volume of the room is 3*3*2=18 m³. With the recommended multiplicity of 4, the air flow will be 18*4=72 m³/hour. The average speed of movement of air masses in the pipe during natural ventilation is assumed to be 1 m/h. The cross section is selected according to the table:
In our case, all conditions are satisfied by a round air duct with a diameter of 160 mm or a rectangular duct with a diameter of 100x200 mm. It is recommended to make a reserve of 10-15%. This means we choose a pipe of the next diameter (180 mm) or a box-shaped air duct 150x150 mm. Supply and exhaust ducts must have the same cross-section so as not to create additional excess pressure (or vacuum) in the basement.
To calculate forced ventilation, the air speed in the air duct is assumed to be 3-5 m/h. We select the cross-section of the air duct for our flow rate according to the table. We see that for our data a pipe with a diameter of 100 mm is sufficient. The fan is selected based on the required volume of air exchange and the size of the channel where the device will be installed.
Pipe selection
Recently, PVC sewer pipes with a diameter of 110, 160, 200, 250 mm have been mainly used. The most popular, 160 mm has a 4 mm wall, stiffness class - SN4 (withstands 4 kN/m2), can be buried to a depth of more than 1 m. Lengths are 1, 2, 3 and 6 m.
Easy installation, availability of all kinds of fittings that ensure complete tightness of the connection. Smooth inner surface, does not rust. It is flammable, but it is not dangerous in the cellar. Attractive prices. The only drawback: fragility at temperatures below – 15° C. Reinforcement with insulation or polyurethane foam eliminates this problem.
Galvanized air ducts rust if the coating is damaged; burying them without waterproofing is not recommended. They are not sealed, condensation forms on the surface, which requires holding a container or installing a tap to drain the condensate. The price is comparable to plastic.
One of the most reliable pipes is asbestos. But the heavy weight, difficulty of transportation, and the need for cutting pushed these air ducts into the background.
In times when there were no pipes of any kind, they were made from edged boards. To improve traction, the inner surface was passed with a plane. The cracks were sealed and the pipe was painted. The part that was in the ground was tarred or wrapped in roofing felt.
If, when calculating the diameter of pipes, one is not enough, it is recommended to supplement them by increasing their number, but not more than 2. When using sewer pipes, this is not difficult.
Here's what it looks like in the video:
Deflector
The upper edge of the hood and inlet must be protected from precipitation. In parallel with the purchase of pipes, it is useful to provide for this. A rational solution for hoods is a ventilation deflector. Not only protects from rain. Strengthens natural cravings and prevents reverse.
This is especially true for areas where strong winds blow, mountainous areas, and if there are buildings or trees of considerable height near the cellar.
The most common is the TsAGI deflector.
Operating principle: when the wind blows from any direction, a vacuum is created at the head of the pipe. It creates increased air movement from the ventilated room. Such a device will also help when ventilation is insufficient due to irreparable errors made during its initial design.
Ventilation care
To ensure quality ventilation, it is necessary to regularly monitor the operation of the system. The easiest way is with a lit match. If there is little oxygen and the air contains excess carbon dioxide, it will quickly go out. This is a signal - it's time to start cleaning your air ducts.
Dust, debris, cobwebs, ice or frost can accumulate in the gaps of pipes. Sometimes foreign objects are found in the ventilation ducts, and often rodents or other small animals.
To clean, you need to remove valves and electrical appliances from the pipe. Place a container underneath to collect debris and use a thin, strong wire with a brush at the end to move along the entire air path.
In winter, condensation collects in the air ducts. When it freezes, it turns into ice. It is quite difficult to remove the solid mass without damaging the pipe. This is done by heating with hot water or warm air. If traction is restored, the cleaning was successful.
Equipment for installing a ventilation system
When arranging a ventilation system, pipes made of different materials are used: asbestos cement, PVC or galvanized metal, and they come in both round and square shapes.
Asbestos-cement channels
Such pipes do not corrode, are resistant to temperature changes and have a long service life. They are available in different lengths, which is convenient for installation and allows you to do without welding.
Asbestos-cement products have, in addition to their advantages, their disadvantages:
- have a relatively heavy weight;
- joints require additional sealing;
- The products are fragile and require careful handling when moving.
Galvanized metal pipes
Such structures are lightweight, they are not afraid of corrosion, have a low price, and it is also convenient to equip an air duct from these products. These pipes can be used to lay communications in any difficult conditions, including in damp cellars. Moreover, all the work can be carried out independently, since they are easy to customize in place: cut to size, flared for a joint, make a lock, etc.
They can be used in cellars for a long time, but if the outer surface is damaged, such material will rust.
Ventilation ducts made of plastic pipes
Plastic pipes are often used to install hoods in the cellar. Thanks to the ideal surface inside, they have good air flow. Such air channels do not corrode, they practically do not become clogged, and their service life is at least 20 - 25 years, and they are also low in cost.
Sewage pipes are often used as such air ducts, since it is convenient to seal the joints in them using cuffs. And also with such pipes it is easier to lay the channel at different angles using bends.
How to make ventilation in the cellar: step-by-step installation
You can organize a ventilation system both during the construction of the basement and in the finished room. You will need plastic pipes (sewage), elbows for them, protective caps and fasteners.
Installation of the supply pipe
At one end of the cellar, attach the supply air duct to the wall. Its lower opening should be at a height of 50 cm from the floor. For fastening, you need to drill holes, hammer in the dowel and screw in the clamp. Insert the pipe.
The basement is located under the house, so in order to bring the duct to the street, you need to hang it from the ceiling. The fastening is carried out similarly to the wall using a hammer drill and dowel clamps.
Hole preparation
Punch a hole in the outer wall of the basement (or basement, depending on the layout) using a hammer drill with a long nozzle. This is done in several stages. First, holes are drilled around the perimeter of the hole.
Then fragments of masonry are knocked out of the wall with a chisel.
A piece of pipe is installed into the finished hole.
Pipe connection
All sections are connected using corner fittings. It is advisable to use not straight knees, but beveled ones at an angle of 45°. When air passing through a pipe encounters an obstacle, it loses speed, which adversely affects the operation of the ventilation system.
A mesh will be installed on the outside of the pipe to protect against birds, rodents and insects. Exterior view
Exhaust pipe laying
The ventilation duct is attached to the ceiling in the same way as a supply pipe. The inlet should be located as high as possible, preferably under the ceiling of the room. Output to the street is provided in the opposite wall of the basement.
The ventilation looks a little cumbersome, but it was not possible to do it any other way, since the basement is located under a residential building.
The exhaust pipe must be raised as high as possible. The greater the difference between the height of air intake and its exhaust, the better the draft and the more efficient the ventilation. A cap is placed on the open end of the pipe.
Recommendations for choosing ventilation
There are several significant points to consider when designing a system. The operation of natural ventilation largely depends on the climate characteristic of a given area, time of year, and street temperature.
It is most effective in winter, since during the cold season there is a large difference between the indoor and outdoor temperatures, which ensures good air circulation.
Image gallery
Photo from
Placing ventilation holes during construction
Strengthening ventilation and forming air
Fan in the inlet
Fan with exhaust pipe
But at the same time, there is a danger of excessively increasing air exchange, which is not good, because... frosty air can lead to freezing of the cellar, and, accordingly, the products stored there. Therefore, it is necessary to monitor the temperature and, if it drops significantly, close the vents.
In summer, when the difference between indoor and outdoor temperatures is minimal, air circulation may stop completely. Therefore, a supply and exhaust system based on the principle of natural ventilation is not suitable for installation in regions with hot climates.
In such climatic conditions it is necessary to use a combined ventilation system.
To arrange the ventilation of a small cellar, you can limit yourself to one pipe. But in order for it to simultaneously function as an outlet and intake of air, it must be divided along the vertical axis into two channels.
Each channel has its own valve, which regulates the intensity and speed of inflow and outflow of air flow.
You can check the functioning of such ventilation by attaching a piece of paper to each outlet.
When installing single-pipe ventilation, the pipe is divided into two independent channels, one of which is used to receive street air, and the other is designed to remove warm air masses from the room
Combined ventilation: step-by-step instructions for installing a duct fan
To make the system work more efficiently, a duct fan is mounted into the pipe or at its end. Installing it is simple, you can do it yourself without any problems. You will need the fan itself, mounting brackets, which are usually included in the kit, and fasteners suitable for this type of wall. It is not recommended to use the device without firmly fixing it to the wall. When the engine operates and air moves in the channel, vibrations occur, which can lead to weakening of all components of the system.
First, you need to make a gap in the air duct equal in length to the dimensions of the fan. If the installation is carried out sequentially, the section of pipe adjacent to the equipment is not rigidly fixed to the wall so that further manipulations can be done.
Couplings or clamps are used to connect the fan to the air duct. The units must be as tight as possible so that there is no access to air from outside, except for the channel. Then the efficiency of the device is maximum.
You need to monitor the direction of the air supply. If the fan is installed incorrectly, instead of exhaust, pressure will follow, that is, the system will not work.
Holes are drilled in the wall and anchors are installed. The fan housing has mounting perforations that can be used to secure the device.
Pipes are supplied to the supply and outlet and connected to the equipment with clamps.
This is what the finished assembly looks like
If the diameters do not match, adapters are used. The power connection is made according to the instructions for the device. When performing electrical installation work, safety precautions must be strictly observed.
Use of electrical appliances for forced or combined ventilation
Maintaining an optimal microclimate using electric dehumidifiers and heaters is a logical solution, but...
The mains voltage should not exceed 42 V for damp rooms and 12 V for particularly damp ones. It is worth recalling that the floor in the cellar is conductive.
This is what is written in the PUE.
"1.1.8. Damp rooms – relative air humidity exceeds 75%.
1.1.9. Particularly damp rooms – relative humidity is about 100% (ceiling, floor, walls, objects are covered with moisture).”
Based on this, the installation of switches, sockets, and any devices operating on 220 V is prohibited. It's simply life-threatening. If not yours, then users unfamiliar with the peculiarities of high voltage and high humidity.
A 12, 24, 36 V step-down transformer installed outside the storage facility is the only reasonable solution.
How else can you reduce the humidity in the cellar?
Even very high-quality ventilation will not cope with the task if the basement is not sufficiently prepared for storing supplies. To prevent moisture from entering from the outside, waterproofing is carried out. Various waterproof materials can be used:
- roll;
- coating;
- bentonite clay;
- waterproofing membranes.
They are installed outside the cellar during the construction phase. If this work has not been done, you can saturate the walls from the inside with penetrating agents or apply a layer of liquid glass.
Along with waterproofing, reliable thermal insulation helps protect the room from excessive humidity. It prevents condensation from forming in structures and thereby reduces the flow of moisture into the cellar air.
In addition to construction techniques, regular drying of the basement in combination with disinfection works well against moisture and mold. It is better to carry them out in the summer, when the weather is dry and warm outside, and almost all the reserves for the winter have already been used up.
Preparing the cellar for permanent use
The installation of ventilation in the basement intended for storing food does not end with installation work. To ensure a normal microclimate in the cellar, it is necessary to dry it well, check the efficiency of the system and follow certain rules during further operation.
Ways to dry a new room
Before you start drying the cellar, you need to check the efficiency of the installed system. This is due to the fact that moisture must be removed during drying and the easiest way to do this is through an exhaust pipe. To test, roll up an old newspaper and wait for it to burn about a quarter of the way through.
After this, extinguish it so that it continues to smolder. If the smoke from the newspaper is freely removed through the hood, then the system is working normally, if not, then you need to once again check the correctness of the calculations and the height of the outlet of the pipe head.
Drying should be carried out in the warm season, before storing food in the cellar for storage. The essence of common and accessible drying methods is to increase the indoor air temperature, which will provoke increased air exchange and removal of evaporated moisture through the hood.
Moisture-absorbing materials
It is possible to use hygroscopic substances, such as quicklime, calcined table salt or expensive technical silica gels that actively absorb moisture. These are very time-consuming methods and also require additional financial costs.
Flame at the entrance to the exhaust pipe
If you light a large candle or a simple alcohol lamp and bring it to the exhaust vent, the air will begin to heat up and the circulation will increase. Dry and warm air coming from the street will begin to warm up the cellar, actively absorb moisture and go outside. However, more than one candle is required and the process takes several days.
Using a Heat Source
Warming up the cellar room is much faster if you install a heat source of any type. This could be a brazier, a stove, an electric heater, or even a simple gas burner. The use of a flame makes it necessary to solve the problem of effective removal of combustion products, so they are usually lowered down on a suspension.
Drying using a broiler.
Electric heaters of any design are safer due to the absence of carbon monoxide, but will require payment for electricity. Therefore, the choice of heating method is yours. You can also read about the fight against dampness in the basement in this article.
Natural ventilation of the basement in a private house
The least expensive method is to use natural ventilation through vents. At the foundation construction stage, provide paired holes located on opposite walls. According to clause 9 of SNiP 31.01*2003, the total area of vents is at least one four hundredth of the area of the entire basement.
Natural ventilation scheme
Calculate the number and size of each hole. The shape of the vents is not regulated.
- To eliminate “dead zones”, step back 0.9 meters from the internal corners and distribute the air evenly along the entire length of the wall.
- Make similar markings for the opposite wall. If the hole size exceeds 0.3x0.3 meters, reinforce around the perimeter. To prevent the flow of flood waters, please note that the minimum height of the lower part of the vent along the external wall must be at least 0.3 meters from the ground level.
- Cover the holes with rodent mesh.
When pouring a strip foundation, insert cuttings of PVC sewer pipes at equal intervals, tightly closing the holes. After the concrete hardens and the formwork is removed, you will get neat vents.
Note! If the layout of the underground floor includes several isolated rooms, it is necessary to ensure air exchange for each.
If you need to break through vents in a finished foundation, calculate their total size using a similar scheme. To work, you will need a hammer drill or a concrete bit to drill round holes. Remember that violating the integrity of the foundation can weaken its load-bearing capacity, consult a specialist, or choose another method of ventilating the underground space.
Supply and exhaust system
- low cost;
- ease of assembly;
- presence of shaped parts;
- low weight of the structure.
Even a person who does not have construction qualifications can carry out the installation. The work does not require an expensive tool.
Stages of work
The supply and exhaust pipes should be located on opposite walls.
- At a distance of 0.5 meters from the lowest point, secure the pipe and bring it to the surface at a height of 1 meter, thereby ensuring a flow of fresh air.
- Install the exhaust pipe so that its lower part is 1.5 meters above the floor, and the upper part rises above the roof ridge at a height of 0.5 meters.
- Ensure tightness of joints.
- Insulate the air duct.
- Place an umbrella on top of the system to prevent precipitation from entering.
In a properly installed system, temperature differences and pressure differences will create draft.
At the end of the work, check the draft by holding a lit candle to the hood. If the candle flame deviates towards its hole, then the system is working correctly. If the light deviates in the other direction, this indicates the presence of reverse thrust. The problem can be corrected by increasing the height of the exhaust pipe or installing a deflector head.
Forced ventilation of the basement in a private house
If the efficiency of natural air exchange is low, install a duct fan in the exhaust pipe. Installing a second device in the supply pipe will increase the performance of the system. The principle of operation is to pump street air into the underground and more intensively remove exhaust air masses outside.
The power of the devices is calculated by a specialist store consultant based on the size of the room.
Modern duct fans are equipped with a casing and supplied with fasteners, so their installation will not be difficult. Some models are equipped with a timer, which allows you to automate the frequency of turning on the system.
According to sanitary standards, heated living spaces on the ground floor require air conditioning and filtration. Installing a recuperator will allow you to heat the incoming air using the heat removed. Due to the complexity of calculations and the large volume of work, entrust the design and installation of such systems to specialists.
Forced basement ventilation
Forced ventilation device
Natural ventilation may not cope with its functions in hot, windless weather, when the temperature difference is very small. If the house is located on a hill where the breeze almost always blows, such a system is quite sufficient. And to increase the draft, the supply channel is installed from the northern part, 2 meters from the nearest fence or wall.
Often no tricks make the air move. And then they resort to using forced ventilation in the basement of a private house.
In addition, forced draft is equipped with:
- In large basements of 40 sq. meters or more. In winter, warm air passes through the exhaust pipe. When it comes into contact with a cold pipe, condensation forms, settling on the walls and gradually freezing. During prolonged frosts, the entire lumen of the pipe may become covered with snow and ventilation in the basement of this house will stop;
- When a sauna, a sports hall, a games room or a workshop are going to be installed in the basement. Forced ventilation of such a basement in a private house will also help remove unpleasant odors and provide people with fresh air.
The standard forced ventilation scheme consists of a mechanical supply of air from the street, which is filtered, brought to the required temperature and supplied to the basement. At the same time, the exhaust air is drawn out through the exhaust channels to the street.
To implement it, you need a lot of bulky and expensive equipment:
- ventilation ducts;
- diffusers;
- air vents;
- air intakes;
- air flow mixing chambers;
- blowers (if the supply ventilation will serve not only the basement, but also the living quarters).
A photograph of such a basement ventilation system in a private house clearly demonstrates its complexity and monumentality.
Advantages of forced ventilation in the basement of a wooden house:
- independence from weather conditions;
- constant work in the required mode.
Minuses:
- complex installation;
- high price.
We offer two schemes for forced ventilation in the basement of a private house, which you can implement yourself.
Method No. 1
Exhaust fan
A pair of fans (sometimes one) is required. It is mounted on the internal lumen of the exhaust duct to enhance the exhaust. When the fan is turned on, the air in the basement is discharged; the deficiency is compensated through the supply duct. If the basement area is large, a pair of fans are installed.
The second will be required for the inflow to balance it with the outflow of air. This ventilation device in the basement of a private house is very simple. The owner, who has basic construction skills, can install it independently.
The entire basement ventilation system of a country house is controlled by one switch. During installation, it should be borne in mind that basement floors belong to the category of wet rooms. Therefore, it is permitted to install only electrical equipment operating at 36 Volts and equipped with safety devices. Otherwise, breakdowns in the housing, short circuits and all subsequent troubles are possible.
Method No. 2
Ventilation deflector
How to make energy-independent ventilation in the basement of a private house? There is such a method; forced draft is provided by wind movement. The outer end of the exhaust duct ends with a special type of deflector. Train cars are equipped with approximately the same structures. When the wind hits one side of the deflector, pressure increases on the other. Due to this effect, traction increases significantly. You can also install small turbines that operate on the principle of a weather vane. Rotating, they transmit movement through a system of shafts to a fan built into the ventilation duct.
Both methods allow you to change the intensity of air movement and use natural ventilation. Therefore, pipes for exhaust and inflow are located according to the rules for installing inflow-outflow systems. But the diameter of the pipes is chosen to be one and a half times smaller, because the mechanical traction is quite intense.
What are the consequences of lack of air exchange in food storage areas?
Unfortunately, not every thrifty owner wonders whether ventilation is needed in the cellar and understands the importance of creating a suitable microclimate in the underground pantry.
After all, numerous sheds, gazebos, and country houses do not require additional expenses for ventilation. Why spend money on a separate hood in the basement, which is not visited very often? The answer is simple and obvious: in a poorly ventilated room, humidity inevitably rises and putrefactive microorganisms begin to develop rapidly, capable of turning environmentally friendly products into foul-smelling waste in a short time.
According to food production technologists, a properly equipped hood in the cellar should provide the following conditions:
- air humidity within 85–90%;
- temperature from –1 to 4 °C;
- absence of sudden changes in these parameters.
At a humidity level of less than 75%, root crops dry out and wrinkle; at 100%, there is a risk of condensation forming and subsequent spoilage of the product.
Maintaining a stable temperature is largely achieved by sufficiently deepening the vegetable storage in the ground and proper insulation, which prevents the cellar from freezing in severe frosts and excessive heating in hot weather.
More about pipe materials
After performing the calculations and determining the diametrical cross-section, you need to determine for yourself what material we will use the pipes for ventilation from. There are two main types, which today are popular and justify their functional purpose:
- low-pressure polyethylene;
- asbestos cement.
Let us give a short description of the proposed options for exhaust pipes:
- Asbestos cement pipes resemble the structure of slate, which is why they are called slate pipes in everyday use. This material is reliable, durable and quite durable.
- Polyethylene pipes are in no way inferior to asbestos-cement pipes in reliability and durability, but they are easy to install, even without the involvement of specialists. But it should still be noted that they need to be soldered together. If you don’t have soldering skills, you won’t get the desired result right away; you’ll need to practice.
Table of standard sizes of plastic sewer pipes for ventilation
There are no special rules for choosing a material; you can use any one. You should rely on your prejudices and the characteristics of the basement. For example, if the basement is small and its aesthetic appearance is not important, then you can use any pipes, even used ones. If doubts remain, it is better to turn to professionals.
Is ventilation really necessary?
Starting to arrange the basement, let’s figure out whether ventilation is necessary in it, as experts recommend. So, what operating conditions for the basement are achieved using the ventilation system:
- creating optimal conditions for long-term storage of vegetables;
- without ventilation, the air in the basement will be musty and humid, and such a microclimate promotes the development of rot and mold;
- If you arrange strong ventilation, this will lead to drafts and drying out of the vegetables.
We conclude that a ventilation device in the cellar is necessary, and it must be very competent and of high quality.
In what cases is natural exhaust sufficient?
The main reason for the lack of forced supply and exhaust ventilation in the cellar is the impossibility of supplying electricity. If the vegetable storehouse is small and the supplies are placed freely in it, there is nothing to worry about - two pipes of different heights will ensure a normal microclimate and the safety of the products.
An extensive cellar, divided into sections, must be equipped with exhaust and supply pipes in several places. Their location should be thought out in such a way as to prevent prolonged stagnation of air in distant nooks. It is in them that mold will begin to multiply and spread throughout the storage facility.
When calculating the number of pipes, follow the rule: for every square meter of the basement there must be at least 26 square meters. cm cross-sectional area of the ventilation duct.
The diameter of the pipes is calculated as follows:
- measure the floor area in square meters. meters;
- the resulting number is multiplied by 26;
- the product is divided by the number π, then the square is found. The root and the result are divided by 2.
The exhaust pipe can be 10–12% larger than the inlet diameter.
Plastic, wood, stainless steel or galvanized steel are used for ventilation devices. Asbestos pipes should not be used - particles of the mineral can cause allergies, cancer and other health problems.