Microclimate
Not only the correct construction of the barn is very important, but also the creation of the necessary conditions for the normal life of chickens.
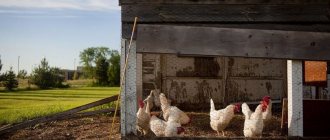
Ventilation
The room in which the chickens will live must be well ventilated in order for the birds to be healthy. Ventilation is especially important in summer to avoid the development of microbes and parasites, timely air purification and drying of the bedding.
Typically, ventilation consists of holes made in opposite walls. Such openings must have valves so that they can be closed in cold weather.
Did you know? The period of darkness for chickens is very important for the formation of bone tissue, changes in calcium metabolism, which is responsible for the density of the shell, and the development of immunity.
Lighting
To illuminate the poultry house, you can use fluorescent lamps with a power of at least 40 watts. One device is installed for every 4 square meters of room. The light source must be positioned in such a way that there is a distance of at least 2 m from the floor.
When organizing lighting in a chicken coop, it is worth considering that there is always high humidity in such a room, so when doing wiring, installing lamps and switches, it is necessary to place the panel outside the poultry house. To prevent chickens from getting burned or receiving an electric shock, a thick shade is installed on the lamps. In winter, lighting in the chicken coop allows you to stimulate the productivity of laying hens, optimally if the daylight hours are extended to 13 hours a day. Be sure to turn on the lighting early in the morning, and in the evening, when it gets dark outside, the light in the chicken coop should be on for at least another 3 hours.
In order not to get up very early every morning, and not to visit the chicken coop late in the evening, it is recommended to install a timer that will control the periods of turning on the lights in the poultry house yourself.
Find out what kind of lighting should be in the chicken coop.
Temperature + how to insulate for the winter
Chickens are resistant to temperature changes, so the air temperature in the room can be within +5...+23 °C. With an increase in air temperature in the chicken coop, the bird will feel uncomfortable when the value goes beyond +30 degrees, the chicken may stop laying eggs, and the chickens become vulnerable to infectious and parasitic diseases. If in winter, the air temperature in the chicken coop drops below +5 degrees, the room should be insulated. To insulate the shed, a thick layer of bedding (straw, sawdust) is poured onto the floor. Initially, natural material is scattered on the floor 10 cm thick, then, as it subsides, it is poured 2 more times, increasing the amount of mound to 20 cm.
Basic requirements for chicken coops
To ensure maximum living comfort for poultry, the chicken coop must meet a number of requirements. The main ones are the correct location of the building, the correspondence of the area of the poultry house to the number of chickens, and the proper microclimate in the room.
Chicken coop location
It is advisable to choose a site for the poultry house not only from an aesthetic point of view. A good location will help avoid dampness in the room, drafts, and help maintain optimal light and temperature conditions.
When locating a barn for chickens, the following points should be observed:
- Sufficient distance from residential buildings. Chicken manure and dirty bedding emit unpleasant odors. Therefore, for the comfort of residents, the chicken coop is located at least 12 meters from the nearest residential buildings.
- Construction on a hill. In the spring, the poultry house located on a hill will always remain dry and protected from floods. In addition, this location of the room will contribute to better heating in winter.
- Placement of the building from west to east. In this case, the windows must be placed on the southern wall, which will provide full lighting throughout the day.
Important! When choosing a building site, it is imperative to provide an area for an open walking area for poultry. Without outdoor activity, chickens will gain weight and lay significantly worse.
Area depending on the number of birds
The area of the poultry house is also an extremely important parameter; it should be calculated carefully. The minimum acceptable standards in this regard are 1 sq. m of space for 4 adult layers. If the breeder also plans to breed young animals and keep them together with adult chickens, then for every 12–15 chickens another 1 square meter is needed. m area.
In addition to the indicated values, a separate place for the location of perches, feeders, and nests is also taken into account. Be sure to calculate the size of the paddock at the planning stage. Additionally, a reserve of space should be provided for ease of cleaning the room.
Taking into account all these points, a poultry house with an area of 9 square meters will be optimal for keeping 10 laying hens. m. To accommodate a livestock of 20–25 individuals, the size of the chicken coop is increased to 18 square meters. m. When keeping 50 chickens or more, the area of the premises must be at least 25 square meters. m. When poultry are kept more crowded, the risk of developing various diseases increases significantly.
Temperature
Another important requirement for a chicken coop is the correct temperature. With excessive cold, chickens will stop growing and lay eggs worse. But too high temperatures are also harmful to living creatures. Therefore, the most acceptable temperature regime in the chicken coop varies between 12–16 degrees. It is at this temperature that the bird lays best.
In winter, to ensure such a temperature range, it is not necessary to organize a heating system in the chicken coop. Its absence is compensated for by dense walls, the thickness of which must be at least 15 cm. The outside walls are insulated with mineral wool or polystyrene foam.
Another important tool in regulating the temperature in the poultry house is a thick straw bedding. When chicken manure gets on it, chemical processes occur in the straw layer, during which heat is actively released. In winter, this feature can be extremely useful.
Microclimate in the poultry house: lighting, ventilation
A warm barn for keeping chickens will significantly increase the egg production of poultry in the winter. But in addition to the optimal temperature regime, it is also necessary to take into account other features of the microclimate in the room. These include:
- Good ventilation. The barn contains large quantities of carbon dioxide, ammonia and hydrogen sulfide, which negatively affect the health of animals. Good ventilation will help remove remaining gases from the room. For small chicken coops, an exhaust pipe and open windows will be enough. In large poultry houses it is necessary to install more complex supply and exhaust systems.
- Lighting. Egg production is also greatly influenced by the length of daylight hours. And if in the summer the bird has enough natural light, then for the winter it is necessary to provide artificial light sources in the barn. Energy-saving lamps or incandescent lamps with a power of 40–50 W are suitable for this. Daylight hours for laying hens should last 15–16 hours.
The humidity in the poultry house also deserves special attention. It is especially important to consider this parameter in the summer when the weather is hot. Its level should be between 60–70%.
Planning nuances
For construction, you can use ready-made drawings, although their presence is not mandatory. The design of any shed for domestic animals is not particularly complicated, the main thing is to choose the right dimensions and outline the location inside the necessary devices: stalls for livestock, perches for birds, feeders, drinking bowls, etc. You can draw a roughly approximate plan by hand, but be sure to mark on it the necessary requirements officially imposed on such buildings.
Table 1. Basic requirements for sheds for livestock
| Dimensions | They are determined individually, depending on the number of individuals. For 10 chickens you will need an area of 3-4 square meters. One goat needs approximately 2-4 sq. m., per cow - 7-9 sq. m. You also need to consider space for feeders and other equipment. The height of the premises can also be different: for a barn - at least 2 m, for a goat barn and pigsty - 1.5 m. |
| Availability of walking space | For chickens and rabbits, a walking area is not necessary if they are kept in cages. Otherwise, it can be made very small. For goats, sheep and cows, you need to fence at least 10 square meters. Pigs most often do not need a pasture either, but a very small area can be fenced off near their barn to expand their living space - physical activity helps increase appetite, and the piglets grow faster. |
| Windows and doors | There should be enough windows to keep the room light. It is advisable to make them glazed, with detachable transoms. Most of the window openings should be located on the south side. Doors can be made on the opposite side. The openings should be wide so that waste can be easily carried out through them and food can be brought inside. It makes sense to have bi-fold doors in the barn. |
| Ventilation and insulation | All cracks in the walls are carefully sealed - there should be no drafts in the room. But at the same time, the barn must have good ventilation. The barn and poultry house must be additionally insulated; if we are talking about regions with harsh winters, then it makes sense to also install heating. Even in the most extreme cold, the indoor temperature cannot drop below 8-10 degrees. |
| Internal layout | A sufficient number of drinking bowls and feeders must be installed for all animals and birds. In the goat shed and barn, it is advisable to make separate stalls for each individual, and in addition, fence off corners for keeping females with cubs. The same must be done for sows with piglets. Low perches must be made for chickens, nests must be built for laying hens, as well as for ducks and geese laying eggs. |
Approximate drawings of sheds for animals and poultry
Construction
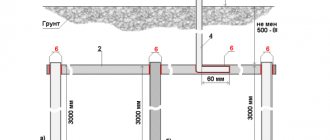
Building a winter chicken coop with your own hands begins with the foundation. There are several optimal options.
Pile is the cheapest and easiest to implement. The weight of screw piles is small, so one person can install them. The screw blades in the form of empty metal pipes are 2.5 meters long and can be easily screwed into any soil, and installing such a foundation will not take more than an hour. The area needs to be marked according to the size of the future chicken coop. It is best to do this using a rope with pegs. Next, you need to mark the places where the piles will stand. First you should screw in those that will be in the corners of the room, and then all the rest. The piles should be installed at a distance of one and a half or two meters.
Columnar is also good for its efficiency and ease of installation. It can be done without much knowledge or experience. The installation begins by marking with a rope and pegs, then along the perimeter you need to dig holes 50x50 cm wide and 60–70 cm deep. The recesses should be located at a distance of about a meter, about 10 cm deep the holes are filled with a mixture of sand and gravel, then they are well compacted. A brick is placed on top of the cushion and the whole thing is filled with concrete mortar. You need to fill until the level along the stretched rope is reached. When the bases are ready, you can install cabinets or pillars on them. It is imperative that they be 25 centimeters or more above the level. After this, you can fill the area with gravel.
The tape type is difficult to implement, but its reliability is undeniable. To do this, you first need to dig around the perimeter of the poultry house. Then formwork is made, preferably from boards, and filled with concrete
In this case, it is important to adhere to the technology, the intricacies of which can be found out from specialists.
Of course, a chicken coop with a strip foundation takes a little longer to build, since the concrete will have to harden before the main construction work. For example, the construction of a building made of wood can only begin 21 days after pouring, and that of brick – after 28–35 days. The first two foundation options are good because they can create additional ventilation. With them in winter there will be no problems with rotting floors. In addition, during the spring flood period, the chicken coop will not be flooded.
When the foundation is ready, you can continue to build the winter chicken coop according to the selected drawing. The actual construction begins with the installation of the floor. First you need to build a so-called support frame, which is covered with boards from the bottom. Then logs are made at a distance of 50 centimeters. It is desirable that their cross-section be 100x150 centimeters.
Next, they move on to the construction of walls. If they are made of timber, then jute fiber must be laid between them, which is necessary to eliminate cracks. For walls made of OSB, you first need to make a frame of beams arranged in a grid. The walls must be sheathed on both sides to be able to fill them with insulation.
Windows and doors need to be made during the construction of walls
When installing, it is important to check their reliability and the absence of cracks. An important point is ventilation, which is easily organized using the simplest pipe
The penultimate touch is the roof, which can be pitched or gable. It is necessary to take care of its waterproofing, for which roofing felt is suitable. The last point is the creation of artificial light and the interior arrangement of the barn
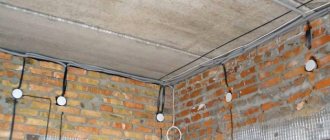
It is important that chickens and moisture cannot reach the wires. It is best to place them in special plastic boxes
You need to lay a mat on the floor with a height of 7 centimeters. A beam with a diameter of about 6 centimeters is perfect for perches. Perches with a total length of 1.7 meters are enough for 10 chickens. Nests measuring 50x50 cm can be made from any materials, for example, wood, old tires. The main thing is that there are at least two of them. Drinkers and feeders can be wall-mounted or floor-mounted. The main thing is that the chickens feel comfortable using them. The very last thing you need to do with your own hands is to build an enclosure.
How to build a poultry barn
The farm may contain chickens, quails, turkeys, geese and ducks. Premises for different types of birds generally differ only in size. Turkeys and waterfowl, as well as broilers, will need larger sheds. Although there are a number of other nuances. For example, turkeys are thermophilic, so it is necessary to maintain a high temperature in the poultry house for them. Chickens need roosts, but ducks and geese do not need such an interior detail.
It is better to make the foundation for a poultry house a strip type - from concrete, so that mice, rats and small predators such as ferrets cannot penetrate under the floor. The depth of the base may not be too great - 25 cm is enough.
Wooden beams are erected at the corners of the future building, and horizontal partitions made of narrow boards are made between them. Then the building is sheathed with plywood. On the south side, two or three windows should be cut under the ceiling. The door is not made too wide and high. For the birds themselves, you can arrange a separate hole. The roof is made in one slope; it can be covered with reeds or straw, and roofing material or slate can be placed on top. Be sure to take the pipes outside for ventilation.
Poultry house with walking
How to make a floor in a poultry house
When the question arises, what is the best material to make the floors of a chicken coop from, the builder has several options:
- wood;
- concrete;
- clay.
The warmest and most comfortable is a wooden floor in a chicken coop. As a rule, it is raised several cm above the ground so that the resulting air gap serves as additional thermal insulation. The plank floor is easy to clean. For construction, a wooden frame is made - logs, on which polished boards are laid. Connect everything with nails. Try to avoid creating cracks in the floor.
Concrete cools quickly and does not retain heat well. If you decide to make a concrete floor, you must lay wooden flooring on top or sprinkle the floor with straw. Step-by-step instructions on how to properly fill the floor in a chicken coop:
- Clean and level the surface.
- Add a layer of crushed stone or gravel.
- Prepare a cement screed (proportion of sand and cement 3:1).
- The mixture should be quite liquid so that it can easily penetrate into the spaces between the stones.
- Fill the floor, level the screed using a rule or a long lath.
- After the first layer has set, prepare another portion of screed of less thickness.
- Distribute the mixture on the floor, level with the rule.
- Wet the floor regularly with water until the concrete gains strength - about 7 days.
- Decide what to put on the floor of the coop.
Hay for warmth on the floor
To keep the chickens in the barn cool on the concrete floor, it is often covered with a warmer material. This type of bulk floor in a chicken coop is made from hay, straw, sawdust, and shavings. Chickens like to rake grass and dig, such a floor will be comfortable and warm for them. The main thing is to change the material in time, because there is no other way to clean the poultry house.
If you want to make a clay floor in your coop, tightly compacted loam or clay will do. The disadvantage of the material is that rodents and small predators can easily overcome it. Choose an earthen or clay floor only when using a strip foundation, then no rat will dig under.
Building a barn for laying hens with your own hands
It is very profitable to raise laying hens on your property, because they are a good source of additional income and food.
Chickens, like people, need a good-quality and spacious home where they can sleep peacefully all year round, without fear of wind, rain, or cold. And for this you need a shed that you can easily make with your own hands, without involving builders or purchasing expensive materials. Our article will tell you about simple ways to build a cozy “house” for chickens.
What should a barn be like for laying hens?
Anyone, even a novice farmer, knows that chickens are very sensitive to the conditions in which they live. And if conditions are not so good, it can seriously affect the health of the birds.
What materials are suitable for building a shed?
For a permanent barn, you will need materials from which it will be possible to build a foundation and build the barn itself. In general, the following materials are suitable for this design:
- concrete blocks or bricks (for the foundation);
- cement mortar;
- sand;
- OSB boards;
- wooden boards and beams;
- metal constructions;
- sheathing material (lining, plywood, etc.);
- insulation.
In addition, you should stock up on tools: self-tapping screws, nails, metal corners, a screwdriver, a hammer, brushes, a grinding tool, etc.
Thermal insulation of a barn
Maintaining heat in a chicken coop at any time of the year is an important issue when raising chickens. When building a shed, it is better to immediately ensure that the floor, walls and roof of the future structure are insulated with special materials.
Foam plastic, felt, sawdust, and straw are suitable as insulation. For example, when insulating with polystyrene foam, it should be plastered so that chickens cannot peck at it.
The walls of the barn need to be insulated both from the outside of the structure and inside, between the sheathing material. The roof should be insulated from the inside with felt, and the floor can be covered with a dense layer of sawdust or straw.
How to Make a DIY Chicken Shed: Step-by-Step Guide
First, the master needs to carry out preparatory work. Namely:
Consider a shed made from OSB sheets. Today this is one of the popular types of structures. First things first.
How to avoid mistakes during construction?
In order for the barn to serve the chickens for a long time, the owner must remember several important construction tips.
- The size of the barn should be calculated based on the rule: 1 square meter for every 4 chickens. It is better to immediately take into account a small reserve for the future offspring of individuals.
- It is better to first fill the floor of the structure with a concrete screed or lay brick, and only then cover it with boards. This will protect the birds from invading predators.
- When planning year-round keeping of chickens, it is better to provide a vestibule in the barn.
- The temperature in the finished shed should not exceed 16 degrees. Otherwise, the chickens will suffer from thirst. At more than 29 degrees, birds will have reduced egg production and the shells will be much thinner.
- The cold in the barn should not be allowed either. This causes chickens to get sick and die. It is better to think carefully in advance about how thermal insulation will be carried out and install it during construction, without delaying until the cold weather begins.
Hatching and food eggs have different shelf life. Read more about this in our article.
Feeding broiler chickens has its own characteristics. All the details are described here.
Internal equipment of the barn
First, inside the chicken house you need to place nests, feeders, drinkers and perches.
They should be located separately from each other at a considerable distance. Otherwise, the shed will become cluttered and messy.
For example, it is better to install perches in the darkest, quietest and warmest part of the barn, where the chickens will rest most comfortably. This also applies to the installation of nests. They can be wooden boxes separated from each other by a thick opaque film.
As for feeders and drinkers, it is best to place them separately from resting areas, so that it is convenient to clean and change food and water. This part of the shed should be well lit.
To maintain a sufficient level of heat in the barn, you can install an additional heater, and to avoid excessive humidity, a special ventilation device can be installed. Humidity should not exceed 60%.
Building a barn for laying hens with your own hands is a simple matter
But it is important to take a responsible approach to preparing all the necessary materials, correctly calculate the dimensions and follow all the recommendations and advice discussed in this article
Humidity and lighting
In order to provide the necessary amount of heat in the chicken coop, you can install an additional heater. To eliminate humidity - a ventilation device.
Climate affects the egg production rates of chickens. If the humidity is higher than normal (more than 60%), this will negatively affect the health of individuals.
Make sure you have good lighting. Light affects the lives of birds. Control the length of daylight hours. For your convenience, you can set special timers that automate this process.
How to build a barn for pigs, large and small livestock
For larger pets, a permanent building made of brick, concrete or gas-foam concrete blocks is better suited. The barn should be made spacious so that it is comfortable for the livestock and the people caring for them. Cows, goats and sheep are milked regularly, so there must be enough space inside to carry out such a procedure. Six square meters are provided for one cow, two to four square meters for goats and sheep. m. The room should have wide passages and large doors to make it convenient to remove manure and bring in feed every day.
Video - Animal barn
First, a foundation is made from bricks or blocks, lined with concrete. The base is laid in a pre-dug trench about 0.6 m deep. Next, corners are made from the blocks, they are aligned using a level and plumb line. After that, guides are installed - vertical bars that are attached to the blocks using brackets. A cord is stretched between them in order to see how to make even laying. Now you need to build walls - approximately 2-2.5 m high. It is then recommended to putty the seams on the inside to avoid drafts.
The roof is made gable. The floor is poured with concrete; grooves must be made to drain urine and liquid waste. A boardwalk made of individual panels, which can be replaced, is laid on top. The internal space is delimited by separate stalls, each with a personal feeder and drinking bowl. It is worth installing electricity into the barn, and running water into the large barn and pigsty. Running water works well for daily cleaning.
The barn should be spacious, with separate stalls inside.
Capital walls made of blocks
Another option is a block chicken coop. The following block materials are used:
- bricks;
- cinder block;
- foam and aerated concrete;
- shell rock
Brick wall in a bird house
Building a chicken coop out of brick will take a little longer than building a wooden model, since the masonry is carried out piece by piece, and it is not allowed to lay out the entire height of the wall in one day. Brick is a very heat-intensive material. Even with minimal wall insulation, the poultry house remains warm in winter, and in summer it will not be so hot.
A popular analogue of brick is cinder block. A cinder block chicken coop is quicker to build due to the larger size of each element. If desired, cinder blocks can be made right in the yard if you have the form. Then construction will also be economical.
Light, warm and affordable - a chicken coop made of shell rock. If you have a lot of this stone in your area, you can use it to build a chicken shed. Shell rock is a natural material. Work with it the same way as with a cinder block. Shell rock is highly valued in construction for its low thermal conductivity.
Aerated concrete blocks are a popular building material. In terms of its thermal conductivity and hygroscopicity parameters, aerated concrete is close to wood. It is better to secure a chicken coop made of aerated concrete with reinforcement. A groove is cut in the blocks along the entire perimeter of the poultry house and steel reinforcement is placed there for strength.
Big barn of their block
A chicken coop made of foam block is a great alternative. The material is non-toxic, which is important for keeping poultry. The D400 brand is suitable for walls. The size of one element is usually 200x300x600 mm, the weight of a 400 grade block is 15.6 kg.
The thickness of the walls for the chicken coop may vary. If you live in a temperate climate, walls of one foam block will be enough. If your winters are very cold, it is better to play it safe and do the masonry in two blocks.
Types of chicken coops
Today on the Internet you can find drawings of a wide variety of barns for chickens. But conditionally, they are all divided into two main types:
- Winter. Suitable for year-round poultry keeping.
- Summer. Such buildings are also called seasonal. They are used to keep poultry during the warm season.
Each of the listed types of poultry house has its own characteristics and construction nuances.
Winter
Winter poultry houses require year-round keeping of chickens, so their planning and construction are approached with particular care. It is worth noting that such a building is not built for a season, but for several years. Therefore, it is placed permanently and the location is clearly planned.
Before installation, be sure to make a solid foundation. The walls are built from thick wooden planks, brick or stone. When using boards, each wall must be insulated. Insulation materials are also laid under the roof and in all cracks that remain during the construction process.
Artificial lighting must be provided in the winter chicken coop. The number of lamps is selected based on the area of the building. It is also mandatory to equip a walking area near the barn. It must be equipped with a roof, and the northern wall of the site must be made of dense material without cracks.
Summer
Summer-type structures are used for keeping poultry exclusively in the warm season. As a rule, they are used in small subsidiary farms, the owners of which purchase several birds in the spring to obtain eggs, and slaughter them in the fall.
Such a building is not located permanently for several seasons. In addition, building a barn for chickens in the summer version is much easier than a permanent winter one.
The design of such a poultry house can be very different. For several birds, you can build a small wooden box with a mesh extension. Also, breeders often purchase ready-made models of summer chicken coops consisting of sandwich panels. After purchase, such a product can be assembled at home in a couple of hours; assembly does not require any special skills.
Ready-made portable chicken coops, manufactured by individual enterprises, are also popular. This design is lightweight and has special wheels for easy transportation.
But regardless of the chosen design option, each summer chicken coop must have the following elements:
- the barn itself;
- small walk;
- drinking bowls and feeders;
- perch;
- a nest in which a hen will lay eggs.
Converting a barn into a chicken coop
general review
Often, a utility block (or part of it), built for various household needs, is decided to be used as a chicken coop. In this case, the room must be refurbished and made comfortable for chickens to live in.
Let's give some specific tips on how to make a barn for chickens. And what to pay attention to first.
The size of the finished barn determines the number of future livestock.
In a room of 15 m2 you can accommodate about 20 meat chickens. For 10 birds you will need 2 times less space.
The organization of a four-tier perch will allow rational use of the area. In a 2x3 m room you can comfortably accommodate up to 20 chickens.
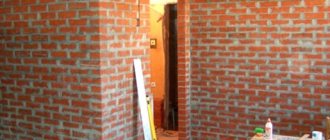
If part of the barn is allocated for a chicken coop, then the bird room is separated by a wall made of plasterboard or plywood. The room must have a window. If it was not there initially, you will have to cut an opening in at least one external wall. And insert the frame.
Interior remodeling
Chickens peck whatever they find. The premises should be carefully inspected for substances hazardous to their lives.
Check the condition of the ceiling. If poisonous crumbs fall from it from rotten boards, the ceiling is replaced.
Inspect the boards on the floor. Replace if they are saturated with gasoline or other poison.
Filling the perimeter with cement will allow you to get a reliable and warm floor. It will also protect from predators. Another option is the sequential formation of a layer of sand and a layer of hay. Or sawdust, dry leaves.
The rotten floor of the barn is covered with strong boards. Not necessarily new. The height of the walls should be sufficient for organizing perches.
Other nuances
Chickens of all varieties are afraid of drafts. For this reason, all cracks and the roof of the barn are sealed. They insulate walls that are more convenient to sheathe outside.
The interior is equipped with everything necessary for chickens to live: feeders, drinkers. According to the diagram presented above, a ventilation system is installed in the barn.
The location of the barn and the condition of the surrounding area are important. If possible, you should designate a walking area.
You will need to make a hole in the right place through which the chickens can go for a walk. We should not forget about the attic area, which, if there is no space outside the barn, can be adapted for walking.
Conclusion
Dear reader, the article provides detailed recommendations on how to build a barn for chickens. Important nuances related to this topic are touched upon.
We hope we were able to help you understand the problem. And, based on our advice, you managed to build a barn and properly equip it from the inside for chickens to live in.
We ask you to leave feedback on the information received and share your experience of similar work in the comments. If the article was useful, tell your friends about it on social networks. Special thanks for the 5 stars.
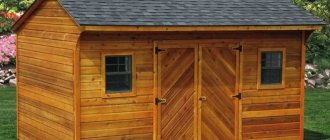
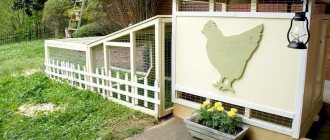
Let's add a chicken coop to the barn
Then the idea came to combine a barn with a chicken coop, to make a town house like this, with chickens on one side of the shovel and the other. Well, or at least have such an opportunity.
Minimum requirements for a chicken coop - dimensions, etc.:
Searches on the RuNet brought absolutely nothing, everything was basically built from shit and sticks, or ordinary barns were used as chicken coops, and there was no need to talk about any features, for example, “Roll out nesting box”
Due to the price, commercial offers also left much to be desired; compare the prices for ready-made chicken coops yourself:
Prices for ready-made chicken coops
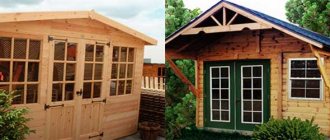
On English-language sites, I was more or less able to find something suitable, albeit not entirely. But at least it gives an idea of what it might look like:
Garden shed and chicken coop (c) https://www.homegardendesignplan.com
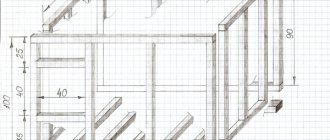
For those who are interested in this chicken coop, here are a few additional images and drawings of a 3 x 2.4 meter chicken coop under the cut. Insulated chicken coop using frame technology:
Drawings of a barn + chicken coop 3 x 2.4 m
Garden shed and chicken coop side view (c) https://www.homegardendesignplan.com
Garden shed and chicken coop (c) https://www.homegardendesignplan.com
Garden shed and chicken coop, using frame technology (c) https://www.homegardendesignplan.com
Construction of a garden shed and chicken coop (c) https://www.homegardendesignplan.com
Garden shed + chicken coop plans include:
- Bill of materials, in XLS and PDF formats;
- Installation manual, 72 pages (87MB);
You can download the drawings here:
Google Drive https://drive.google.com/open?id=0B_YQCp4dk8TRYllaS2x2Mm9ZTmM
Original taken from Frank Nguyen https://www.homegardendesignplan.com/2015/11/cb202-combo-chicken-coop-garden-shed.html
It is planned to keep laying hens only in the warm season. And given the fact that there is not a lot of space on the site, I didn’t really want to “give out” separate m2 to laying hens just for roosting. Therefore, it was decided to combine a similar barn with a small “summer” and a decorative chicken coop that allows you to walk under it, like this:
Summer chicken coop (c) SummerHawk Ranch https://www.hayneedle.com
In a word, there is nothing left but to be inspired by the Internet and take up Sketchup and draw your dream barn yourself.
Winter chicken coop
In summer, chickens can spend most of their time outside, but in winter they generally have nothing to do there. Some people force their pets into an unsuitable barn or other outbuildings. Poultry requires full care, and only a specially equipped room can provide comfort. Therefore, it is extremely important to take care of arranging a warm chicken coop before the onset of cold weather.
It should be warm and dry inside
Since the outside temperature is low in winter, you need to make sure that the chickens do not freeze. The optimal temperature at which they feel good and lay eggs regularly is 15-25 degrees. Chicken coops for winter should be designed in such a way that they can maintain this temperature throughout the day.
To keep the temperature at the same level and not drop, they build an insulated chicken coop. Insulating materials are used to insulate the walls and roof, seal the slightest cracks and eliminate cold bridges - this way there will be no drafts in the barn and the necessary microclimate will be created.
Wall insulation is mandatory
Since chickens will spend almost all their time in the winter barn, and the days are short in winter, you need to take care of the lighting. In addition to the mandatory presence of a window for access to natural sunlight, you will also need a light bulb under the ceiling. But you don’t need to leave it on around the clock; in everything you need to strive for natural conditions. At night the lights are turned off.
A chandelier is too much, but you need a light bulb
You can’t do without walking at all either. Keeping a bird in confinement for several months is harmful and will immediately affect its health and performance. Winter walking should be covered, protected on all sides from the wind. You can let them go outside even at sub-zero temperatures, the main thing is that there is no gusty cold wind.
Setting up a chicken coop
In order for the chickens to feel comfortable in the built barn, it must be properly equipped. Nests for laying hens are located in secluded places where nothing will disturb them. Only safe equipment is installed. Perch poles are well sanded so that the birds do not injure their legs on protruding twigs. A thick layer of straw is placed in the nests and they are equipped with an egg collector. You can buy a cage for chickens and chickens or make it yourself. Purchased options are made from mesh. The bottom is covered with a thick layer of straw so that the chickens can walk comfortably.
An aviary for walking is set up next to the chicken coop. It is fenced with a fence made of fine mesh or wooden boards. It is better to use a fine mesh, through which it is more difficult for predators to get through. The size of the walking area depends on the orientation of the birds. Laying hens are given more territory than broilers. On average, 1 m² is enough for one chicken. If space allows, the enclosure is made portable.
It's easy to build a chicken barn yourself. The winter chicken coop is made permanent, and the summer chicken coop is made lightweight. At the design stage, the dimensions and design of the room are considered. You can make an extension to the main room. However, it is rarely possible to attach a room so that it does not differ from the main part. Yes, and the process is expensive.
Many owners of private houses often think about getting small livestock: geese, turkeys, chickens. However, having studied a little about the technology of raising poultry, a good half of those interested change their minds due to the need to build a special room for keeping animals. But building a poultry barn with your own hands is not as difficult as it might seem at first glance, and in this article you will learn all the details of the technology.
Chicken coop dimensions
Of course, the size of a chicken shed is subjective. But there are certain standards regulating the area of the poultry house depending on the number of chickens living in it. Laying hens spend a lot of time in nests, and they are not as large as broilers. Therefore, the standards for the housing density of these types of chickens are different.
House for 5-10 birds
General points
For a chicken or turkey to lay eggs well, it must be healthy.
That is why it is so important to pay enough attention and effort to building a high-quality, strong and warm poultry shed. Most novice farmers do not dare to have livestock due to the lack of suitable premises for their maintenance, believing that they cannot afford to build from scratch
However, if you carefully study the issue, which is what we will do in this article, it will become clear that building a high-quality chicken coop is not only not difficult, but also not so expensive.
Choosing a location for a bird shed
First of all, you need to choose the right place for construction. In this case, it is necessary to start not only from considerations of the square footage of the future barn. Keep in mind that poultry waste products emit a rather strong unpleasant odor, so if the barn is located on the leeward side, the odors will constantly be directed towards the residential building. It is best to place sheds for animals and poultry at a sufficient distance from residential buildings next to a toilet or cesspool.
The dimensions of the object being built are directly affected by the free area of the site. The best place to build a shed is on a small hill, then in the cold it will not need to be heated additionally, and in the warm season it will warm up faster. In addition to the space for the barn, it is necessary to allocate an area for walking poultry - this is a prerequisite for the comfortable and healthy well-being of pets. Its area should exceed the area of the barn itself by 2-3 times.
You can build a chicken coop using existing plans developed by professional builders and experienced farmers, or you can take one of them as a basis and create your own unique poultry shed design, ideal specifically for your site. At the end of the article you will find several examples of chicken coop designs.
Bird shed dimensions
Poultry is quite unpretentious in keeping, but this does not mean that it does not need care and attention at all. Remember, the more comfortable your chickens and turkeys live, the better they will lay eggs. In this part of the article you will learn how to arrange a poultry barn according to all the rules.
The chicken coop must be durable, warm and safe. This is a kind of smaller copy of a residential building, the residents of which should feel safe and comfortable in it. It must have ventilation and lighting. It is not at all necessary to conduct electricity there - you can install several windows for natural light.
Birds are social animals, but they still require personal space. Otherwise, strong individuals will begin to dominate the weak, peck at them and fight. To avoid this, it is better to think in advance about how many chickens will permanently live in the barn and, based on this, calculate the area of the room. No more than 4 chickens or 3 turkeys can be placed per 1 m².
Inside the barn you need to install nests, perches, feeders and drinkers. It is best to place the perch as far as possible from the front door, since the bird will rest there, and therefore it is better not to disturb it again. In this case, the perches should be slightly inclined, but just enough so that the chickens can move freely along them. Usually, to make a perch, wooden beams with a diameter of up to 5 cm are used, the upper part of which is rounded so that it is convenient for the bird to clasp the pole with its paws. The beams are installed parallel and in several tiers, maintaining a distance of at least 25 cm (up to 40 cm), between the floor and the lower beam there should be 40-50 cm. Experienced farmers advise making a perch in 4 tiers, attaching the beams to the walls using hinges.
As for the equipment of nests where birds will hatch eggs, you can use wooden boxes (for vegetables and fruits) or baskets to make them. Use hay or straw as soft, warm bedding, which is periodically replaced with fresh one. One nest can accommodate 3-5 laying hens.
At the bottom of the barn door you need to make a closable hole (miniature hole) approximately 30 cm high. It is necessary for the birds to freely exit to the walking area.
So, based on the above information, you can calculate the exact dimensions of the future chicken coop and walking area. A barn for 10-20 chickens will occupy an area of 2x3 m, and the walking area should be several times larger.
How to choose the right place for construction
When choosing a location to build a chicken barn, a number of factors are taken into account.
First of all, there is the possibility of flooding by rain or melt water. Suitable areas are elevated, located in an area open to the sun, protected from the winds.
Distance from residential buildings is required. Due to the specific smell that arises as a result of the vital activity of chickens, it is advisable to maintain a distance of 30 meters.
You will need to install electricity, heating, and plumbing. Year-round breeding of birds requires artificial lighting of the premises in winter.
The number of livestock is also taken into account. This affects the size of the building and the walking enclosure. The latter should be 2-3 times more spacious than the barn.
The location of the barn affects the internal microclimate. An area where the soil is quickly cleared of snow, dries out moisture and warms up in the sun makes it possible to organize chicken walking in early spring.
Construction of a chicken coop
Before you build a barn for chickens with your own hands, create a drawing. The drawing marks the location of each element located inside the building (perches, nests, partitions, etc.). If possible, a storage room should be set up to store equipment and feed. If there is not enough space inside, it is better to do it in the attic. When planning, the nuances of keeping birds are taken into account. A mandatory element of a chicken coop is a cage for young animals. It is located outside the roosts. The minimum height of a chicken coop is 1 m, and the most suitable is 1.70-2 m. In a room where the height is less than a person’s height, cleaning is inconvenient, and the chicken coop is cleaned several times a week.
The construction of a chicken coop itself consists of several stages:
- Preparing the site. At this stage, the site is marked and all tall plants and shrubs are removed. They do not do this only if we are talking about a mobile building.
- Construction of the foundation. If chickens are kept in a permanent barn, then the foundation must be concrete. If the building is lightweight, then it is better to make a columnar foundation. This will raise the structure above the ground and protect the birds from predators.
- Construction of the frame. The easiest way is to build a frame building. To construct the frame, wooden beams or metal structures, as well as durable fasteners, are used. When constructing a wooden frame, 2 methods of fastening are used simultaneously. Grooves are made in the beams, assembling them like a construction set. Then, fix the fastening points using self-tapping screws and nails. Metal structures are attached to each other using welding and fasteners.
- Arrangement of floors. The floors are made of concrete or wooden planks. It's better to use wood. Its disadvantage is that such a floor is less durable than concrete. The concrete floor is cold. In addition, during the cold season it quickly cools down, which is why it needs to be insulated with a thick layer of straw bedding and sawdust. The plank floor is warm. Before laying it, it is better to treat the wood with special means that prolong the service life of the natural material. Also, a plank floor will last longer if the underlayment is always dry.
- Walling. The walls are sewn onto the frame. If we are talking about winter construction, it is better to insulate them. If this is a summer building, then choose a material that does not heat up too quickly (wood, plywood, OSB, PVC or fiberboard). It is better to insulate a winter chicken coop from the inside using glass wool blocks. Sheets of corrugated sheets are sewn on top of the insulation. Fiberboard or oriented strand boards are used. Using plasterboard panels is a bad option because... they absorb moisture and become deformed over time. When constructing walls, space is left for windows and doors. To ensure that there is not enough material, before insulating the walls, they make markings and calculate how to lay the thermal insulation so that there is no waste left.
- Roof arrangement. To store supplies of hay and feed under the roof, it is made gable. If the attic is not needed, they are limited to the construction of a lean-to structure. Having an attic under the roof will not only help save space. The straw layer will act as additional insulation. Slate or tiles are used for covering.
- Installation of windows and doors. Chickens in the barn should have sufficient light. The number and size of windows depend on the size of the building. It is better if they open, acting as a natural ventilation system. A door is made in the doorway or in the wall for the birds, through which they can go inside without human help.
- Summarizing communication. Any chicken coop, even if it is small, is equipped with an artificial light source. Birds need long daylight hours, and in early spring and late autumn its duration does not exceed 12 hours, which is 3 hours less than normal. In winter, the days are even shorter. There is no need to equip a small chicken coop with a forced ventilation system, but in a large barn it will be useful. The hood will ensure normal air exchange in the room.
The do-it-yourself chicken shed is ready.
Construction order
It is important
A person with minimal experience in such work can build a chicken coop using frame technology. But he knows how to handle power tools. It should be understood that the process is accompanied by serious physical activity. At some stages you will need the help of a partner.
First you need to create drawings of the barn project, which reflect the dimensions and main elements:
- internal partitions;
- openings for windows;
- manhole for chickens;
- doors;
- ventilation system.
At this stage, it is necessary to decide on the thickness of the walls and the type of roof (single-pitch, gable).
Construction of a columnar foundation
A reliable foundation for frame buildings is the simplest columnar foundation. It is built as follows.
Along the perimeter of the building and the line of proposed internal partitions, holes are dug every meter, with a depth of at least 0.5 m.
Pour sand into each hole and compact it tightly.
Pillars are installed from the selected material.
The main requirement for installing pillars is to maintain horizontal flatness, which will be checked with a special level.
Construction of the frame
The process uses large-sized elements. In particular, long bars and boards. Therefore, the help of 2 people will be required.
Below are the main stages of assembling the frame.
Foundation of the building
They start by creating a foundation. On the foundation pillars, bars with a cross section of 100x100 mm (or boards 50x100 mm) are installed. The method of fixing the bars depends on the foundation material.
Fastening to wooden posts is carried out using nails up to 200 mm long. Or anchor elements with perforated corners.
In places where the brickwork or cinder block comes into contact with the timber, at least 2 layers of bitumen waterproofing are laid. The connection is fixed with a perforated corner with an anchor element. The hole in the masonry for the plastic dowel is pre-drilled.
You can use wire to secure the timber to the foundation.
Floor arrangement
The installation of the floor is carried out after the construction of the wall frame. First, logs are installed from 50x150 boards mounted on edge. They are nailed (120 mm long) to the base and frame posts.
Then the floor is laid using different materials:
- boards (retain heat, but quickly rot);
- lay out a layer of crushed stone, then pour in cement;
- iron sheets.
The cement or iron floor is cold and damp. But it is a reliable protection against predators and rodents. It will have to be thoroughly insulated. The best option is sawdust and straw.
The poured floor is prepared as follows.
Side walls made of bricks or boards, up to 200 mm high, are built between the foundation posts. If necessary, to obtain the desired size, remove part of the soil.
Fill with an even layer of crushed stone. Cement is poured to a thickness of about 50 mm.
The article “What is the best material to use for making floors in a chicken coop” will help you avoid mistakes when choosing a material.
Wall assembly: first stage
The described method will help you build walls quickly. The assembly of each wall (or part of it, depending on the length) is carried out separately, on a flat horizontal surface.
A wooden stand with a cross section of 50x100 mm is laid edgewise on the surface. The length of the rack is calculated according to the plan of the barn: the perimeter of the building, internal partitions.
Perpendicular to it, every 600-750 mm, install the same racks 50x100 mm, 200 mm long - the height of the future walls.
Each perpendicular post is nailed to 1 post with 2 nails of 200 mm each. They are driven in from the outside.
Second phase
For the stability of the structure, horizontal jumpers are installed on nails in a checkerboard pattern between the perpendicular posts. At least 2 pieces in each span.
On the other hand, a post parallel to 1 is installed to the perpendicular posts. They are nailed in the same way with 2 nails.
The assembled frame forms the future wall. It is installed on a support. They nail it to it with a sufficient number of 200 mm nails.
When calculating the height of the walls, we must not forget that with a pitched roof, the front wall of the barn will be higher than the back. After all, the slope of a pitched roof is always made from the front wall to the back. And the side walls are made in the shape of trapezoids.
Window and door openings
During the process of assembling the walls of the barn, when installing lintels, the location of future window and door openings is taken into account. And also a hole for chickens.
Window openings are formed by lower, upper and vertical lintels. They are installed according to the size of the window. Plus 20 mm on each side.
Doorways are formed by vertical posts and a horizontal lintel between them.
The chicken hole is formed by vertical and upper horizontal jumpers.
Wooden frames are made independently. Plastic windows are ordered from specialized companies.
The door is cut out of plywood. Knocked down from boards.
The installation of barn doors and windows is usually carried out after the roof has been erected.
Chickens wake up early in the morning, so the windows should face east or northeast.
Wall cladding
The walls are sheathed from the inside with wooden panels and OSB boards. The best option for VGL is moisture-resistant plasterboard sheets, followed by painting.
Basalt insulation, which is laid on the outside of the walls, allows you to get a warm barn for chickens.
You can cover a chicken shed with your own hands using plastic clapboard or siding.
More details about insulation are written in the article “How to insulate a chicken coop for the winter with your own hands.”
Roof installation
The roof consists of a rafter system, sheathing, insulation and outer covering. When building a barn for chickens with your own hands, it is advisable to choose the easiest option for a pitched roof.
Work order
The rafter system is mounted on the upper horizontal boards of the walls using perforated corners or nails. The interval between the rafters is 750-900 mm. Use boards with a section of 50x150 mm.
A vapor barrier is sewn to the bottom of the rafter system using a construction stapler.
The lower (inner) sheathing is hemmed in the same way with an axial step of 4 mm. The section of the board is 25x100 mm.
Basalt insulation is laid on the upper part of the rafter system, between the boards.
Hem the waterproofing.
The top sheathing is made of boards with a section of 25x100 mm. The pitch is determined by the type of coating (metal tiles - 350 mm).
Install the outer covering.
Instead of a stapler and staples, you can use regular nails.
The slope of the slope depends on the coating material, the range of values is 8-35 degrees.
Equipment for a walking pen
On the side of the manhole and the entrance door there will be an area for birds to walk. The site is surrounded by a fence. It can be made from boards or mesh.
The fence should perform the main function - to protect against the penetration of predators. Detailed information can be found in the article “Constructing a pen for chickens.”
Ventilation
It is important to ensure adequate air circulation in your shed. Ventilation is arranged as follows.
Make at least 2 holes. They are provided at the stage of wall construction. Be sure to cover them with bars.
The pipe is brought out through the roof. A canopy is installed on the surface as a barrier to rain and snow.
The ventilation pipe should rise 1-1.5 m above the roof. You can install the system yourself if you study the article “How to properly ventilate a chicken coop.”
Interior arrangement
Inside the barn it is necessary to provide everything necessary for a comfortable stay for chickens.
Make perches of the required length. Each individual requires at least 20 cm of surface.
Install separate containers for water and feed. It is advisable to use special stable feeders with high sides.
You will also need containers for gravel, shells, and feed chalk, which are a source of mineral elements.
It is important to provide nesting sites for laying hens where they can lay eggs.
The article “Rules and tricks for arranging a chicken coop inside” will help you equip a room for chickens.
What materials and tools to use
For utility rooms, remnants of building materials that have been in stock for a long time and are waiting in the wings are suitable. You can buy the missing parts and it will be inexpensive. You will also need the most standard tools, which are usually found on any farm: saws, hammers, nail pullers, containers for mixing mortars, brushes and rollers for painting, tape measure and slopes for measurements, etc.
Wooden structures are erected faster, but do not last as long as stone-brick structures. A wooden shed must be well strengthened, the walls must be primed and painted. It can be insulated from the outside and inside using a suspended profile, shingles, etc. Capital buildings for animals are erected on a columnar foundation, for which it is most convenient to use aerated foam concrete blocks, held together not with concrete, but with a special construction adhesive.
Frame barn
What will be needed for construction
Tools
Building a shed using frame technology from lumber on a columnar foundation is the simplest option. You will need a standard set of tools:
- shovel;
- hacksaw for wood, plastic;
- electric drill;
- screwdriver;
- construction stapler, staples;
- hammer.
You can’t do without a tape measure, a plane level, a perpendicular.
Materials
The foundation is erected from cinder blocks, bricks or wooden posts with a diameter of at least 100 mm.
The frame of the building is constructed from wooden blocks with a cross-section of at least 50x50 mm and 100x100 mm. Also used: flat board, plywood, slats, OSB boards, fiberboard.
Plastic lining and siding are used for exterior wall decoration.
Coatings suitable for roofing sheds (in order of increasing cost):
- roofing felt;
- corrugated asbestos-cement sheets (slate);
- bitumen-fiber sheets (ondulin);
- folded sheets (galvanized metal sheets, 0.5 mm thick);
- metal profile (height no less than 50 mm).
When constructing the roof, you will also need wooden lining and vapor barrier.
You should not skimp on metal corners, screws and nails. They largely determine the stability of the structure.
In cold regions it is necessary to stock up on insulation. Its use will reduce heat loss in cold weather.
Doors to the poultry house
An important detail is the door to the chicken coop. It should be the same as the door to any other outbuilding, that is, match your height. Most often, a wooden door is made from boards, but any option will do.
The door in the chicken coop should open inward, this makes it easier to control the bird so that it does not run outside when you enter. A lock or deadbolt is a must. This way no stranger will get into the barn.
How to make a door frame with your own hands from boards in a chicken coop:
- Take a board that is equal in width to or slightly larger than the thickness of the wall, the thickness of the board is about 50 mm.
- Cut one board equal to the width of the opening - it will be at the top of the box.
- The length of the vertical elements is 50 mm less than the length of the opening.
- The lower part is the threshold, 100 mm less than the opening width.
- Connect the elements using furniture dowels.
- Secure the fastening with wood glue.
- Keep an eye on the level. The entire structure must be strictly in one plane.
Door height depends on height
To keep the cold out when opening the entrance door to the chicken coop, you can provide a vestibule. A small room literally 1 square meter in size. m is a kind of transition zone where the temperature is maintained.
The question of whether a chicken coop needs a window arises only for those who raise poultry exclusively in the summer. Then the chickens spend all their time outside and do not suffer from a lack of sunlight. In winter, the presence of a window in the barn is mandatory.
The size of the windows in the chicken coop depends on the height of the room. The larger the area and height of the poultry house, the larger the window that needs to be provided. To prevent blowing from them, make several layers of glazing, seal the cracks or install ready-made double-glazed windows.
Comfortable perches
Project selection, poultry house dimensions
It is not necessary to try to find drawings of a poultry house for exactly 20 birds. The design of winter chicken coops for any number of birds is the same, only the size differs. Here you need to take into account the characteristics of the breed: the larger the chickens, the more space they need. It is believed that 2-3 heads of ordinary laying hens or eggs and meat birds can fit per 1 m2 of area. Broilers are sedentary; up to 4 individuals can be accommodated in a similar space.
In fact, such conditions are very cramped. The bird simply has nowhere to spread out, and crowding will increase the risk of spreading diseases. Plus, you need to take into account that a certain place in the chicken coop will be occupied by feeders, drinkers, and nests. The ideal would be to allocate 1 m2 of space for 2 small birds or 1 large meat chicken.
Advice! Too much free space is also undesirable in a chicken coop. In winter, it will be difficult to heat the barn.
A poultry house design with an area of 15-20 m2 is considered ideal for 20 chickens, but this is only a barn. The paddock is made of similar sizes, and if the area allows, it can be increased. As a result, the chicken complex will occupy from 30 to 40 m2.
The shape of the chicken coop is selected according to the characteristics of the site. Square poultry houses are inconvenient in terms of internal arrangement. It is more convenient to distribute feeders, drinkers, perches and nests inside a rectangular barn.