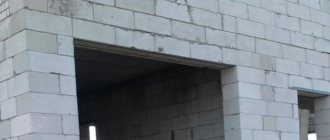
One of the most popular types of cellular concrete today, gas silicate, is used in the construction of residential buildings and non-residential premises. Its popularity is easily explained - convenience and speed of laying, as well as an affordable price. But like any material, the laying of gas silicate blocks has its own nuances.
When working with gas silicate blocks, it is important to pay attention to several main points:
- Surface level;
- Bandaging blocks;
- Reliable waterproofing;
- Mandatory laying of fittings.
Reasons for the popularity of laying walls of houses and outbuildings from gas silicate:
- Thermal insulation – the material has low thermal conductivity and retains heat well;
- Light weight - gas silicate belongs to the group of lightweight concretes;
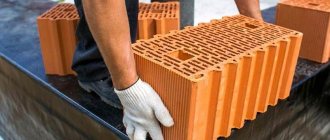
- Ease of installation - the blocks can be easily processed, and their size allows you to reduce the time for installation work;
- Affordable price.
But, despite their advantages, gas silicate blocks have several negative features - poor resistance to water, so during construction it is important to install good waterproofing, and fragility. Transportation of blocks must be carried out carefully, all parts must be tightly secured.
When purchasing gas silicate blocks, it is better to purchase a certain reserve for “battle”.
Construction technology from gas silicate blocks
The work of laying gas silicate is not very difficult, the main thing is to adhere to a few rules.
- The blocks must be smooth and have a homogeneous structure; if necessary, the surface can be cleaned with a plane;
- Each installed block is checked for evenness using a building level;
- It is better to use tongue-and-groove blocks, they provide a stronger connection;
- First of all, the corner elements are installed with the tenon facing outward;
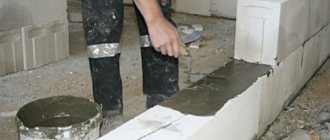
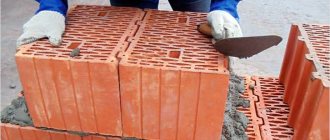
- The gas silicate block is laid using cement mortar or special adhesive for cellular concrete;
- On every third or fourth row a layer of reinforcement is laid;
Using only cement adhesive will result in a decrease in thermal insulation properties.
Below is a detailed description of step-by-step instructions for laying gas silicate blocks with your own hands.
Aerated concrete blocks on polyurethane foam
Construction of a cottage from aerated concrete is one of the most common house-building technologies in our country. Regular readers of FORUMHOUSE know well that gas blocks must be placed on special glue.
Aerated concrete - with foam or glue
Adhesive for aerated concrete ensures thin joints of the masonry (with a seam thickness of 1-2 mm), which reduces “cold bridges” and reduces heat loss in the building.
When laying elements on cement-sand mortar, the thickness of the seam increases to 10-12 mm. In terms of the area of the aerated block wall, such seams turn into powerful “cold bridges”. Since the thermal conductivity of cement-sand mortar is higher than the thermal conductivity of aerated concrete, this leads to significant heat loss.
When using glue, up to 10% of thermal energy is lost through masonry joints, and when using cement-sand mortars, losses amount to up to 30%.
This leads to the need for additional insulation of the house and an increase in the power of the heating system. Also, laying aerated concrete with glue is more economical than laying with cement-sand mortar.
A bag of cement mortar costs less than a bag of glue of the same volume. But in the end, in terms of per 1 m3 of masonry, due to the thin seam, the glue consumption will be several times less than the consumption of cement mortar.
In recent years, foam for aerated concrete has been gaining popularity in Europe. The laying of piece materials - gas block and warm ceramics is carried out using a special one-component polyurethane foam adhesive - polyurethane foam.
Adhesive foam for aerated concrete.
Similar method:
- Improves the thermal insulation properties of masonry, because Cold bridges are eliminated.
- The construction of a house is accelerated, since the number of “wet” processes is reduced.
Does this technology have a right to life? Let's turn to the experience of forum members.
Features of laying aerated concrete on polyurethane foam
Like everything new, this technology raises a lot of questions. Let's try to understand the main points. FORUMHOUSE member under the nickname jek48:
I want to build a house. At first I thought about building a frame structure, but my neighbor, an experienced builder, advises building a house from aerated or foam concrete. Moreover, the masonry should be laid not with cement mortar, but with polyurethane foam (special polyurethane foam adhesive). So I'm wondering if it's worth doing this.
The opinions of forum members were divided. Someone is “for” the technology with both hands. Some people think that a house made of gas or foam concrete, “assembled” with adhesive foam, will either immediately fall apart or not last long. The main question is the durability of such masonry. The properties of cement are predictable and well studied in the long term, but we cannot say what will happen to polyurethane foam in 10-15 years. Especially in our climate - with frequent transitions through “0”, severe frosts, rain, etc.
The main enemy of polymer-based materials (this includes foam adhesive) is ultraviolet radiation. When installing windows, uncovered foam, when exposed to sunlight, is destroyed within 1 year. However, in masonry it is completely isolated from the harmful effects of ultraviolet radiation. If you leave the facade work for later, then the maximum that can happen to it in the masonry is that the outer layer of the seam 1-1.5 mm wide will burn out. This will not affect the strength of the structure. But to guarantee that when laying, you need to use not the first PPU glue you come across, bought on the construction market, but a special one designed for such work .
Gas blocks on foam-glue. Feedback from FORUMHOUSE participants
NadegniyForumHouse Member
You need special foam, with a low coefficient of secondary expansion , a uniform structure, and a water-resistant type. Others will simply fall apart.
The practice of using foam with a low secondary expansion coefficient has shown that after its curing, the masonry seam is not deformed, and the geometric stability of the laid block is maintained in both the horizontal and vertical planes.
To achieve this, in addition to special foam, you must adhere to the technology of laying the aerated block. To do this, you must meet the following conditions:
- The geometry of the blocks must be ideal.
- Particular attention should be paid to laying out the elements of the first row. The evenness of this row determines the entire geometry of the future wall. The first row is traditionally laid on a cement-sand mortar.
- All irregularities must be ground down with a plane, and the surface must be smoothed with floats.
- Before squeezing out the foam, the element must be cleaned of debris and dust.
- Its surface must be moistened with a brush dipped in water.
- Foam is applied to the block (depending on its width) in one, two or three strips along the entire length.
- The distance between the strips of adhesive is approximately 10 cm.
- To prevent excess from being squeezed into the cracks, the strip is applied not reaching 5 cm from the edge of the element.
If these recommendations are followed, the foam, under the weight of the block, spreads in a thin layer over its surface, filling all the smallest irregularities.
This provides:
- increased adhesion;
- increases the contact patch;
- prevents further shrinkage of the wall;
- minimizes point loads, because the elements completely overlap each other.
With thin-seam masonry, the main task of the mortar is to keep the blocks from moving.
In fact, a house can be built from them “dry”. Such a structure will stand (not in an earthquake-prone area) only due to the friction force that arises between the elements. Foam for gas silicate blocks
JkorchFORUMHOUSE Member
I worked for a long time installing windows and know that even heavy materials can be glued to foam. It all depends on the area of the mating surfaces. And foam for aerated concrete is no longer real glue! I tried putting gas silicate on foam glue. I note that it is very convenient to work with, but the blocks should have minimal deviations in size. Because My gas silicate blocks were far from ideal, so I made a compromise - I filled only the vertical seams with foam, and the horizontal ones with regular glue.
Foam for laying gas silicate blocks.
Foam for aerated concrete masonry: reviews from FORUMHOUSE participants
At the moment, the use of adhesive foam instead of cement mortar is recommended only when laying non-load-bearing (internal partitions) and self-supporting walls in frame-monolithic construction. Its use in laying load-bearing walls has not yet been officially confirmed in our country. Although in the Czech Republic and Poland, masonry of load-bearing walls with mounting foam has been carried out since 2007. FORUMHOUSE users, as usual, are pioneers of new construction technologies. Let's look at their practical experience.
Polyurethane foam for foam blocks
serge 67penaFORUMHOUSE Member
I built a house from foam blocks using foam. This foam block house has been standing for 5 years. Using it, I am building a second house. In my opinion, foam blocks on polyurethane foam are much more convenient than fiddling around with mixing the solution, adding water, and further cleaning the tools from the remaining solution. Excess glue is easily removed. The foam block masonry itself looks clean and neat.
Laying foam blocks on polyurethane foam.
According to the observations of a forum member, one foam cylinder with a yield of 65 liters is enough to lay 25-27 elements measuring 400x625x250 mm.
If you fill your hand, then 1 cylinder is enough to lay 1.5-2 cubic meters of aerated concrete. Moreover, after several minutes have passed after laying the element, it comes off with great difficulty and only when struck with a large mallet. After 15-20 minutes, it is impossible to tear off the block without damaging it.
For the sake of experiment, a forum member with the nickname Gansales decided to glue three blocks at the ends with foam (for the lintel). Without reinforcement, they supported their weight, secured only at the very ends (about 5 cm from each edge). The glue failed a similar test.
GansalesFORUMHOUSE Member
I build my house in my free time from my main job. There is no water on the site. If previously you had to carry water in a canister to stir the solution, now everything is simple - I took out the mounting gun, installed the cylinder, quickly squeezed out the foam, put the blocks in a couple of hours in the evening and went home.
Aerated concrete on foam, load-bearing walls.
When laying on foam, a lot of manual work is added to sand the block, but when laying aerated concrete on glue, it also needs to be sanded. According to the observations of a forum member, if you compare the cost of “glue/foam” masonry, then the foam turns out to be about 2 times more expensive (here a lot depends on the experience of the mason and the width of the blocks used). But, when recalculating the cost of laying one row “on foam”, the final price increases by about 5%, which has virtually no effect on the cost of the house.
So far, the technology of laying piece materials on foam has not been sufficiently tested by time - forum users lay load-bearing walls at their own peril and risk. But the “laying aerated concrete on foam” method has advantages:
- masonry can be carried out in an area where there is no water and electricity necessary for preparing cement-based mortars;
- “cold bridges” are removed;
- masonry speed increases and time is saved;
- no need to wash tools every time at the end of the working day;
- the process is more technologically advanced and virtually waste-free.
At FORUMHOUSE you can learn everything about how to lay gas and foam concrete on polyurethane foam. Read reviews from members of our portal on how to reduce the cost and improve the quality of building a house from aerated concrete. Get acquainted with a detailed description of all stages of building a house made of aerated concrete. Watch our video about building an aerated concrete house yourself.
Selecting a mixture for installation work
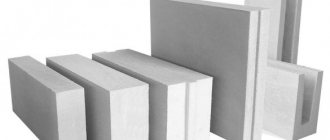
To work with gas silicate products, several options for the binding solution are offered:
- Mortar based on cement and sand;
- Special glue.
The cement mixture is the simplest and most affordable option, the price of the ingredients is quite low, you can prepare the mixture yourself - 1 part cement, 3 parts sand and water, the mixture is thoroughly mixed until smooth.
But the cement-sand mixture has a big disadvantage - the appearance of “cold bridges”, the room quickly cools, so it is not worth building a residential building using this solution alone; it is better to use it for the construction of garages, fences, industrial buildings, etc.
Special glue - for the installation of gas silicate blocks, preference should be given to glue for deep penetration cellular concrete. It is characterized by high levels of durability, moisture resistance, resistance to mold and fungal diseases.
The glue is sold in a building materials store in a tightly sealed package, which contains exact instructions for preparing the solution.
When choosing a mixture, it is necessary to give preference to plastic solutions that have good moisture resistance and resistance to temperature changes, and also have adhesive properties.
Which glue to choose?
A short overview of the formulations offered for sale
The timely selection of dry building mixtures intended specifically for laying cellular concrete blocks (including aerated concrete) is extremely wide. It is difficult to even simply list all compositions of this type. Therefore, the table below will present just a few popular brands - just to give a general idea of the characteristics and price level.
| Illustration | Name and brief description of mounting adhesive | approximate cost |
| "Ceresit ST 21". Water- and frost-resistant adhesive for interior and exterior use. Seam thickness – 2÷3 mm. Application time after preparation is up to 2 hours. Corrected blocks - at least 10 minutes. Frost resistance – F75. Consumption – 1.46 kg per 1 m² with a layer thickness of 1 mm. Packaging: 25 kg bags. | 300 ÷ 350 rub. | |
| "AEROC" - glue is produced by a company that produces aerated concrete blocks of the same name. That is, the composition is maximally adapted. Thin-layer, available in winter and summer versions. Correction of blocks – up to 15 minutes. Consumption – 1.5 kg/m² with a layer of 1 mm. Packaging: 25 kg bags. | 200 rub. | |
| "Baumit PorenbetonKleber" is a gray thin-layer adhesive. Seam thickness – up to 5 mm. Application time after preparation – up to 4 hours, adjustment of blocks – within 7 minutes after installation. Consumption – 1.54 kg/m² with a layer of 1 mm. Packing: 25 kg crayons. | 245 rub. | |
| “BIKTON KLEB” - thin-layer adhesive for aerated concrete blocks, seam up to 3 mm. The shelf life of the solution after mixing is up to 60 minutes. The consumption declared by the manufacturer is 25 kg per 1 m³ of masonry with a layer thickness of 3 mm. Packaging: 25 kg bags. A winter and summer version of the mixture is available for sale. | Summer – 200 rub. Winter – 240 rub. | |
| “Ivsil block” is an assembly adhesive with a wide range of applications, including suitable for aerated concrete blocks. Seam thickness – from 2 to 5 mm. The viability of the solution is up to 2.5 hours. Possibility of block adjustment – up to 15 minutes. The declared consumption is about 25 kg per cubic meter of masonry. Packing – 25 kg bags. | 190 rub. | |
| “Volma block” is a popular mounting adhesive for gas blocks among domestic builders. Available in summer and winter versions. The thickness of the seams is up to 5 mm. The viability of the finished solution is up to 2.5 hours, adjustment of the position of the blocks is up to 15 minutes. Consumption – 1.4 kg/m² with a layer thickness of 1 mm. Packaging – 25 kg bags. | 200÷240 rub. | |
| “Unis uniblock” is a masonry and installation mixture that allows, in addition, to carry out internal and external plastering and repair work. The thickness of the seam is from 3 to 5 mm, it is possible to adjust height differences up to 20 mm thick, and seal surface defects up to 40 mm deep. Consumption – 1.45 kg/m² with a thickness of 1 mm. Frost resistance – F100. The viability of the solution is up to 2 hours, block adjustment is up to 10 minutes. Packaging: 20 or 25 kg bags. | 200 rub. | |
| “Kreps KGB” is an adhesive for blocks made of any type of cellular concrete. The recommended layer thickness is up to 3 mm. Consumption – 1.6 kg/m² with a layer of 1 mm. The shelf life of the solution after mixing is up to 4 hours, adjustment of blocks is within 10 minutes. Frost resistance – F35. Packing – paper bags of 25 kg. | 220 rub. | |
| "Bergauf Cleben Block" is an adhesive composition for all types of cellular concrete. Layer thickness - 2÷3 mm. Consumption – 1.3 kg/m² per 1 mm. The viability of the solution is up to 3 hours, adjustment of the position of the blocks is within 15 minutes. Frost resistance – F35. Packaging: 25 kg bags. | 235 rub. |
As you can see, it cannot be said that any of the compositions stand out too much from the general range with their characteristics or cost.
What else to look for when choosing glue
If the time has come to buy glue for blocks, then you have to choose the best brand from those offered in the store and decide on the amount of material required. We'll talk about quantity a little later, but let me give a few more important recommendations regarding selection.
- If there is a conversation about purchasing glue, then, most likely, the issue with the blocks themselves has been resolved or is being resolved in parallel. As we saw in the table above, some companies offer both branded aerated concrete and masonry mortar for it. We must assume that these materials from the same brand are ideally adapted to each other, and this choice will certainly be optimal.
Both aerated concrete blocks and the adhesive for laying them from the same manufacturer are an almost ideal combination.
This choice may also be supported by the fact that often the purchased “sets” are subject to very significant discount programs. And you can save a lot of money.
In the same case, when this is not possible, it is still worth looking in advance at the possible recommendations of the manufacturer of aerated concrete blocks. Quite often it is indicated which adhesive composition is considered optimal, having successfully passed laboratory tests and shown the best results.
- It is clear that the choice of glue must correspond to the quality of the blocks available or purchased. If aerated concrete is not of high quality, or there are significant deviations in the geometry of the products, then thin-layer adhesive may simply not be suitable.
- The selected adhesive must correspond to the season of the planned construction work. Although, to be honest, it is best to carry out such stages of construction during the warm season - it is simpler, more reliable, and cheaper.
- Dry building mixtures are the type of materials when choosing which you must pay attention to the date of its manufacture. Unfortunately, even under ideal storage conditions, the shelf life of such compounds is limited, and they begin to lose their quality. Outwardly, before kneading and use, this may not be particularly noticeable. But during operation, “overexposed” mixtures can behave “inappropriately” - setting too quickly, not showing the expected adhesion, etc.
If the store ships glue to you in frayed, torn, spilling bags, or even in perfect containers, but with an expired expiration date, you should refuse such a purchase.
It is clear that the paper container of the purchased batch of glue must not be wet or torn - that is, it must be in perfect condition. But even with all this, it is very dangerous to take expired goods.
In the video below, an experienced master mason shares his vision on the problem of choosing high-quality adhesive for laying aerated concrete walls. There is something to listen to.
Video: Expert’s opinion on choosing assembly adhesive for aerated concrete blocks
How much glue will be needed?
If you look at the passport characteristics of various compositions, you can see that there is no uniformity in assessing the consumption of the dry mixture. Some manufacturers indicate the approximate consumption per cubic meter of blocks, others indicate the area of glue application based on the specified layer thickness (both 1 mm and 3 mm are found).
It’s easy to get confused in such “polyphony”. What should a not-so-experienced builder do who plans to purchase materials and do the laying on their own?
Practice shows that, despite the variety of brands, the approximate consumption, if we take some common unit of measurement, is approximately the same. Therefore, if the scale of future construction is known, it is still possible to calculate the required amount of glue with a sufficient degree of accuracy.
By the way, the calculation based only on the volume of masonry, without taking into account the size of the blocks, is still too approximate. So, in any case, it would be more correct to take into account the format of the blocks, and then, as is more convenient, proceed from the volume of purchased aerated concrete or from the area of the masonry in accordance with the existing project.
All this is not so difficult to do if you use the proposed calculator for calculating the amount of mounting adhesive.
The application is quite easy to use.
- The user first needs to indicate the geometric dimensions of the blocks planned for the construction of walls - their length, height and thickness. Since the production of blocks still adheres to certain standards, in the calculator you simply need to indicate one of the proposed values for each of the dimensional parameters.
- The second step is to select the “calculation path”: based on the area of the wall or based on the volume of material. Depending on the choice, the corresponding data entry fields appear: either area (in square meters) or volume (in cubic meters).
- Next, you should indicate the planned average thickness of masonry joints. By default, the optimal value for high-quality blocks is 3 mm.
- At the last point, the user can choose whether to carry out a “pure” calculation, or also immediately lay down a supply of material, 5 or 10%, depending on the quality of the blocks and the experience of the master mason who will do the masonry.
The result will be shown both in kilograms and in the number of standard paper bags of 25 kilograms.
Required materials and tools
All construction work begins with the preparation of the required material. First of all, you will need gas silicate blocks and something to put on – two types of adhesive mortar (cement and adhesive for cellular concrete). Also water for wetting the blocks and a roll of waterproofing; without it, it’s better not to start construction.
Tools used in work:
- Reinforcement and reinforced mesh;
- Saw;
- Container for mixing glue;
- Construction mixer or drill with a special attachment;
- Wall chaser;
- A plane, with its help you can eliminate the unevenness of the block;
- Notched trowel;
- Rubber hammer;
- Roulette;
- Planks or pegs;
- Building level;
- Plumb lines;
- Stairs or scaffolding;
- Cord;
- Corner.
Wall construction technology
Before you figure out how the installation is done, you should first decide on the mixture for. What is better to choose: glue or solution?
What to choose: solution or glue?
Installation adhesive has a number of advantages over mortar.
They boil down to the following:
- A significant reduction in cold bridges occurs by reducing the thickness of the seam, especially if the geometry is high.
- Now a little about the cost. Many argue that a specialized composition is quite expensive. Indeed, 25 kg of glue will cost more than the same amount of self-prepared cement mortar.
Note: However, if you look carefully, there may not be any savings. Firstly, mixing the solution takes a lot of time and effort, and this is unnecessary labor costs. And if we assume that specialists are involved in the construction, then they will value their services much more expensive. Secondly, due to the reduced ability of mortar masonry to maintain temperature, additional insulation may be required, and this is another cost item.
Also, the advantages of using an adhesive mixture include the following:
- High level of ductility, the adhesive is easy to handle.
- The construction of the wall will take a minimum of time. With minimal skill and good geometry, one m3 can be laid in just 30 minutes.
- Peel strength and biological stability.
- Another advantage is the availability of winter mixture compositions in the range. It contains a specialized anti-frost additive, which allows construction to be carried out at sub-zero temperatures.
Many more arguments can be given in this regard, but these are the main ones. Now let's figure out how much glue is needed?
And this depends on some factors:
- Specialist skills;
- Layer thickness;
- Geometry and weather conditions;
- An important factor is the properties of the product itself, because the characteristics of glue from different manufacturers, including the recommended layer thickness, may differ.
But, since the building construction technology requires a minimum layer thickness, as a rule, about 40 kg of dry mixture is enough for 1 m3 of products.
Preparation of tools and material
The following tools will be needed for laying products:
- Building level. It is necessary, first of all, to control the evenness of the masonry.
Level
- A rubber hammer is a must. With its help, adjustments are made. The installation rules require this procedure to be carried out, since once the mortar has set, it will no longer be possible to disassemble the wall.
Rubber mallet
- The square is also useful for control and measuring activities.
Square
- The construction thread will be an excellent guide.
Construction thread
- The technology of construction from this material requires mandatory reinforcement, so it is impossible to do without reinforcement.
Armature
- To mix the glue, you need a container in the form of, for example, a bucket.
Construction bucket
- A scraper bucket will make it easier to apply the adhesive.
Tool for applying adhesive mass
- You will need a grater for sanding.
Construction grater
- A drill with a mixer attachment is necessary when mixing glue.
Drill with attachment
- A saw or hacksaw is useful when cutting products to the required size.
Hacksaw for cellular concrete
In general, the above tools are not that expensive and will come in handy around the house.
Before looking at how to do your own masonry, let's figure out how to properly mix the adhesive solution and how to avoid mistakes.
The instructions are as follows:
- Carefully read the manufacturer's recommendations;
- Do not make the solution too thick or thin; the consistency should resemble thick sour cream;
- Do not mix too much glue - it sets quickly, and diluting it is strictly not recommended.
The video in this article: “Aerated concrete: laying products with glue” will demonstrate step by step how to properly mix the mortar and adhesive mixture.
Description of stages
Now let's look at it step by step: how to lay the material correctly? Let's use the table.
Product placement:
| How to lay the material: name of the stage | Brief description and comments |
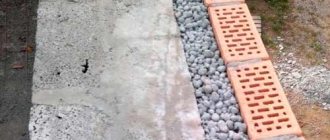
| Before starting to lay the products, it is necessary to carefully prepare the base of the structure, that is, the horizontal plane of the foundation. All defects must be eliminated, the base must be waterproofed. For this purpose, roofing material is used, glued, for example, to bitumen mastic. |
| The first row is laid on the solution in any case. Always start from the corners. The highest point is selected, at which the first product is laid. A construction thread is pulled between the gas blocks and further work begins. |
| The technology of building a wall with glue involves applying the minimum possible layer, as mentioned above, this will help increase the heat-retaining ability of the wall. The blocks are laid row by row, and the following rules are observed. |
| This procedure should be carried out as often as possible. As a rule, the adhesive mixture sets after 10-15 minutes. To do this, use a level and a mallet. When used correctly, it will not compromise the integrity of the products. |
| Don't forget about dressing. The photo shows some possible options. Please note that the masonry seam in relation to the previous one must shift by at least 20%. |
| Reinforcement must be done without fail. It is recommended to repeat the procedure after laying every third or fourth row. And if you are currently doing your own styling, the video may be very useful for you. It contains information regarding the rules for reinforcing aerated concrete masonry. |
| There can be several options for laying: one block, one and a half, two. The diagram shows the most common options. |
| Upon completion of installation, it is necessary to install an armored belt. |
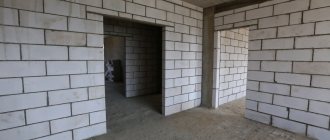
Finished walls
And if you still don’t fully understand how aerated concrete blocks are laid, the video below will help you understand this issue.
Preparation of the solution
General rules for preparing an adhesive solution:
Observe the proportions; failure to comply with the specified number of components will lead to a violation of the technological properties of the solution.
- Pour dry ingredients into prepared container;
- Gradually pour in purified water, thoroughly mixing the mass with a construction mixer or drill with a special attachment;
- Bring the solution until smooth and leave to rest for 5 - 10 minutes, during which time the glue will acquire the necessary properties;
- Stir again - the solution is ready for use.
The glue quickly loses its properties, so you can use it within a couple of hours.
Some experts practice installing gas silicate blocks on polyurethane foam, but this method has not yet been fully tested.
Installing the first row
Before laying the first row of gas silicate blocks, it is necessary to carry out preparatory work - check the evenness of the finished foundation, correct defects if necessary, and clean the base from dust and dirt.
Two layers of waterproofing are laid on the surface of the foundation. It is used as:
- Ruberoid;
- Bitumen;
- Modern polymer compositions.
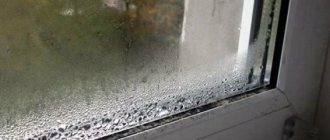
If waterproofing is not installed, the gas silicate blocks will absorb moisture, and the wall will eventually become damp and covered with mold.
A cement mortar 3 centimeters thick and a reinforcing mesh are placed on the waterproofing layer. Reinforcement is used to distribute the load and strengthen the load-bearing capacity of the wall.
Work on establishing the first row begins from the corner, the blocks are laid on a solution of cement and sand. Builders suggest using simple devices to facilitate laying gas silicate blocks with your own hands - a cord and pegs.
Install pegs at the corners and perimeter of the future building, which are connected to each other with a cord, and carry out further laying along the resulting guides.
The adhesive solution is applied immediately before laying the block; the end of the product is also lubricated with the solution. The blocks are stacked tightly against each other, it is important to constantly check the evenness with a building level; if there are unevennesses, the position is corrected with a rubber hammer and increasing or decreasing the thickness of the mortar layer.
Cement mortar for laying lintels
All embedded parts and structural elements resting on the masonry near the openings must fit as tightly as possible. Gaps are not allowed. The contact patch depth must be 100 mm or more. To fill voids over the entire area of contact of beams and slabs, CPR should be used. The maximum layer thickness is 15 mm.
If the mating surfaces are in close contact, a 5 mm thick adhesive seam can be made between them. It is allowed to use elastic sheet gaskets with a cross section of 3 mm.
If the edge loads on cellular walls are higher than the calculated load-bearing capacity of the wall by more than 80%, intermediate reinforced concrete structures - belts or cushions - should be installed.
Requirements for the strength of adhesives and CPR and recommendations for its preparation
The strength of the factory-made adhesive mass is not regulated. When making seams, you must follow 2 rules:
- Manufacturers' recommendations must be followed.
- The thickness of the seam layer should not exceed 5 mm.
Seams made of cement-sand suspensions must meet the requirements:
- Solution brand – M50;
- Compressive strength – 2.5;
- The thickness of the seams should not exceed 12 mm.
To prepare CPR grade M 50, take 1 cubic meter of sand and cement:
— 140 kg brand M 400
or
— 185 kg brand M 300.
The solution is prepared as follows.
- First you need to mix the binder and filler.
- After this, pour half the calculated amount of water into the mixture and stir for 2 minutes.
- Finally, add the rest of the water and mix for 10 minutes.
- The mixer rotation speed is limited to 50 rpm.
- Together with water, you can add a plasticizer - 1% of the volume of the solution. Washing powder, detergent mixtures, and PVA glue are used as additives.
- To increase frost resistance, potash and sodium nitrite are used. Additives should be produced taking into account the requirements of GOST.
- To reduce water absorption, salts of alkaline elements are added to the mortar for laying aerated concrete. Suitable calcium nitrate
- Comparative consumption of adhesive materials per 1 m3 of masonry
- When laying 1 cubic meter of aerated concrete on a special adhesive mass, the average consumption of the mixture is 15–25 kg.
- When laying 1 cubic. m of aerated concrete cement mortar will require 80 kg or 0.13 cubic meters of heavy mixture.
Now, knowing the volume of each element of the house, it is easy to calculate how much mixture of each type is needed for construction.
Thus, when using an adhesive solution for gas silicate blocks, we save from 50 to 90 percent of materials, time and physical labor. You can find out more about the technology and projects on the website “Building with ED”
Laying the remaining rows
After completing the installation of the first row, it takes time for the solution to harden. Further laying of gas silicate blocks with your own hands begins after 2 hours, this time will be enough for the cement mixture to set and the position of the elements will remain unchanged.
When laying the second and subsequent rows of the building, adhesive for cellular concrete is used; it is mixed in small batches, as it quickly loses its declared properties.
The technology is no different from installing the first row, the only thing is that the thickness of the adhesive layer is several millimeters. The bricks are laid out in increments of half a block, pressed closely against adjacent elements and checked for evenness of the lines.
To facilitate installation work in the summer, it is worth moistening the blocks with water.
Wall reinforcement
Every third or fourth row of masonry is reinforced. To do this, take a mesh or reinforcement based on metal or fiberglass.
If a reinforcing mesh is taken, it is simply laid on the adhesive solution between the rows of blocks. But it is better to use metal reinforcement bars.
Stages of block reinforcement:
- Using a fence cutter, two parallel lines are hollowed out along the entire length of the row;
- The resulting recesses are cleaned of dust and partially filled with glue;
- Reinforcing bars are laid, in places where they are interrupted they overlap;
- The reinforcement is filled with adhesive solution, the surface is leveled.
Openings for windows are reinforced along the bottom row.
After the full height of the wall is built, an armored belt is poured, it will distribute the load and ensure the durability of the structure.
Reinforced belt installation process:
- A structure is first built from wooden boards and supports, carefully secured, but it should be taken into account that later it will have to be disassembled;
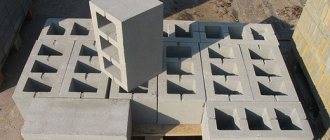
- U-shaped gas silicate blocks are placed on the boards;
- An iron reinforcement frame is placed in the recess of the block and filled with concrete.
The composition of concrete for reinforcement includes cement (1 part), gravel (3 parts), crushed stone (5 parts) and water. The mass should be homogeneous and of medium density; it is better to use a concrete mixer for mixing.
Before pouring concrete, wet the surface of the blocks - this will increase adhesion.
Mortar for non-autoclaved concrete
Let's consider step by step what materials are needed to prepare the solution, how to calculate its composition and how to prepare it.
Materials for the mixture
To prepare a mixture for aerated concrete you need only a few components:
- water;
- Portland cement grade no less than 500;
- sand;
- plasticizer;
- gasifier - aluminum powder or paste.
We need high-quality cement because the partitions between the pores are thin, and they need to be given the necessary strength.
Also, to increase the strength of aerated concrete, polypropylene fiber fiber can be introduced into its composition; it reinforces the material throughout its entire volume. To reduce cement consumption, a plasticizer is added. Sometimes alkali is additionally introduced to increase gas formation (although the concrete mixture itself also has an alkaline reaction with a pH of about 13, but its activity may not be enough).
How to determine the particle size modulus
We need sand with a fineness modulus less than one
If you find a set of sieves with mesh sizes of 2.5; 1.25; 0.63; 0.315 and 0.16 mm, then the particle size modulus can be determined independently, it is not difficult. The procedure is as follows.
Set of laboratory sieves for concrete aggregates
- We place the sieves on top of each other in order at the bottom with the smallest meshes at the top - the largest.
- We measure out a sample of sand, for example 1 kg, and begin sifting it. The operation can be considered complete if no sifting is observed when shaking any of the sieves over a sheet of paper.
- Then we weigh the residues on each sieve and determine what percentage of the sample they make up.
- The total residues are determined, which are designated A2.5, A1.25, and so on, the index after the letter is the mesh size of the corresponding sieve. Total residues are equal to the residue on a given sieve plus the sum of the residues on the sieves above it (that is, the amount of sand that would remain on it if there were no sieves on top).
- The sand fineness modulus is calculated using the formula: Mk = (A2.5+A1.25+A0.63+A0.315+A0.16)/100.
It is clear that the smaller the particle size modulus, the finer the sand; according to GOST 8736-2014 “Sand for construction work” they are classified as follows.
| Sand group | Fineness modulus (Mk) |
| Very large | St. 3.5 |
| Increased size | St. 3.0 to 3.5 |
| Large | St. 2.5 to 3.0 |
| Average | St. 2.0 to 2.5 |
| Small | St. 1.5 to 2.0 |
| Very small | St. 1.0 to 1.5 |
| Thin | St. 0.7 to 1.0 |
| Very thin | up to 0.7 |
We need to order fine, fine or very fine sand. In the composition of aerated concrete it is called dispersed filler.
Advice. If problems arise with the purchase of the necessary sand, then the standards do not prohibit the use of dolomite flour. It is sometimes easier to find; this material is used in large quantities in agriculture to deoxidize soils.
Dolomite flour, used to deoxidize soils, can replace sand
What kind of aerated concrete will we prepare?
Next we need to decide what kind of aerated concrete we will prepare. According to GOST 25485-89, non-autoclaved concrete must have the following density grades, which correspond to strength classes and frost resistance grades.
| Brand by density | Type of concrete | Strength class | Frost resistance grade |
| D400 | Thermal insulation | B0.75; B0.5 | Not standardized |
| D500 | B1; B0.75 | ||
| D600 | Structural and thermal insulation | B2; B1 | From F15 to F35 |
| D700 | B2.5; B2; B1.5 | From F15 to F50 | |
| D800 | B3.5; B2.5; B2 | From F15 to F75 | |
| D900 | B5; B3.5; B2.5 | ||
| D1000 | Structural | B7.5; B5 | From F15 to F50 |
| D1100 | B10; B7.5 | ||
| D1200 | B12.5; B10 |
A few clarifications are required here:
- In the density mark, after the letter D, the numbers indicate the density kg/m3 of the material.
- Concrete class is the strength in MPa guaranteed for 95% of samples.
- The frost resistance mark indicates in numbers after the letter F how many cycles of thawing and freezing the material can withstand without losing more than 5% of its strength when completely saturated with water.
For an example of calculation, we take the most common aerated concrete D400, and we will calculate it so that the output complies with GOST.
Calculation
You will have to calculate it manually
This is the most interesting section of our article. The fact is that even its author, having a specialty as a civil engineer-technologist (with a specialization in monolithic concrete), could not remember and find the calculation method in his student notes; it was simply not taught.
Online calculators count the number of blocks, but do not select the mixture for their production
You won’t find an online calculator either (all that is available on the Internet is the calculation of the number of blocks for construction, but not the selection of a mixture for preparing aerated concrete). I had to study the literature - several sources were studied.
Let’s make a reservation right away: in any aerated concrete production, the recipe is not only calculated, but also tested experimentally. Almost all calculation methods require adjustments by testing prototypes.
Digressing a little from the topic, we can say that, like the recipe for delicious pilaf, the quality composition of the mixture for aerated concrete depends on the cook and process engineer. When setting up production at home, the owner plays his role, experiment...
Calculation methods that were abandoned
Several methods were found - we rejected four of them:
- According to the publication: Sazhnev N.P. “Production of cellular concrete products: theory and practice”, the formula is given: Ts = PshKts / 100, where Ts is the amount of cement, Ps is the amount of dry components in the mixture in kg, Kts is the amount of cement in percent.
- According to the book: Portik A.A. “All about foam concrete” the formula is similar: Rts = Rvyazhn, here Rvyazh is the mass of the binder in kg, n is the proportion of cement in the mixed binder.
As you can see, in these two methods the amount of cement is not actually calculated, but is set:
- Next edition: Makhambetova U.K. “Refined method for selecting the composition of foam concrete” offers a calculation using the formula: P = Рsuh/(Kskh(1+Spc), where Рsukh is the mass of dry materials, Ks is the coefficient of chemically bound water, it is for preliminary calculations 1.1 is assumed, Spc is the ratio of the mass of sand to the mass of cement.
- According to the book: Kudyakov A.I. “Design of non-autoclaved concrete,” the formula is as follows: C = ρb/(1.15-Снс), where ρb is the density of concrete, Снс is the ratio of filler and binder.
After analyzing these two formulas, it is clear that the amount of chemically bound water is determined by a constant coefficient, and they also do not take into account the properties of cement, the conditions for the formation of the concrete structure, and its strength. Also, in the above methods, the introduction of fiber fiber and plasticizer into the mixture is not taken into account. Therefore, it was decided to abandon them.
Selected technique
The most clear calculation method was found in a publication by BelNIIS employees from 2010 (by the way, the author of this article completed pre-graduation internship there, although earlier than the calculation method given below was developed). Therefore, it was decided to bring and apply it. The step-by-step instructions for carrying out the calculations are as follows.
- First of all, we find the rational ratio of the mass of the filler to the mass of solids: n = Gdn/(Gbnit + Gdn), where Gdn is the mass of the dispersed filler (sand), Gbnit is the mass of the binder. To do this, we use graphs obtained as a result of laboratory tests of various proportions of the compositions. They are listed below.
Graph of the rational ratio of the mass of filler to the mass of solids
For our example with a density of 400 kg/m3, in order to fit into the strength normalized by GOST between classes B 0.5 and B 0.75, according to the graph, the most suitable value is n = 0.4.
- The strength can be adjusted if fiber is introduced. To do this, we find out the strength growth coefficient when introducing Kv fiber fiber from the table below.
| Amount of introduced fiber fiber in kg per m3 of aerated concrete | 1 | 1,5 | 2,5 |
| Strength increase coefficient Kv | 1 | 1,2 | 1,3 |
Having found out the coefficient, using the formula: R28 = (5.3x10 -3x ρb-2.1xn-0.49)xKv, you can calculate the planned strength of concrete at the age of 28 days - R28. For our example, let’s first take the amount of fiber 1.5 kg/m3, therefore, Kv is equal to 1.2 - we get: R28 = (0.0053x400-2.1x0.4-0.49)x1.2 = 0.94 MPa. This is slightly higher than class B 0.75 adopted by GOST.
You can leave everything as it is (extra strength does not interfere), or take a smaller number n, or you can reduce the amount of fiber. In our example, we take 1 kg/m3 of fiber and get a strength of 0.79, which is close to class B 0.75.
- Next, we find out the amount of binder using the formula: Gbinder=ρb/(1+αмхмхсв+n/(1-n)), where αм is the degree of hydration of the binder (for most cements 0.7), mхв is the amount of chemically bound water (assumed 0.227) .
Let’s calculate for our example: Gknit=400/(1+0.7x0.227+0.4/(1-0.4))=219 kg.
- Let's find out the amount of dispersed filler: Gdn=nxGknit/(1-n). For our example, Gday = 0.4x219/(1-0.4) = 146 kg.
- Next, the gas volume is calculated using the formula:
Vg=Vb-((αxGknit)/ρ knit+Gdn/ρ dn+(αxGvyazhmkhsv)/1000), where ρ knit and ρ dn are the true densities of the binder and dispersed filler (on average for cement 3100 kg/m3 for sand 2400 kg/ m3). For the calculation, we take 1 m3 of aerated concrete.
In our example: Vg= 1-((0.7x219)/3100+146/2400+(0.7x219x0.227)/1000)=0.86 m3.
- Next, we calculate the pressure inside the gas bubble: Pp = ρbsx9.8xhf + Ratm, here ρbs is the density of the concrete mixture, hf is the height of the mold, Ratm is atmospheric pressure (for calculation we take 101325 Pa).
Let us fill forms with a height of 0.5 m with aerated concrete, in this case the pressure in the gas bubble will be: Рп=400х9.8х0.5+101325=103285 Pa.
- Next, we calculate the amount of gas-forming agent (aluminum powder or paste) using the formula: Gg=((0.018xVgxPp)/(RxTxCal))x100, where R is the universal gas constant equal to 8.31 J/(mol x kg), T is the temperature in kelvins at which gas formation occurs, Sal is the content of active metal in the gas generator as a percentage.
For our example, we take T = 293 K (absolute zero -273 o C plus twenty degrees, we get kelvins), Sal = 85%. We count: Gg=((0.018×0.86x101325)/(8.31×293x85))x100=7.57 kg.
- Next, the amount of water required to prepare the gasifier suspension is calculated: Vsus = Ggh5, in our example Vsus = 7.57x5 = 37.85 kg.
- If it is necessary to enhance gas formation by introducing alkali, then its amount is calculated using the formula: Gsh = Gknit x0.05. For us Gsh = 219x0.05 = 10.95 kg.
- When introducing a plasticizer, we calculate its quantity: Gd = (GvyazhDd)/SD, where Dd is the dosage of the plasticizer in the ratio by weight, SD is the concentration of the plasticizer solution. For our example, we take Dd=0.005, Sd=0.4. We consider Gd = (219x0.005)/0.4 = 2.73 kg.
- This is the most interesting part of this technique. If, to calculate the amount of water in a solution of heavy concrete, tables or graphs are most often offered that take into account the required mobility and the maximum particle size of coarse aggregate, then in the case of aerated concrete these characteristics are not important. The authors (as indeed in almost all other recommendations) write that the mass of water must be determined experimentally.
For our example, let's take the optimal water-cement ratio - W/C = 0.44. Knowing the consumption of binder, we find out the amount of water: В = (В/Ц)хG binder. For our example, B0 = 0.44x219 = 96.33 kg.
By the way. Due to the fact that the amount of water is determined experimentally, all further calculations can be abandoned. But, if you have found the optimal composition, then, having made them, you can easily adjust the recipe, for example, when using sand with a different humidity or aluminum powder instead of paste.
- Next, we calculate the amount of chemically bound water: Bxw=Gvyazhαxmxw, for our example Bxw=219x0.7x0.227=34.8 kg.
- We calculate the amount of water in the dispersed filler (sand): Vdn = Wdn x (Gdn/100). For our example, we assume the sand moisture content is 5%, and calculate: Vdn = 5 (146/100) = 7.3 kg.
- Next you need to find out how much water the plasticizer contains: Vd = (1-CD)xGd. For our example: Vd=(1-0.4)x2.73=1.64 kg.
- In the same way, we calculate the amount of water in the paste (if we use dry aluminum powder, then naturally there is no need to do this): Br = (1-Sal)xGg. We calculate Bg = (1-0.85)x7.57 = 1.13 kg.
- It remains to calculate how much water is needed to prepare the mixture without taking into account the moisture already contained in the components: B = Vo- (Vsus + Vxsv + Vdn + Vd + Vg). For our example, B=96.33-(37.85+34.8+7.3+1.64+1.13)=13.6 kg.
The calculation is ready, for convenience we list the results of our example:
- Cement - 219 kg.
- Sand (fine filler) - 146 kg.
- Fiber fiber - 1 kg.
- Plasticizer - 2.73 kg.
- Gas-forming paste - 7.57 kg.
- Alkali for intensifying gas formation - 10.95 kg.
- Water for preparing the paste suspension - 37.85 kg.
- Water in solution - 13.6 kg.
Preparation of mortar for aerated concrete
Now we’ll tell you a little about the technology used to prepare a solution for non-autoclaved aerated concrete. The process includes the following operations.
- We immediately measure the water and separate out a portion of it to prepare a suspension based on powder or paste and a plasticizer solution.
Advice. It is better to heat the water - this way we speed up the gas formation reaction.
- We make a suspension of the blowing agent by thoroughly mixing the paste or powder in water.
- Next, we prepare the plasticizer solution in the same way.
- Mix the remaining water, cement, sand and fiber, accurately weighing them. Add a plasticizer solution to the mixture. If alkali (usually caustic soda) is used to activate gas formation, then we add it to the mixture.
- Let's start mixing; for aerated concrete, which does not have coarse aggregate (its particles, when falling, additionally mix the remaining components), it is better to use forced action concrete mixers (with blades) rather than the usual gravity concrete mixers.
- After all the components except the suspension are well mixed, add it. Gas formation begins and the mixture increases significantly in volume. We continue mixing for a few more minutes until the entire composition reacts.
- We place the finished aerated concrete in molds or formwork and level the surface. No need to vibrate.
Attention. The formation of pores continues after laying the mixture. Therefore, the products are obtained with a crust (similar to “brick” bread). Once the mixture has hardened, it can be cut off.
Additionally, we can offer a video in this article, which shows the process of preparing aerated concrete.
Laying gas silicate in the rain
Everything about how to correctly lay gas silicate and what is needed for this has been described above, but many people wonder whether it is possible to lay gas silicate blocks in the rain or not.
It is difficult to answer this question; there is no consensus on this matter yet. Gas silicate does not tolerate strong humidity; it has a porous structure that quickly absorbs moisture and slowly releases it. But at the same time, before applying the adhesive solution, the blocks are moistened with water to increase the tenacity of the materials.
If you decide to carry out work in rainy weather, it is worth installing an awning over the installation site.
Calculation of the amount of material needed
The size range of blocks differs in their parameters, so calculating the purchase volume may cause some difficulties
The size range of blocks differs in their parameters, so calculating the purchase volume can cause some difficulties. To know how to correctly make calculations, you need the parameters of one block: width * height * length and the area of the element is obtained in cm3. Now you need to divide the area of the wall by the area of 1 element and you will get the amount of material. In this case, you should take into account door and window openings, and also count the goods separately for external and internal wall panels, since the structures have different widths.
And to understand how many blocks are in 1 m3, the volume of one element (X) is measured and calculated using the formula 1/x. The final figure will show how many gas silicate blocks are required for 1 m3 of wall structure.
Advice! Calculations for wall panels for internal and external purposes are carried out separately and without fail: the number of elements for arranging internal partitions may be different from the figure determined for external walls due to the difference in the cube parameters. The formula for calculation is the same: 1/x (volume of one block for internal masonry).
Knowing how to correctly calculate the volume and amount of material, how to lay gas silicate blocks and what is best to use for building a house with your own hands, you can complete all the work well and without the involvement of a construction team. The main advantage of the material is ease of installation and ease of use. The glue mixing guide will help you cope with the preparation of the composition, the consumption rate of which is indicated on the package. When choosing masonry materials, give preference to a stable and reliable supplier; in this case, the efforts to build your own home will please you with the results obtained.
Work in winter
Is it possible to erect buildings from gas silicate only in the warm season, or can gas silicate blocks be laid in winter? The construction of buildings from gas silicate blocks is possible both in summer and winter.
Installation in winter has its own characteristics:
- Selecting an adhesive solution - using a cement-sand mixture is strictly prohibited; only anti-frost glue is used for work.
- Masonry is permitted only at temperatures not lower than -5 degrees, in conditions of normal humidity and non-frozen structures;
- The construction site should be pre-insulated and heated using a heat gun;
- A big waste of time - the glue is applied immediately before laying the block; even a couple of minutes of delay can have a bad effect on the basic properties;
- When interrupting installation work, carefully cover the surface of the row with film, and after removing it, if necessary, clean the surface of any ice that has formed;
- The blocks need to be warmed up first.
Since gas silicate blocks are laid in winter using glue with anti-frost additives, it is worth carefully studying the instructions for preparing the solution. It is important to preheat the water to 40 -65 degrees (the manufacturer indicates the exact figure).
The finished mixture can be used for no more than 30 minutes, so you should knead in small portions. Store the prepared glue in a plastic container with a lid.
Similarities and differences between masonry mixtures for aerated concrete
Special adhesive for aerated concrete blocks, like the popular masonry building mixture, is 95% made from the same minerals - sand, cement and water.
The composition of the factory mixture has been modified. Its capabilities are adapted to the physical and mechanical properties of cellular blocks.
- A water-retaining additive has been added to the mixture recipe to reduce adsorption. Aerated concrete is hygroscopic: after laying, blocks absorb water from the solution and destroy the seams. The additive binds moisture and limits its entry into the blocks. This composition polymerizes long before it dries.
- So that the adhesive composition can be applied in a thin layer to the surface of aerated concrete, the masonry mixture is given good workability at the factory. To do this, plasticizers - polymers - are introduced into the formulation.
Sergey Yurievich
Construction of houses, extensions, terraces and verandas.
Ask a Question
The amount of additives is strictly in accordance with GOST. Their share is 5% by weight. The composition of the factory-made solution for aerated concrete differs by this amount from that prepared at the construction site.
Adhesive mixtures for high-quality aerated concrete differ from conventional masonry mixtures not only in the composition of minerals, but also in the preparation method.
For example:
- the size of sand fractions in a traditional CPR can reach 2.5 mm;
- fine sand is used in a special adhesive mixture; its grain size is limited to 0.63 mm.
At the same time, the weight fractions of the substances are selected with maximum precision, and the mixing is carried out especially carefully. Such parameters are difficult to achieve in conditions of artisanal preparation of masonry mixture.
At home, washing powder is used as a plasticizer. The manufacturer introduces additives from materials permitted by GOST, in strict accordance with the standards.
Expert advice
Working with gas silicate blocks does not require a high level of skill; basic knowledge and following all stages of the instructions are enough, so you can build the necessary structure with your own hands.
Let's look at some tips from experts in the construction field:
- When choosing blocks, give preference to blocks with ideal geometry - the surface is flat, smooth, uniform in color, all lines and angles are straight;
- Mixing the adhesive solution should be done with a construction mixer or drill; mixing the mass by hand does not guarantee the homogeneity of the adhesive;
- In summer, the surface of the blocks is wetted with water; in winter, the bricks are preheated;
- Construction always starts from a high angle.
Gas silicate blocks have been used for a long time in all areas of construction; they have a large list of advantages, among which are thermal insulation, speed of operation, ease of installation and affordable cost.