The construction of brick houses has been successfully practiced for several centuries. The material remains one of the most popular, despite the emergence of new opportunities for creating structures for residential and public purposes.
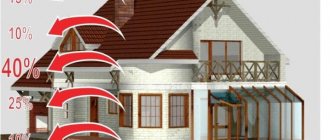
Brick walls provide warmth with the onset of cold weather and maintain optimal temperature in summer. They are durable, do not require constant maintenance and look decent after decades.
Load-bearing structures are the frame of the building, support and protection from deformation. Let's figure out which walls in the house bear the main load, how to determine a load-bearing wall in a brick house, plan its location and create a reliable brick structure in stages.
What it is?
Load-bearing walls take on a significant part of the mass of the structure and transfer pressure to the foundation. They are subject to the load from all elements located above: floors, beams, roofing. In addition, they transfer their own weight and serve to separate internal adjacent rooms.
The load-bearing elements include the following:
- exterior walls;
- those located between blocks;
- supporting flights of stairs.
The load on the load-bearing walls inside the building is less, insulation is not required, so they are thinner than the outside ones.
Load-bearing walls are inviolable. How are they different from others:
- The thickness of the masonry is measured in bricks, from one to three. A full brick is 250 mm. According to the requirements, a standard seam width of 10 mm is additionally laid to it. Load-bearing walls are built with a thickness of 360 to 640 mm, that is, a masonry of 1.5 to 2.5 bricks. The choice depends on the region where the construction is taking place; the colder it is, the thicker the wall.
- They are located directly on the foundation, and not on the floors.
If, after several years of operation of the building, you want to change the situation, the load-bearing walls cannot be demolished or partially disassembled. Otherwise, a redistribution of the load will occur, which threatens the appearance of cracks, deformation and destruction of the building.
How to understand what they are?
There is a concept - a supporting frame . It includes the foundation, load-bearing walls, roofing, floors and beams, which make up the main part of the structure, what the entire house rests on. The strength of this structure ensures the stability of the entire structure, its ability to resist any pressure and loads that can lead to critical bends and deformations.
The frame, as a structural element, is made in accordance with the purpose of the structure and its dimensions. When building cottages and private houses, a frameless frame is most often chosen; it is cheaper, fully meets safety requirements, and the process does not take as much time as installing a frame option.
Here, external walls, powerful internal longitudinal and transverse walls connected to the foundation become load-bearing. Floors are laid between them, and stairs provide additional rigidity to the resulting stable box.
The lower part of the walls, as a rule, is more massive and thicker than those that are closer to the second floor or roof, since the main load falls on it. For example, the walls of the ground floor are made of brick with 640 mm masonry, and on the second floor thinner walls are created - 360 mm.
Load-bearing walls inside a building can be:
Longitudinal. They are located along the outer wall, which is longer. The floors will be laid perpendicular to them. Such load-bearing walls are built at a distance of the width of the floor. This scheme is suitable for elongated houses.- Transverse. They line up along shorter external walls. The frame with them becomes more stable and rigid, but then the internal layout will be limited in possibilities, it will not be possible to change the width of the rooms, it will be fixed by transverse load-bearing walls.
- With the participation of both longitudinal and transverse walls. In this case, a combination of two types is made. Rigidity here is ensured by a well-chosen combination, the interconnection of flights of stairs, floors, which are rigidly connected to the load-bearing walls. This option is suitable for houses of non-standard shape.
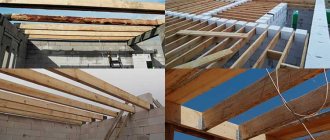
The standard floor length is 6 meters .
Accordingly, the distance between load-bearing walls cannot exceed this figure. And if one of the external walls of the house exceeds the length, then there must be a longitudinal or transverse load-bearing wall inside. It is located at the junction of the floors between floors.
How to determine load-bearing walls
When deciding to redevelop a room, restrictions arise on the performance of some construction work with loaded structures in order to avoid causing irreparable damage to the structure. A load-bearing or load-bearing element is a structural element of a building that receives and transmits pressure from floors located above or below. The integrity of the load-bearing element is critical to the entire facility. Work is carried out with the permission of the supervisory authorities and subject to the approval of the project. Reconstruction, as defined by the housing code, is possible only if there is an approved construction project.
SNiP and SP standards
SNiP 3.03.01-87 clause 7 and SP 70.13330.2012 on load-bearing and enclosing structures state:
- The difference in height between the walls should not exceed 1.2 m.
- The next floor can be erected only after installing the floors and monolithically fastening the seams.
- Mooring beacons must be installed to control the uniformity of the masonry. The permissible deviation from the vertical is no more than 5 mm if the masonry is to be jointed. No more than 7 mm if under plaster. After each row, an instrumental check of vertical and horizontal accuracy is required.
- The thickness of joints in horizontal masonry when creating walls made of ceramic or silicate bricks should not exceed 12 mm, in vertical masonry - no more than 10 mm.
- The dimensions of the finished structure may differ from those specified in the project by no more than 15 mm in thickness. Also, no more than 15 mm error in the width of openings and partitions is allowed.
- Vertically, the wall and corners cannot deviate by more than 10 mm within one floor. If the building is up to 2 floors high - no more than 15 mm. The vertical position during the laying process is controlled by a plumb line.
- It is unacceptable to weaken structures through unplanned openings and niches.
- The supporting surfaces may deviate by no more than 10 mm. The vertical axes for window openings can be shifted by no more than 20 mm. The axes of the load-bearing wall can shift by no more than 10 mm.
- A horizontal deviation of the wall is allowed no more than 15 mm for every 10 m. This requirement is checked using a building level.
- When forming the masonry of load-bearing walls, in places where a prefabricated structure is planned (installation of floors, beams, window openings, etc.), bonded rows are laid.
- If a connection is planned with a partition that will be built later, fines are created at the connection points and reinforcement is installed (at a distance of every 2 meters).
The set of rules contains a table with the maximum wall height standards for various types of masonry.
Arrangement of crown monolithic belts.
Crown or strapping monolithic belts are formed under the ceilings, evenly distribute the loads along the load-bearing walls and their arrangement is mandatory. For crown monolithic belts, “tray” U-blocks with the thickness of the outer wall are used, which are laid on an adhesive composition with the placement of a wider shelf of the tray on the outside of the masonry. To increase the thermal protection of the crown row, insulation (basalt fiber slabs) is placed in the recess of the tray blocks on the street side, and reinforcement cages are placed on the room side, which are connected by welding into one continuous strapping structure.
The U-blocks are filled with concrete of the design compressive strength class; further work on the installation of floors (or roofing structures) is carried out after the concrete has completely hardened and not earlier than one day later. To eliminate the risk of violating the integrity of the blocks in the crown rows when laying floors along the edge of the masonry from the side of the premises, chamfer them with a sanding board.
Brick requirements
There are 2 types of bricks that are used to create residential and non-residential buildings:
Ceramic or red .
Its composition is based on clay, advantages: resistance to damage, durability, tolerates low temperatures well, retains heat. Disadvantage: susceptible to cracking, absorbs moisture. Standard sizes 250*120*65.- Silicate or white . The composition is based on lime and sand. It is characterized by frost resistance, the ability to store heat, is not afraid of fire, and creates a comfortable microclimate in the house. Disadvantages: fragile, it cannot be placed below ground level; when in contact with moisture, the brick loses strength. Size matches red.
To create load-bearing walls, solid brick is required. It has a dense structure, uniform, and is able to withstand pressure along the entire perimeter. Ordinary brick for rough masonry has a rough surface. The material has been fully fired, rough, and may vary in color.
Spalling is allowed along the perimeter of the brick, the total area of which is no more than 1 sq. cm. The strength grade should not be lower than M125; it is better to choose M200, M250 and higher values. The higher the designation, the more pressure the brick can withstand.
Frost resistance from F25 and above . This indicator explains how many freezing cycles a material can overcome. It is important to understand that during one season, a brick can freeze and thaw several times, so it is better to take a brand with a higher coefficient, from F50 and above.
Regulatory requirements for the material are specified in GOST 530-2007.
Necessary materials and tools for masonry
To create a brick wall you will need:
- triangular spatula with a curved handle (trowel);
- Master OK;
- hammer-pick 30 cm;
- spatula for mortar;
- level, plumb line, triangle, order;
- mooring cord;
- solution and container for it.
You don't have to use grouting for grouting. The excess mortar is removed with a spatula, after which the rough masonry will be hidden under the following layers (plaster, insulation, cladding).
Stages of work
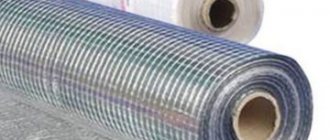
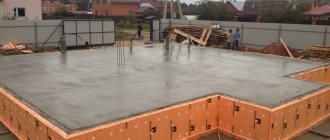
Since the load-bearing walls are laid on the foundation, it is necessary to waterproof the base before starting work.
Most often, roofing felt or a membrane is used, which covers the base of the building in a single layer, overlapping. The joints are treated with bitumen mastic to prevent moisture from penetrating through the foundation to the walls.
The choice of masonry depends on the average temperature in the region . In the northern and central zones of Russia, options of 2-2.5 bricks are more often used; in the southern regions, 1.5 bricks are acceptable.
There are several methods of dressing, each of them is reliable and is used along the entire length of the wall. Before starting work, masons must have a plan with openings marked on it and points of connection with adjacent walls.
Preparation of the solution
A rigid mortar mass is used for joints so that shrinkage is minimal. How to prepare the joining solution:
- you will need a cement mixture of grade M400 and pure river sand without impurities, the dry components are combined in a ratio of 4:1;
- water is added to the resulting mixture to make it homogeneous and plastic;
- prepare the solution in portions so that it does not have time to harden during the work.
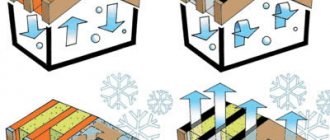
Creating a structure with insulation
Stages of work to create a full load-bearing wall with insulation:
- Form the first row of rough masonry. For example, an option of 2 bricks, lay them dry, taking into account the additional distance at the seams. Before installation, the brick is moistened in water. This is done to prevent the porous and dry material from absorbing water from the solution before it hardens.
- Start rigidly fixing the wall from the corner; further compliance with the horizontality of the walls depends on it. The system for bandaging the corners depends on preference; the physical properties of the wall do not change depending on the choice.
- The corner is initially built in 4 rows.
To form the frame of the structure, the press-on masonry technique is used. The mortar mass is placed at a distance of approximately 1 cm from the outer edge of the brick. Stretch the mixture over the surface with a trowel, then place the brick on top, pressing it to the base. The trowel handle is tapped on the material, horizontal and vertical are checked using a building level. During the process, the solution will be partially squeezed out of the seams; it is used to form new ones. - Then continue the first row of walls until they connect along the entire perimeter, taking into account openings and access to the combined partitions. The starting row is the most important, it forms the direction of the wall. Before forming the next one, it is recommended to strictly check all horizontal and vertical lines and repeat the check every 4-5 rows.
- To create the required rigidity, you can add reinforced mesh to the seams every 4-5 rows.
- After the walls rise to the required height, the ceilings take their place, and insulation is laid on the outside of the house. The procedure is not necessary if the house is located in warm regions.
- Next, a facing masonry is formed, rigidly connected to the rough masonry. The cladding is laid in 1 row of beautiful bricks (red, silicate, clinker, etc.).
Between rough masonry and cladding, the house goes through all stages from the appearance of the roof to the laying of communications. Windows and doors are often installed immediately, and the final design of the facade, cladding and insulation of load-bearing walls is the final stage of construction.
Possible errors and their consequences
What can go wrong:
The masonry has deviated.
To prevent this from happening, it is necessary to constantly check the angles, horizontal and vertical. If it was not possible to keep track, the wall must be disassembled and rebuilt, since compliance with the geometry is necessary for the strength and stability of the house frame.Small deviations are leveled out later using plaster.
- The dressing was performed incorrectly. The bricks must be laid out so that the load from one of them falls on the two lower ones. The seams should not match, otherwise the strength of the structure is greatly reduced. Those who create masonry for the first time need to familiarize themselves with the technology and dressing options and practice dry.
- Poorly sealed seams significantly reduce the thermal insulation properties and structural strength. The solution should lie smoothly, without gaps. Therefore, they use the principle of pressing, when the mixture under pressure fills the voids.
When creating rough walls, some builders do not pay attention to the cleanliness of the process, are in a hurry, and do not observe the uniform distribution of the solution. Load-bearing walls are the most important element of the structure; you need to pay time and attention to each brick.
Pros and cons of using building materials
Advantages:
- strong and durable material that retains its properties for centuries, maintaining decent appearance and quality for a long time;
- brick is a frost-resistant material, does not react to wind, prevents the penetration of moisture, it does not rot, and is not susceptible to attack by insects and rodents;
- withstands high temperatures, fireproof;
- high sound insulation properties;
- environmentally friendly, maintains a favorable climate inside the building.
Flaws:
- heavy - for load-bearing walls you will need a lot of bricks, which need to be transported by several machines, this is expensive, there is also a large load on the foundation, which will need to be given maximum attention and strengthened, which also requires financial investments;
- each brick requires laying by hand, the load-bearing walls are the thickest, it will take a lot of time to install;
- It is not recommended to work with them in winter, otherwise the solution will not retain its properties and cracks will appear in the walls later;
- There may be problems with the passage of radio waves into the room, which affects the operation of some devices.
Option No. 2: walls made of blocks
The most popular and widespread are the following building materials belonging to this group:
- Cinder blocks.
- Foam blocks.
- Gas blocks.
- Sand-lime brick.
- Ceramic blocks.
- Arbolit.
Wall masonry made from a wide variety of blocks has become widely used and very popular. Walls built from one type of block or another have different physical properties and features inherent in the block filler material.
However, most buildings built from block building materials are characterized by excellent heat and sound insulation properties, increased fire and frost resistance, environmental friendliness, lightness, strength, durability, resistance to mold and mildew, and ease of processing. In this section we will dwell in detail on the advantages and disadvantages of various types of this building material.
Cinder blocks
Slag, which is the flux-containing components of waste rock, is the main filler of cinder blocks. A wide variety of materials can be used as building stone fillers: cement, expanded clay, cullet, broken brick and concrete, gravel, sand, granite screenings, crushed stone. Cement is the main binder of cinder blocks.
The main advantages of cinder blocks include the following:
- Low cost due to the low cost of the components used. As a result, the cost of masonry and construction of the entire house is significantly reduced.
- Easy to use. No special skills are required to build cinder block walls.
- Strength and durability.
- Fire resistance and frost resistance.
- Possibility of self-production.
- Low consumption of binder solution.
However, cinder blocks also have some disadvantages, among which are the following: poor sound insulation properties, high thermal conductivity, the need for double-sided plastering of walls and the difficulty of laying various communications.
Foam blocks
This type of building material is made from foam concrete, which is a type of cellular concrete. Cement mortar, sand, water and a foaming agent are used to make foam blocks. Foam block is an artificial porous stone that can float in water. A wall made of this material is able to “breathe”, creating an ideal indoor microclimate. Approximately the same microclimate is created in houses built from wood. However, foam blocks, unlike wood, do not rot or burn.
Advantages of foam blocks:
- Low specific gravity.
- Low hygroscopicity.
- Ease of processing.
- High durability.
- Environmentally friendly.
- Cheapness. Foam block is one of the cheapest materials.
- Good sound insulation.
- Cost-effective due to low weight. Thanks to this, you can significantly save on the construction of the foundation and the thickness of the plaster layer. Foam blocks can even be laid with glue.
- High fire resistance.
- Low shrinkage rate.
- High thermal insulation properties.
The only disadvantage of foam blocks is that the construction of walls is only possible using a frame method, and a synthetic foaming agent can enhance the hygroscopicity of concrete.
Gas blocks
This building material has unique characteristics and is becoming increasingly popular. It is aerated blocks that provide real competition to classic brick due to their natural origin and excellent performance qualities. Sand, lime, cement, water and aluminum powder are used to produce aerated blocks. Depending on the binder component used (lime or cement), a gas silicate or aerated concrete block can be obtained. Both types of gas blocks, due to their high porosity (up to 85%), have excellent performance properties inherent in both wood and stone:
- High strength.
- Ease of processing.
- Low thermal conductivity.
- High fire resistance and frost resistance.
- Excellent sound insulation properties.
- Excellent vapor permeability.
- Durability.
- Environmentally friendly.
- Ease.
- Resistance to fungi, bacteria and mold.
- Moisture resistance.
- Quick installation.
However, gas blocks also have a number of negative properties. In particular, additional cladding of external walls or protective plastering may be required; sound and heat insulation properties decrease with increasing density and strength. It is impossible to build high-rise buildings (more than 3 floors) from aerated concrete blocks. However, in our case (construction of a two-story house), this factor has absolutely no influence on the choice of material.
Sand-lime brick
This building material is made from sand, lime and some additives. Sand-lime brick is used for the construction of external and internal walls and for cladding. It is not recommended to use sand-lime brick in places with high humidity and for masonry that may be exposed to elevated temperatures. These features of the use of sand-lime brick are due to its ability to absorb moisture well and decompose hydrate components with a significant increase in temperature.
The main advantages of sand-lime brick include the following:
- Reliability and durability.
- Environmentally friendly.
- Resistance to the influence of aggressive factors.
- High fire resistance.
- Possibility of use for a wide variety of architectural solutions.
- High noise absorption coefficient.
However, sand-lime brick also has a number of negative properties that limit its use:
- Increased construction time and high labor intensity of work. This state of affairs is possible due to the small size of sand-lime brick.
- High ability to absorb moisture.
- Heavy weight. Sand-lime brick is one of the heaviest building materials.
- Low adhesion to cement mortar.
- Limited application (temperature and humidity).
Ceramic blocks
Ceramic blocks or “warm” ceramics are an environmentally friendly building material made from high-quality clay with the use of certain additives. Many builders use the expression “warm block” in their everyday life, which indicates one of the main characteristics of this material - ceramic blocks are distinguished by excellent thermal insulation qualities. In addition, these blocks have almost all the positive properties of ceramic bricks:
- Resistance to aggressive factors.
- High strength.
- Light weight.
- Environmentally friendly.
- Ease of processing.
- High adhesion achieved due to the corrugated surface of the blocks.
- Durability.
- Frost resistance.
- Excellent heat and sound insulation properties.
- Light load on the foundation.
- Optimal indoor microclimate.
- Reduced construction time (compared to brickwork).
- Saving mortar when laying.
Ceramic blocks have few disadvantages, but they do exist: high price, the need to plaster the walls to protect them from moisture, and fragility during transportation.
Arbolit
This building material is a type of lightweight concrete. To make it, a mixture of organic fillers (woodworking waste, fires, reeds, etc.), a binder and water is used. The mixture also contains some additives. For example, to accelerate the hardening of cement and mineralization of the aggregate, calcium chloride and alumina sulfate are added.
Arbolite very successfully combines the best qualities of stone and wood. This unique building material is characterized by excellent heat capacity (the thermal conductivity of wood concrete is 4-5 times lower than brick), high strength, and resistance to rotting. It is environmentally friendly and fireproof. A negative quality of wood concrete can be called high water absorption, which can be successfully overcome by creating a reliable protective coating.
The positive qualities of this unique material more than compensate for this drawback:
- Low thermal conductivity, which allows you to significantly save on heating your home during the heating season.
- Environmentally friendly.
- Plastic.
- Ease of processing.
- High strength.
- Low specific gravity.
- Fire safety.
In addition to the block building materials discussed above, you can use ceramic bricks, expanded clay blocks, twin blocks, gas silicate blocks, sand concrete blocks, polystyrene concrete and sawdust concrete blocks to build houses. These building materials have almost the same performance qualities as all block building materials.
What determines the prices for work?
The cost of the work depends on the complexity of the masonry (1.5, 2 or 2.5 bricks), the dimensions of the building, and the layout. In some cases, it is necessary to form walls not only vertically or horizontally, but also rounded options, sharp corners, etc.
The more creative the layout, the more expensive the work to implement it. The price also depends on the category of performers. If reinforcement is required, the work costs approximately 100-200 rubles per m3 more.
Approximate prices for laying load -bearing brick walls in Russian cities:
| Title of works | Moscow and Moscow region, r/m3 | St. Petersburg and Leningrad Region, r/m3 | Krasnodar, r/m3 | Kazan, r/m3 |
| Rough masonry of 2.5 bricks | 4000 | 4000 | 3800 | 3900 |
| Rough masonry of 2 bricks | 3800 | 3600 | 3500 | 3800 |
| Rough masonry of 1.5 bricks | 2200 | 2200 | 2000 | 2200 |
Combination of materials
In order to increase the thermal conductivity of load-bearing brick walls, today the option of combining stone with insulation materials is used. From the technological side, this execution is carried out as follows:
- First, two bricks are laid;
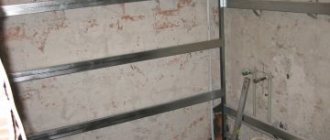
- then the outer part of the wall is covered with insulation made of polystyrene foam or mineral wool;
- Finally, the surface is finished with decorative material or plastered for painting.