To insulate or not to insulate?
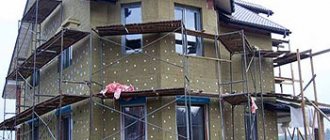
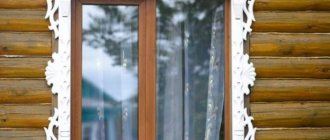
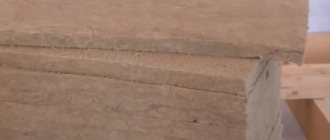
Is it necessary to insulate a house under the siding? (photo No. 1)
Is it possible to do without insulation, or is it necessary to insulate the facade? There is no universal answer. Each case is calculated individually.
The dew point, weather conditions in the region, the material from which the walls are built, and its thickness are taken into account. If you are not ready for complex calculations, it is better not to neglect insulation. All energy-efficient houses need high-quality thermal insulation. And it is better to insulate any house in which people live all year round. This will save on heating costs and improve the microclimate inside.
The choice of fasteners depends on whether you will insulate the house. So, when installing siding with insulation, studs of 138 mm will be required, and if without it - 53 mm. Pre-thought-out details will help you avoid unnecessary costs. Therefore, it is better to make a decision before purchasing finishing materials.
Arrangement of vapor barrier and frame construction
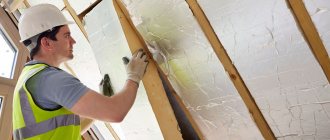
Before you begin constructing the sheathing, you need to attach a vapor barrier membrane to the walls, this is especially important if the house is wooden or frame. The film strips are placed overlapping and taped to make the joints airtight. It is advisable to cover the joints of the walls (corners) in solid pieces.
Important! The vapor barrier membrane is attached exclusively with its rough surface to the wall. Otherwise, it will not perform its function.
Next, you can begin constructing the sheathing, which is simply necessary to attach the siding and ensure mandatory ventilation. It can be assembled either from wooden blocks or from a metal profile.
What insulation should I use?
Traditionally, insulation in rolls or slabs is used in construction. The former are cheaper, but are only suitable for horizontal surfaces. For walls, including the facade, you need insulation in slabs: mineral wool, polystyrene foam, extruded polystyrene foam, etc.
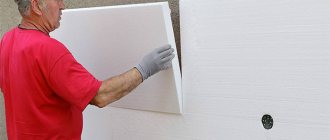
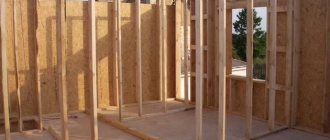
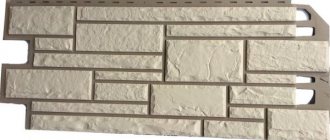
- Polystyrene foam is an inexpensive, lightweight and durable material. Thermal conductivity: 0.035 W/(m K). Polyfoam is easy to install, but has low vapor permeability. This means that the walls underneath do not “breathe”: moisture from the inside will be retained in the building’s structures, promoting the development of mold and fungi. In addition, polystyrene foam burns and rodents like it as a home.
Foam plastic for facade insulation (photo No. 2)
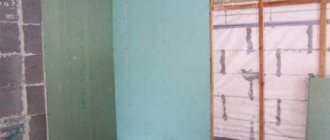
- Extruded polystyrene foam (EPS) has high heat and sound insulation properties. Thermal conductivity: 0.028 - 0.032 W/(m K). But, like polystyrene foam, it burns, rodents like it and does not let moisture out of the house.
Extruded polystyrene foam (photo No. 3)
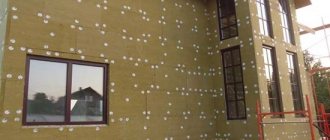
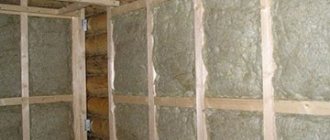
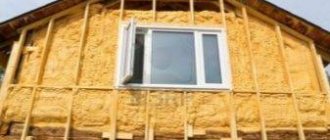
- Mineral board is an environmentally friendly material. The best among them is basalt. Its thermal conductivity is 0.035-0.041 W/(m K). Does not burn and allows the walls to “breathe”. But mineral wool absorbs moisture, so it needs an additional insulating layer.
Mineral wool slabs (photo No. 4)
Plates of the same insulation can have different densities and thicknesses. To select, you need to calculate the thermal conductivity of the walls and the required insulation layer. Only in this way will the thermal insulation material be chosen correctly.
Choosing insulation for the facade
If you want to use foam plastic as an insulation material, then keep in mind that, despite all its advantages, it is not suitable for buildings with curves, and then it is better to give preference to mineral wool or combine these two options.
Scheme for insulating a house with mineral wool
Buy mineral wool that is intended for work outside the building - it is thicker and has a more dense structure. One of the varieties of fibrous roll material is ecowool, which has good thermal and vapor insulation, but its high price is not suitable for everyone.
Do-it-yourself siding with insulation on a house: algorithm of actions
Technology for installing siding with insulation (photo No. 5)
The process of covering a building with siding and insulation is simple. With minimal construction experience and a standard set of tools, the home owner can handle it on his own.
Let's consider a step-by-step installation algorithm using the example of vinyl siding with mineral wool insulation.
- Preparing the walls
- Installation of sheathing
- Installation of insulation
- Siding installation
Stage 1. Preparing the walls.
It is not necessary to level uneven walls. This defect will not be noticeable under the sheathing.
It is necessary to remove all protruding elements: grilles, shutters, drains, lamps, etc. If necessary, remove mold and mildew, treat the walls with protective compounds.
Stage 2. Installation of the sheathing.
Plastic lathing “Alta-Profile” (photo No. 6)
You can use wood, metal or plastic sheathing. For vinyl and acrylic siding, the latter is preferable, as it has comparable coefficients of thermal expansion. The siding will not work with it even with sudden temperature changes.
If you choose wooden slats, their humidity should be no more than 15-18%.
In addition, they will need to be treated with an antiseptic. !
For vinyl and acrylic siding, it is better to use plastic sheathing. It has comparable coefficients of thermal expansion. This means that the siding will not behave even with sudden temperature changes.
For horizontal siding, the sheathing is installed vertically, in increments of 30-50 cm. Calculate the increment depending on the length of the panels and the width of the insulation boards.
Sheathing profiles are installed around door and window openings, as well as in corners and along the contour of the building.
Vertical and horizontal alignment must be strictly observed - this determines how even the façade will turn out.
Stage 3. Installation of insulation.
To prevent mineral wool from absorbing moisture from the walls of the house, it must be protected with a vapor barrier film.
Mineral wool slabs are laid in the space between the sheathing strips in such a way that there are no cracks or gaps. The formation of “cold bridges” should also be avoided. For example, when using the Alta-Profile facade fastening system, after installing the sheathing, the profiles are dismantled, leaving the studs with the fastening bases. Insulation is put on the studs, and then a wind and moisture protective film is put on. Then the sheathing profiles are installed again and aligned vertically.
There must be a ventilation gap between the insulating film and the siding panels.
Stage 4. Installation of siding.
Installation of siding panels by a certified Alta-Profil team (photo No. 7)
To begin, set the starting bar. Siding is installed from the bottom up. Each panel is fixed from the middle, gradually moving towards the edges. Secure with self-tapping screws in increments of 30-40 cm.
Before installing the last, top panel, install the finishing strip at the bottom edge of the cornice. The siding panel is fixed in the previous one, and then inserted into the finishing strip and secured in it.
It is necessary to leave a gap of 2 to 6 mm between the panels and slats (depending on the time of year when the facade is installed) - for thermal expansion of the panels.
For the same purpose, the siding is not screwed too tightly. There should be a distance of 1-1.5 mm between the top edge of the screw head and the panel.
These are general installation rules. But there are a number of features and nuances. Let's look at some of them.
Insulation materials
Insulating a house can be done in various ways. For example, walls made of timber are often insulated using external cladding with small slabs, concrete or ceramic stones, and small blocks. A heat-insulating material is placed between the layers. In addition, do not forget about the ventilated air layer, which will help remove excess moisture from the wood.
Ecowool
If the walls are made of wood, ecowool is usually used. This thermal insulation material is characterized by a high heat saving coefficient and a minimum thermal conductivity coefficient.
This insulation better withstands high temperatures, helps remove moisture and is able to withstand all sorts of troubles in the form of fungus, mold and insects. In addition, ecowool does not contain toxic substances.
Minvata
Stone and mineral ecowool are excellent materials for thermal insulation of a home. The thicker the mats, the easier they are to install and the longer they last. Loose mats often slide off the frame and fall apart, creating dust that is harmful to the health of residents. It is not recommended to skimp on quality materials for home insulation.
In addition to ecowool, you will need two layers of film - a waterproofing film, which will protect the log house from moisture, and a hydro-windproof film, which protects the insulation itself from moisture. Both layers are required.
Wall insulation with expanded clay is used quite often, since the material is originally natural and environmentally friendly.
Insulating a house with sawdust
Another fairly popular material (after ecowool) for insulating wooden walls and floors is sawdust. Wall insulation with sawdust has been used for a long time to this day, despite the variety of modern insulation materials. This method has many advantages, the first of which is environmental friendliness (the material can be used without fear for the health of residents), and low cost (sawdust can be purchased for a nominal fee or completely free).
As for the disadvantages, there are basically none, except for the inconvenience when using this bulk material. Although you can also use sawdust slabs.
Insulating a floor with sawdust requires certain knowledge. Before use, they must be applied with an antiseptic, dried thoroughly and mixed with slaked lime, which will protect the material from rodents.
Advice! For effective insulation, the thickness of the sawdust layer must be at least 25 cm so that over time the sawdust does not settle and lose its heat-saving properties, it is necessary to prepare a mixture of sawdust (80%), gypsum and lime. To ensure the rigidity and strength of the wall, gypsum can be replaced with cement.
So, the prepared mixture must be doused with boric acid, added 10 liters of water and checked for moisture. If the lump of the mixture does not crumble in your hand, then the insulation is ready. Next, the sawdust must be left for some time. After 2 weeks, check to see if there is any emptiness. If there is a void, fill it with an additional portion of sawdust.
In general, there are many methods of insulation using sawdust. You can add not only cement to sawdust, but also clay, water, and newsprint. The solution can be made in the form of plaster and covered the walls with it. It is worth noting that sawdust insulates not only the walls and floor, but also the ceiling. The mixture is prepared similarly to the above method with the addition of copper sulfate.
An important part is treatment with an antiseptic, which will prevent the occurrence of harmful microorganisms.
Ceiling insulation occurs in several stages:
- At the first stage, it is necessary to dry the sawdust (it is better if it is large shavings). It is strictly forbidden to use fresh shavings for insulation.
- Next, you will need clay, which should be soaked with water and left for a while.
- After this, add sawdust to the softened clay and mix. The density of the solution should be medium.
- Cover the surface with plastic wrap and spread the mixture.
- After drying, the surface may crack a little, but this is not a problem. Cracks can be filled with ordinary clay or the same solution.
Sawdust can also be used with cement and copper sulfate. This mixture is also possible for insulating a wooden private house. Before laying a mixture of cement and wood shavings, it is worth laying polyethylene on the surface. While the solution is hardening, you should not speed up the process in any way.
Siding of a wooden house with insulation
Siding of a wooden house with insulation (photo No. 8)
Before installing siding on a wooden house, it is necessary to carefully prepare the surface of the walls - because under the panels it will be difficult to assess their condition.
Therefore, you need to inspect the surface of the walls. If there is even the tiniest area contaminated with mold or mildew, it must be thoroughly cleaned. Treat the entire surface of the walls with an antiseptic.
It would also be a good idea to apply special agents that prevent fire.
Facade cladding
Decorative finishing of a wooden, frame or brick house begins with the installation of a membrane vapor barrier layer. This layer does not allow condensation to pass from the walls to the insulation, which may lose its protective functions due to getting wet. An expensive membrane can be replaced with a more affordable roofing felt or film. For mineral wool, unlike polystyrene foam, vapor barrier is not necessary, because such material allows air to circulate, so condensation will not collect.
Winter installation of siding with insulation
Installation of siding in the cold season (photo No. 9)
All installation processes are dry. Therefore, covering a house with siding with insulation, as well as without insulation, can be done even in winter. It should be taken into account that vinyl and acrylic panels are narrowed at this time. In the summer they will expand, and it is important to ensure a gap between the panels, as well as between panels and slats, of 4-6 mm.
!
If you are installing vinyl siding in winter, the gap between panels, as well as between panels and strips, should be maximum - 4-6 mm.
The panels become more fragile in the cold, so scissors should not be used to cut them in the cold season. And at temperatures of -7 degrees and below, it is better to postpone installation of the facade. This is dangerous for the panels, and it will also be uncomfortable for you.
Waterproofing
- Waterproofing protects the walls of the house from the destructive effects of moisture, mildew, and mold.
- It is strengthened between the insulating material and the siding.
- Installation of the waterproofing membrane is carried out by overlapping the fabric by 10-15 cm.
- The canvases are stapled to the surface of the sheathing, and the joints are sealed with special tapes.
- Ventilation gaps are formed using lathing with a 25×50 block;
- A protective metal mesh is installed below
Waterproofing membrane
In conclusion, it is worth saying that insulating the walls of a house made of timber can be done independently. All that is required is your patience and some expenses, which will more than pay off in the future.
Technology of covering a house with siding with insulation: mistakes
Improper installation of siding and thermal insulation material can negate the insulation of the house, spoil its appearance and shorten the service life of the insulation, facade and building structure.
Here are a few typical mistakes.
- The choice of insulation is not based on characteristics, but on price, without taking into account the climatic conditions in the region, the thermal conductivity of the walls and the insulation material itself.
As a result, the house will lose heat, and its owner will pay more for heating in winter and cooling in summer. In addition, this can lead to a shift in the dew point and reduce the life of the walls of the house.
- Lack of insulation.
In most cases, it will be a mistake to cover a wooden house with siding without insulation or a waterproofing layer. Exposure to moisture can cause mold and mildew to appear, and temperature changes will shorten the life of the wood.
- No ventilation gap.
The water that will get under the facade will not be able to evaporate, which will lead to the appearance and spread of mold and mildew.
- Use of non-galvanized screws.
In the rain, the fasteners will rust, leaving characteristic brown stains on the facade.
- Failure to comply with the technology of siding a wooden or other house with insulation.
Even one incorrectly screwed screw can ruin the entire facade of the building.
To avoid mistakes, you need to study in detail the instructions for installing siding and insulation and follow them unquestioningly. After all, here, as in court, ignorance of the laws does not excuse one from responsibility.
If you are not confident in your abilities, it is better to entrust the work to professionals.
Types and characteristics
The term “siding” refers to ordinary panels intended for cladding the facades of buildings and auxiliary home structures. In addition to their decorative purpose, the panels are often part of a multi-layer wall covering, installed for the purpose of waterproofing, reducing noise entering the premises, and improving the operational characteristics of the building.
At first, siding was made of wood; nowadays, the variety of types of such external cladding is quite large.
Natural wood remains extremely popular to this day. Of course, modern wood panels are significantly different from the boards that were used before.
The wood used for the production of natural siding is usually coniferous, and certainly undergoes a cycle of special preparation, including disinfectant impregnations and heat treatment. This makes the raw material resistant to external influences and increases its resistance to fire and rotting.
Despite the processing of wood, it remains the most environmentally friendly material for the exterior cladding of buildings. No other type of material can compare with it in terms of thermal insulation properties.
Almost all types of modern cladding have a locking part with grooves, allowing the installation of panels with almost no gaps that require sealing.
Metal cladding of houses is not very popular . It is more often used for finishing public buildings, commercial and social buildings, industrial enterprises, offices and other similar buildings.
Most often, galvanized steel is used to produce such panels. The most expensive types are made from aluminum and zinc. The advantages of metal cladding are its reliability (with high-quality anti-corrosion treatment), ease of installation, non-flammability, mechanical strength (however, if the material is inattentively transported or due to a pinpoint impact, it may well become deformed).
Plastic siding is the most popular . More than half of the sales volume of all facade panels comes from this group. Most often, the base substance in them is polyvinyl chloride (PVC), a polymer characterized by excellent performance properties.
Siding installation is so simple and intuitive that anyone, even an inexperienced builder, can handle it.
The best insulation materials
Those home owners who ignore the issue of insulating the external walls of a building are deeply wrong.
No matter how you try, there will certainly remain voids between the wall and the cladding . They will not add heat to the house, but they will collect dampness and create conditions for the appearance of mold, moss, fungi, and insect nests, the proximity of which can be not only unpleasant, but also dangerous.
In addition, damp walls will inevitably collapse. And the dew point will be in the thickness of the wall, which means that temperature fluctuations will contribute to the freezing of the material, rapidly destroying the building. The insulation will move the point outward, into the thickness of the thermal insulation material. Condensed moisture will be discharged outside through the ventilation gap.
Any home should be insulated, even country houses where you live only in the summer. This will ensure the safety of the building and freshness in the house in the heat. After all, thermal insulation protects against heat no worse than against frost.
Who can you trust to cover a brick (and not only) house with insulation with siding?
Certified installer "Alta-Profile" at work (photo No. 10)
There are many hacks in the construction market who will get down to business without a clear understanding of the characteristics of materials and the intricacies of their installation. Their services are cheap, but expensive for the home and owner. A typical situation: the panels are reupholstered, and after a couple of months or even weeks the entire facade is covered with waves.
How to distinguish such a homemade product from a professional? Ask the installer a few questions:
- How should you screw in the screws?
- What gap should be left for thermal expansion of the panels?
- What kind of studs will he use to cover a log house with siding and insulation?
- Does it use windproof film, starter strip and j-trim? If yes, how and where?
If installers cannot answer any of these questions, refuse their services. It is better to pay a little more so that the facade pleases you much longer.
!
To distinguish a professional from a hack, ask a few professional questions. If the installer cannot answer them, refuse his services.
In order not to take risks, you can order facade cladding from a certified Alta-Profile team. The quality of the work they perform is guaranteed by the manufacturer. All installers undergo professional training, so they not only know, but also understand the process and procedure for covering a house with siding and insulation.
Siding fastening
This material is considered not the cheapest type of insulation for a wooden house.
Such panels are subject to strong thermal expansion. They can “walk” under the influence of external temperatures. Their installation begins from the bottom; before this, the starting rail is first leveled. The panels are fastened with self-tapping screws, which are screwed into the middle of the mounting holes. Each subsequent part snaps into the groove of the previous one. During installation, the following mistakes must be avoided:
- panels cannot be mounted closely, because without a gap their coating usually begins to warp;
- self-tapping screws should not be attached to the edges of the panels, as this may cause them to break;
- The starting guide must be attached strictly level and very tightly, otherwise the coating may deteriorate.