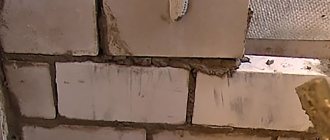
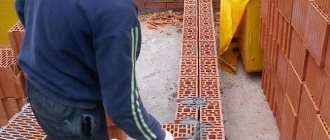
Brickwork is a classic technology, known since time immemorial. It is impossible to say exactly when the first baked brick was born, but the fact that it was used for construction back in the 3-2 millennium BC is an indisputable fact. Such a rich history is the envy of the vast majority of building materials, but longevity has another advantage. Humanity has fully mastered the art of laying these stones, since it had plenty of time to improve the technology. If a future builder plans to work with these parallelepipeds, then first he must learn how to properly make brickwork. From the outside it may seem that this operation is elementary, but in reality it is not so simple: insidious “pitfalls” lie in wait for the master from all sides.
Brick is an old friend
In order to begin to study the question of how to properly make brickwork, you need to get acquainted with the stone itself, and then learn about the types of masonry. This parallelepiped is a block made of a mixture of sand and lime (silicate stone) or fired clay (ceramic). There are other varieties.
Stone and its dimensions
Any (self-respecting) brick has edges that have long been given names. They very accurately reflect their essence. Any artificial stone has:
- the bed is the largest surface;
- spoon - long side, side;
- poke - the smallest end.
There are several standard sizes, but our most popular are two of them:
- regular: 250x120x65 mm;
- one and a half: 250x120x88 mm.
The most massive ones are double bricks, which don’t look quite familiar. Their dimensions are 250x120x138 mm. The main difference between classic bricks and concrete blocks, which have appeared on the construction market in large quantities, is their precise geometry. The correct shape is a must; perfection makes laying much easier.
Types of bricks
A small stone has many types. They differ not only in size, but also in the material of manufacture, structure and purpose.
Materials for production
Like everything else used in construction, these blocks are classified according to the material they are made of. Ceramic and silicate stones have already been mentioned, but we need to “go through” all the varieties.
- Ceramic red bricks are considered the most popular. For their production, high-quality clay with a minimum content of impurities is used. The blanks are first formed, then dried and fired at a temperature of 1000°. These artificial stones are quite strong and durable. Their price is relatively high.
- Clinker stones. They are also made from good clay. The production of these products differs from the production of ceramic “colleagues” only in temperature, it is higher and is already 1200°. This species is easily recognized by its darker shade. Clinker has the best frost resistance and strength. Another difference from other types is the minimum water absorption rates (1-5% by weight).
- Sand-lime bricks. The raw materials for them are a small amount of lime and sand. These stones do not burn. They are “hardened” in an autoclave, under high pressure and a temperature of 200°. This material has a low price, so it is often chosen for the construction of outbuildings. Disadvantages - strength, less than that of ceramic products, tendency to absorb moisture.
There is another type - hyperpressed brick. The raw material for its production is a mixture of rocks (limestone) and a small proportion of cement. First, it is pressed using a semi-dry method, and for hardening it is sent to a steaming chamber, or left in a heated room. This type of artificial stone is intended for cladding buildings and other structures.
Another product called brick is adobe, adobe, adobe or adobe. It contains clay soil and additives - straw or other plant fibers. Constructions made from raw brick are popular in regions with a dry climate, since this “stone” is not indifferent to moisture.
Structure
The scope of application of building materials depends on it. There are solid and hollow bricks.
The first ones are solid. If there are small voids or pores in them, then they were formed during production. These blocks are used for the construction of load-bearing walls and other structures to which serious loads will be applied. Their main advantage is strength, but solid bricks lose in another component. Such products have worse thermal insulation performance when compared with their “leaky” brothers.
Hollow blocks, on the contrary, are “speckled” with holes - rectangular, round, or oval. Their number and size may vary. The advantage of “leaky” parallelepipeds is excellent heat and sound insulation characteristics, but in this case there is also a significant disadvantage - insufficient strength. However, the golden mean, a brick that would have the advantages of both materials, has not yet been invented.
Scope of application
According to their purpose, bricks are:
- Construction workers, or ordinary workers. They are used for the construction of walls, as well as for the construction of interior partitions. Since such structures almost always require finishing work, the building bricks may not have an entirely ideal shape. But their price is not as high as that of other, “elite” types.
- Facing, or front. This stuff has no reason to complain about its “looks.” It can be used for the construction of walls, plinths and other serious structural elements, but due to its better appearance, the facing material does not require additional finishing. He is quite “self-sufficient”.
- Refractory. Its specialization is clear from the name. This type is chosen for the construction of stoves, fireplaces, and chimneys. Fire bricks can withstand fire and high temperatures.
- Decorative. Its only purpose is to serve as a finishing surface: both internal and external. Decorative stones have different colors and textures.
These species may be joined by another potential candidate for the title of building material. This is a used brick, so it’s better not to seriously consider this “pretender” at all. The strength, as well as the appearance of such products, leaves much to be desired.
Types of masonry
To learn how to make brickwork correctly, first of all you need to get acquainted with what types of brickwork exist. Depending on the purpose of the structure, “your own” masonry can be used. The walls are erected:
- half a brick;
- in one brick;
- or 1.5, 2 or 2.5 bricks.
Half-brick masonry involves the construction of a wall whose thickness is 120 mm. This option is used for wall cladding. Load-bearing walls or interior partitions are made of one brick. In this case, the thickness of the structures is twice as large - 250 mm. This solution is ideal for private homes. The third method is optimal for the construction of multi-story buildings, but it is also suitable for individual construction.
There is another option - quarter brick masonry. In this case, the blocks are placed on spoons. The disadvantage of this method is its small thickness (65 mm), so there is no need to talk about strength or thermal insulation qualities. This type of masonry is used exclusively for the construction of interior partitions.
What row layouts are there?
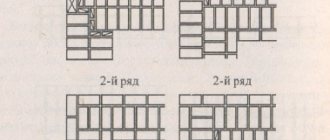
There are several types of bricklaying you can do with your own hands, among which spoon masonry is considered the easiest. It is made in half a brick with vertical seams shifted.
Chain method
With this dressing, spoon and butt rows alternate. This technique makes the wall strong. An interesting fact is that the seams of the butt and spoon rows should not coincide vertically.
Multi-row dressing
6 spoon rows alternate with one back row.
The “end-to-end” laying method
The solution is spread over the entire row at once, since added substances increase the time before setting.
Press-on dressing
When working with hollow bricks, rigid mixtures are used. In this case, lay the brick closely.
Lightweight technology
This option is used for the construction of low-rise buildings. What distinguishes this method from others is that there are cavities in the wall that are filled with thermal insulation. A wall built in this way consists of two planes of half a brick.
Well masonry
It got this name because in cross-section it resembles a row of wells. Between the walls there are dressings located vertically relative to each other.
Three-row dressing
This option consists of five rows of a hollow wall with three butted rows. Dressings help to organize the reliability of the structure.
Reinforced dressing
Reinforced with reinforcement. Used in the construction of walls. The masonry gives the structure reliability in regions where tremors are observed.
How and how to caulk a timber house with your own hands: materials and step-by-step instructionsDigging wells
Wall masonry - tips for choosing bricks, calculating thickness and brick laying techniques (100 photos and videos)
Decorative
This masonry is done in the case when the built wall will not be plastered and then the surfaces are given a beautiful appearance. The pattern is formed from different colored bricks.
Preparing for work
Before moving on to how to do brickwork correctly, you need to collect all the tools that will be required for this important operation. The future mason will need to collect several tools and materials. The list includes:
- a solution consisting of sand, cement and water (+ clay, washing powder or detergent for plasticity);
- order - a corner made of metal, it is attached to the corners of the building to fix and move the mooring cord;
- mooring - a long nylon cord, it will serve as a guide for the rows;
- trowel (trowel) for applying and leveling the mortar;
- level, but it’s better to have two at once - long and short;
- plastic template for applying the solution;
- plumb line, tape measure, square, pencil;
- piece of reinforcement, diameter - 8 mm;
- shovel for mortar;
- jointing, pickaxe.
A grinder or circular saw can be a substitute for a pickaxe. You will also need a container for the solution. If the place of its manufacture is far from the object, then it is better to stock up on a wheelbarrow to transport it. For large-scale work, it is recommended to rent a concrete mixer. For structures that will be visible, it is recommended to take bricks from the same batch. So the difference in shade will be “as minimal as possible.”
Tools
Let's find out what you need for laying bricks:
- Trowel or its second name is trowel. He uses it to lay down the solution and remove all excess. Use the trowel handle to level the brick into the correct position.
- Joining – designed for cutting seams.
- Kirochka. A device for breaking bricks to the desired size and cleaning them. Order. It is used to check the height of masonry. The thickness of the seam should not exceed twelve millimeters.
- Twisted cord - this device is necessary for checking the horizontal. Serves to ensure straightness of rows.
- Square - for checking angles.
- A plumb line is a tool that is responsible for the verticality of the wall being built.
- In the work of a mason, the main importance is control over the horizontal and vertical accuracy of rows of bricks. For such control, building levels are used.
- The rule is a flat metal or wooden strip to control the plane of the wall.
Read here - Finishing the facade with tiles: tips for choosing a facing material and the best ideas for decorating the facade (100 photos and videos)
A tape measure is also used to measure distances and lengths. And for marking - a pencil. By doing the work yourself, you significantly save on mason labor costs. Accordingly, the price of bricklaying also decreases.
How to make brickwork correctly?
To a person unfamiliar with the procedure, it may seem that there is nothing complicated about how to do brickwork correctly. However, it is not. The operation itself has quite a few stages. Each of them requires maximum care from the master. To minimize the risk of mistakes, it is better to devote time to training: for example, you can first “talk” with the most problematic areas - the corners.
First row "dry"
This preparatory stage is mandatory. It will help you calculate the number of bricks, give you the opportunity to get acquainted with the process itself, but not make mistakes.
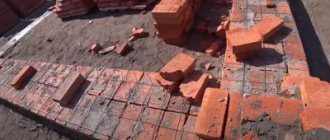
- First, waterproofing is fixed around the perimeter of the foundation or on the plinth. The “hit” in this case is roofing felt. Then they lay out the first row without mortar; careful adjustment is also not done. A piece of reinforcement or pin is prepared, but its diameter must correspond to the thickness of the mortar joint.
- Now the laid out row of bricks begins to be adjusted. They are leveled, a piece of reinforcement is inserted between the blocks so that equal gaps remain. The greatest attention is paid to the corners of the future structure.
- Often in cold regions, a hole is provided in the wall between the bricks for thermal insulation. In this case, after the formation of the first, inner row, the second, outer row is laid out in the same way.
- After completing this stage, they “arm themselves” with a tape measure, pencil and paper. Measure and then record the length of each wall. To determine the correctness of the work performed, measure and compare the diagonals.
The location of the bricks is recorded with a pencil. Marks are placed on the foundation (basement): first at the corners, where the edges of the bricks will be. To facilitate and speed up further work, it is better to place them along the entire perimeter of the structure.
First row "wet"
This stage is the most critical, since the strength and appearance of the entire building will depend on the quality of the first row. Therefore, the greatest care during this operation is not a recommendation, but a rule.
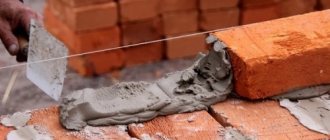
- If necessary, the roofing material is covered with a reinforcing mesh. Laying, focusing on the marks, begins from the corners of the future building. Using a trowel, lay out a layer of mortar, its thickness is about 15 mm. It is leveled, a brick is laid, the correct position of which is carefully checked with a level.
- If there is a need for leveling, it is done with the handle of a trowel or the blunt end of a pick. The thickness of the vertical seam should be 8 mm, horizontal - 8-10 mm. After successfully placing bricks on the mortar at the corners of one wall, check whether the height of the laid blocks matches.
- In the same way, the first row is laid on the remaining corners of the building. After “dealing with” them, cords are attached between the bricks using ordering (or corners). The moorings should not sag; it is not recommended to change their location during laying.
- Having completed the preparatory “mooring” operation, the remaining bricks of the row begin to be laid out between the corners. Excess solution is promptly removed with a trowel.
After finishing the first row, check again the height of all bricks, their verticality, and the absence of displacement relative to the foundation (basement). In exactly the same way, starting from the corners, moving the mooring cord, construct the next rows.
Methods of laying bricks: end-to-end, pressed
How to make brickwork correctly? In general, there are two answers to this question. One of them is called strangely - “end-to-end” (it seems that “end-to-end” would be more logical). Another version of “breaking the tongue” is more understandable: this is “squeezing.” It is necessary to talk about these techniques.
“Sticky” method
The berths are stretched along the upper ribs of the future row. For an ideal result, it is recommended to pull 2 cords: not only from the outside, but also from the inside of the wall.
- Then the solution is applied to the surface of the finished row and distributed evenly. All gaps in the previous row must be filled.
- Take a brick, slightly tilt it down with the edge that will connect to the surface of the adjacent block. It is then immersed in the solution and moved so that it captures a layer of mixture that will fill the vertical joint.
- Do the same with the following bricks, simultaneously obtaining both a horizontal and vertical seam. Excess mortar is removed, then added to where small voids remain.
This method does not guarantee that the perfect result will be obtained the first time, so only preliminary training will help you acquire at least a minimum skill.
"Press" technique
The work begins in the same way: with tensioning the cord and distributing the masonry mortar. However, the next steps are different.
- After leveling the mixture, the mats are turned vertically, then the tool is lightly immersed in the solution, grasping part of it, and raked to the vertical edge of the adjacent brick.
- As a result of these actions, an almost finished seam is obtained. Holding the mortar with a trowel, lay the brick with the other hand, press it against the lower block, then bring it closer to the tool, which is immediately removed.
The laid element is adjusted using the tool handle. The next stone is placed in exactly the same way. Excess mortar is cut off, placed in the seams, on top, or put back into the container.
Types of seams
Familiarity with the stages of masonry is not the only thing a master needs. He needs to know at least the most popular, simple types of seams. For brickwork, the following options are used:
- Pustoshovka. In this case, the solution is neither flush with the surface of the brick wall nor protrudes beyond it. These gaps are left on purpose; they will then be reliably closed with plaster.
- Convex, concave seams. Their purpose is purely decorative. To create the former yourself, you often use a piece of pipe of a suitable diameter. It is cut lengthwise in half. To form the second, the same pipe is used, but it is not cut.
Another common method is to create seams flush with the surface. This method is used where it is necessary to avoid the accumulation of soot: during the construction of chimneys, fireplaces, stoves. Sometimes full joints are chosen for decorative masonry.
How to avoid efflorescence and brick “rupture”
Efflorescence (formation of salt crystals on the surface) is considered one of the main problems of brick facades, as it not only spoils the appearance, but also provokes destruction. To avoid having to regularly combat this phenomenon with the help of removers and water repellents, it is enough to follow a few recommendations.
CorsaC939FORUMHOUSE Member
I remind you - strict adherence to the dosage of water in the solution, protecting the walls from rain with covering material every night and long breaks in masonry work. Plus the absence of any additives to the solution, except water, sand, cement. No “Fairies”, liquid soap, washing powder and other rubbish. If you don't follow these rules, don't complain about efflorescence.
Along with efflorescence and “snapping” of bricks on the facade, shrinkage “breaks” are also not uncommon, which also do not contribute to the preservation of either the durability or attractiveness of the masonry. The correct ratio of the strength of materials will help to avoid this phenomenon.
Alex_22FORUMHOUSE Member
The brand strength of the masonry mortar should be about a third lower than the strength of the brick, otherwise it will tear the masonry during shrinkage. For example, when the mixture is M150, the brick should be M200-250, but you still need to look for one. This means that you should prefer a mixture of M75, M100.
Expert advice
Any undertaking is rarely without mistakes, so it is better to become familiar with the possible pitfalls in advance.
General recommendations
The following tips may be useful to someone. The first of them concerns the need for ligation (overlapping vertical seams), but, apparently, this truism is already known to everyone. But there are other recommendations.
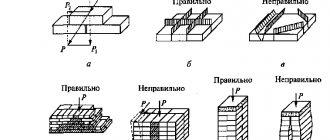
- To ensure greater structural strength, it is necessary to lay reinforcing mesh every 6-7 rows.
- Before you start laying, the bricks must be placed in a container of water. In this case, the operation will contribute to better adhesion of dissimilar materials.
- The best way to get acquainted with brickwork is to practice on the most basic, small structures. For example, on pillars, steps, etc. In this case, you can begin a more complex task with a little experience.
- To obtain the necessary skills, it is optimal to use parallelepipeds of ideal shape. The best example is face brick. Another option is rougher products that more closely resemble natural stones.
- To avoid a large number of mistakes and the costs associated with them, it is recommended to draw a detailed diagram in advance, in which all the bricks and rows will be marked, and the exact locations for the seams and their width will be indicated.
When purchasing material, you must add at least 10-15% to the calculated amount, since mistakes when cutting bricks are not uncommon, especially for those who are faced with the operation for the first time.
How to “deal” with a brick?
Both simple and complex patterns require the presence of pieces of blocks, halves or quarters. This stage of work can be performed in three ways: using a pickaxe, grinder or circular saw.
Using a Pickaxe
For this tool, the condition of the brick itself is extremely important. It is better to take blocks without defects. Or those in which the cracks are located in the right place, near the future cut.
- First, mark the cutting line with a pencil and ruler. Then they resort to using a tool: they scratch the surface around the perimeter with the sharp part of a pick.
- A fairly strong blow is applied along the line with a sharp part, after which the stone should split into two parts. Large blocks require multiple hits. Sometimes the blunt side of the tool is preferable.
"Intervention" of the Bulgarian
In this case, such a crude approach is not necessary. An angle grinder will allow you to get even cuts, but it will not do without noise and dust. Safety precautions when working with a formidable tool must be strictly observed.
- The “experimental” brick (with a marked line on the spoon) is placed on a flat base: for example, on a board. The ideal is the ability to securely fix the block.
- They take a grinder, then approach the brick so that the dust goes in the other direction from the master. They turn on the tool, pause for a short time, and then begin cutting.
The same is done if a circular saw is used to operate on artificial stone.
How to make brickwork correctly? Carefully, carefully, paying attention to absolutely all details. Since any job requires at least minimal skills, it is better to start with the simplest designs. Slowness is another prerequisite for high-quality masonry.
The following interesting video, showing the hard work of a mason, will give you a chance to evaluate brickwork from all sides: both the upcoming large-scale operation and the feasibility and possibility of doing it yourself.
