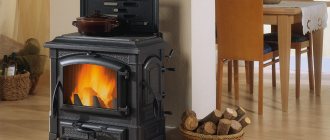
- Do-it-yourself parquet repair and restoration
- Basic types of do-it-yourself parquet restoration
- The main reasons why parquet floors lose their appearance
- Preparing the premises for the main types of repair and restoration of parquet flooring
- Spot repair of old parquet: eliminating cracks and restoring loose boards
- How to get rid of squeaks and other problems that require restoration of old parquet
- What is the restoration of parquet after flooding?
- Features of parquet repair without sanding
- Repair and restoration of parquet: sanding, sanding, how these types of work differ
- What tool is used to restore and repair old parquet: sanding
- How sanding is carried out: the cost of repairing old parquet
- Video: repair and restoration of parquet
Do-it-yourself parquet repair and restoration
For a long time, parquet has been considered one of the most expensive materials for floor finishing, since natural wood is used for its production. Properly laid parquet looks aesthetically pleasing and attractive, and its service life is significantly longer than that of other coatings. The question often arises: how to keep parquet in perfect condition? Parquet repairs will not have to be carried out frequently if you constantly take care of the coating and eliminate them when defects appear.
If the installation of parquet was done correctly, then this coating can last for many years.
How to fix squeaky parquet floors
At first, the creaking of parquet boards is perceived absolutely calmly - there is even a certain amount of romance and mystery in it. But over time, this fact begins to greatly irritate, interfere with sleep, and therefore something will have to be solved with this problem. Most likely, you will need to pull the parquet away from the edges.
Stages of work:
We remove the baseboard around the entire perimeter of the room and check the condition of the spacer wedges. Most likely, once a persistent creaking appears, they are no longer able to open anything, but simply lie in the crack.- If there are complete absence of wedges and the presence of polyurethane foam, you will need to completely clean the gap and insert the wedges.
- We install new wedges at a distance of 50-60 cm and tap them tightly.
If an individual floorboard creaks, you can fix the problem in a matter of minutes, without dismantling the baseboard. Watch detailed video instructions on how to eliminate squeaking parquet floors:
Now you need to knock out the wedges every day and control the strength/loudness of the squeak. If after 5-7 days the creaking has not disappeared anywhere, and the wedges “sit” tightly in the crack, then this means only one thing - it’s time to change the floor covering.
It is quite possible to carry out minor parquet repairs with your own hands - there is nothing complicated about it. It is only important to adhere to the described recommendations and then the luxurious, cozy, practical parquet will last for many years.
( 82 votes, average: 4.70 out of 5)
Do-it-yourself installation of wall panels
Cladding the walls of a house with bricks: instructions and recommendations from experts
Related Posts
Basic types of do-it-yourself parquet restoration
Before raising the issue of restoring parquet boards or parquet, you must first analyze the condition of the floor covering and, if specific problems are identified, make a decision on the need for repairs. To do this, you should think through the main stages of the work, approximately calculate the waste, so that during the repair process you do not encounter the problem of a lack of funds. Only after a preliminary assessment can work begin.
Before restoring the coating, it is necessary to assess its condition.
Depending on the degree of complexity of parquet repair and restoration, the work carried out can be divided into 3 types:
- Major renovation. It is carried out mainly after the expiration of the warranty period of the floor covering and in the event that the cost of restoring the parquet will be higher than the cost of a major replacement of the boards.
- Average renovation. It is planned when obvious defects have appeared on the floor that require elimination, for example, a change in the color of the surface, the appearance of stains, the mobility of some elements or squeaking when pressed. The work consists of replacing parquet or restoring individual tiles of the coating.
- Routine repair of parquet floors. This measure is more likely to be preventive; it allows you to postpone major repairs for a long time.
Note! Parquet is one of the most stable coatings. With proper operation and timely repairs and maintenance, it can last for several decades. Moreover, most of the restoration work can be performed locally.
Repairs of average complexity include general restoration of parquet or replacement of individual boards.
How to restore loose parquet boards with severe chips
One of the most popular options for restoring the surface of a rickety parquet board with significant chips is to use a mixture of sawdust and epoxy glue, which is diluted in a ratio of 1 to 4. Before applying the mixture prepared in this way, the parquet floor must be thoroughly cleaned of previously applied paint and varnish coatings, and then rinse well.
An epoxy mixture with sawdust is applied to the damaged areas of the parquet board and carefully leveled with a regular spatula, and everything is left for several hours until completely dry. Next, the surface of the treated parquet is sanded, cleaned of dust, and covered with a layer of varnish, after which hardens, the floor takes on the appearance of a new one.
Even such a serious chip can be fixed without replacing the parquet board
The main reasons why parquet floors lose their appearance
The need to repair and restore parquet will arise sooner or later in any case, and the main reason here is constant and long-term operation. After all, people not only walk on parquet flooring in house shoes, they also move furniture on it and damage the flooring with sharp heels or rough soles. Other causes of defects include:
- Constant excess humidity. Wood is distinguished by its ability to swell when wet, the same applies to wooden parquet blocks. If this is a basement floor and a special waterproofing layer is not laid under the parquet, then the coating will sooner or later swell and walking will be accompanied by squeaking.
- Excessively dry air. Constant high temperature in the room causes the wooden elements to dry out, which is likely to cause deformation and distortion of the base.
- Improper cleaning. Frequently carried out wet cleaning with a regular mop or steam cleaner leads to the accumulation and retention of liquid in the crevices, which can cause the wood to rot.
- No processing. If the purchased parquet has not been pre-treated with special agents that prevent the growth of fungus or wood pests, then such a floor will quickly become unusable, even with proper care.
Parquet flooring can deteriorate due to high humidity or excessive dryness in the room.
Among the main reasons why you will have to repair parquet boards is surface discoloration. This happens mainly due to the use of unsuitable detergents, excess moisture or the ingress of aggressive chemicals, such as ammonia. The main problems also include:
- Appearance of cracks. The main reason is considered to be dry air, which often occurs in winter with active use of heating devices. The preferred humidity in a room with parquet is 40-50%.
- Blistering of boards. It is formed due to the accumulation of water under the surface of the board or due to improper repair of the parquet after the room has been flooded.
- Lack of heat resistance. Associated with improper installation of insulation or poor processing of joints, and can also be caused by insufficient preparation of the base.
- Displacement of boards when walking. It occurs due to a violation of the screed technology, the absence of a soil layer or the formation of mold on the inside of the boards.
- Peeling of parquet from the base. The problem occurs when there are uneven surfaces on the floor, due to uneven application of the adhesive mixture, as well as when the dies are incorrectly attached to the wooden base.
- Gaps between boards. The main reason for the appearance is the use of too wet material.
- Glue protrusion. Occurs as a result of applying a very thick layer, improper laying of boards or due to incorrectly sized sheets.
- Scratches and dirt. This happens mainly when the floor covering is not used carefully.
The appearance of defects on the parquet may be the result of improper cleaning.
The most common problem that causes the need to replace parquet is subsidence of the floor, which occurs due to the destruction of the screed under heavy load.
Caring for parquet after renovation
Restored parquet flooring puts forward some requirements for compliance with operating rules:
- ensuring optimal humidity levels;
- eliminating prolonged exposure to ultraviolet radiation on wooden flooring;
- preventing abrasive particles from getting onto the parquet. The main enemy of parquet is: sand, legs of furniture, chairs and chair wheels.
A door mat, felt pads on the legs of furniture and chairs, a pad for a computer chair, indoor slippers instead of outdoor shoes - these are simple ways to protect the parquet from destruction.
In addition, wet cleaning of parquet is carried out exclusively by hand using special detergents.
Preparing the premises for the main types of repair and restoration of parquet flooring
Any repair or restoration of parquet in an apartment should begin with preparing the room. To do this, you need to remove all furniture and interior items from the room. If you replace the boards locally, you can repair the parquet without removing the furniture, but in any case it is better to cover it with film to protect it from dust settling. During a major replacement, you should completely vacate the room, because any type of repair will be accompanied by dusty work, especially if you need to adjust the boards to size using a jigsaw.
It is also better to immediately identify all damage; you can even outline them with chalk so that during the repair process you do not miss defective areas. After assessing the condition of the coating, you should make sure that you have some tools, especially if you will be restoring the parquet yourself. These include:
- surface grinder or parquet sander;
- angle grinding;
- cycle;
- sandpaper with varying degrees of abrasiveness;
- vacuum cleaner;
- chisel and plane;
- jigsaw;
- putty for wooden structures;
- finishing coating, which includes varnish, wax or oil.
After assessing the condition of the parquet and determining the type of restoration, you need to stock up on all the necessary tools.
We should not forget about personal protective equipment, because some types of work should be carried out with gloves, and when using a jigsaw, it is recommended to cover your eyes with safety glasses.
How to clean parquet
To clean parquet, you can only use special products containing surfactants that have a neutral acid-base reaction. Under no circumstances should abrasives, dishwashing detergents, soda, or solvents (acetone, alcohol, gasoline, etc.) be used.
If blood gets on the parquet or pets defecate on it, you should immediately clean the stain with a damp cloth. Once such stains dry, it will be impossible to remove them without leaving a trace. You will have to scrape, sand and re-varnish.
conclusions
With proper care, parquet can last a long time and delight you with beauty and comfort. At the same time, minor cosmetic repairs in case of minor damage or loss of appearance can be performed independently. Guided by the recommendations and video materials, you can easily cope with this task.
Spot repair of old parquet: eliminating cracks and restoring loose boards
The cost of parquet repair will primarily depend on the extent of the damage. Often, local replacement of some elements will cost a little less than a major overhaul, because it will be necessary to fit new parts to those already installed. The duration of operation of the floor covering without additional measures is influenced by the quality of local work.
The most common reason for minor parquet repairs is the appearance of cracks due to loosening of the planks. This problem is relevant due to the fact that wood is a capricious material, which is characterized by swelling and shrinking. Therefore, preventing the occurrence of cracks is considered a rather difficult task, since it is not always possible to maintain constant humidity and temperature in the room.
On a note! When large gaps appear, the first thing you need to do is pull the planks together and place a piece of wood in the free space, which will be enough to close the gap. If there are a lot of cracks, it is better to completely lift the covering and lay it again. You need to be prepared for the fact that some of the planks will need to be replaced.
Local restoration of parquet will cost much less than major repairs.
It is recommended to take into account that if, when loosened, only a certain number of planks are replaced, there is no guarantee that over time the same defect will not occur in another part of the floor. Step-by-step instructions for repairing parquet with your own hands:
- Using a chisel, remove any loose dies. If the element does not come out well, you can try to split the part with a sharp end by inserting a chisel parallel to the fiber structure. After splitting, the element is taken out in parts.
- Remove the remaining adhesive mixture and clean the base on which the removed boards were located.
- If strong unevenness occurs, use putty.
- Remove the side edges from the dies requiring replacement and level the ends using a plane.
- Sometimes, in order to install several strips, the parts adjacent to them are also replaced.
In some cases, when replacing several elements, the picture is assembled separately and then placed in its entirety in the resulting space. At the same time, it is necessary that the details match perfectly with the rest of the parquet in pattern and color and fit into the overall picture. When replacing individual parquet boards, you can use special glue or bitumen mastic, which requires heating before use.
Parquet blocks that are loose are removed using a chisel.
After a certain section of parquet has been replaced, a weight should be placed on top. In this case, it is necessary to additionally capture small areas located next to the long-glued elements. If there are glue residues on the sides of the edges, they must be removed immediately, because after drying it will be impossible to remove the glue without leaving traces.
When the boards adhere tightly to the base and the glue is completely dry, restoration work will need to be carried out. To do this, you need to clean the treated area with sandpaper, then remove the dust and cover the new parquet with varnish, oil, mastic, or the same composition that was used to treat the entire surface.
Repairing loose boards
You can secure individual parquet boards using small nails driven into the end of each board at an angle of 45 degrees. This process is shown in more detail in the figure.
Scheme for fastening individual parquet boards using small nails
In order to completely drive a nail into the end of a parquet board, you need to use a rod - a “doboychik”. The most ordinary large nail can play this role. The “doboychik” head is placed on the head of the nail being driven in and hit with a hammer on its opposite side.
If it is not individual boards that are loose, but entire “pockets” of parquet, then you can use bamboo inserts to secure them. The fact is that bamboo has a structure different from wood, due to which it swells significantly more than any type of wood when exposed to moisture. To fix a group of parquet boards, it is enough to drill a number of holes around the perimeter of the “hearth” and drive bamboo “blocks” into them. Excess bamboo is cut off with an ordinary knife. After about a week, after the bamboo has swollen, the repaired piece of parquet can be puttied and varnished.
How to get rid of squeaks and other problems that require restoration of old parquet
The problem of a creaking floor is familiar to many, because it is considered one of the most common; it arises due to the friction of the planks relative to each other under the influence of weight. In this case, you can try to repair the parquet yourself using any type of fastener. These can be screws, self-tapping screws or other options screwed flush with the coating. After screwing in the element, the installation site is hidden using putty of the desired color.
Another reason for unpleasant sounds is the separation of the floor covering from the base. Here, an important task is to return the boards to their original position.
In some cases, in order to eliminate the squeak, you will have to completely or partially remove the parquet.
To repair creaking parquet flooring you may need:
- self-tapping screws, with the help of which individual strips are tightened to the base;
- an adhesive mixture injected into the gap between the slats using a syringe or syringe with a thin plastic tip;
- Polyurethane foam, due to its strong swelling, is recommended for use least often.
The most expensive parquet repair will involve complete or partial dismantling of the planks, after which they are re-installed, and the most unsuitable parts are either adjusted or replaced with new ones.
The third reason for the friction of the boards against each other is considered to be a violation of the technique of laying the dies and an incorrectly calculated distance between them. In this case, local repairs of the parquet are not allowed, because in any case it will be necessary to completely remove all elements, as well as move the logs, after which the coating will be laid again.
On a note! If one joist moves during assembly, do not lift the entire parquet completely. It is necessary to disassemble the adjacent part of the covering, use a hammer to knock the joist into place, and then reinstall the parquet.
If some parquet tiles have peeled off, you can fix the problem using self-tapping screws and a screwdriver.
In addition to the reasons listed, creaking sounds can also be caused by the absence of an expansion joint, which should be located between the edge of the parquet and the wall. In order to properly make a seam, after laying it is necessary to cut off part of the covering to form a small gap, the optimal size of which is 1-1.5 cm. There are other reasons why it may be necessary to repair panel parquet or conventional plank covering.
The appearance of a difference between shields or individual elements. In this case, it is necessary to sort out a significant area, because the cause of the violation may be deformation of the base. If a step of small height has formed, you can try to raise the protruding planks, cut off part of the coating at the base, or sand it.
Darkening of the surface. The main reason why old parquet has to be restored is considered to be the contact of aggressive chemicals on the surface, which quickly penetrate deep into the wood. Another reason is the wrong type of tinting or other coating. In this case, the only option for parquet repair is scraping and sanding, after which varnish, tonic or an oil-wax mixture is applied.
Parquet board repair video
Viewed times: 6,287
Great article 1
Author's rating
Author of the article
Oleg Grishin
Flooring specialist with 10 years of experience. Oleg has something to share with our readers
Articles written
105
- Even more interesting:
- Pros and cons of parquet
- Types of parquet installation
- How to eliminate squeaking parquet flooring?
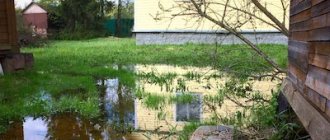
What is the restoration of parquet after flooding?
Exposure to large amounts of water on parquet is considered one of the destructive factors, because wood is a natural material, and moisture almost instantly enters the pores and microcracks. As a result of flooding, the boards not only swell, but also lose their shape and their structure is disrupted. In addition, other problems arise:
If the parquet is flooded, you need to quickly remove the liquid and dry the coating, for example, with a hairdryer.
- blackening of the coating;
- development of fungus and mold;
- formation of cracks, differences or chips;
- warping and swelling;
- change in color of seams and joints.
To avoid having to carry out a major overhaul of the entire floor covering, you should try to remove and saturate all moisture as quickly as possible, using fans, heat guns or any other methods. In this case, the cost of repairing parquet after flooding will directly depend on the wet area, as well as on what kind of base was used to lay the covering.
If local swelling occurs, you can try to dry the area with a regular hairdryer, which will melt the mastic. The appearance of the smell of mastic indicates that you can try to return the parquet to its original place, after which you need to evenly distribute the load not only over the restored area, but also grab at least a meter on each side.
Note! In a situation where minor flooding has occurred, but the water has spread over the entire floor area, everything will depend on the speed of response. If you immediately begin to dry the surface and get rid of moisture, there is a high probability that swelling and re-laying of the floor will be avoided. If the floor was seriously flooded, major repairs cannot be avoided.
The consequence of the flood may be the appearance of mold and mildew, as well as a change in the color of the coating.
If, as a result of flooding and soaking, the planks have become detached from the base, you should immediately prepare to replace the covering with a new one. If individual dies that remain firmly attached to the surface are deformed, you can try to carry out restoration work.
When repairing parquet (consumer reviews contain such information), you can encounter situations where, after pouring, the parquet dries on its own in 3-7 days, takes on its previous appearance, and the planks take their original position. Therefore, you should not immediately begin major repairs. In any case, if you make a complete replacement, it is quite possible to wait a few days.
If the parquet boards have dried well, but still do not take their place or remain swollen, you will need to perform a complete overlap. After replacing the damaged area, the parquet is sanded using a sanding machine, after which the damaged area is sanded and re-varnished. You also need to take into account that even if a little more than 30% of the floor covering has been damaged, experts will still recommend performing a complete covering. In some cases, the cost of repairing parquet per m2 of damaged area may be higher than the cost of laying new parquet per square meter.
Materials for restoration
To protect the parquet floor from external influences, it is opened with special varnishes.
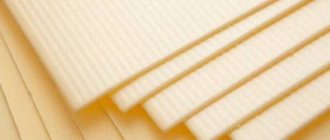
There are 4 types of parquet varnishes:
- Alkyd and uralkyd varnishes. They are inexpensive, do not emit toxins, dry very quickly, so you can be indoors within an hour after varnishing. However, such varnish will last no more than 10 years. Uralkyd varnishes are somewhat more durable, although they are more expensive. As a rule, they are used for short-term repairs followed by sanding and varnishing, as well as around the perimeter of the room.
- Based on epoxy resins. Such varnishes provide a durable and reliable coating for 30-40 years, although they are not cheap. As they cure, they release toxic volatile substances, so you should not start working without personal protective equipment (gloves, respirator, goggles). Windows should be open, but the door to adjacent rooms should be tightly closed. It will take about a week for the epoxy varnish to harden and gain density. Only after this can you be in the room.
- Acrylic varnish consists of a base and hardener, which are mixed immediately before application. This composition is practically non-toxic, but much more expensive than epoxy. With proper care, the service life of the coating will be 50 years or more.
- Water based. Rather, it is a finely dispersed suspension of some polymer, for example, PVA, in water. This varnish dries in a day, while it is non-toxic and inexpensive. Provides long-term protection to wood by penetrating deep into its structure. Mastic can be applied over the coating. The treated surface becomes less sensitive to minor mechanical damage. However, such varnishes somewhat change the color of the wood and quickly fade in direct sunlight.
Features of parquet repair without sanding
After laying parquet or parquet boards, scratches are inevitable, because the floor is constantly damaged by shoes, furniture legs, animal claws, as a result of children's games or when heavy objects fall onto the surface. In some cases, you can try to restore the parquet without sanding, using a retouching pencil or putty that matches the color of the main coating. If the area is small, you can do without sanding and using varnish.
If the defect is minor, you can use a special putty or pencil.
Damage and scratches from the boards are removed using cosmetic putty, which is applied using an ordinary thin spatula. Finding the right color is not difficult, because retail establishments offer a wide selection of materials.
On a note! The second name for parquet putty is restoration paste. If you can’t find the desired option on store shelves, you can try making the paste yourself.
To make decorative putty, you need to mix crushed sawdust and epoxy varnish in a ratio of 1:4. After this, the required amount of dye is added to the mixture. The finished paste is applied to the damaged area, which is then treated with fine sandpaper.
Sometimes, after restoring oak parquet, in order to create a complete picture, it will be necessary to imitate joints in some areas using an ordinary awl and a metal ruler. Work should be carried out when the restoration paste is partially dry; it should not be very hard, but it should not stretch. Step-by-step instructions for repairing parquet with your own hands:
Cosmetic putty is applied to the damaged area using a spatula.
- Using a ruler applied at the end, make a small indentation at the joint.
- Using an awl, apply the end false joints along the attached ruler.
The final stage of such a restoration is considered to be varnishing the parquet. It is appropriate to use any type of varnish here: alkyd, epoxy, acrylic or water-based. Before using the composition, it is recommended to study the application features specified in the instructions. You also need to take into account that to obtain a perfectly smooth surface you will need to apply at least 2-3 layers of varnish. After the varnish has completely dried, to obtain a better result, it is recommended to rub the surface with mastic, after which the restoration of the old parquet with your own hands without sanding is considered complete.
How to update old parquet without sanding with your own hands
It is clear that it is clearly not possible to do without minor repairs or restore a parquet floor without repairing microcracks, raised boards and removing scratches. Just varnishing the parquet without sanding is a temporary solution for a short period of time. You will still have to eliminate the defects in the boards. Therefore, an attempt to simply refresh the parquet without sanding or removing the varnish will be a waste of time and money.
The scope of work must additionally include:
- Sealing and restoration of raised parquet tiles without dismantling and sanding;
- Elimination of cracks and chips, restoration of the surface of blackened areas of parquet;
- Removing parquet floors from squeaking;
- Restoring the varnish layer.
Of course, before you try to repair parquet without sanding yourself, you need to inspect the entire surface of the floor as carefully as possible. Even in a relatively good condition, parquet blocks can present many unpleasant surprises; it will not be possible to restore them with just a cosmetic update. Therefore, before abandoning sanding, you need to be sure that you will not need to cut off the top layer of varnish and wood.
The secret to restoring parquet without sanding
The operation consists of mechanical processing of the surface of the parquet floor with razor-sharp metal knives; scraping is used to ensure:
- Removing the surface layer of varnish;
- Leveling the parquet plane, especially if you need to restore areas where individual dies have risen due to swelling or deformation of the adhesive base.
There are two methods of scraping - manual and machine. In the first option, the parquet is freed from varnish and the top layer of wood to a depth of a fraction of a millimeter. In fact, this is more of a cosmetic procedure, as it is aimed at restoring the texture of the parquet. A machine scraper cuts deeply and is designed to level the plane of a parquet floor.
Not just any floor can be scraped; sometimes it is simply impossible to restore the geometry of old parquet by trimming it
Important! In both cases, sanding requires high qualifications and high-quality tools; a violation of the technology can cause deep grooves to appear on the parquet, which will lead to the need to replace or overhaul the dies.
Therefore, the best option would be to renew the parquet without sanding, especially since, if desired, you can get a very good result at much lower costs.
What to do if the parquet flooring becomes loose and falls out
Let's start right away with the most important stage in restoration. The biggest problems are caused by dies that, for various reasons, have moved away from the adhesive base and become loose under load. Restoring them will not be difficult, but you should remember that do-it-yourself restoration without sanding does not involve deep grinding of the surface. Therefore, you will need to select several repair boards of the same size, but of different thicknesses.
After removing the board, you need to restore the adhesive base
After the defective parquet has been cut out of the floor, we remove the entire adhesive base and select a patch of the required thickness, taking into account a new layer of glue 1.0–1.5 mm thick. We adjust the shape, length and width of the new die exactly to the dimensions of the cutout, or better with an allowance of plus 0.1-0.2 mm on one side. We cut off the edge at the base of the die along the perimeter, and make the side edges with a beveled wedge.
If the neighboring parquet floors are also “playing”, then using a syringe for 20 cubes we drive polyester resin under them and load them with pressure until the polymer hardens. Carefully remove the remaining resin. Next, to restore the parquet, you will need to heat the cut out repair die, insert it and, using a mallet, carefully push it into place through the felt.
The advantage of restoring parquet with your own hands without sanding is the fact that the repair procedure is carried out quite quickly; most of the restoration can be completed in just one couple of weekends.
Important! When replacing or fixing loose parquet flooring, do not use screws, self-tapping screws, nails, or any mechanical fasteners.
The board should be seated with a small allowance for polishing
As long as the parquet restoration is done with your own hands without sanding, this does not matter much. Someday it will be necessary to restore the coating by grinding and scraping the surface, and then it will turn out that the screw heads disable the cutting edges of the scraper, and you have to spend a lot of time and effort processing the parquet with just one sandpaper.
How to fill cracks in parquet without sanding
It is imperative to remove cracks when restoring a parquet floor. Despite the fact that small gaps between the dies compensate for thermal expansion and swelling of the coating from moisture, they must be closed, since moisture and dust enter the parquet through the cracks.
When restoring parquet with your own hands without sanding, the gap is eliminated in three stages:
- The edges of the boards on both sides are sealed with tape or paper. If this is not done, then part of the putty will definitely be squeezed out onto the surface of the die, and you cannot do without scraping the surface;
- Relatively narrow gaps measuring less than 1 mm are simply rubbed with putty using a rubber spatula;
- Large cracks are first filled with fine wood dust, and only then a sealing layer of putty and powder is laid.
Until the material has completely hardened, it is carefully trimmed to the level of the parquet. This can be done with an ordinary stationery knife, but more often they use a hacksaw blade for metal, sharpened along the “back” line to a razor sharpness.
How to remove scratches on parquet
Small micro-scratches and damage to the varnish layer can be restored by hot polishing the surface using felt and an industrial hair dryer. The method can only be used if the parquet has been coated with oil varnish. This method does not work for modern epoxy and polyester materials. To restore parquet without sanding, you need to polish the damage yourself with special repair compounds for several hours.
If the old parquet is to be covered with a new layer of varnish, you need to limit yourself to cosmetic repairs and filling the deepest scratches with a low-melting polymer. If the repair procedure without sanding does not include painting the old parquet, then you will have to polish the floor from the damaged area to the baseboards, gradually moving in circles over the entire surface of the floor.
Most damage can be repaired with repair paste
How to get rid of a squeak
Unpleasant sounds that occur when walking on a parquet floor are most often a consequence of the displacement of the “playing” tiles relative to the end surface of more durable and rigid parquet flooring. If restoring defective parquet boards with your own hands without sanding does not bring the desired results, then you can resort to a more traditional method of restoring the parquet.
Fine crushed wax is carefully poured into the joint between the boards, since the grains of the material are quite large, you have to push them with a spatula and a brush into the depth of the gap. The next step is to warm up the area where the creaking occurs with a hairdryer. In approximately half of the cases, it is possible to restore the condition of the parquet with your own hands without sanding and without using more radical means.
Advice! You should not try to fill cracks and creaking areas with varnish and oil compositions; as a rule, they do not give the desired result and only aggravate the condition.
How to clean parquet without sanding
Cleaning parquet floors is carried out in several stages. First of all, you need to thoroughly vacuum the parquet with a regular household vacuum cleaner. Most of the problems that arise during the process of floor repair are associated with the presence of wood and house dust.
A vacuum cleaner helps restore a cleaned floor, remove dust and even moisture
The next stage is rough cleaning of the parquet. Using felt or a felt pad for a polishing machine and detergent, we try to wash and restore the original color of the parquet floor in those places where the most dust settles:
- Under furniture and sofas, in the corners of the room;
- Under heating radiators and around the perimeter of the room, along baseboards and thresholds.
Regular soap and hot water can remove most of the dirt. If you plan to varnish the parquet without sanding, you will need to additionally wash off the top part of the old varnish film to improve the adhesion between the layers.
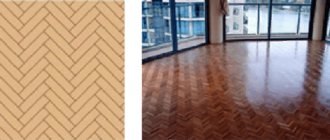
Repair and restoration of parquet: sanding, sanding, how these types of work differ
Sanding is the process of leveling the surface of the floor covering by removing the worn layer from the parquet using a cutting tool. By grinding we mean almost the same process, only in this case the surface layer is removed by using an abrasive material.
Today, the processes are considered almost identical, which is due to the frequent use of machine scraping, which requires the use of an abrasive material. Parquet repair (grinding or sanding) is carried out using various equipment, the selection of which takes into account the following factors:
Using scraping, the top old and damaged layer of the coating is removed.
- Scale of work. Sanding and restoration of parquet are carried out if it is necessary to process a small area and are mainly carried out using hand tools. If you need to organize work over a large area, it is better to use a grinder.
- The original state of the parquet before renovation. If the coating is in a disrepair, repairing the floor yourself using hand tools will be quite time-consuming, but a sander will help to significantly reduce not only time, but also labor costs.
- Performer experience. Parquet repair (scraping) is often performed by people who do not have much experience working with sanding machines. Professional craftsmen rarely use hand tools during the repair process.
On a note! If you want to repair the old parquet flooring in your apartment faster with your own hands, you don’t have to immediately buy a sanding machine, because it is not only expensive, but also quite expensive to maintain. The best option in this case is to rent the device for the duration of the repair work.
For grinding, devices with abrasive materials are used.
What to do if the parquet floor creaks?
Creaks in the floor are a sign of a poor connection between the parquet and the floor screed. This can happen if low-quality glue is used to install the panels, or perhaps you used the services of a private worker with little experience in this field.
To get rid of squeaks, you need to carry out individual parquet repairs. First, we identify areas for repair. We determine the middle of the area and drill through the parquet with a drill. The hole may be about 2mm. Pump the glue into the syringe and fill the cavity between the parquet and the base. We place a load on the repair site and leave it to dry for a day.
You can use a dowel to tighten the floor to the concrete base.
The dowel should penetrate 50 mm into the concrete.
What tool is used to restore and repair old parquet: sanding
The main tool for manual scraping is considered to be a scraper, the task of which is to scrape, rather than plan, a wooden covering. The device itself is a simple design and consists of a metal plate sharpened at an angle with a fixed handle.
Main technical characteristics of the device:
- Blade thickness. It is selected based on the height of the coating, taking into account the applied paint layer. A blade with a thickness of 0.7-0.8 mm is considered optimal; in this case, the size of the peeled layer should not exceed a few millimeters.
- Blade width. The wider the base, the larger the layer you can remove in one pass. Experts recommend purchasing a tool whose width does not exceed 45 mm; If the blade is wider, the scraper will be difficult to work with.
- Handle length and material. It is more convenient to control the pressure if the tool has a short handle. Recommended length – 45 mm. The material is chosen based on personal preferences, but still many note that when working with a wooden handle, the hand sweats less than after working with a plastic one.
Manual scraping of parquet is carried out using a special tool - a scraper.
Additionally, for ease of use, many product options are equipped with a pressure handle, which allows you to increase the pressure on the working tool. Separately, we should highlight the figured cycle used in the repair of block parquet to decorate the figured wooden plinth. The estimated cost of the device, depending on the characteristics, varies from 100 to 200 rubles. If a blade breaks during operation, it can be easily replaced by purchasing a new one. At the same time, the price of blades ranges from 30 to 50 rubles.
The main advantages of using cycles:
- low cost of the device;
- the ability to carry out repairs in hard-to-reach places;
- maintaining the appearance of the coating;
- absence of dust during operation.
It should be noted that when repairing artistic parquet, the use of cycles makes it easy to carry out actions, observing the correct direction of the wood fibers.
In addition to the advantages, there are also some disadvantages:
- time-consuming work;
- removing a fairly thick layer of coating;
- the need to exert a large amount of physical effort;
- working in an awkward position.
Work is done much faster and easier using a sanding machine.
Details
Types of parquet repairs
To implement your plans (eliminate defects), you will need special equipment and tools that can be purchased at a hardware store. But you can simply find it for rent through an ad in the newspaper or on the Internet. This will help you save a lot of money.
Set of building materials for parquet restoration
Let's look at the list of everything you need:
- Personal protective equipment – goggles and respirator.
- Small hammer, chisel and spatulas.
- Hacksaw for wood.
- Hammer or electric drill, with a full set of drills.
- A regular powerful or industrial vacuum cleaner.
- Sander, scraper or hand scraper.
Moreover, you need to take care of shoes with perfectly soft soles so as not to scratch the fresh varnish layer during the work process. Materials required:
- Stain, oil, varnish composition and paint.
- Adhesive composition and putty for wood.
- New dies to replace damaged parquet flooring.
After this, you are ready to carry out DIY wood floor repair work.
Renewing parquet without sanding
This type of repair belongs to the category of surface repair and is carried out in several stages. It is necessary to dismantle the thresholds and baseboards, they will interfere. Use a sander to remove the old varnish layer, and use a hand scraper in hard-to-reach places. If you don’t have a machine, use a special hairdryer, then heat the surface of the varnish and clean it off with a spatula. After a thorough preparatory stage, you need to remove dust and debris in the room with a vacuum cleaner.
It is necessary to inspect the surface and, if considered necessary, then putty certain areas. Next, go through the sanding machine a second time, but with a coarse-grained attachment so that there are no roughnesses. Next, vacuum so that there is no dust at all. Next, prime the surface with the first coat of varnish, apply with a wide brush or roller, and then let it dry. Using fine sandpaper, sand the surface, remove dust and apply a second coat of varnish. This can be repeated up to 9 times until the floor becomes perfectly smooth and even. It is important to apply the varnish composition to the parquet along the fibers, and the last varnish layer dries for at least 3 days. It is necessary to close all windows and doors in the room in advance, so that there are no drafts at all and do not allow dust to fall on the newly varnished surface.
Cracks and scratches
We looked at how to update parquet flooring without sanding with your own hands. If you have a pet in your house or apartment, then scratches from the pet’s claws will definitely appear on the surface. When there are not so many scratches, they can be eliminated using a wax pencil, which will clog microscopic cracks. This is an economical restoration option that does not require a lot of effort and time. If large, deep scratches or cracks appear on the floor, for example, if pieces of furniture were moved without pads on the legs, then there is no way to do without cleaning the varnish composition.
Clean it using the methods described above and then use an automatic or manual scraper to remove the thin layer of wood. Inexperienced beginners will find it very difficult to achieve perfect results in one go. Be prepared that the scraping procedure will need to be performed several times. Next, thoroughly clean everything from any remaining dust in the room, prime, putty and cover with a layer of varnish. You need to do the procedure so many times for everything to be perfectly smooth.
Chips and gouges in parquet boards
Although parquet flooring is made from hardwood, it will not be immune to larger defects. In this case, the steps will be the same as when removing scratches; mix the putty with dust after the cycling process. Cover the defects with a wide spatula. Try to make sure that the movements are in the direction of the wood fibers. Due to the fact that the putty mixture is made from wood dust, the treated potholes and chips will not stand out against the general background. Prime the surface and coat it with varnish, and then restore the parquet - cleaning, sanding and varnishing, and so on several times in a circle.
Crevices
Gaps between the dies are formed due to the ability of wood to absorb water and also dry out if the air in the room is dry. Fixing this problem is not that difficult. You still need to remove the protective layer, and then you need to carefully vacuum every crack and clean it of debris with a knife. Open and clean cracks must be covered with a putty solution containing wood dust from sanding. Next, similarly restore the varnish layer in several layers.
Floor creaks, local update
Parquet flooring begins to produce unpleasant sounds for 3 reasons. Firstly, the bars have become loose over time, secondly, the wedges between the flooring and the wall have sagged, and voids are beginning to appear under the boards. When eliminating them, there is no need to remove the varnish layer and scrape the surface. First, you need to check with wedges under the baseboards, and finding that they have dried out and do not hold the parquet, you need to remove each one and install new ones.
After returning the baseboard slats to their original place, you need to observe the floor for 7 days. If the sound does not disappear, you will need to find the cause elsewhere. Parquet flooring is laid on a sheet of plywood or screed.
Over time, they collapse and gaps appear, and in this place the floorboards begin to creak. This defect can be corrected using a simple method. Determine the die from under which the creaking will be heard. Drill a hole and use a large syringe to pump in adhesive or cement.
When working with cement mortar, remember that it hardens quickly, so do everything quickly and carefully. As soon as the mixture stops getting inside and appears on the surface, you need to complete the procedure and place the press on the area. After a couple of days, remove the weights and seal the drilling site. What if the creaking has a large area? In this case, the entire surface will need to be redone, and it will be necessary not only to remove the protective layer, but also to completely re-lay the parquet.
Blistering
So, how to update parquet without sanding? The biggest nuisance is if the dies become bumpy. This will indicate that during the installation process technology was violated or water began to seep under the tree and the blocks swelled. If this affects panel-type parquet, then there is no way to do without a complete re-laying. When small areas begin to swell due to moisture, warm up the floor surface.
After the specific aroma of chemicals appears, place a weight on the treated area. Its weight should be 12 kg per dm2, and after a day, inspect the surface; if the tuberosity has decreased, you need to perform the procedure again. In the case where the parquet laying technique is broken and the gaps between the wall and the flooring are not taken into account, the floor must be completely dismantled. Dry each beam in natural conditions, and then lay it on the floor again.
Plank restoration
When renewing a wood deck, you may often notice that certain pieces of wood no longer stay in place. In this case, the old type of planks must be replaced and further work must be carried out to restore the work on the entire plane. The actions are:
- Remove the varnish to find the bars that need repair.
- When the gap from one strip to the others is greater than 0.5 cm, replacement is required.
- Small cracks need to be filled with glue, weighed down and left for several hours.
- If the bars need to be changed, then remove them with a chisel and hammer, splitting them in the center.
- Scrape off any remaining wood adhesive with a narrow spatula.
- Adjust the dimensions of the replacement strip.
- Lubricate the cleaned base with adhesive solution.
- Place the block so that the grooves coincide with the grooves of the one lying down, and press firmly.
- After a week under the weighting agent, putty the entire floor, sand it and treat it with a varnish composition, as in other examples.
As you can see, everything is not so complicated.
Sticky plasticine
And finally, it’s worth considering how to get rid of fresh chewing gum on the surface of wood. The solvent helps, but stains remain. Use a simple ice cube and hold it over the plasticine, and after freezing you can easily remove the “decor” from the parquet surface without harm.
How sanding is carried out: the cost of repairing old parquet
As for grinding, you can use a variety of abrasives. Sandpaper is considered the simplest. Of course, doing the work manually is quite long and difficult. To speed up the restoration, some people attach sandpaper to the base of the shoe, but this method is not widely used due to the fact that it is difficult to control the work of the legs and maintain the same pressure.
A more advanced repair option is the use of a drum-type sander. The device is mainly used for deep sanding, because coarse abrasive cannot leave behind a perfectly smooth wooden floor. In one pass, the machine removes 1.5-2 mm of coating. To prevent dust generated as a result of removing the coating from spreading throughout the room, the device is additionally equipped with a dust collector. The most popular model of parquet sanding machine is considered to be SO-206, the price of which varies from 56 to 70 thousand rubles.
During the process of both grinding and sanding, scratches may appear when large abrasive grains leave marks. This is especially noticeable on soft types of wood, such as pine. In this case, you can re-grind or cover the damaged areas with restoration paste. After completing all restoration work, you need to apply a protective varnish coating, which not only makes the parquet attractive, but also protects the surface from mechanical damage.
A drum sander is best suited for sanding parquet.
On a note! It is recommended to repeat floor polishing at least once a year. The more layers, the stronger the coating. All work on applying the varnish layer must be carried out in a respirator.
As for the price of restoring old parquet, it directly depends on the original condition of the coating. If the parquet is in satisfactory condition and you only need to go over it with a sander and also restore the varnish layer, then the cost will be about 850 rubles/m². When you want to make the floor covering perfect, you need to carry out a variety of work: sanding and sanding with a drum machine, re-sanding with a surface grinder, tinting and applying varnish. Such work will not cost less than 1250 rubles/m².
Parquet is an expensive floor covering that has long been admired. Even the cheapest parquet option will always look better and last longer than the most expensive laminate. In order not to have to carry out major repairs of parquet, it is recommended to carry out restoration and restoration work from time to time, which can extend the life of the material. Even a simple application of an additional layer of varnish will help refresh the parquet and restore its shine.
Removing old floors: secrets of successful renovation (read more)
Sanding parquet
Parquet scraping is a type of work that involves removing a large layer from the floor surface - up to 1.5 mm. When performing scraping, it is important to adhere to the sequence of work. If the damage to the floor is insignificant, you can immediately sand the parquet.
Parquet sanding is a type of work, the essence of which is to remove a thin layer of wood - 0.5-1 mm. They sand the parquet in several directions using special equipment that allows you to achieve the ideal level of smoothness of the parquet surface.
The purpose of the treatment is to remove the worn surface layer of the coating and part of the surface of the parquet strip or solid board.
Note. Sanding and sanding are accompanied by the appearance of dust. Despite the fact that modern equipment is equipped with a dust collector, after repairs it is necessary to clean the room.