Do-it-yourself wooden staircase installation
A modern private house is necessarily equipped with a staircase for moving to the upper floors or attic space, and an ordinary stepladder is unlikely to work here. It is necessary to build something more reliable and durable. For example, a staircase made of solid wood. A DIY wooden staircase will require special care at all stages of its manufacture.
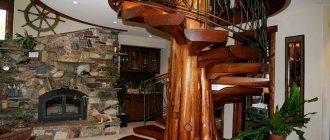
Stairs to the second floor can have a creative design..
Spiral staircase
As already mentioned, a spiral staircase in a private house takes up the least amount of space. But it has a serious drawback: it is uncomfortable to walk on, and it is almost impossible to lift anything bulky to the second floor. So they are not very popular, although they look good and fit well into any interior.
Calculation features
When designing a spiral staircase, it must be taken into account that in some positions there are other steps above your head. Therefore, it will not be possible to make small risers.
The next feature is that the steps are all unequal in width - narrower on one side, wider on the other. The narrow part is attached to the central support (post), the wide part is attached to the walls or balusters. The standard for the width of the tread is measured in the middle part, and the wide part should not be more than 40 cm.
The span width is from 50 cm to 100 cm. The entire structure is doubled - a square with a side of 100 cm to 200 cm is required.
Prefabricated column design
This type of spiral staircase is the easiest to make: a pipe is placed on which wooden elements are placed - steps, intermediate cylinders, etc.
The device of a spiral staircase on the central pillar
If you look in more detail, in addition to a metal pipe (in this case with a diameter of 40 mm), steps and balusters (available in any design), there are turned wooden cylinders (segments) that set the distance from one step to another.
Elements of a spiral wooden staircase
On the other hand, the distance between the steps is maintained using cuts on the balusters. The steps are attached to these grooves (with glue + fasteners).
The same device, but in metal
Do-it-yourself installation of a staircase to the second floor begins with the installation of a pillar. A hole equal to the diameter of the pillar is made in the floor of the first floor and the ceiling of the second. We insert the pipe into the hole, put on the enlarged washer, and tighten the nut. Further assembly is simple: the corresponding elements are mounted on the rod, and in parallel with the installation of the step, a baluster is placed and secured. The dimensions of the steps for this spiral staircase with the given parameters are in the drawing.
Drawing of elements of a spiral staircase with dimensions
The steps are cut from laminated boards or furniture boards. You can use solid wood, but of furniture quality, that is, without any defects and dried, with a humidity of no more than 8-12%. Although laminated wood is considered more reliable: it will definitely not be damaged and will not crack when dried.
For an example of assembling such a design, see the video. It has a prefabricated pole, but you can also use a solid one, although assembling the steps will be inconvenient - you will have to climb the stairs every time.
The design of a metal spiral staircase is presented in the following video fragment. For those who are familiar with welding, this option will be easier.
Spiral staircase to the second floor: photos of interesting options
Spiral staircases can have a futuristic look. Such models fit well into the styles of minimalism, hi-tech and other modern trends in interior design
With or without railings - the choice is yours. In the photo on the right, a wooden spiral staircase on a bent stringer is a difficult element to execute
The original shape of the steps in the form of a semicircle is very comfortable when walking
Forged twisted staircases - a classic of the genre
With the same design, the impression may be different
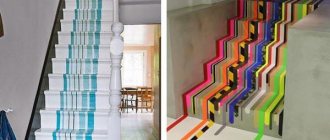
Color design is also important
Advantages
Wood is the most environmentally friendly and easiest to process material that does not require special processing skills. It can be used both for interior structures and for the porch of a house. Stairs with a metal frame are considered much more reliable, but now we are not talking about them.
Completely wooden structures, which can be assembled as a construction set, have the following advantages:
- acceptable price;
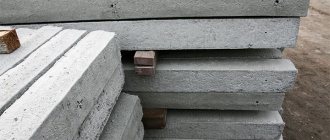
- availability of material;
- easy processing.
To make climbing stairs more comfortable, you can install wall railings.
The most common material is pine. This is an inexpensive soft wood that is well suited for beginners. The disadvantage of pine is its soft texture, which is why during operation the structure may begin to darken and the steps to creak if the necessary wood processing is not carried out before starting to build a wooden staircase to the second floor with your own hands or a porch made of a similar material.
Finished steps for a pine staircase.
When building a more reliable, beautiful and durable staircase structure, it is better to use expensive varieties. Stairs made from solid beech, oak or larch have an inimitable structure and increased wear resistance due to the density of this material. The only drawback of these breeds is the high price.
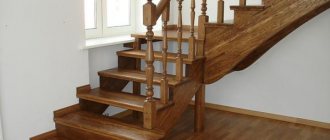
An oak staircase looks very beautiful.
“Staircase to the house” - affordable wooden stairs and professional installation
If you don’t have one hundred percent confidence in your hands, but want to get a professionally made, strong, beautiful design, this will help you. We offer ready-made systems or we can make a copy with individual sizes to order.
Our company produces interfloor systems of marching, screw and other types from wood and metal, as well as forged products - balusters, canopies, and so on. If necessary, we will send manufactured stairs to any region of the Russian Federation. For customers from Moscow and Moscow Region, a system installation and installation service is provided.
:
- provides a 12 month guarantee;
- makes professional calculations of stairs for free - the measurer will arrive in Moscow and Moscow Region any day of the week;
- sets affordable prices for products - we cooperate with direct suppliers;
- uses certified premium wood materials;
- checks products for the level of wood moisture, the strength of gluing parts, the uniformity of the cut, and so on.
With the support of our company, you will be able to safely move between floors and enjoy the beauty and convenience of your staircase every day.
Design
How to make a wooden staircase for a porch or for a house from solid oak, pine, ash and larch? Before studying the manufacturing instructions and talking about the frame and components, you need to understand what types of wooden structures you can assemble with your own hands. Conventionally, we can distinguish marching and spiral staircases.
It is important to choose the right place for the stairs to the second floor.
Screw structures are used in rooms with limited space. These structures are not suitable for moving large objects and can only be used for human movement. Such a staircase will never be completely wooden, since the support (rod, pipe) is made of metal.
Unusual design of a spiral staircase.
Marching stairs are the simplest to implement. Wooden structures of this kind on stringers or bowstrings are mounted both indoors and outdoors (mainly for the porch, which, as a rule, is located on a metal frame). For indoor installation, the main criterion is ergonomics. That is why it is not so important what kind of staircase will be built in your room - a single-flight staircase, a double-flight staircase with a platform, or a design with winder steps. It is worth noting that building a staircase to the 2nd floor with a turn is not much more difficult than a straight one.
Two-flight stylish staircase.
The main thing is that it fits perfectly into the space allocated to it and is in harmony in style with the engineering elements surrounding it. A wooden staircase inside a house means, first of all, warmth and comfort. These are not simple porch stairs or welded structures on a metal frame. To choose the right type of staircase structure, you need to measure the area on which the staircase will be located. Then make initial calculations and draw drawings. A detailed drawing will show the location of the structure in the room and how ergonomic it will be.
Drawing of a marching wooden staircase.
Choosing which staircase to build
Staircases can be marching or spiral. The design of a flight of stairs is quite simple and is the best choice if you plan to make it yourself, however, in order to ensure an acceptable slope and height of the steps, a considerable area is required. This ladder is very easy to use and can withstand heavy loads. It can be used to easily lift furniture and other large objects to the second floor; in addition, it is safer, so it will be the best choice if children or elderly people live in the house.
The spiral staircase has a more complex structure. It is used in conditions of limited space, when due to lack of space it is not possible to provide a safe slope of an ordinary staircase. The main disadvantages include the not very convenient design, which makes it difficult to lift and does not allow carrying large objects. At the same time, a skillfully made spiral staircase has sufficient strength and can be the main element of the interior.
Safety first!
Before you start making a ladder with your own hands , you need to take care of its safety. Firstly, it must be durable and easily withstand a load several times greater than the weight of a person of average build. Secondly, the ladder should be comfortable and ergonomic. In this case, it is necessary to pay great attention to such factors as the height of the steps, the slope of the stairs, as well as the location and shape of the railings. The steps must have a non-slip coating, and the spaces between the balusters are chosen in such a way that the child cannot squeeze through them and fall.
Elements
Making wooden stairs from solid wood will require some knowledge about the elements of staircase structures. Let's understand the terminology.
- Bowstring - a supporting beam and an element of additional fastening of the steps, located at the end of the latter.
- Stringers are the most common method of making wooden staircase structures. Cuts are made in load-bearing parallel beams on which treads are laid.
- Treads – the surface of a step.
- Risers are the vertical part of the step, mounted (if necessary) between the steps, covering the visible space.
- Balusters are a fencing element that gives the structure additional rigidity and strength. Attaches to steps and railings.
- Pillars (or support rod) - are installed mainly when installing screw structures as the main (central) load-bearing element.
- The railing is part of the enclosing structure of the staircase, attached to the top of the balusters or fastening spokes.
- Decorative elements – decorative overlays, plugs.
Designations of elements of a wooden staircase.
Ladder
-67 votes
+
Vote for!
—
Vote against!
In modern suburban construction, the construction of houses with several floors has already become the norm, and to ensure free movement between floors in such houses, stairs are installed. The seemingly simple design of a staircase in a private house, which any craftsman can do, requires precise calculations and an understanding of the mechanics of human walking. An error in calculations or in choosing the type of staircase and the material used can negatively affect the reliability of the staircase design as a whole, as well as the ease of use. Staircases in a private house fit very organically into the ordinary interior, which gives it great sophistication.
- Types of stairs for a private house
- Spiral staircases
- Marching stairs
- Stairs on rails
- Installation of stairs in a private house
- steps
- Support beams
- Railing
- Construction of stairs in a private house
- Place of installation of stairs
- Dimensions of stairs in a private house
- Choosing the angle of inclination of stairs
- Installation of a spiral staircase
- Installation of a flight of stairs
- Installation of a bolt ladder
Having decided to build a staircase in a private house with your own hands, you must not only be able to handle the tool, but also have certain knowledge regarding the structural elements and types of stairs. For those who decided to make a staircase in a country house for the first time, the information presented in this article will be a good help.
Types of stairs for a private house
When making stairs in a private house yourself, it is vitally important to be familiar with this or that type of stairs, as well as their design and operational features. Today, the variety of types of this seemingly simple building structure, as well as the materials for its manufacture, can confuse the craftsman with the choice. But everything is not as scary as it might seem at first glance.
Stairs in a private house: photo
In suburban construction, three main types of staircases are installed: spiral, marching and railed. Each of these types can be built both inside and outside the house, and each of them can serve as an entrance, interfloor, work or passage staircase. The materials used for the manufacture of such stairs are wood, metal, concrete, reinforced concrete, natural or artificial stone, plastic, glass, as well as combinations thereof. The choice of one material or another depends on the purpose of the staircase, possible loads and financial capabilities of the owners. In addition, the choice is influenced by the strengths and weaknesses of each type of stairs.
Spiral staircases
This type of staircase is most often used when it is necessary to strictly save space and where it is simply impossible to equip a straight staircase. When using such stairs, you can forget about convenience, but this is compensated by saving space. Often such stairs are equipped for descending or ascending to the attic and basement. From an aesthetic point of view, spiral staircases look very impressive and, in addition, they can be round or made in the shape of a polygon or square, which gives designers the opportunity to use them in their projects.
Today you can see metal spiral staircases in private homes with steps made of glass, plastic or wood, but usually they are made entirely of metal, wood or stone. However, not everyone can afford a good stone spiral staircase. And the point here is not only the cost of materials, but also the complexity of the work.
Marching stairs
The most common type of stairs in private homes are marching ones. The high popularity of flight stairs is ensured by the simplicity of design and arrangement, as well as the fact that to achieve maximum convenience when ascending and descending, the mechanics of human movement are taken into account in its design. The main disadvantage of marching stairs is their need for large free space, more than 3 m2. But you can save precious meters and install a flight of stairs. For this purpose, so-called rotary flight stairs with intermediate platforms are used.
Marching stairs in private homes are made of metal, wood, stone, concrete, plastic or glass, using only one type of material or combining them. Today, for reliability, concrete is used in the manufacture of staircases. This approach is completely justified, since the material is accessible and cheap, and will also last for several decades. But wooden staircases in a private house, as they were previously popular, continue to hold their position. The reason is largely that today there is a tendency to build houses from natural and environmentally friendly materials.
Stairs on rails
The name of these stairs comes from the German word Bolzen, which means "bolt". Essentially, the steps of such a staircase are laid on a structure that is attached to the wall using pins or bolts embedded or screwed into the wall. The main advantages of such a staircase are its compactness and economical use of materials. The peculiarity and disadvantage of this type of stairs is the mandatory presence of a solid stone wall on one side of the stairs.
The design of a bolt ladder uses metal elements (bolts, rods, pipes) to create a frame and handrails, and wood, metal, glass, concrete or reinforced concrete are used for the steps. Bolster stairs, despite their apparent fragility and lightness, can withstand very heavy loads. For example, bolted concrete staircases in private houses can withstand loads of up to 1500 kg, which, in combination with a minimum number of additional structural elements, is very attractive.
Installation of stairs in a private house
A staircase, like any other building structure, consists of several main elements, manufactured separately and then connected to each other. Depending on the type of staircase, its design may lack certain elements, but to create a staircase with your own hands you need to have an idea of each. Knowledge of structural elements and their purpose is especially necessary in order to design stairs in private homes.
steps
This element consists of two parts - the tread and the riser. The tread is a horizontal working surface. The size of the tread is selected based on the convenience of placing the foot on it. But over the course of many centuries, craftsmen have determined that the most convenient tread size is about 30 cm. The width of a staircase in a private house depends on the length of the tread and varies from 90 cm to 150 cm.
The riser is the vertical part of the step, and its height should be within 15 - 20 cm. Sometimes, in order to get a beautiful staircase design in a private house, steps are made without risers.
Important! For a classic spiral staircase, the width of the two ends of the steps is different. So the widest is 45 cm, and the width of the central part should be about 25 cm.
Support beams
The steps of the staircase are attached to the support beams. They come in three types: stringer, bowstring and post. The first two types are used for marching staircases, but the pillar is used when arranging a spiral staircase.
The stringer is a wooden beam 50 mm or more thick with triangular cutouts for steps. A bowstring is also a wooden beam more than 50 mm thick, but unlike a stringer, cuts are made only for treads on the inside of the beam. The pillar for a spiral staircase can be made of metal, wood or stone; the steps will be attached to it.
Railing
This structural element ensures safe movement along the stairs and consists of two parts: handrail and balusters. Handrails are installed on top of balusters or attached to the wall. Balusters support the railings and at the same time act as a natural fence for the entire staircase. Handrails and balusters can be made from various materials, from wood to plasticized PVC. It all depends on what design of stairs was chosen in a private house.
Important! A march is a part of a staircase consisting of several steps and railings. Marches are usually called those parts of the stairs that are separated by landings.
Construction of stairs in a private house
Before making a staircase in a private house, it is necessary to develop a project. To do this, you can use one of the specialized computer programs, or you can contact a company whose specialists will perform all the calculations and make drawings for a fee. When designing stairs yourself, you need to remember a number of basic rules, requirements and design features of various types of stairs. This applies to the size of the stairs, the angle of inclination and the location of their installation.
Place of installation of stairs
The choice of installation location for the staircase will largely influence its size, slope and appearance. But to make the staircase comfortable and reliable, you need to take into account the following simple rules. First, measure the area of the planned installation site, and if it is less than 3 m2, then you should choose a spiral staircase. Otherwise, you can opt for flight or bolt stairs. Secondly, the most convenient are straight flight stairs, but such stairs will be long, more than 4 m, and if it is not possible to install such a staircase, you can install a rotary flight staircase. Thirdly, bolt stairs require the presence of a load-bearing wall nearby, to which the steps will be attached.
Dimensions of stairs in a private house
When designing a staircase in a country house, in addition to the free space for the staircase, it is also necessary to take into account the ease of movement along it. So the width of spiral staircases is usually made 100 cm. Of course, 150 cm is possible, but then the area occupied by the stairs will increase. For marching and bolt stairs, the width should be from 120 cm to 150 cm. This width is designed for the movement of two people.
The length of the staircase is the sum of all its treads, starting from the first and ending with the last. This applies to all types of stairs. For rotating ones, the landing is also taken into account.
With the height of the stairs everything is much simpler. It will be equal to the height from the floor of the lower floor to the floor of the next floor. In this case, the last tread of the stairs should be flush with the floor, and the first one should be placed at the height of the riser.
Choosing the angle of inclination of stairs
An angle of 45° is considered ideal, but, unfortunately, such an angle is not always possible. Sometimes you have to make the stairs at an angle of 55° or even more. In such cases, the ease of movement around it invariably decreases.
Important! The height of the riser, the width of the tread and the angle of inclination are interrelated. So, as the angle of inclination increases, the height of the riser increases and the width of the tread decreases. And as the angle decreases, the riser decreases and the tread increases.
The table above shows the dimensions of the tread and riser depending on which angle will be chosen for the designed staircase. As can be seen from the table, stairs with an angle of inclination from 30° to 45° are considered the most convenient.
Installation of a spiral staircase
Perhaps the assembly of spiral staircases is the most difficult in comparison with marching or bolt ones. The reason for this is the fan arrangement of the steps and the need for precise calculations during installation. Those who decide to equip such a staircase need to do the following:
- First of all we make the steps of the stairs. If it is wooden, then take a wide rectangular board and mark it diagonally for one or two steps, then saw and round the edges. If the staircase is made of stone, then you will have to order stone processing for the steps from a special workshop. You can make steps from concrete. In this case, we make a mold and place a reinforcing mesh in it, fill it with concrete and wait for it to dry completely;
- Having prepared the steps, we install a vertical stand. It can be stacked or solid. It all depends on the staircase design. If the stand is stacked, then a main pipe with a diameter of 50 mm is installed, the first bushing and rubber hardening are threaded onto it. In the case of using a solid rack, after installing it, a groove is cut in the places where the steps are installed, into which the step will later be laid;
- Now let's install the steps. To do this, we take previously made blanks and string them onto a thin pipe and press it on top with a wider sleeve, after which we fan out the steps. To give strength to the entire structure, we connect the steps together along the edges using vertical brackets. They can also be secured to the wall with bolts. For a solid rack, the steps are inserted into cut grooves, connected to each other by brackets and reinforced by fastening to bolts;
- All that remains is to make and install the railings. This is the most difficult stage of work, since the handrails must be made curved, and the balusters must be machined from a single piece of material.
Installation of a flight of stairs
The creation of this type of stairs is somewhat simpler in comparison with spiral ones, but in any case it is necessary to strictly adhere to the previously made calculations and monitor the quality of the work performed. Not only the reliability, but also the appearance of the staircase depends on this. To install a flight of stairs, you must do the following:
- First of all, we make treads and risers. To do this, we mark the boards and saw them, after which we process the edges, making them even and smooth;
- Now let's start creating support beams - stringers or bowstrings. To create a stringer from a wooden beam, you need to make a special template in the form of a right triangle that fully corresponds to the size of the step. Applying this template to the beam, we mark the places for the cutout. Then we carefully cut them out. To create bowstrings, on the inside of the beam at a certain distance we mark the places for the grooves into which we will insert treads. The angle of inclination of the grooves must coincide with the angle of inclination of the stairs. For metal stairs, it is most convenient to weld corners for the steps on the inside;
- Having finished preparing the support beams, we install them in place and secure them there. If the project provides for a landing, then we install it first, and then the support beams;
- Next we begin to install the steps. To do this, first install the riser and secure it, and then the tread. We use self-tapping screws as fasteners and press them flush. For metal stairs, we lay wooden treads on welded corners and fasten them to them using self-tapping screws;
- Having completed the installation of the steps, we install balusters and handrails.
Installation of a bolt ladder
The undeniable advantage of bolt ladders is their simple design, which also affects the ease of installation. The only difficulty during installation is clearly and correctly marking the places on the wall for bolt mounting. To install such a ladder, you will need the following:
- purchase all the necessary fasteners, as well as purchase or make treads yourself;
- Mark on the wall where to install the fasteners. Then drill holes and install bolts;
- Now all that remains is to install the steps. You should start from the bottom. At one end the step is attached to the wall, and at the other, another bolt is installed under it;
- Having installed the last step, we proceed to the installation of balusters and handrails.
Creating a staircase in a private house with your own hands from purchased materials is not particularly difficult. The only thing I would like to note is the possibility of purchasing ready-made stairs. Having decided to buy a staircase, you need to be prepared for the fact that the price for stairs in a private house starts from 1000 USD. and depends on the complexity of the design and the materials used.
On bowstrings or stringers?
Stairs for the house on bowstrings and stringers are equally simple to make yourself. You should understand the difference between them. The strings are attached to the end of the tread using corners, grooves and wood glue or using bars. All this is held together with self-tapping screws or bolted connections.
Attaching the steps to the string.
Stringers are located under the steps and secured with special fastening fittings.
Attaching the stringer.
For the production of bowstrings and stringers, blanks from solid oak, ash, pine and larch are most often used. These tree species are the most common in the vast expanses of our homeland. To produce load-bearing elements, woodworking enterprises use machines that cut logs into unedged boards of the required thickness (and the load-bearing parts are at least 50 mm), when trimmed, the finished timber is formed (50x50, 50x100, etc.). If you decide to assemble the bowstring structure with your own hands, we recommend that you further read this article.
Milling strings for steps
Making a stringer
Design features of stairs
Depending on the method of fastening the steps, flight stairs can be on bowstrings, stringers or rails.
- Stairs on bowstrings have two side beams to which the steps are attached. Such squirrels (strings) can be made of metal or wood. They can be attached to a wall or special supports, ensuring high strength of the entire structure.
- The steps of the stairs on stringers are attached to beams, which are located below and repeat the geometry of the entire structure. Such beams (stringers) can be straight or curved. Straight stringers, as a rule, have a jagged shape, with the steps superimposed on the teeth.
- Stairs with bolt-jointed steps are highly durable, so this design does not require additional supports and can be supported on two points. The steps are attached to each other using metal rods - bolts, which completely eliminates the creaking caused by the friction of two wooden surfaces.
Calculation
To make a wooden staircase with your own hands, you need to make accurate calculations and draw up a drawing.
- The angle of inclination of the stairs should not be higher than 45 degrees.
- The tread depth should not be less than 250mm.
- The height of the riser is in the range of 160-200mm.
- The minimum opening width is 1000mm.
- The height of fences (railings) should not exceed 1000mm. For children, additional handrails are installed at a height of 600mm.
- The vertical opening should not be lower than 2000mm.
The calculation for the stairs can be done in a computer program.
By applying these simple rules, you can build a correct and convenient staircase structure for your home or porch.
Important!
It should be remembered that the topmost step must be level with the floor of the second floor, this applies to both concrete and wooden floors.
Cutout for a step on the second floor.
Assembly of finished structures
Today you don’t have to do everything yourself. There are many companies that design and manufacture prefabricated stairs from different types of wood. These are a kind of construction kits made from individual elements, with ready-made mounting grooves and holes.
Among the many models, it is easy to choose the one that suits you both in size and configuration. To do this, you just need to decide on the platform for it and measure the height of the room. If difficulties arise, the company’s specialists will help you make a choice.
Due to large-scale production, the price of such products is very affordable. It is much lower than custom-made stairs. For example, the cost of a modular staircase LS 91 made of pine is only 16-18 thousand rubles.
Assembling a wooden staircase LS 91 is done on your own in a short time
Each model comes with all the necessary fittings and detailed instructions for assembling a wooden staircase. There are also models consisting of separate sections, differing in size and number of steps. By combining them, you can construct a staircase that is ideally suited to your dimensions.
For example:
Constructor ladder K-040m
This model consists of three sections:
- Section A – the first flight with a supporting frame structure for the turntable;
- Section B – platform;
- Section C – second march.
All sections are available in several versions with the number of steps from 5 to 9 and different platform dimensions. In order for the prefabricated wooden staircase to be the desired height and match the width of the opening, just select the desired combination from the table below.
Height table depending on combination
Marking and production of elements
Let's look at detailed instructions on how to make a wooden staircase for your home. After detailed calculations and analysis of the drawing, you can begin marking and manufacturing structural elements.
- We apply markings to the bowstrings or stringers. To do this, it is convenient to use a right triangle or a special corner with marked legs (rise height and tread width).
- We measure the length of the steps and risers, as well as other elements that we will cut out ourselves.
- We cut out all the elements of the staircase structure using an electric saw.
- We sand all the wooden pieces of the stairs.
- If there is no opening for passage to the second floor, it is necessary to organize it by dismantling part of the ceiling.
Marking is also an important process when designing a wooden staircase.
Assembly and installation instructions
Assembling a staircase for a house on wooden stringers or bowstrings begins with the installation of load-bearing elements. Rigid fixation at the upper and lower points is carried out using corners, threaded connections, or anchors (depending on the material of the floor and floor). Before the final fastening of the load-bearing structures, it would be a good idea to once again check the coincidence of the horizons. To do this, use a level placed on the horizontal “notches” (the place where the future tread is attached). If the stringers were cut according to one pattern, then there is no need to worry too much. So, during the assembly process, do not be lazy to look at the drawing once again and keep a measuring tool at hand.
Checking the uniformity of horizons using a building level.
Log staircase
Quite often the question arises: “Is it possible to make a staircase from a log?” Of course you can. It cannot be made from just one log. Let's look at the options.
The staircase made of logs has a massive appearance.
The logs are sawn in half. From these blanks steps and load-bearing parts will subsequently be made (one might say massive “strings”). For convenience, let's turn to the simplest project - a straight staircase. After processing the front side using an electric plane and an emery wheel, we proceed to marking the inside. The steps and fasteners will be attached to it (a steel corner is the most suitable option for such a massive structure; it is secured with a threaded connection or an anchor).
Steel corner for log stairs.
We install our bowstrings, securing them to the ceiling and to the floor. In accordance with the markings, we use self-tapping screws to attach the bars to the bowstrings, which will support our steps made of half-logs (choose the width yourself). Immediately before fixing, we check the horizon of each step with a level. We drill a hole through the string into the end of the step, without allowing it to move. We lay the anchor and tighten it until it stops. There are four anchors for each step. A little secret of fastening - for greater reliability, drip silicone sealant inside the drilled hole, and then lay the anchor . The head of the anchor bolt can be hidden in a hidden compartment.
Fastening the bars to the bowstring using self-tapping screws.
To install such a staircase, you can also use threaded connections with the organization of hidden “windows” in the steps for tightening elements, but this requires serious skills in working with wood. This type of construction made from logs is much more reliable. You can also make steps for the porch stairs from logs, which is also very interesting.
A log porch gives your home a medieval feel.
Some manage to create something from one solid log that vaguely resembles a ladder, laying it at the right angle and cutting something like steps into it. It would be more correct to lay two logs in parallel as load-bearing stringers, make cuts in them for steps and attach the latter to the load-bearing parts. So you can make a staircase from a log. It remains to add that such a structure, if done correctly, will be no worse than concrete ones in terms of reliability. As you can see, marching structures are quite simple to install. If we talk about screw ones, then everything is somewhat more complicated. However, you can install a spiral staircase with your own hands.
Do-it-yourself log staircase
Instructions for making a flight of stairs indoors
Having a little practical experience in making the simplest stairs, you can move on to more complex projects. Our staircase will be located on the landing and will lead to the second floor of the house.
Calculation of a straight staircase
The height of the platform is 35 cm, for it you need to make one step from the floor, the platform itself will be the second. The bowstring is made from 50x200 mm boards; buy lumber of at least first grade. To improve the cleanliness of the surface, sand them with a cylindrical grinder (grinder) with a rubber disc with Velcro. Sanding cloths with different grain sizes are glued to it in turn.
Step 1. Mark the bowstring. This is a very important process, and although there is nothing particularly difficult, mistakes should not be made under any circumstances. Place the board in place of the ladder. At the bottom end, use a bubble level to draw a horizontal line from the top corner of the board. With this surface the bowstring will rest against the platform. At the top, draw a vertical line from the far corner of the board. The cut rests against the vertical plane of the entrance hole of the second floor.
The string is screwed to the wall and markings are made
Practical advice. If the length of the cut exceeds the thickness of the ceiling, then it must be shortened so that all architectural elements are located in the same plane.
Step 2. We have a planned step pitch of 135 mm, we need to make markings on the boards taking this parameter into account. In theory, it is required to measure each step in height and thickness, and mark it using a ruler and square. This is long and difficult, in addition, beginners can make a mistake at this stage, and this will cause incorrect marking of the entire bowstring. In the best case, you will have to make new markings, and in the worst case, if the recesses for the steps are made, you will have to look for a new board.
Marking the steps
Experienced builders strongly advise preparing two templates from scrap boards. One is 135 mm wide, with its help the positions of the lower plane of the steps are marked. The second template is 50 mm wide, these are the dimensions the steps will have, this template fixes their parameters. Having templates, it is enough to mark only one lower step, and the templates are used to mark all the remaining ones.
Sections of boards are used as templates
Step 3. Make cuts under the steps. To do this, place the bowstring on a flat platform, its height is approximately 1 m; it is convenient to work in this position. Set the cutting depth with the saw, in our case it is 1.5 cm; the width of the platforms is sufficient to securely stop the step. A slight reduction in the thickness of the board does not have a critical effect on the load-bearing capacity of the bowstring. First, cut lines along the width of the step, and then make a few more passes inside the outline to make it easier to remove the wood.
Grooves are cut according to the markings
Important. When operating a circular saw, follow safety precautions and never remove the protective metal casing. It slightly interferes during work, but ensures the safety of the master.
Step 4. Use a hammer and chisel to remove the wood and level the areas. You can try to do this with a saw, but professionals do not recommend such experiments. Why? During lateral movements of the saw, the edges of the seats are damaged, and gaps appear between the step board and the string. This not only significantly worsens the appearance of the staircase, which is bad, but also reduces its stability, which is very bad. It’s better to work slowly with a chisel, acquire skills, they will always be useful in life.
It is convenient to select wood from the grooves using a hammer and chisel
Step 5. Attach two boards mirror to each other and mark the location of the steps on the second one. Make sure that they do not move, constantly check all dimensions, draw lines at the points. Repeat all the above operations for making technological platforms on the second string. Drill two through holes in the seats - this makes it much easier to tighten the screws, and the fixation strength does not change.
A second string is made, after which holes for fasteners are drilled
Step 6: Prepare the steps. For convenience and beauty, it is advisable to make a small overhang; in our case it is 6.5 cm; by this size the step protrudes beyond the bowstring. Check how the parts are connected and correct problem areas if necessary. Everything is fine - start assembling the stairs.
Check how the steps fit into the grooves
Assembly of the structure
The ladder is small, you can assemble it on the ground, it is much simpler, easier and faster.
Step 1. At each step, mark the offset, taking this size into account, insert them into the seats of the bowstring. Screw the parts with self-tapping screws. Constantly check the corners of the stairs, they should all be straight. If you made the blanks without violating the recommended technology, then there will be no deviations.
Insert the steps and fix them with self-tapping screws
Step 2. Place a baluster on each step and secure it at the bottom with self-tapping screws. If they deviate slightly from the right angle, then this is not considered a problem. The situation will be corrected during the installation of the railing (handrail). Before this, the upper ends of the balusters must be cut at an angle; it must be exactly the same as the angle of the bowstring. Make the markings using a bubble level.
A baluster is attached to each step
Step 3. Attach the handrail, constantly monitor the position of the balusters. They must be strictly parallel. For fixation, use self-tapping screws with countersunk heads; holes must first be drilled in the parts.
The last thing to install is the handrail
Now the ladder is completely assembled, it can be lifted and fixed in the right place. The lower and upper sections are screwed to the ceiling and platform. The string is nailed to the wall.
The finished structure is installed in its place
Prices for various types of balusters
Balusters
Video - DIY wooden staircase
The space under the stairs is often left free. Modern designers consider this use of living space ineffective and advise installing various pieces of furniture under the steps. An excellent solution is to install a bookcase. Everything is within easy access; a coffee table with chairs can be placed next to the shelves - there is a home library. You can read how to make a beautiful and functional shelving on the pages of our website.