Insulation materials
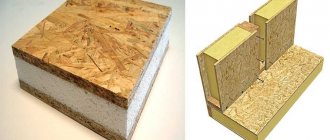
SIP panel structure diagram
When choosing SIP panels, it is better to seek help from specialists. But if this is not possible, it is worth studying the main types of insulation and their characteristics.
There are three main types of insulation:
- polystyrene foam (expanded polystyrene);
- mineral wool (basalt insulation);
- polyurethane foam.
And each of these insulation materials has its own advantages and disadvantages.
Styrofoam filling in the panel
Polystyrene foam is positioned as insulation, distinguished by its durability. In addition, it is an environmentally friendly material. It has waterproof properties and is not afraid of the sun. But at the same time, such material is very flammable and burns quickly.
Mineral wool practically does not burn and is also harmless to health.
Mineral wool panel filling
This insulation also withstands biological and chemical influences well. But despite the set of such important advantages, basalt insulation has very low resistance to moisture.
Polyurethane foam conducts heat poorly and is highly flammable, but it has a high insulation threshold.
Polyurethane foam as a starting point for a sandwich panel
The thickness of the building material, and therefore the price, directly depends on the thickness of the insulation itself.
The price of the SIP panel is 1,300 rubles per square meter. Its thickness is 174 mm, width – 1250 mm, height – 2500 mm.
In our country and the CIS countries, sandwich panels of the following sizes are used:
12+100+12=124 mm;
12+150+12=174 mm;
12+200+12=224 mm.
OSB (OSB)
OSB for SIP boards
Acquaintance with the concept of OSB boards should begin with a general classification. There are four main types of OSB. Each of them differs from the others only in its indicators of moisture resistance and strength.
- OSB 1 is a board with the lowest moisture resistance strength. This type of plate is often used in the installation of light weight parts. The advantage of these plates is their low price.
- OSB 2 – has a low moisture resistance threshold and at the same time high strength. Such boards are used mainly for the production of furniture, sometimes for load-bearing elements. OSB 2 is used less frequently in the construction industry, and then only for internal structures.
- OSB 3 is one of the most popular types of boards. These boards combine strength and moisture resistance at an attractive price. They are used more often in construction for the construction of both facade and interior finishes. Sometimes OSB 3 acts as a roofing material or ceiling.
- OSB 4 - these OSB boards have the highest threshold of strength and moisture resistance. They are used for the construction of structures with high load levels and in areas with high humidity.
Foundation for a frame vulture house
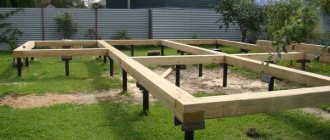
Houses using Canadian technology are quite light and durable. At the base of the structure, a pile foundation will suffice; the grillage can even be made from timber of the appropriate diameter. Watch the video about SIP panels on Discovery, interesting experiments!
Construction technology
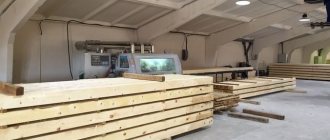
Sip construction is the assembly of ready-made factory panels using the tongue-and-groove connection principle. The most important point here is the quality of the source material; only with proper execution of the panels themselves will the house be built without gaps at the joints, which will ensure good thermal insulation and strength of the structure.
When assembling a sip house, the seams and joints are treated with polyurethane foam, which is not recommended to be cut off after hardening. Foam tends to degrade under the influence of ultraviolet radiation; cutting off the edge only speeds up this process.
Construction of a semi-structured house can be carried out in any season, but the most favorable is winter, because... The summer construction rush may delay you at some stages of construction, and in the off-season there is a chance of rain and bad weather. You can order Sip Panels on the EcoEuroDom website
Construction of houses from sandwich panels: advantages and disadvantages
Like any material, using sandwich panels has both its advantages and disadvantages.
First, about the pleasant things . The main advantage of this building material is the consistency of its quality, which is evidenced by the high strength of the material, relative to the price. This factor plays a very important role when calculating construction estimates. After all, the use of this material significantly reduces costs. Due to the lightness of the panels, the weight of the overall structure is lightened, which means there is no need for a reinforced foundation.
As for installation, here too you can save at least on maintenance equipment.
In addition, the use of SIP panels greatly facilitates the finishing of facades; interior finishing is also easier - the walls are already warm and smooth. Their remarkable structure allows for maximum smoothness of surfaces.
And now about the sad thing .
The main disadvantage of SIP panels and buildings made from this material is their limited service life, although no one gives the exact figure. A few years after installation, the structure begins to lose its thermal and insulating properties. But this problem is completely solvable. It is enough to replace mineral wool or polystyrene foam with polystyrene. Also, any building made of this material requires constant ventilation in all rooms.
Installation
The main stage of building a house from SIP is the installation of the panels themselves.
Horizontal method
The specified installation method is used for laying roofing panels. The slabs must be installed in the following order:
- We start work from the lower section of the roof;
- we use special control marks for the correct fastening of two adjacent sheets;
- for the installation of building products, long self-tapping screws with a sealing rubber gasket are used;
- the gaps on such an overlap are sealed using polyurethane foam;
- We remove the insulation along the entire length of the joint; it will interfere with the quality joining of the slabs;
- A crane or hydraulic jacks are used to lift building products to a height.
Note! For small roofs, the vertical installation method is used. It is much easier to do, but takes a lot of time.
Vertical method
The technology for installing sandwich wall panels in a vertical manner is almost no different from the horizontal installation of products. This method is used when constructing a small building with a wall height of 3 to 6 meters. Building structures are attached to guide embedded parts located on the floor and ceiling of the building. In this case, all adjacent elements are rigidly fastened together.
The main advantage of this scheme is considered to be a durable and stable structure in which there are no cold bridges. The walls of the buildings are well insulated; they do not require additional thermal insulation. This approach leads to financial savings. With the vertical installation method, there is no need to construct scaffolding.
Roof panels
Assembling the roof begins after installing the wall panels. If the length of the roof slope is less than 12 meters, it is recommended to make structures from solid sheets of the required size. For assembly, factory-made products of a unified size are suitable, which will eliminate the need for cutting material and sealing joints.
If the outer panels will be mounted in several rows, the joints are cut off. The internal cladding is installed with an overlap of 30 centimeters with a roof slope of up to 10 degrees or 20 centimeters. The last gap is used when there is a more sloping roof. During the work process, it is important to obtain a completely sealed structure. To do this, the grooves in the panel locks are coated with silicone and the joints are additionally treated with moisture-resistant compounds.
Sandwich panel house projects
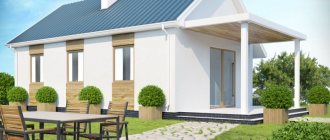
Structure of a house made of SIP panels
Standard designs of houses made of sandwich panels are an integral part of every building. After all, the quality and durability of the future structure depends on the accurately completed project. For the most part, design bureaus create ready-made custom building plans based on the requirements and wishes of the customer. Most often they are used in the construction of small hotels, shopping centers, and cottages.
The main advantage of these projects is the lightness, ease of transportation and mobility of all materials.
Projects of one-story frame houses
Projects of frame houses with an attic
See more house projects in the “House Projects” section on our website.
SIP (Structural insulated panel): characteristics, advantages and disadvantages
Sip panels are three-layer sandwich panels. Between two layers of solid sheet material there is a heat-insulating and sound-proofing layer. OSB boards are most often used as outer layers; polystyrene foam is used as a filler. Mineral wool is used less frequently for filling, since this significantly increases the weight and cost of the elements. The outside is treated with fire-fighting and antiseptic impregnations. Sip sandwiches are produced in various thicknesses - 124; 174 and 224 mm, depending on the purpose. The main linear dimensions are 2500*1250 mm and 2800*1250 mm, although products of other sizes can be ordered.
The popularity of this product is due to a large number of advantages:
- Factory readiness. When ordering prefabricated elements at the factory, the assembly is carried out in such a way as to take into account all the features of the project and reduce assembly errors to a minimum. Also, many manufacturers complete their products with a tenon board, which ensures a reliable tongue-and-groove connection. In other cases, timber is supplied at the assembly site.
- Ease of use. The technology is so simple that the building can be assembled with your own hands. At the same time, the set of tools for work is minimal.
- Wide application. From SIP you can build country cottages, office and warehouse premises, garages and install other buildings and structures.
- High heat and noise insulation. The presence of foam or mineral wool provides excellent thermal properties.
- Strength. Manufacturers provide a minimum 50-year warranty.
- Lightweight design. Low weight allows the use of lightweight types of foundations.
- Construction speed.
- All-season. The absence of “wet” processes allows you to carry out the installation yourself, regardless of weather conditions.
- Saving. The use of this technology at all stages of construction from floor to roof allows reducing material costs.
- Reducing monetary costs for heating.
Important to know: Waterproofing in a house made of SIP panels
[ads-pc-1]
Disadvantages include:
- Synthetic materials.
- Complete sealing of buildings. For normal operation of such a facility, a good forced ventilation system is required.
- Flammability. There are heated debates about this, although manufacturers promise a high class of fire safety.
You need to take a responsible approach to choosing SIPs so that they meet all the specified requirements. The presence of impregnation for biological protection, fire-resistant and moisture-resistant coatings, the thickness of the frame coating and the density of the insulating layer.
DIY sandwich panel house
To build a house from SIP panels - how to assemble a construction set
. The first thing you will need in this matter is a design for the future building. Particular attention should be paid to its construction, not forgetting the requirements and wishes. If it is not possible to build it yourself based on the complexity of the calculations, then there are a lot of companies ready to help in this matter. We will try to show you all stages of construction in a photo report, with step-by-step instructions. But, all houses are individual, our photo can only be considered as an information guide.
By the way, SIP panels can be used to build not only houses, but also extensions to residential buildings. They can accommodate verandas or kitchens.
The next step is to order SIP panels or produce them yourself. You can order them directly from the company that produces them. Here you can look at catalogs and select everything you need for subsequent installation. When choosing panels, do not forget about the base - the foundation. For a structure made of such material, the foundation is usually installed on screw piles.
Water supply, heating and electricity for the future house must be installed before pouring the foundation.
To avoid curvature of corners or height mismatches, all panels must be checked for integrity and dimensional conformity before installation. If inaccuracies are noticed, contact the supplier to replace the material.
After the foundation is poured, you need to tie it with a wooden beam. Then the corners are set and holes are made using a percussion tool. Using these holes, the timber is fastened to the concrete with 12 mm anchors. The recommended distance is 2.5 m. Next, the building itself is assembled on the installed foundation. The assembly begins with zero overlap and the first SIP panels are laid on the timber.
Wall frames are assembled from timber. The embedded board is secured along its perimeter with special nails. The main thing here is to maintain the vertical calibration and frame angles. After all, if you miss even 1 mm somewhere, the wall will turn out crooked and there will be no way to correct it. After installing the frame, panels are placed on it.
After the construction of the general structure, the filling of holes begins. The joints and corners of the panels are filled using edged boards measuring 25 * 100 mm. All cracks are sealed with foam.
It is better to make the ceilings between floors and all supporting structures wooden. You can use both timber and boards. Photos of the construction stages are below.
How to install panels yourself?
Despite the fact that the procedure for building a frame house is simple and quick, to build it, you will need many auxiliary tools, finishing materials and fasteners.
A careful calculation is made specifically to find out how much material will be spent on construction. This calculation must take into account all the locations of door and window openings, their width and height, as well as the thickness of all external and internal walls of the house and the location of communication networks.
Panel country houses - installation technology
Do-it-yourself installation of panel houses is done as follows:
- waterproofing (for example, roofing felt) and a strapping beam impregnated with an antiseptic substance are placed on the existing foundation base;
- starting boards are attached to the strapping beam using screws;
- standard width of sip panels: 125, 250 and 280 cm. They are attached to each other using special grooves into which wooden dowels are inserted. The fastening must take place without any gaps, hermetically, with further blowing of polyurethane foam, so that the future construction does not allow the cold to pass through;
- if the house is on a shallow foundation, the starting boards are attached to composite panels rather than frames.
Foundation for a house made of SIP panels
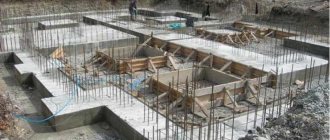
Foundation reinforcement
The foundation is, first of all, the foundation of a building. It transfers the entire load of the building to the underlying soil layers. In addition to the strength of the foundation itself, you need to consider:
- total area of support on the soil;
- the supporting capacity of the soil itself;
- groundwater levels.
Experts believe that the most common mistake when pouring a foundation is the excessive abundance of concrete and metal in it.
The most popular types of foundation are:
- pile (pile-tape);
- columnar (columnar-ribbon);
- shallow monolithic slabs;
- tape deepening;
- tape recess with a plinth.
But, it is worth noting that among this variety, for frame panel houses the best option would be shallow recessing.
Laying the strapping (crown) beam
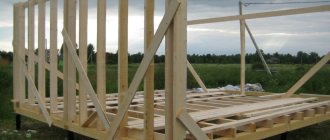
Installation of strapping beams and floor joists
For installation, take a beam measuring 2.5 * 1.5 cm. Laying should begin from the middle of the foundation, while measuring its horizontal calibration. Next, the timber needs to be connected at the corners using a notch. After this, the parts are secured. For proper fastening, holes 1–1.5 cm long with a diameter of 2 cm are drilled in the timber and a dowel is driven in.
The timber is secured to the foundation using recessed anchor bolts. The fastening distance is about 1.5–2 m. The size of the bolts should be 35 cm in length with a diameter of 1–1.2 cm.
Arranging the floor in a house using SIP panels
Construction of the first floor floor
Another proof of the distinctive properties of Canadian construction technology is the technology of floor construction.
Floors and ceilings are also built from SIP panels.
Although many contractors recommend laying a regular wooden floor in such houses with insulation between the joists and beams. These floors are reliable and more durable. In addition, this floor will be easier to disassemble or repair.
Construction of walls
To begin with, create a corner structure to which subsequent panels are attached. The grooves between the external elements and the polystyrene cores are filled with polystyrene foam, after which all elements - sip plates, joists and beams are fastened with special screws. The ends are covered with timber, the lower edge of the panels is tightly attached to the connecting base.
Cutouts for doors are made only after all external walls have been firmly connected. Blind trim is made in doorways. During the construction of walls, it is necessary to periodically check their verticality with a level. If the house has two floors, then the installation of subsequent panels is carried out in the same way after laying the floor of the second floor and attic.
Construction of walls from SIP panels
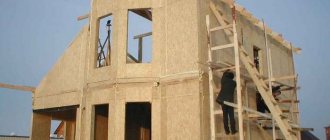
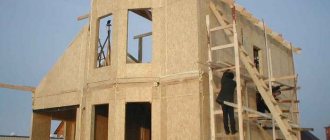
The process of constructing walls from SIP panels
Construction of a house from panels.
One wall has been assembled When building walls, you need to carefully choose the source material, because the quality of the future home largely depends on its quality. The best option for exterior work would be a beam with a diameter of 15 cm. As for the height, here is a minimum of 1.5 m. For the interior, 10 * 15 cm is suitable. These are acceptable sizes that will help save on consumables, minimize the number of seams and joints and achieve ideal smoothness of future walls. Assembling walls is not easy, you need experience.
Before laying the timber in the crowns, all materials must be adjusted in accordance with the height and given the desired shape. For corner joints, it is better to use the “half-tree” or “tied with a root tenon” method. It is better to make connections between the outer parts by cutting or using veneers. And it is better to connect the internal sections of both joints and corners with a half frame.
You need to begin direct installation by laying a crown beam treated with an antiseptic into the foundation.
Installation instructions for houses made of SIP panels
As we have already figured out, SIP is a ready-made element, produced at a factory according to standard sizes or according to customer dimensions, so building a house comes down to assembling ready-made elements as a constructor according to developed instructions for each specific building.
The entire technology of building a house from sip panels consists of the following typical steps:
- foundation installation;
- installation of strapping;
- installation of the first floor ceiling;
- assembly of the walls of the first floor;
- installation of the second floor ceiling;
- assembly of the walls of the second floor;
- installation of attic floor and roof.
If you are building a one-story house, then installing the ceiling and walls of the second floor is excluded. So, let's look at each step separately.
Foundation and piping arrangement
For SIP houses, it is recommended to use lightweight foundations, since there is no need or economic feasibility for heavy monolithic foundations. Either a pile foundation or a bored foundation is suitable as a foundation for such buildings due to ease of installation, low price, and no need to bear heavy loads. We will talk about them in the future.
The dimensions of the pile field and the number of piles are selected individually depending on the project. The installation depth of piles is selected depending on the depth of soil freezing characteristic of a given area. As a rule, piles are installed to a depth of 1.8-2.4 m.
After installing the piles, a frame is made of timber or a metal profile. The pile binding is a ready-made base that connects all the piles into one single structure, onto which the basement floor is mounted.
As a rule, a 100x150 or 150x150 beam is chosen as a frame for metal piles, which is laid along the perimeter of the building on the piles using the “tenon-in-groove” method and attached to the pile heads with anchors M10x210 (or M10x260, respectively), or wood grouse M10x80 (M10x100) from under the bottom of the head.
The installation of the piping must be approached with special attention, since it is the zero level of the entire structure, and the accuracy of the installation of the entire house will depend on the accuracy of its installation. All strapping beams must be treated with a special fire-resistant impregnation, and also waterproofed with sheets of roofing felt in places of contact with the pile heads.
Installation of the first floor ceiling
The basement floor in houses made of panels is similar in design to conventional wooden floors - the load from the beams is transferred to the foundation of the building, but the insulation is not mineral wool with waterproofing and vapor barrier, but ready-made panels. There is also a difference in installation - beams and sip panels are mounted sequentially, like a constructor. Let's take a closer look at the installation process.
Laying of panel elements begins from the corner of the building. The next panel in the row is attached to the end groove of the panel using a double block of 2x40x200 and 3.5x40 mm wood screws with a pitch of 150 mm. The length of the double bar is chosen equal to the width of the sip panel. Before installation, all panel grooves are additionally sealed with polyurethane foam. In this way, the entire row of overlap is formed.
After this, a double beam 2x40x200 long, equal to the length of the entire row, is mounted in the side groove of the entire row (pre-filled with foam) and similarly fastened to the panel with self-tapping screws. This creates a rigid lag structure with insulation that can withstand significant loads.
The following rows of sip panels are similarly attached to the double longitudinal beam according to a pre-approved scheme. After completing the installation of the ceiling, 40x200 timber is also installed in all external grooves of the panels.
Assembly of walls from SIP panels
Next, by analogy with assembling the floor, the walls are installed, but before installing them around the perimeter of the base, you need to install a frame made of 40x140 timber, on which the vulture blocks will then be installed.
It is important to note that the strapping beam must be installed with a 12mm indentation into the building (OSB thickness), so that after installing the walls, their outer part will be in the same plane with the base of the building and will not overhang it.
The installation of wall blocks begins from the corner of the house. First, the stand, which will fit into the groove of the panel, is attached to the bottom trim with 4.2x75 self-tapping screws. Then a sip panel with a pre-foamed groove is inserted into this rack. This entire structure is fastened with 3.5x40 self-tapping screws in 15cm increments. The second panel is fastened in a similar way - the stand is attached to the strapping beam and to the already installed panel, and then the panel itself is wound up and fastened.
Next, all the other panels are installed, which are connected to each other using double bars (as when installing the ceiling), and the grooves are filled with polyurethane foam. Vulture panels at the joints with interior internal partitions and in the corners are also additionally tightened with long wood grouse 8x200 in increments of 30-50cm.
After completing the installation of the walls, the upper grooves of the panels are filled with polyurethane foam and similarly closed with 40x140 timber, forming the top trim.
Installation of walls and ceilings of subsequent floors is carried out similarly to the previous ones.
Assembling a roof from SIP panels
The production of panels in a factory according to individual projects and customer needs allows us to construct roofs of any complexity using tens and hundreds of elements. When installing such roofs, it is important to strictly follow the instructions or carry out installation with the participation of professional roofers or representatives of the manufacturer.
In the simplest case, when installing a gable roof, after installing the attic floor, a simple rafter system is installed, mounted on a mauerlat with a section of 100x150. Such a rafter system includes racks on which the ridge beam and rafters are installed, which are mounted in the grooves of the sip panels and rest on the ridge beam at one end, and on the mauerlat at the other.
In this case, installation of sheathing is not required, since sip panels have the necessary rigidity and ensure the stability of the entire roof.
The roof panels are installed using standard technology. As a rule, for small buildings it is possible to use panel elements that are one-piece along the length without splicing, which can significantly simplify the process of their installation. If it is necessary to splice the panels to increase the length, then this procedure is carried out on the ground, and on the roof they are installed with the seams staggered.
Finishing the facade of a house from SIP panels
The final stage of building a house is the exterior finishing. When building houses from SIP, it is not recommended to delay this stage. Despite the fact that the panels are treated with special protective compounds, constant exposure to precipitation and sunlight can negatively affect their properties over time.
Today there are a lot of materials that can be used to decorate the facade of such houses. Due to the fact that the walls of the house are absolutely vertical and smooth, there are no restrictions on their finishing, which is a big plus. The most common houses are finished with vinyl siding, as the most affordable material, and imitation timber - wooden panels, which give the house a more expensive look.
After the construction of the box and exterior finishing, they begin to install and install engineering systems and communications in the house and interior decoration.
Experience in the construction of such houses shows that when using qualified labor, building a house from sip panels, starting with installation of the foundation and ending with external finishing, takes a week. You can build such a house with your own hands within a month. Such deadlines attract many people, which is why this technology is so widespread lately.
The video shows a good example of building housing from panels in a very short time:
Installation of a roof in a house made of SIP panels
Installation of floor joists
Scheme for installing a roof made of Sip panels
The roof for a house built using this technique can be the most ordinary rafter. This type of roof is characterized by support in the form of grooves or Mauerlat, which are cut into the beams on the attic floor. The rafters are installed on supports, sheathing is stuffed onto them and roofing material is laid.
The process of building a roof from sandwich panels
As for insulation, it is not necessary for a cold attic. But if you plan to install an attic, then you should put insulation between the rafters and cover it with a vapor barrier film.
In addition to the rafter roof, no less popular is the roof made of SIP panels. For this type, first of all, the starting rafters are installed, which are bolted to the Mauerlat. And only after this the panels are laid. The panels are mounted on one side of the roof, gradually increasing in height along with the ridge. Once the first skate is finished, you can move on to the next one.
Interior of a house made from SIP panels
This installation method is more painstaking than the traditional one, but no less reliable.
Assembly of floor panels
This is the operation of laying out or stitching the rough base of the future floor covering. Assembly can be carried out using ordinary beams followed by laying joists and boards, or using the same SIP panels, but in this case the technology becomes more complicated. So, in the first option, installation will be required along the previously laid rims of the load-bearing beams - they can be placed transversely or lengthwise, but the main thing is to maintain a step sufficient to hold the load. Next, the resulting sheathing is covered with small joists and boards. All fasteners are made either with self-tapping screws or mounting brackets with metal clamps. For a frame house, there are still no special requirements for power supply.
As for the installation of SIP panels on the first floor level, the technology for building houses of this type requires the master to delicately integrate bars of the appropriate format into the side openings of the slabs. That is, between two layers of OSB, logs are installed, which are fixed to the crowns at the edges and hold the slabs. Of course, in this case it is not possible to do without safety nets and a perpendicular counter-lattice is placed through the opening in the bars to make it more reliable. What justifies the advantage of using SIP slabs as the basis of the floor? The material makes it possible to provide sufficient heat and sound insulation in the critical unit connecting the foundation and the subfloor.
