Shower with or without tray?
When choosing the desired modification of a shower stall, consumers pay attention to functionality, aesthetic appearance and size.
You can build a box from any convenient materials - from brick to glass blocks. However, when choosing the right model, the presence of a tray where the water will drain is also important. You can buy such an element in a store or make it yourself using a minimum of time and money.
It is not always possible to build a shower without a tray in apartments, since the thickness of the partitions and floors does not allow for communications to be installed inside.
Conclusions and useful video on the topic
Useful information from the video will help you install plumbing equipment yourself.
Assembling the acrylic tray:
Intentions to change the furnishings of the bathroom in an apartment in a municipal residential building are not the exclusive prerogative of the apartment owner. Owners of municipal housing should remember the existing rules related to the reconstruction of premises and communications. Only after receiving the appropriate permission from the authorities can construction or installation work begin.
Do you have any questions, notice any inaccuracies, or want to add valuable information to this material? Leave your comments in the block below. Or maybe you had to assemble a shower tray yourself - share your experience with our readers.
Advantages of homemade pallets
A special feature of a shower with a tray: the water does not spread beyond the sides. In addition, when constructing a box for a shower with your own hands, they focus on individual preferences. The shape of such a structure can be absolutely varied: round, corner semicircular or rectangular. Depends on the design idea and modification of the side walls.
Advantages of homemade shower floor boxes:
- Ability to produce any product shape.
- Height and width are determined individually.
- Wall thickness and texture are also selected individually.
- The walls built under the brick sides will last for decades.
- Water will not seep through the walls or under the floor.
Creating sides
When the waterproofing layer is completely dry, the sides of the pallet are formed from bricks. The work is carried out in the following sequence:
- in a separate container, cement-sand mortar is diluted in the required proportion;
- The brick is laid on the prepared mortar. When choosing the height of the brickwork, you need to focus on the height of the shower drain. The height should be approximately 7 cm.
- left to dry. This will take approximately 3 days.
Brick outline
Instead of brick, you can make a floor screed under the shower stall. For this, formwork is made from wooden boards. For this, steel corners, self-tapping screws and other elements are used to secure the formwork. Then the concrete mixture is poured and time is waited until it dries completely. After a few days, the boards are removed. This method simplifies tiling the wall, since the sides are perfectly smooth.
Concrete screed
When creating a wall, it is necessary to ensure its sufficient height. After all, the main task of the circuit is to prevent water from spreading throughout the room.
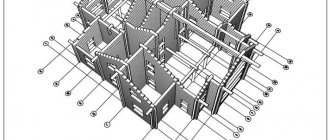
What layers does the pallet consist of?
Repairing and building a shower tray with your own hands has a lot of advantages: the possibility of additional insulation, soundproofing layers and decoration. The pallet consists of the following layers:
- The floor or base on which the object will be built.
- Waterproofing or protecting the floor covering from moisture and water.
- Overlay box or layer of cement and screed (depending on the type of pallet).
- Soundproofing.
- Thermal insulation.
- Communication layer.
- Decorative base made of tiles or other materials used in construction.
Layers can be divided into three main ones:
- Cement screed – 5 cm.
- Insulation – 5 cm.
- Expanded clay concrete base – 12 cm.
Between each layer you can apply waterproofing or primer.
Preparation
Preparatory work includes determining the location of the booth, measuring the dimensions and height, as well as leveling the floor surface for future construction. Pay attention to the location of the shower and distance from communications. If you plan to build a cabin away from the sewer drain, first take care of running sewer pipes in the floors.
Choosing a location for a shower stall in the bathroom
Determining the location of the shower depends on the following factors:
- Availability of free space.
- Distance from communications (water supply and sewerage).
- Practicality for later use.
- Dimensions of the proposed cabin and tray.
It is easier to install water supply pipes than sewer pipes. Therefore, when choosing, it is better to focus on the distance from the sewer outlet.
List of tools
For work you will need:
- level;
- roulette;
- putty knife;
- Master OK;
- mallet;
- container for mixing cement;
- sealant gun;
- stationery knife.
List of materials
The number and list of necessary tools depends on the material used in construction. In this article we will look at a step-by-step guide to constructing a pallet from an available material - brick. What will be required for the work?
- Brick. If you calculate the number of bricks for a standard shower corner measuring 1.5 x 1.5 meters, you will get approximately 6 pieces. in one row. If the standard number of rows is 2-3, then about 18-20 bricks will be required for the sides. Additionally, you need to calculate their number for leveling the floor if screed is not intended.
- Plumbing elements for the pallet: siphon, pipes, rings and everything else necessary to provide sewerage and pipelines.
- Silicone sealant, heat and sound insulating materials.
Determining the shape and dimensions of the pallet
The shape of the future pallet depends on the planned size and modification of the booth itself and the walls. If you need to install a corner shower, it is better to make the tray semicircular or rectangular with two free walls. A square shower visually takes up more space in the room, and therefore its use is less relevant.
The standardized sizes of shower doors are 90, 120 and 160 cm. When choosing other sizes, problems may arise. Therefore, they first measure the width and diameter of the upper part of the booth, and then lay out the pallet. In the opposite situation, you will need to order individual wall sizes
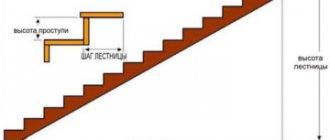
Determining the height and width of the sides
The minimum height of the side is one brick or 125 mm. The optimal height to prevent water from splashing out and splashing on the sides is 2-3 rows of bricks laid out on edge.
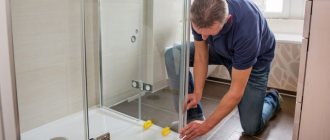
Assembly of the central panel:
- We assemble the central panel if it is disassembled. No need to roll the square one =)
- It is very important to place a decorative cover, which is correct in the photo. We are guided by the pictures that the people of one very numerous country have carefully depicted for us.
- The handles of the lever mixer are installed using a small mounting bolt with a flat-head screwdriver, or there is also an option with a small hexagon, which is most likely included in the shower cabin kit. If you don’t have it, a set of bits will save you .
How to make a tray instead of a bathtub
If it is not possible to buy a ready-made tray instead of a bathtub for a shower, then you can build it yourself. The base of the pallet is the floor, leveled and tiled. Sides - a frame made of bricks or monolithic concrete.
Made of brick
Making brick sides is the simplest task that even a beginner in construction and repair can do. It is necessary to level the base under the brick, degrease it and dry it. The construction is made by laying bricks, each new row of which along the seam does not coincide with the previous one.
Made from monolithic concrete
The use of monolithic concrete will require qualified knowledge and experience from the builder. Therefore, this method is not practiced for the purpose of erecting a pallet independently. The advantages of this option are that the monolith can withstand any temperature changes, is resistant to moisture and dampness, and can be repaired. However, this effect can be achieved by using high-quality refractory bricks in construction.
Tile device
A solid base is finished with tiles. Ceramic itself is not a device for edges or floors. To keep it in place, you need to level the floors and build side walls at the required level. After the base and cement have dried, ceramic tiles are laid.
Shower doors
If the cabin is rectangular, everything is solved more or less simply: the rectangle can be cut out of glass in the workshop. There are many canopies for glass doors, you can choose the one that is more convenient for your case. Just order doors with canopies: you will have to drill holes for them, and it is best to try them on.
It is advisable to take tempered glass. Even if it breaks, it will be into small fragments with blunt edges that are difficult to injure. But, most likely, the fragments will remain hanging on the film. The downside of this glass is that it is expensive. To save money, you can order a regular thick one - 5-6 mm, and at home cover it on both sides with a translucent polymer film. You will have to tinker, but the effect will be almost the same as with tempered glass: the fragments will be on the film.
The simplest, but most expensive option is to install glass doors in a homemade shower stall
One point: the glass is washed before applying the film, then degreased. The film is glued to wet glass. This makes it easier to expel air bubbles, and you can also move the film for a while.
If you don’t want glass doors, but need translucent ones, you can make them from polycarbonate, but not cellular, but sheet. You will have to find a suitable furniture profile, make a frame out of it, and put polycarbonate into the frame with sealant. For reliability, you can also attach it through with screws and washers.
Another option is to buy ready-made doors. There are also glass ones specifically for cabins, or you can use plastic folding “accordion” ones, as in the video.
How to do it: stages of work
The service life and attractive appearance of the finished structure depend on how thoroughly the work on the construction of the sides was carried out. An uneven floor and crooked walls cannot be corrected in the future.
Filling the screed
After deciding on the location of the booth and its dimensions, work is done to level the base. Since it is planned to lay the base under the tiles without a pallet, it is important to make the screed in such a way that its lowest level is 2-3% lower than the main one in the direction of draining the water into the sewer.
Waterproofing
First you need to prepare the base of the floors, level them, clean them from accumulations and dirt, and only then carry out subsequent work. Waterproofing is a mandatory layer of liquid glass. Such work is carried out at least twice during the entire construction phase.
Additionally, additives can be added to cement to increase water resistance and reduce porosity.
Features of waterproofing a tile tray
Waterproofing begins with the construction of a threshold.
A sheathing is made, which is then filled with concrete. Additionally, small-piece materials (brick or foam concrete) are used.
Then they begin to apply the protective composition. Processed with it:
- a bowl of a tray for tiles;
- threshold or sides on both sides around the entire perimeter;
- adjacent walls if the tiles have not yet been laid.
Construction of a drainage system
The drainage system consists of pipes to the sewer and a siphon. The siphon is installed according to the instructions: one end of the pipe is connected to the sewer, the other remains standing straight (if you plan to screed over the pipes). If the floor is laid with brick and leveled with cement, the siphon and stand must be secured or placed in a box so that it can be accessed in the future (if it leaks).
The drain should be sloped so that water flows faster and does not flow back into the shower tray if the drain is clogged.
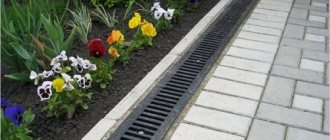
Ladder installation
The ladder is set strictly according to the markings - 2% below the main level. Water falling on the floor should not accumulate in one corner. The place for the ladder should be chosen in a corner or on the side of the entrance to the cabin, this way you can ensure ease of draining water into the pipes. Sequencing:
- Marking is done with a laser or level;
- fixing clips are installed on the floor;
- the ladder system is attached;
- the level is checked.
It is better to choose stainless steel outlets rather than plastic ones. So, when you press the heel on the ladder, it will not be deformed.
Creating sides
The sides and their construction are not a difficult task, but the work must be done correctly. When laying the first row of bricks, level measurements are taken several times and in different places. If the surface is uneven, it will be problematic to ensure the installation of a tray or glass walls in the future.
Pouring concrete inside
After the walls have dried, you can apply one layer of waterproofing under the screed.
After the water-repellent layer has dried, a screed is made for laying the tiles. The peculiarity of this layer: the quality of laying tiles depends on the evenness. To ensure additional viscosity and density of the solution, mix the cement composition with acrylic or quartz sand. The pleasure is expensive, but justified. Step-by-step screed work:
- installation of wooden formwork;
- laying a damper tape made of corrugated cardboard around the perimeter;
- primer;
- layer of expanded clay concrete;
- a clean layer of cement mortar for leveling;
- After the solution has dried, the formwork is removed and the remaining corrugated cardboard is cut off.
Insulation
After the layer of concrete screed and mastic has dried, the insulation can be installed. Additionally, such a layer will serve as a soundproofing layer, which will not give an acoustic effect when water gets in. Materials used:
- fiberglass;
- extruded polystyrene foam;
- agrofibre;
- polyurethane foam.
Installation of a heated floor system
Additional installation of a heated floor system will only be a positive thing.
While swimming, the floor will heat up electrically and keep your feet warm. This option is convenient in the cold season, as well as in a country house where there is no constant heating. Installation of a heated floor is carried out by specialists, because you need to be able to choose the thickness and cross-section of the cable, RCD, and heating elements for heating. Without special skills and knowledge in the field of electricity, it is impossible to build a safe heated floor.
Filling with mortar
Next, pour the finishing screed with a slope towards the ladder. The sequence of actions is as follows:
- The bottom of the pan is coated with bitumen mastic.
- Lay a waterproofing roll material on top - roofing felt or glassine.
- Above the ladder, a hole is cut out in the rolled material corresponding to the internal diameter of the flange. That is, the drain flange remains under the roofing felt, and the drain hole opens.
Carrying out waterproofing
Also, holes are pierced in the roofing felt for mounting screws to secure the upper part of the ladder.
- They take rags out of the ladder and screw the upper part to it, without the grate for now. The drain hole is again clogged with rags to prevent solution from entering.
- Special beacons are installed on the bottom to form a slope of the finishing screed towards the ladder. They are often sold complete with a ladder. The beacons are installed so that the bottom of the ladder is divided into 4 triangles with a slope towards the ladder. They are adjusted so that the screed at the ladder has a thickness at which the tiles laid on it (the adhesive layer should also be taken into account) will be flush with the grid of the ladder.
- Lay the finishing screed. The preferred waterproof solution is polymer-cement or ordinary cement-sand with the addition of liquid glass.
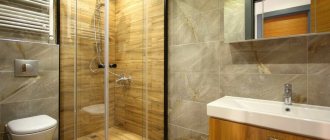
Facing
After work on installing brick sides and sealing, tearing out the surface and waterproofing, decorative finishing is carried out. There are many design options, the choice depends on the stylistic decision and interior direction.
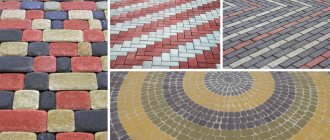
From tiles
Tile is a practical and simple option for covering floors and sides of shower trays.
The peculiarity of this material is resistance to temperature changes, high strength and environmental safety. The tile does not react with other materials and does not emit toxic compounds when heated.
Few people look at some of the details of the tile, focusing more on the brand name and country of manufacture. The tiles have markings:
- Floor tiles are indicated by a small foot icon on a black background on the inside.
- If the foot is black and the background is lighter and shaded, then the tile has increased wear resistance.
- The hand icon indicates a wall application. When laying such tiles on the floor, you should not expect that they will withstand a weight of over 40 kg.
- Snowflake icon – frost resistance.
- A stylized flame sign marked “1” or “2” indicates the number of coating firings.
- Repeated repetition of the firing quantity icon indicates a high level of the indicator.
- “AA” – tiles resistant to chemicals.
- “A” – tiles less resistant to chemicals.
- “O” – low resistance.
- “B” and “C” – average resistance to damage and chemicals.
Other options
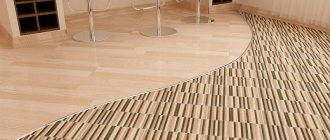
In addition to ceramic tiles, the following are suitable for cladding:
- tree;
- plastic;
- glass blocks;
- rubber pallets and tiles;
- poured glass solutions;
- painting with special compounds.
Fantasy and a sense of stylistic perfection will allow you to create a masterpiece; you need to decide on the external characteristics of the finished cabin.
Ceramics or small mosaic tiles are combined with natural stone, frosted glass or wood frame.
Building a shower tray from ceramic tiles is an easy task that allows you to realize your personal creative ambitions and construction skills. When choosing a stylistic direction, do not forget about the quality of materials and performance characteristics.