Main advantages
A shower drain is a structure made of a decorative grille, a water inlet and a siphon that collects and drains water from the floor in a shower or bathroom. Each structural element performs its functions:
- Grate – filters water from large debris that can clog the sewer pipe.
- Water inlet funnel - discharges water into the sewer.
- Siphon - creates a water or air barrier to prevent the penetration of unpleasant odors from the sewer.
The main advantages of a shower drain are:
- You can make a shower of any size, rather than relying on offers in the store.
- A hand-made ladder will definitely fit the overall style of the interior.
- It is always possible to install additional options (folding chair, rain shower).
- Unlike industrial pallets, a drain made of concrete and ceramics will last for many decades without changes or damage.
- Can be built in any convenient corner of the room.
Appearance of a standard shower drain
Types of shower drains
The assortment of hardware stores offers a large selection of shower drains. They differ in the shape of the drain grate, overall design and height. Let's consider the main types of lattice shape:
- Square.
- Rectangular.
- Triangular.
The grille is made of high-quality material that resists corrosion, since the element is constantly exposed to water of different temperatures and chemical composition, including cleaning agents.
By design features there are:
- Point drains - installed in the center of the shower room or with a shift to one of the walls. In this case, you need to make a slope on four sides so that all the liquid collects at one point.
- Corner - placed in one of the corners, and the slope is made in two planes from the wall and from the center.
- Wall-mounted - located along one of the walls, and the floor bevel is only towards this wall. The height of the ladder is selected taking into account the height of the ceilings in the room. The larger the size of the element, the higher the floor needs to be raised for high-quality water drainage, and this means that the height of the ceiling is cut off.
Advice. It is better to buy a shower drain whose height can be adjusted independently.
Corner shower drain: a convenient and ergonomic solution
What is a “ladder” and what is it for?
A drain drain refers to plumbing fixtures disguised under the floor covering. In essence, it is a drain of a simple design mounted under a waterproof floor.
The main purpose of a simple-looking element of sewer communications is to drain wastewater into the main drainage shaft - the riser, but there are a number of equally significant functions:
- preventing blockages by filtering used water from large contaminant particles with the possibility of periodic cleaning;
- ensuring a tight connection with the floor covering;
- protection against unpleasant sewer odors.
The material from which all components of the drainage device are made must be anti-corrosion, so the drain is assembled from plastic or stainless metal parts, sometimes in a combined design.
The external shape of the ladder can be oval, round, rectangular or square. Structurally, these are linear, point and wall devices. A point drain can be placed anywhere in the room. Linear and wall drains are used along its edges and mainly in the corners of the room.
The shape and size of drains are represented by a whole line from various manufacturers. From the simplest reliable models to complex designs with shut-off and a cascade of dry and wet check valves. For convenience, some standards have been developed for the height of the product, which is selected depending on the thickness of the floor screed.
The height of the product is of great importance - it is usually equal to the level of the floor rise
The product must be durable, wear-resistant, and not violate the tightness of the floor covering.
Today, manufacturers produce ladders with variable height structures , which greatly facilitates the installation of the product.
One of the best options for a home shower is a plastic drain with a stainless steel grate, a dry seal and a water seal, side or direct outlet
Externally, the drain resembles a funnel, equipped with a fixing flange on one side and an outlet on the other. Outlets can be single or through (in case several devices are connected to one pipe in the shower stall).
Each branch ends with a coupling for connection to the pipeline. A siphon with a filter grid is fixed inside the housing, which is a water seal that protects against blockages and odors. Tray ladders have a different structure.
When choosing a drain, pay attention to the dimensions of the outlets - they must correspond to the diameter of the inlet holes in the pipes. It is better to purchase everything as a set, and to be on the safe side, do a trial assembly.
Don’t forget about the couplings and fasteners; each part must be in good working order, without cracks or chips.
The prefabricated design of the drain allows, if necessary, to remove the upper parts and replace them with new ones, as well as to clean them during a blockage without repair work.
Materials for work
Before starting work, it is important to stock up on all the necessary tools and materials. Anything bought in haste is usually not of good quality. And when constructing such a structure, there is no need to save. So, you will need:
- Shower drain.
- Materials for arranging formwork.
- A hammer drill with a nozzle for mixing mortar.
- Cement.
- Sand.
- Containers for solution.
- Guides for creating a slope.
- Rule.
- Tile.
- Tile adhesive.
Building a ladder with your own hands
There is no problem installing a shower drain in a private house, especially if such a plan came up during the construction stage. The element is placed on the floor of the room, taking into account the required slope. Then everything is covered with tiles, which are selected to decorate the entire bathroom. As for apartment buildings, you will need to work hard. The floor will need to be raised by 10-15 cm. To build a drain in the floor with your own hands, adhere to the following plan:
- Choose a convenient location for the ladder. It is better to make sure that the tiles that will be laid do not have to be cut. To do this, measure a distance that is a multiple of the size of the tile with a gap for the seams.
An approximate diagram of the relationship between the height of the screed and the type of drain
- Connect the drain to the sewer pipes.
- Formwork for the ladder is made from plasterboard, edged boards or other available materials.
- At this stage, you can additionally insulate the area allocated for the ladder. For this, slabs of extruded polystyrene foam or polystyrene foam with a density of 35 kg/m3 or more are used. Slabs 5 cm thick are suitable.
- The selected location is filled with concrete. The level should reach the ladder. If thermal insulation material has been laid, then concrete is not used, but immediately proceed to the next stage.
- A seal for the flange must be cut from the waterproofing material. The gasket dimensions must be larger than the flange. A hole is cut inside. The seal is screwed to the flange.
- When the screed dries, it is also covered with waterproofing, so that the edges extend onto the wall. Before installation, do not forget to cut a hole for the flange.
- Now you need to install the siphon in the drain. It is better to seal the decorative lattice with tape. This will prevent mortar or other building elements from getting into the drain, which could clog the system.
- Once again, we pour the mortar into the formwork and form the required floor bevel. To make a smooth slope and not worry too much, you can purchase special profiles in the store. They are installed according to the chosen drain design.
Advice. To ensure that water does not accumulate in one place, but rather flows down to the drain, it is necessary to make a slope of 1 cm per 1 meter of pouring.
- The solution must be aligned with the guides. After some time, the surface is grouted. Therefore, they are left until completely dry. The second layer of mortar should not reach the edge of the siphon by the thickness of the tile along with the glue.
Siphon selection
Siphons for drains differ from their analogues only in the absence of a plug covering the drain hole. There is simply no need for this in a shower stall, so simple cheap siphons will have to be abandoned in favor of more technologically advanced devices. These include:
- siphons with manual control. The adjusting knob is located on the wall, which makes it easy to control the drain hole by simply turning it;
- click/clack systems (open/closed). The plug in these devices is mounted above the drain hole and is simultaneously responsible for opening and closing it. The first press of the plug with your foot causes it to lift - the hole opens and the water is removed. The second press closes the plug, preventing liquid from draining.
The classification of siphons by engineering features looks like this:
- bottle - installed mainly in kitchens, not suitable for showers;
- corrugated - are a flexible, embossed hose that can be laid at any angle to the shower tray;
- classic pipe ones - they are bent in the form of the letters U and S, and the hydraulic valve is formed directly in the bend of the pipe.
For non-standard drain location options, a corrugated siphon would be a good solution. In other cases, a classic tubular system is installed.
Final touches
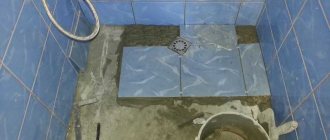
After the solution has dried, you can begin laying the tiles. It is best to start working from the drain. If the element has a rectangular shape, then there is no need to trim the tiles, and small details near the wall are not so noticeable.
Popular drain models on the market
To grout joints between tiles, it is better to choose moisture-resistant mixtures that match the decorative finish. The joint between the drain and the tiles must be treated with silicone sealant, which will protect against leaks and further destruction of the entire structure. In order to understand the process of installing the ladder in more detail, you can watch the video.
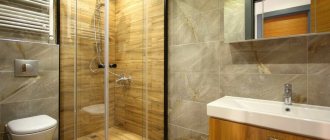
How and where to place the drain in the floor under the tiles seems clear and there is nothing complicated here. But how to properly perform decorative finishing so that everything looks as aesthetically pleasing as possible? To select a suitable interior, you can look at the photos on the Internet.
Those who are not confident in their abilities should use the services of professional designers. They will select the option that best suits all the client’s requirements. Starting from the location of the drain and ending with the smallest decorative details.
Video instruction
The best posts
- Master classes on macrame for beginners: bracelets and toys with video
- Jared Leto built himself a “Martian house”
- How to restore a coffee table with your own hands?
- Beaded bell: weaving pattern for beginners with photos and videos
- Installation of entrance doors according to fire safety standards and regulations
- DIY invitation to graduation in kindergarten
- Knitting patterns for men's mittens with a description of the main patterns
- A child ruined the interior: quick and cheap ways to eliminate defects
Related article: Current rectifiers and their purpose
