The need to install fresh air ventilation
Some ordinary people think: if there are vents and the ability to open windows, why install ventilation equipment? You can clean the air in your apartment this way. But in reality, it turns out that natural ventilation does not cope well with this task, and the circulation of air masses does not occur. Unpleasant odors emanating from the kitchen and bathroom stagnate in the house, humidity or dryness is created, and a person begins to experience discomfort.
Following the fashion and advertising of plastic window manufacturers, many of us install them in our apartments. Thanks to this, the space is sealed and an obstacle to free natural air exchange is created. A heavy atmosphere forms inside the room.
The issue of air purification becomes especially relevant in winter. Ventilation through windows causes heat loss and drafts. If you do not open the windows and avoid ventilation, the air in the rooms becomes dry and the amount of oxygen in it decreases. It makes people feel bad.
Do-it-yourself forced ventilation allows you to avoid all these problems. It can be done in several ways:
- install fans in a window or in a specially made hole in the wall;
- arrange a supply and exhaust air duct;
- install a system of inlet openings (valves).
Now the most popular is supply and exhaust ventilation, driven by mechanical devices.
Features and nuances of the technological process of installing supply ventilation with air heating
Installation of supply ventilation is not difficult for a professional. In principle, the technological process does not have many difficulties. First of all, to prevent condensation, you need to insulate the area before the entrance to the device using roll insulation.
Air ducts must be fixed to the wall or ceiling. To avoid unnecessary vibration, it is recommended to attach vibration round inserts between the installation and the network. Supply ventilation with heating and cooling of air should be located so that the ventilation grilles are directed to places of maximum concentration of people.
It is much easier to install equipment in a simple apartment or private house. For this purpose, compact installations with small dimensions are used. If the room has plastic windows, it means that natural ventilation is impossible, and therefore you will have to install a forced supply model.
A heated supply valve can be mounted either in the wall or in the ceiling, it all depends on the design of the room and the personal preferences of the owner.
What functions does the ventilation system perform?
Fresh air must penetrate into the premises: without it, a person feels tired and unwell. In unventilated rooms, harmful microorganisms multiply, an unpleasant odor appears and mold spreads.
Mold is the first sign of high humidity in a room
Lack of fresh air leads to fungal growth
In the warm season, you can use open windows for ventilation: air flows circulate freely throughout the rooms, removing dust, wool and other contaminants. During the cold season, a forced ventilation system is used for ventilation. Its functions:
- removal of carbon dioxide;
- normalization of humidity levels;
- air purification in rooms.
People exhale carbon dioxide, so it accumulates indoors. If you don’t remove it, the rooms will be stuffy and uncomfortable. It is difficult to work in such conditions: concentration decreases, and a feeling of constant fatigue appears. In a stuffy room, a person does not get enough sleep and feels exhausted.
Open windows often to let fresh air into your home
High indoor humidity leads to the formation of fungus and mold. Glass surfaces fog up: condensation accumulates in double-glazed windows and forms on mirrors. An unpleasant musty smell appears in the bathroom and kitchen.
Foggy windows indicate faulty ventilation
Animal hair, mold spores, dust, and allergens accumulate in the premises. The surface of the furniture emits formaldehyde vapors - it is part of MDF, chipboard and fiberboard. With insufficient ventilation, harmful substances enter the lungs along with the inhaled air.
The importance of arranging air exchange in buildings
When learning how to make ventilation in a cellar with your own hands, you need to understand that its arrangement in this and other rooms is important for a number of reasons.
Their complex includes a number of factors; their compliance is conditioned by mandatory compliance with sanitary and hygienic standards for residential and commercial buildings:
- constant and regular updating of the gas-air mixture in the premises;
- neutralization of fungal spores and bacteria that reproduce in a humid environment;
- timely removal of humid and dusty air from premises.
Ventilation of premises of different types, volumes and purposes ensures the maintenance of an established and comfortable microclimate in them.
In this case, a variety of devices and technical devices are used to ensure the effective operation of the ventilation complex; it includes different types of air exchange.
How to determine that an apartment has a faulty ventilation system
Apartment buildings are equipped with a natural ventilation system. Special compartments are installed in the kitchen and bathrooms through which the exhaust air goes outside through channels. After several years of operation, the mines become polluted and air masses are removed less well.
The following signs indicate that the ventilation system in the apartment is not working properly:
- increased humidity in the bathroom;
- formation of condensation on mirrors and windows;
- unpleasant odors in the bathroom;
- spread of smoke and steam from the kitchen to all rooms;
- stale indoor air.
Supply ventilation in the apartment solves these problems; it provides a constant flow of fresh air. The microclimate becomes comfortable for work and rest.
Supply ventilation device
Ventilation is a method of ventilating a confined space , which helps:
- fill the room with fresh air;
- create a special microclimate;
- prevent the appearance of mold and mildew on the walls and ceiling.
Supply ventilation with a built-in heating element is a system that fills the room with fresh air, heated to a comfortable temperature, and warms rooms in cold weather (supply ventilation is described in detail here). Modern ventilation devices are equipped with a number of useful functions :
- temperature control;
- adjusting the air flow power, etc.
Ventilation devices are compact and fit into the residential interior. Heated ventilation devices consist of a heating element, a filter grille that cleans the incoming air masses from debris, dirt, dust, and additional elements that not all systems are equipped with (humidifiers, antibacterial filters).
Attention
A high-quality ventilation system regularly fills the room with fresh, warm, purified, humidified air.
Options for ventilation systems for apartments
One solution in this situation is to install forced ventilation. What options do you have to choose from in this case?
Duct systems: for those who are not limited in funds and free space
A ducted supply ventilation system for an apartment is an engineering complex that is capable of providing forced (using a fan) inflow, filtration, heating and removal of air masses. Duct ventilation usually includes fans complete with a muffler, corrugated pipes, filtration units, and a recuperator/heater. Air ducts, as a rule, are mounted above the ceiling, and the equipment itself is mounted on a balcony or loggia. This option is one of the best, almost silent and comprehensive.
At the same time, this is an expensive pleasure - along with installation, such a “flush” will cost an average of 300,000-500,000 rubles for an apartment with an area of 90 sq.m. or more. Not suitable for standard housing in high-rise buildings with ceiling heights of 265 - 275 cm and a total area of less than 100 square meters. It also requires annual full maintenance and cleaning of the air ducts.
Option two: installation of ventilation valves
In this case, the flow of air from the street is ensured through special valves that cut into the profile of the glass unit of the plastic window. This option requires replacing the glass unit with glass with a prepared hole. There is an alternative - you can look for special windows on sale with already built-in ventilation valves. The asking price is about 40,000 rubles for one standard window.
Option three: ductless “inlets”
Ductless ventilation systems are a type of ventilation equipment that does not have air ducts. It provides air flow through a through hole in the wall adjacent to the street. Such “inflows” are divided according to the method of supply:
- passive (the air flow enters the apartment by gravity, due to the pressure difference);
- forced (equipped with a built-in electric fan and heating).
An example of passive ductless ventilation is a supply valve - a plastic tube with thermal insulation and sound insulation. It is inserted into a hole that is drilled in the wall.
An active “intake” is a device equipped with a fan and a filter (or a set of filters). Mounted on an external wall.
How to do it?
Before installing a ventilation system with your own hands, you need to calculate the power of the fans, the pipe system, and the route layout. It is necessary to plan which rooms will be ventilated and which will not.
Using these data, you can calculate the components:
- Fans. They are selected depending on the room. Fans with a capacity of up to 30 cubic meters per hour are used for the bedroom, children's room or living room; for the kitchen - from 60 to 90 cubic meters / hour; Coolers from 25 to 50 cubic meters per hour are installed in a bathroom or bathroom, depending on the size of the room.
- Connecting pipes. Exhaust ducts are located under the ceiling, in those rooms where the exhaust openings will be located. The common pipe should be slightly larger than the branch ducts, since it will remove air from all rooms at once.
- Grilles, filters. These components are available as options. They improve air quality and protect the system from pollution, dust and debris.
For installation you will need a hacksaw with a blade for wood or metal, a screwdriver, and sealant (more information about installing ventilation with your own hands is given here). A hammer drill may be required if you have to make a complex system of ventilation ducts passing through the partitions of rooms.
In a private house
In a private house, it is worth considering the presence or absence of a second or more floors, an attic. If there is a need to ventilate these levels of the house, then it will be necessary to install a ventilation duct system on these floors as well.
For your own home, it is best to plan the ventilation system in advance , even before construction, in order to hide all shafts and channels from view. If the existing ventilation system cannot cope or needs to be replaced, you should do the following:
- Find a place in the house where the largest number of rooms will be located as close or adjacent as possible. This is usually the center of the home. In this place you need to install an inlet pipe, which will provide a flow of fresh air to different rooms.
- If installing a pipe is not desirable, try making small ventilation holes under the windows.
- Calculate and design the exhaust pipe system, install the ventilation duct system and cut into the main ventilation shaft. If it doesn’t exist, make it too. Raise the exhaust pipe 0.5 m above the ridge to enhance the convection effect.
To install ventilation lines, you can use ordinary plastic sewer pipes or buy ready-made ventilation ducts at a hardware store (installation of ventilation from plastic pipes is written here).
Attention
When installing supply and exhaust ventilation on an old hood, do not forget to clean the main pipe shaft in advance! Otherwise, the efficiency of the new system may be negligible.
Ventilation diagram in a private house:
The features and procedure for installing ventilation in a private house are described in detail in a separate publication.
In the apartment
There are several tricks to installing a ventilation system in an apartment:
- Output channels can be hidden under a suspended or suspended ceiling. It needs to be done efficiently and at one time. Otherwise, you will have to disassemble the ventilation ducts along with the ceiling covering.
- Before installation, you must consult with a housing office engineer or a specialist from the management company. He will tell you which channel you can enter and which you cannot.
- For better air flow, you can make small holes under the windows.
Otherwise, the system is designed and installed according to general rules. The channels themselves can be made from rectangular pipes. They will save space under the ceiling and will look more aesthetically pleasing.
Important
Under no circumstances should you make holes for ventilation in the wall facing the outside of the house (facade). So you are violating Article 7.21 of the Code of Administrative Offenses of the Russian Federation.
Unauthorized interference with the architecture of a house can cost the resident a fine of 1 to 1.5 thousand rubles. At the same time, he will be obliged to eliminate damage to property.
Ventilation diagram in the apartment:
In the toilet
It is easiest to organize ventilation in the toilet. To do this you will need one fan. It is installed on the introductory window of the main ventilation duct. The hood can be turned on in two ways:
- Forcibly. The cooler motor is started from a button. Sometimes it is powered together with the light switch in the toilet.
- Via light sensor. The fan turns on when someone turns on the light in the room.
Advice
The first method is most often used.
Ventilation diagram in the toilet:
Read about how and what kind of ventilation you can make in the toilet here.
In the garage
In the garage, ventilation can be organized by installing two plastic pipes in diametrically opposite corners of the room. In this case, you need to make the input at floor level, and the output at ceiling level. To force the system to start, you can install a regular switch. Both pipes need to be installed 0.5 meters above the roof level.
Attention
Protect the external opening of the exhaust duct from rain and other precipitation. Install canopies or weather vanes to prevent moisture from getting through the pipe onto the operating fan.
Ventilation diagram in the garage:
Find out how to install ventilation in the garage with your own hands in another article.
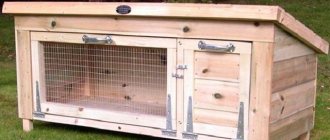
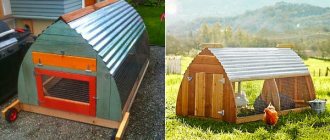
In the chicken coop
For a small utility room or chicken coop, it is enough to install a couple of pipes , as for the garage version, and one fan. Sometimes just a hole in the wall with a fan installed is enough if the chicken coop is made of wooden materials.
Advice
As an option, you can set a timer to operate the hood. For example, for work at night, when the birds are closed and the natural flow of fresh air is reduced.
Ventilation diagram in the chicken coop:
Read about all the nuances and features of installing ventilation in a chicken coop and other sheds in a separate article.
Forced supply ventilation
It should be noted that there is also forced exhaust ventilation, which differs from forced supply ventilation only in that the fan is installed on the hood. There is another option, which is called a forced supply and exhaust circuit. This is when fans are installed for both air supply and exhaust. This system is most often used in private housing construction. In apartments - either exhaust or supply. Although it should be noted that today manufacturers of ventilation equipment offer various new products in the form of air handling units for apartments. They are compact, effective, but not cheap.
Since the topic of the article is supply ventilation of the apartment, we will consider this option. As mentioned above, the supply circuit means the presence of a fan. Therefore, there are air valves on the market, inside of which low-power fans are installed. The photo below shows two types of such devices: with a cylindrical channel shape and a rectangular one.
Two types of air valves with fans inside
In principle, the process of installing such a valve is no different from the previous one:
- You also need to use a puncher and a crown to make a through hole;
- install a cylindrical valve into it;
- fill the space between the device and the walls of the hole with foam;
- connect the fan to the mains supply;
- install a cover on the street side that will protect the hole from the entry of birds and small animals, debris and dirt;
- A decorative grille is installed on the inside of the valve, with which you can regulate the power and direction of the incoming air flow.
Forced ventilation in an apartment is not only about installing valves with fans inside. There are several options for organizing a ventilation system of this type.
Air conditioner with forced ventilation for an apartment
Conventional air conditioners work like this: the air from the room is forced through a filter, then through a heat exchanger, where it is cooled, and then it is reintroduced into the room. That is, the air masses are purified, cooled, but do not become fresh and saturated with oxygen.
Today, air conditioner manufacturers offer models in which small fans are installed as a separate element; with their help, fresh air is driven into the rooms of the apartment. The design features of fan installation vary greatly from manufacturer to manufacturer, but the meaning is the same for all. The fan is connected to the street by an air duct, which passes through the same channel as all communications of the split system.
It is necessary to indicate that the fan itself can be installed outdoors or inside the house on the housing of the indoor air conditioner unit. The photo below shows the first option with installing a fan outside, which is connected to the room in the apartment with a hose.
Air conditioning with fresh air from outside
The principle of operation of ventilation of a house and apartment
All ventilation systems are divided into two types - with natural air movement and with forced one.
Air always moves from a zone of higher pressure to a zone of lower pressure. This property is used in natural ventilation systems. The higher pressure area is usually located in the apartment/house. If there are ventilation ducts/openings, air from the premises should tend to flow outside. But a new one must take the place of the “departed” one, otherwise the movement will stop. That is why for the normal operation of the ventilation system, both an outflow of exhaust air and an influx of fresh air are necessary. And this is worth taking care of. Only then will ventilation - whether made/developed by yourself or not - work effectively.
It must be taken into account that warm, exhaust air tends upward
Keep in mind that “breathing” walls have nothing to do with air exchange. At best, they help regulate humidity. But only. Likewise, a regular air conditioner does not add oxygen. It only maintains the specified parameters of the existing air. It only removes excess moisture and has nothing to do with air exchange. Air inflow must be ensured in the same way as outflow, using windows (not the most effective way) or special devices.
Inflow problems
It would seem that there is nothing simpler - make a hole in the wall - here you have an influx of oxygen. This may be true somewhere, but not in our climate, when most of the year the temperature outside is far from comfortable. What's wrong? A number of unpleasant moments:
- Even at not very low temperatures, unheated air causes acute discomfort. Therefore, heating elements are installed in the supply channels or a recovery system is used.
- The air carries dust and exhaust gases. Therefore, a cleaning system is needed - filters.
- Just a hole in the wall is a source of extraneous noise. In cities, noise can make life difficult. Therefore, noise reduction is also necessary.
One of the options for organizing the flow of fresh air is a valve in the wall
- Air conditions “overboard” are constantly changing, so humidity control is desirable - with dehumidification/humidification depending on need. This point is not a necessity, but how you can make a separate system for maintaining humidity levels.
- When cold air enters, condensation forms on the walls of the supply channel. If no measures are taken, it is absorbed into the walls, freezes/thaws - depending on the weather, thereby destroying these walls. Therefore, air supply devices are made thermally insulated.
As you can see, a “simple” hole in the wall becomes a very complex device. Moreover, little from this list can be neglected. Existence will be too uncomfortable.
Exhaust ventilation
Exhaust ventilation in an apartment building is a large pipe that runs through all floors and goes out to the roof. All apartments “in the riser” are connected to it. Under normal conditions, due to the difference in pressure in the apartment and on the roof, a “draft” is formed, which draws air from the premises (it also works when there is an inflow).
This is how you can organize exhaust ventilation in a house or apartment. You just need to take into account that the channel must “pull” the entire required volume of air
In apartment buildings, risers are usually located in the kitchen and/or bathroom. All other rooms are ventilated through these hoods. For normal air exchange in the bathroom and kitchen doors, it is necessary to provide ventilation gaps (under the door or make flow holes in the wall) or install grilles.
In a private house, everything is organized in approximately the same way: a main ventilation duct is installed in the kitchen or bathroom, which is led to the roof. There is no point in finishing it in the attic. Even if the attic is cold and ventilated. When there is a difference in temperature and high humidity in the removed air, a large amount of condensation is formed. Even with good ventilation in the attic, it does not have time to escape, the ceiling gets wet, and the walls become damp. In general, this is a bad idea.
Air duct material
A few words about the material from which the exhaust ventilation duct in a private house is made. Most often, galvanized pipes are used, and they are of round cross-section. Their resistance to air flow is minimal. The second place in popularity is occupied by plastic air ducts. There are more problems with them - they accumulate static, which contributes to the accumulation of dust, and are less resistant to fire. The advantages include simpler installation, the presence of ready-made shaped elements, with the help of which it is easy to create any system. In the case of these materials, the choice is yours - use what you like best.
Plastic air ducts are round or rectangular
What you shouldn’t do is remove the exhaust duct from the brick. Firstly, it is expensive (you also need a foundation for it), and secondly, it is the most problematic to use, since it has uneven walls, which contributes to the accumulation of dust. Condensation accumulates in brick walls that are not covered with a metal sleeve, causing the brick to quickly collapse. In general, brick exhaust ducts are a thing of the past.
Additional devices
What else may be needed in an exhaust system are check valves. They prevent the air from moving in the opposite direction, which occurs when the draft is overturned.” When the pressure in the apartment/house becomes lower than outside. Also, check valves prevent the spread of odors from the kitchen/toilet to other rooms connected to the duct.
Check valves - a simple device
In general, the design of the exhaust system is simpler. But only if the cross-section of the ventilation duct is correctly calculated, the route is correctly drawn up and installation is carried out correctly.
Natural or forced
There are two types of ventilation - natural and forced. What's better? It's difficult to say for sure. Everyone decides for themselves, taking into account all the advantages and disadvantages of both types.
Natural ventilation in a house works due to the difference in pressure indoors and outdoors (due to the existence of that very “natural draft”). Its advantages are noiselessness and independence from electricity. Disadvantages - low productivity due to which large cross-section pipes are required, inability to control/regulate the intensity of work, dependence on the state of the external environment. In summer, natural ventilation often does not work, and sometimes it works in the opposite direction. This is when hot air is “pulled” into the room through the exhaust ventilation duct.
Forced ventilation in a private house - install fans of a suitable type
In forced ventilation, air movement is provided by fans. It can be adjustable and works in any weather, but only if there is electricity and working fans. And this is a minus. Even two. The first is energy dependence, the second is the noise that fans make during operation. Therefore, many people prefer to use plastic air ducts in forced ventilation systems. Precisely because they are “quiet”.
Budget options for restoring air exchange
Wall and window valves do not have a fan. The air flow occurs due to the difference between street and “home” pressure. A prerequisite for the operation of overhead inlets is proper exhaust ventilation.
Features of different types of window valves
The design of all window climate control devices is very simple. A typical valve consists of an air intake, a telescopic duct and an indoor unit.
The air intake is installed outside the frame. The external unit is equipped with a visor and a grille that prevents insects from getting inside. The telescopic channel cuts into the frame, forming a through gap for the unhindered flow of air.
The indoor unit is mounted on the side of the room. Some models of inlet units are equipped with a filter and a valve that regulates the throughput of the device
Based on the design features and installation method, the following climate control devices are distinguished:
- slotted;
- folded;
- invoices.
Slot models. The throughput capacity of the unit reaches 20 cubic meters per hour - the influx of air masses is carried out through a micro-hole up to 1.6 cm high and up to 4 cm wide. The device consists of two blocks, which complicates its installation - milling of the window frame is required .
Rebated valves. This is the most affordable and easiest way to ventilate a room. The air flow is carried out through slits in the vestibule. The main advantage of the models is the ability to install them on a window in use without milling a groove.
Additional advantages of rebated models include: low cost, preservation of the sound-absorbing and heat-retaining properties of PVC double-glazed windows and the possibility of automation.
The valve capacity does not exceed 5 cubic meters/hour. To ensure a larger volume of air supply, it is permissible to install several valves on one window
Overhead climate products. This option is rarely implemented in domestic conditions due to the complexity of installation - the valve is inserted at the stage of assembling the double-glazed window. In addition, the product worsens the heat and sound insulation of the window.
Overhead modifications have found their application in production and warehouse premises. The productivity of climate control devices is about 100 cubic meters per hour.
In the simplest models of window inlets, the size of the gap, and, consequently, the intensity of the air flow, is selected manually - the position of the valve is adjusted. High-tech devices are equipped with humidity and atmospheric fluctuations sensors.
Wall model: device and installation
Externally, the wall valve resembles a cylindrical flask or a wide pipe, with a diameter of about 10-16 cm.
The plastic air duct is equipped with the following elements:
- thermal insulation layer - a “sleeve” passes through the entire flask, preventing freezing of the wall and reducing the noise effect from the street;
- filter – located at the outlet of the air duct, provides rough air cleaning.
In some models, an O-ring (silicone) with flaps is placed in front of the filter. The purpose of the part is to equalize the air flow in windy weather.
On the street side, the wall air duct is closed with a metal grille and an anti-mosquito insert, and on the inside - with a decorative cover with an adjustable handle
When choosing an air supply device, the power and “operating” temperature of the unit are first assessed. On average, the productivity of a wall climate product is 40 cubic meters/hour. This value is enough to ventilate a room of 13 sq.m.
The operating temperature range is indicated by the manufacturer on the packaging or in the instructions for the device. For harsh climatic conditions, special models have been developed to prevent the formation of condensation and the appearance of an ice plug in the channel.
The following photo selection will clearly introduce the technology of installing a wall valve:
Image galleryPhoto from At a height of approximately 2 - 2.2 m from the floor plane, we drill a hole in the wall. We select the drill bit in accordance with the size of the future ventilation duct. We rework the hole with a drill of a smaller diameter, trying to give it a slight slope towards the street. In the hole drilled and cleared of dust, we first install insulation, made in the form of a pipe, then a plastic air duct. We cut the insulation flush with the surface, the air duct should protrude by 1 cm. We apply the lower part of the housing to the installation site and mark the fixation points of the device through the holes in it. We fix the lower part of the housing to the wall by drilling holes at the marked points. We place the included filter in the housing. We snap onto the upper part of the housing, equipped with a device for adjusting the air flow. We check the functionality of the system and the ability to regulate the volume of air flow entering the room. On the outside of the wall, we install a grille with inclined lamellas, it will protect against insects and birds. Step 1: Drilling holes for installing the valveStep 2: Refinishing the hole with a drillStep 3: Arranging the drilled holeStep 4: Marking for attaching the valve bodyStep 5: Installing the filter into the fixed bodyStep 7: Installing the supply valve coverStep 7: Checking the functionality of the systemStep 8: Installing the grille from the facade
Stage 1. Determining the location. When choosing a wall, you should consider some nuances:
- It is better to install it on a supporting structure;
- optimally – the valve “exit” to the insulated loggia;
- It is better to avoid installation from the side of the roadway.
Valve manufacturers have designated recommended and undesirable areas for installing the device. When installing, it is important to consider the air flow vector.
In the first option, fresh air entering the apartment warms up at the top and falls down. The second option is that the air masses are heated by the heating radiator
Stage 2. Preparation and drilling of the wall. On the inner wall, mark the place for the through hole and draw the diameter of the valve.
Channel drilling procedure:
- Perform initial drilling with a diamond core bit to a depth of 10 cm.
- Remove debris and use a chisel to knock out a small notch for stable placement of the drill.
- When drilling, keep the slope outward - this position of the air duct will prevent rainwater from getting inside the device.
It is better to carry out the work with an assistant who will periodically wet the drilling area. Humidification will reduce dust levels and protect the instrument from overheating.
Stage 3. Installation of valve components. Clean the groove from dust and place a heat-insulating “sleeve” in the channel. Using screwing movements, install the cylindrical body of the device, and secure the fine-mesh grid on it.
A panel, a ring with dampers and a filter are fixed from inside the wall. The final stage of assembly is installation of the lid with the adjusting handle
Supply system device with heating function
Technically, the design of the supply air unit is not a high-tech device. True, the latest developments in this area, aimed at providing specialized areas of the national economy with air supply machines, have stepped far forward.
Industrial structures are equipped in accordance with the latest technology:
- control controllers;
- electric motor speed regulators;
- control and analysis sensor systems;
- effective filters and recuperators;
- air heating (cooling) modules;
- channel cut-off mechanisms.
As a result, the treatment of outside air is achieved at a truly high level, which contributes to the creation of a favorable atmosphere inside the work premises.
Is it possible to do something similar for use in a private home?
Industrial high-tech system for the supply and processing of external air, equipped with full automation, capable of stable operation with the support of periodic maintenance
Perhaps, for a single-family private house, such air treatment is quite acceptable.
But for implementation in a city apartment, this is already a difficult task. The complexity of the task for a city dweller is determined by various nuances - both technical and economic.
Design features of the heated “inlet”
To better understand the complexity of the task, let’s consider the classic design of an air supply unit with functions for additional processing of street air.
First of all, the purely installation factor should be taken into account. After all, an air treatment system is a rather large installation that requires the allocation of part of the room area.
Relatively small-sized branded supply and exhaust systems are produced, designed for sub-ceiling installation. For cases with private houses, this approach can be considered
The default “inlet” design contains:
- electric motor;
- impeller;
- air capture diffuser;
- air injection diffuser;
- duct shut-off valves;
- filters;
- air channel system.
In order to ensure stable heating of the air flow forced by the fan impeller, a heating system is installed after the discharge diffuser.
We talked in more detail about the types of air inlets in an apartment here.
Types of heating systems for ventilation
Technologically, in conjunction with forced ventilation, use a water or electric heating system. Or it is possible to use two heating options simultaneously, which, although rare, occurs when operating industrial supply air processing machines.
Implementing a water option in a domestic environment (in an apartment) for arranging ventilation with heated air with your own hands is an extremely difficult task, especially if you plan to operate the supply system in winter conditions.
Execution of the air handling unit, where a water heater is used as an air flow heater. This option, however, is extremely problematic to implement for urban conditions, but is possible for a private single-family home
Water heating requires reliable control and mandatory protection against “defrosting” of the water circuit. To achieve high heating efficiency, the water circuit must be made with a multi-pass, multi-row design. Such a heating device must be removable. We recommend that you familiarize yourself with the types of water heaters for supply air and their operating principles.
The introduction of an electric heater into the design of a home air supply system promises to result in somewhat less difficulties. However, in this case, electricity consumption will inevitably increase, and, accordingly, monthly costs.
To ensure heating of the supply air electrically, it will be necessary to install powerful electric heaters (TEH).
An example of an apartment project with heating
The modern market for technological equipment, in particular, fans and electric heating elements of various designs, theoretically makes it possible to implement a home “warm air supply” project. For example, it is quite possible to consider a design based on a duct fan.
This is what the design of a duct axial fan looks like - a device theoretically suitable for the manufacture of a heated home air-handling unit
The design of an axial fan, for example, is well suited for an apartment project. This device is small-sized, lightweight, low-noise. The equipment is distinguished by relatively low energy consumption with fairly high productivity. Supports step-by-step speed control, which is also relevant for home “air-fitting” when making it yourself.
However, in addition to the axial duct fan, you will need to select an electric heater (TEH), a design that would ensure full heating of the air mass passed by the fan.
That is, it is necessary to calculate the power of the heating element sufficient for maximum performance of the Dospel device.
For calculations you can use the following formula:
Qt = L * 0.36 * (Tv – Tn),
where: Qt – heating element power; L – duct fan performance; Tv and Tn – air temperature inside and outside.
Main stages of supply ventilation device
To make fresh air ventilation in a house or apartment with your own hands, it is important to carry out competent preliminary work. It consists of several points.
Carrying out calculations. For a private cottage under construction, the ventilation system can be designed together with the general plan. For a finished building and an apartment in a high-rise building, an autonomous air duct is created, taking into account the area of all rooms and each room separately. All calculations are carried out according to a formula that uses the values necessary for optimal circulation of air masses. These include:
- total power and performance of the supply system;
- fan input power;
- air flow rate;
- maximum noise level from device operation;
- diameter of inlet openings, dimensions and length of pipes;
- power and energy consumption of additional devices (heater, recuperator, etc.).
When carrying out calculations, the coefficients established by SANPiN are taken into account.
Based on the calculations performed, a detailed layout of all components of the device is drawn up.
Next, parts are selected from the remaining building materials and the missing elements are purchased.
Now it has become possible to purchase ready-made ventilation devices of the supply and supply and exhaust type. Different manufacturers have different prices. But why spend extra money if every man can install such a system at home on his own. Do-it-yourself supply and exhaust ventilation takes longer and is a little more complicated. It is much easier to equip a regular flow-through air duct.
Supply or supply and exhaust ventilation: which is better?
According to the principle of operation, supply and supply and exhaust ventilation are practically no different.
The supply type is the simplest and is associated with natural air purification through a system of pipes and holes located on different surfaces. Air circulation occurs naturally in it, following the laws of physics. The finished set of parts can be accompanied by a heating or cooling element.
The supply and exhaust system involves the construction of a more complex system of pipes running throughout the house. A convector is installed outside, which is responsible for regulating the influx of air masses, cooling them in the summer heat and heating them in the winter. This system contains ultraviolet lamps, which help disinfect the air entering the room. There is a fabric filter that retains particles of dust, burning and other impurities that accumulate in the external environment.
Both systems are easily assembled from ready-made parts produced in production or any available means. However, supply and exhaust ventilation is more effective. During its operation, processes occur that provide additional comfort to the room:
- heating or cooling air;
- its cleaning and disinfection;
- humidification and ionization.
Modern supply and exhaust systems have a recovery function. It is performed by a special device - a box - with radiators and tapes inside. The air leaving the room “leaves” heat in it, which returns back to the apartment or house. The recuperator is installed at the outlet. In summer it is removed or looped so that the air in the room does not overheat.
Installing this device allows you to significantly save thermal energy. It is inexpensive, and the benefits of its use are great.
Supply and supply and exhaust systems have natural and mechanical drive of fans located at the inlet and outlet of the air ducts. Mechanical activation of the device allows you to significantly increase the speed of air flow and carry out additional measures to improve their condition. With good fan power, such an installation can clean and refresh a large area in 2-3 hours.
Exhaust ventilation
The task of exhaust ventilation is to remove exhaust air, airborne particles and unpleasant odors from the apartment. Exhaust ventilation systems are divided into local and general. They can work either autonomously or in combination with natural or forced ventilation.
A feature of all exhaust ventilation systems is the presence of exhaust channels through which exhaust air is discharged outside the room. In this case, air intake grilles are always installed in the kitchen and bathroom. Thanks to this arrangement of the exhaust ducts, unpleasant odors and moisture do not spread throughout the apartment and are “locked” in a limited area.
A typical example of local exhaust ventilation combined with a natural ventilation system is a kitchen hood
.
Quite often, small fans are installed in the ventilation shafts of bathtubs and toilets to remove excess moisture and unpleasant odors from the premises.
Ventilation schemes for private houses and apartments
The simplest option is implemented in small houses and apartments. Supply openings are located in living rooms, hoods - in the kitchen and bathroom. The air entering the premises penetrates through the cracks under the doors into the kitchen and bathroom, where it is exhausted. This scheme works for an area of no more than 100 square meters.
When the supply ventilation is separate devices in each room, the exhaust is through the kitchen or bathroom
In houses with a total area of more than one hundred and fifty square meters, two separate systems are organized - supply and exhaust. Each of them has its own air duct system. With this arrangement, each room has exhaust and supply openings in each room. In this case, adjusting the intensity of air inflow and outflow is possible in each room - you can adjust the atmosphere to the requirements of its inhabitants.
With centralized supply and exhaust ventilation, heating or air conditioning can be arranged
With a centralized supply ventilation system, it is easier to prepare the air taken from the street - you can create a unified cleaning and heating system. The prepared air can now be distributed throughout the premises. In this case, each room has two ventilation openings - one supply, one exhaust. They are located in opposite corners and covered with grilles or diffusers.
Supply and exhaust ventilation in a private house can be organized in this way: the supply is decentralized, the exhaust is centralized
Even with a large area of the house, the supply ventilation system can be made decentralized, as in the first scheme. With the correct selection of equipment, it will work no less efficiently. The question is which will be more economically profitable, since the problem of air preparation for each supply channel will have to be solved. And the equipment is not cheap at all.
Recuperation units for apartments
The disadvantage of many supply ventilation systems is the high energy consumption for heating or cooling the air entering the apartment. Recuperation units will help reduce energy consumption - they use the thermal energy of exhaust air masses to heat fresh air from the street.
If there is a high temperature difference between the street and the apartment, the recovery unit will not be able to achieve the required parameters, and the air will have to be heated, but the energy consumption in this case will be much lower than for conventional heating of supply air.
The higher the efficiency of the model, the less the need for additional air heating. On average, the efficiency of modern air handling units is 85-90%, which often makes it possible to completely abandon the use of a heater.
Monoblock air handling units with a recuperator take up relatively little space - they can easily be installed on a balcony or loggia. Among the products of leading manufacturers of climate control equipment, models with a capacity from 150 to 2000 m3/h are widespread. For comparison, a one-room luxury apartment with an area of 60 m2 with two residents requires an average air exchange of 300 to 500 m3/h.
Where to install the inlet valve
There are three main options for installing a supply valve:
- Above the heat source . In this case, the outside air enters the room already heated, and its convection is also stimulated.
- At a height of 2/3 from the window , which is about two meters from the floor, and at a distance of 0.3 m from the window slope. The air mass will be directed to the ceiling, where it will mix with warm room air.
- In places with high dampness . This could be a corner of the house that has already begun to become moldy.
Wall ventilators are installed not only in the walls of private houses, but are also used to improve the supply ventilation in the apartment. They are often placed on the lower floors of apartment buildings - the best place would be the space between the window sill and the radiator.
These devices are in demand in children's institutions, where fresh air is especially important. With the help of this design, they provide an optimal microclimate in premises for keeping animals and birds.
The ventilator or supply ventilation device can be installed on any walls. The valve does not affect the structure of the walls and does not disturb the appearance of the facade
It is a mistake to think that by installing one valve you will solve the problem of lack of clean air. This is only possible if its design includes a device for forced ventilation. When this is not the case, air exchange occurs as a result of the pressure difference between indoors and outdoors.
One wall valve with a pressure drop within 10 Pa, which is observed under normal conditions, provides a flow of up to 30 mᶾ/h. This is the norm for one person.
With a greater pressure difference, the volume of air entering the room increases. Therefore, to achieve the desired effect, you will have to install another valve additionally or forced ventilation.
They also produce supply valves that are built into ventilation shafts. This is usually done in the bathroom, bathroom, kitchen. Before installing them, the traction should be tested. To do this, check the presence of air flow with the window open, using a lit match brought to the hole.
If it turns out that the existing ventilation is not functioning well, then the supply valve installed in the wall will not guarantee the flow of fresh air in the volume for which it is designed
These manual testing methods may not work during hot weather. Air heated by the summer sun becomes heavier than during cool weather. Because of this, the pressure in the ventilation duct will decrease and even with a satisfactorily operating system, the flame or sheet of paper will not be attracted.
Read more about methods for checking apartment ventilation in this article.
In addition, it is worth considering the following rules:
- If the flow of the supply valve is quite large, and its design does not provide for adjustment, you cannot install two such devices opposite each other. In winter, when ventilation operates most actively due to the inequality of pressures inside and outside, drafts will appear.
- The valve cover must fit freely in the space between the window sill and the heating device. If the radiator is semi-warm, then the air entering through the wide valve without adjustment will not have time to warm up and the temperature in the room will drop. And if the volume of incoming air is insufficient, you will have to think about additional ventilation.
When choosing where to install the valve on the facade, you need to take into account where this wall is directed. It is better when the air intake occurs not from the side of the street, where there is active traffic of vehicles, but from the yard.
Combining ventilation and air conditioning in an apartment
A city apartment can rarely boast of having extra space, so combining ventilation and air conditioning systems into a single complex
not only reduces installation costs, but also saves valuable space.
The simplest version of a ventilation and air conditioning system is a conventional air conditioner with a fresh air supply function
. It will not be able to provide full air exchange, but at least in one room there will be an influx of fresh air. It can be used in conjunction with Ventmashine ventilation units.
Another option for comfort lovers would be a duct system.
ventilation and air conditioning. It is based on a central air conditioner with the option of adding fresh air or a supply and exhaust unit with a cooler. If desired, the installation can be additionally equipped with a recuperator.
Home ventilation problems
Many people don’t know, but modern window systems have several functions, one of which is micro-ventilation mode. When turning to open the sash, the control handle should not be brought all the way down, but should be set at an angle of 45 degrees relative to the horizontal. The window does not fully open; the system weakens the pressure, creating a gap of 2-3 mm through which air can flow. Later you can return the sash to its original position.
However, such a function is a half-measure because, in fact, in this mode the window creates a draft, which is also not needed in the room.
What does such a room ventilation system with an installed supply valve provide, and how does it work?
The operating principle is based on pressure differences, but in order for the valve to provide an influx of fresh air, the internal one must be removed from the room. To do this, the house needs working exhaust ventilation. If it is not there, you need to equip it, or thoroughly clean the existing channels.
The supply valve works like this. Fresh and colder air enters the room through the system and pushes the lighter, warmer mass into the hood.
The normal functioning of such air exchange requires certain conditions:
- Full operation of the ventilation valve begins if the outside temperature is lower than +5 degrees. In summer, it requires forced exhaust with fans to operate. If internal air is not removed, the system will not work.
- It is necessary to seal the entrance door from the entrance or street so that there are no other sources of supply of cold mass.
- Between all housing premises, it is necessary to arrange free air exchange. All interior doors must be kept ajar, or a gap of 20 mm must be provided under them. Also, as an option, you can install ventilation holes in the lower part of the canvas (for a kitchen with an area of 200 cm², a bathroom with an area of 130 cm²).
In the case when you need to block the access of air, you simply need to seal the valve gap.
It is worth knowing that in winter, in severe frosts, you cannot block the channel slot; it is best to adjust it to the minimum flow. Otherwise, the ventilation gap may simply freeze over with ice and stop working.
Do-it-yourself supply ventilation installation
Supply ventilation in an apartment in a multi-storey building can be connected to a common house natural air duct system. To do this, you first need to check its condition in a simple way. A notebook sheet is applied to the ventilation hole. If the paper adheres to it and is held, then there is traction and the air duct can be used.
If the channels are clogged and clogged, you can try cleaning them. But in a large house this can be problematic. Then supply ventilation is installed using valves. They are bought in the store. How many of these parts are needed depends on the size and total area of the space. Valves come in different capacities.
The simplest models of these devices include an indoor unit, a protective grille and a connecting pipe. They are usually installed above the radiator to minimize heat loss.
- In the selected location, primary marking is carried out: the outline of the valve device is outlined.
- If it was purchased assembled, then you need to disassemble and free the body.
- Using a hammer drill, a through hole is made in the outer wall, trying to maintain a slope angle of no more than 7 degrees.
- A tube covered with insulating material is inserted into it. It should be invisible from the outside, and protrude 1 cm from the inside.
- At the points where the tube is attached, holes are drilled in the wall for dowel-nails.
- They fix the body of the supply valve, which is additionally clamped by the insulating layer of the tube.
- When the base of the device is securely fastened, the parts that were removed during disassembly are inserted into it.
- A grille is installed outside.
- After this, the operation of the supply valve is checked by opening and closing the valve.
During operation, it is necessary to disassemble and clean the valve twice a year from dirt and dust that clogs it through the cracks in the grille.
Installing fresh air ventilation in an apartment is a simple and reliable way to improve air quality and maintain a favorable microclimate.
Checking ventilation after installation
To check the functionality of the resulting installation, you need to close all doors and windows to the room. You will need a strip of paper that is not too thick. You need to bring it to the ventilation grille.
If it flutters or even sways a little, there is a flow. Instead of paper, you can use a lit candle - the flame reacts sensitively to the slightest air movement, and should die out near good ventilation.
If nothing happens, open the window or door. If after this the leaf remains at rest, the system is not working properly.
Assembled supply unit
The exhaust ducts are checked in the same way, only a whole sheet of paper is taken and brought close to the grate. With proper ventilation, the paper will “stick” to the hole.
The check must be carried out periodically, since the system becomes clogged with dust over time and its performance may noticeably decrease. This is harmful to both people and buildings.
Installation stages
The use of this type of ventilation is relevant in any room - from the bedroom to the kitchen. The number of valves can be selected in this way:
- 1 valve under each window.
- 1 valve for every 15-20 “squares” of area.
To install the ventilation valve you will need the following set of tools:
- Pencil (marker, pen).
- Hammer.
- Crown for concrete (diameter – 60 mm).
- Drill for concrete (diameter – 40 mm).
- Drill for concrete (diameter – 6 mm).
- Industrial vacuum cleaner (if not, use a broom and dustpan).
- Polyethylene (or rags) - to cover the work area.
- Thick and durable plastic garbage bag.
The product is installed above the battery so that the outlet “looks” at its center. In this case, the distance from the case (or rather, from the outlet) to the radiator must be at least 15 cm.
Drilling a hole for the air duct of the Domvent valve
Now let's look at the process step by step:
- Marking is carried out: the housing is applied to the wall in the selected location.
- Mark the center of the hole for the pipe and the holes for the fasteners.
- Using a crown with a diameter of 60 mm, the wall is drilled to a depth of 7-10 cm. In order not to litter the floor in the room, you should place a bag under the hole (or lay down film/rags).
- Using a drill with a diameter of 40 mm, the wall is drilled through.
- A plastic tube is inserted into the hole made. From the outside it should be flush with the surface of the wall, from the inside it should protrude by 7-10 mm. If necessary, the pipe should be cut to the required size.
- A heat insulator is placed on the end of the tube closest to the room. It should protrude from the hole by about 10 mm, no more. If necessary, excess is cut off.
- From the outside (from the street) a grate is glued to the tube (this will have to be done while leaning out of the window).
- Using a drill with a diameter of 6 mm, holes for fasteners are drilled.
- Fastener plugs are inserted into the holes.
- The valve body is pressed against the wall and fixed with self-tapping screws.
- An anti-mosquito net and seals are installed in the housing.
- The housing closes.
The procedure itself, with the participation of two people and the presence of the above-mentioned tool, will take about an hour on average. The cost of installing a Domvent ventilation valve by hired specialists will cost approximately 2,000 rubles.
Installation stages (video)
Care and cleaning
Over time, the use of the product leads to the fact that the seal located inside the housing gradually becomes dirty. It is recommended to clean it approximately once a year. The warm season is best suited for this, since the use of a ventilation valve is primarily relevant in cold weather.
To clean the sound absorber of the Domvent ventilation valve, you need to remove the housing cover, take out the seal and simply shake it several times to get rid of dust. Alternatively, you can do this with a vacuum cleaner (which is much more effective).
If there is too much dirt, you can wash it with a polyf under low-flowing water. In this case, the seal must be dried before installation. After cleaning, the sound absorber is installed back and covered with the housing cover.
Disassembled Domvent valve body
In addition to getting rid of dust, in winter you should pay attention to the condition of the outer grille - in severe frosts it can freeze. To solve the problem, the valve damper must be completely closed until the ice has completely melted.
Reviews about the model
It’s easy to find reviews about this model - many people have already installed it in private houses, apartments, and non-residential premises (offices, workshops, and so on).
Alexey V., 30 years old, Omsk:
About 3 years ago, supply valves were installed in our office so that noise (we are located in an area with constant construction) would not distract people from work. In winter, of course, you have to close it - despite the fact that the valve is located near the battery - the air still comes in cold.
But in the summer it is an irreplaceable thing. There is no need to open the windows, and the air conditioner is also turned on less often.
Dmitry A., 41 years old, Krasnodar:
In our country now, probably, all new buildings are immediately equipped with inlets. Last year we were choosing an apartment, probably looking at 15 options - and almost every new building had valves. The one we chose in the end turned out to be a Domvent: one in each room.
The model is not bad for its price - it has inflow adjustment and insulation (although it is more likely for show - such insulation is of little use, especially in colder latitudes). Well, it doesn’t let in much air - one valve is definitely not enough for the room.
Step-by-step instruction
Diagrams and pictures
Before installation, craftsmen recommend sketching the future ventilation system on paper . The drawing should include all dimensions and directions to make it more convenient to install the finished system and make calculations. The valves are marked with grilles and flaps.
Any scheme takes into account:
- The air flow should go from clean rooms to contaminated ones: from the bedroom, children's room, hallway to the kitchen and bathroom (how to install ventilation in the kitchen and bathroom?).
- A heated supply ventilation valve must be located in all rooms and spaces not equipped with an exhaust hood (how to install an exhaust hood?).
- The exhaust ducts must be the same size everywhere, without expansions or contractions.
Diagram of heated ventilation ducts in a private house:
Supply ventilation to the wall with heating and a supply valve in section:
A simple drawing of ventilation with check valves on air ducts:
Drawing of the location of air ducts in the apartment:
Calculations
In order for the system to work properly, it is necessary to calculate its power as accurately as possible. To do this, you will need all the parameters of the room through which the flow will move. Take into account:
- number of floors in the house;
- area of rooms;
- room layout;
- number of people living in the total area;
- availability of household appliances (computers, televisions, machines).
Calculation of the ventilation system begins with determining the air capacity , measured in cubic meters per hour. For calculations, you need a plan of the house or apartment, where the rooms and their areas are indicated.
For each, the amount of air supplied is determined.
Important
The calculation is usually carried out in accordance with the requirements of SNiP.
For example:
- for residential premises where windows do not open, the flow rate should be at least 60 m³/h per person;
- for a bedroom - at least 30 m³/h per person.
When calculating, only those people who are in the premises regularly (permanent residents or employees) are taken into account.
The next stage is the calculation of air exchange by multiplicity. This parameter shows how many times in one hour the air in the room is completely changed. It is important to provide at least one air exchange.
Installation
To install the equipment you will need the following tools:
- Hammer or diamond drill.
- Hammer or sledgehammer, screwdriver or screwdriver.
- Wrenches of different sizes and a ratchet wrench.
Stages:
- Prepare a plane for the through hole.
- Choose its dimensions, mark out the space.
- Drill a through hole with a diamond drill or hammer drill. Prime the walls of the hole.
- Insert the air duct pipe into the through hole. A housing and a fan are mounted to it.
- After installing the duct, fill all cracks around the pipe with sealant.
- Lay channels for wiring to automate the operation of the device.
- Install all remaining parts: filters, sound absorbers, temperature sensors, grille.
- Check the system for functionality.
More details about the stages of installing a ventilation structure in different types of premises, about the essential and significant nuances of ventilation installation work are described in a separate publication.
You can do fresh air ventilation with an air heating function yourself , even if you have no experience working with ventilation devices. The main thing is to act step by step, carefully prepare for work by drawing the necessary diagrams and making the correct calculations.
TOP best air handling units
The best inexpensive air handling units
These models have a low cost (we have placed devices with a price of up to 25,000 rubles in the budget mechanisms segment). Thanks to this, such ventilation units are suitable for buyers with a limited budget. Most often, such models are used for domestic use.
Domovent Solo RA1-35-9R
This model is a supply valve. The device has a low price. The manufacturer of this mechanism saved money on the control panel - it is not included in the package. The unit can be turned on using the switch located on the power cable. You can still regulate the ventilation performance using a pull cord switch. The package weight is 2.5 kilograms.
Cost: 7,500–8,500 rubles.
Domovent Solo RA1-35-9R Pros
- low price (the model is available for budget buyers);
- small dimensions;
- high degree of protection.
Minuses
- There is no control panel.
Blauberg Fresher 50 1000045121
The model of this air handling unit has a high-quality filter, which in turn is capable of fine or coarse cleaning (depending on the desire of the buyer). Products can be connected to each other in series and form a chain. The design also includes a humidity sensor and a sensor that measures the carbon dioxide content in the room.
Cost: 14,000–16,000 rubles.
Blauberg Fresher 50 1000045121 Pros
- high degree of protection;
- several operating modes;
- low cost of the model;
- energy saving.
Minuses
- Thick walls are required for installation.
Aeropac SN
This model is universal. The device can be used both in an apartment and in a residential building. This ventilation is used less often in offices. The housing of the air handling unit is very durable. The model is able to withstand falls or loads. The device can be mounted next to the battery (to increase the room temperature in winter). Installation on an air duct is also possible. The mechanism has a fairly low level of electricity consumption.
Cost: 18,000–21,000 rubles.
Aeropac SN Pros
- the model has a long cord;
- can work on filters from other manufacturers;
- strong, durable construction;
- You can make a hidden installation.
Minuses
- not controlled using the remote control.
Tion Lite
The model is small in size; among the entire Tion line, this model is the smallest. The device can be mounted into the wall at any angle - this does not affect its performance. You can also select the filtering level. In total, the model can operate at six speeds. The display of the device reflects all the most important information - full climate control is provided.
Cost: 23,000–25,000 rubles.
Tion Lite Pros
- small dimensions of the model;
- there is the possibility of hidden installation;
- heater power is 850 W;
- can be installed at any angle.
Minuses
- insufficient quality of noise reduction.
VAKIO Lumi
This model can be mounted on walls with a thickness of 15 cm or more. The model is small-sized. Ventilation has a high degree of filtration. The installation efficiently cleans the air from street dust or harmful substances. The model has three modes of operation: supply, exhaust, and can also be used as a passive valve. The device perfectly dampens noise coming from the street. The mechanisms can be combined into a joint group of 10 installations.
Cost: 20,000–22,000 rubles.
VAKIO Lumi Pros
- possibility of combining into one cluster;
- control can be carried out from me on the case or using the remote control;
- inexpensive maintenance;
- Can be installed on thin walls.
Minuses
- The kit does not include a heater (additional purchase required).
The best premium air handling units
In this section we have included air handling units with a price starting from 45,000 rubles. These mechanisms are capable of providing hundreds of square meters of space with fresh air. They usually come with many different sensors and more options available.
AIRNANNY A7 BabyCare H11
This device was created specifically to control the climate inside a children's room. The model continuously introduces fresh air into the room, monitoring the state of the environment: humidity, temperature and other indicators. The mechanism can be configured to operate automatically. The device has a robust design that can withstand mechanical damage or loads. The model is also resistant to hypothermia – it can function at a temperature of -20°C.
Cost: 47,000–49,000 rubles.
AIRNANNY A7 BabyCare H11 Pros
- withstands negative temperatures;
- favorite among ventilation for children's rooms;
- there is no sound or light alarm - nothing will interfere with the child’s sleep;
- many different options.
Minuses
- large dimensions of the model.
Tion 3s Plus
The model can immediately supply fresh air and filter it. The model perfectly cleans the air flow from dirt and dust. The device collects and displays several environmental parameters at once: it shows air temperature, humidity and carbon dioxide concentration. The product has six different speeds for operation. Maximum productivity is up to 140 cubic meters/hour. Depending on the selected power, the noise level from the installation ranges from 19–47 dB.
Cost: 50,000–53,000 rubles.
Tion 3s Plus Pros
- 6 speed modes;
- energy efficiency;
- controlled remotely (via smartphone using Bluetooth function);
- filters are easy to replace.
Minuses
- There is no control panel on the ventilation itself.
Ventmachine Satellite
The device has excellent performance, but at the same time produces a low noise level during operation. There is also the possibility of installing a model with wiring for several rooms. That is, one such installation can easily replace several cheaper options (the price of this model is quite high). The device has a long service life. Ventilation can serve its owner for decades.
Cost: 150,000–155,000 rubles.
Ventmachine Satellite Pros
- a sufficiently high coefficient of suppression of external noise (coming from the street);
- high service life;
- many functions included (fire sensor, carbon dioxide sensor);
- Durable stainless steel construction.
Minuses
- high cost of the model. Further maintenance will also cost a pretty penny.
Do-it-yourself supply valve to the wall
As soon as plastic ones are installed after dismantling the old window units, the problem of lack of oxygen arises, the room becomes stuffy, sometimes the effect of “crying windows” occurs, and mold and mildew appear in the bathroom. The problem of insufficient natural ventilation can be solved by constantly opening windows and vents, which is quite inconvenient, especially in winter. Another solution is to install a forced ventilation system. The simplest and most affordable device is a supply valve to the wall.
A ventilation valve in the wall is a simple solution for bringing fresh air into the room
Supply valve to the wall. Valve device
Among the various methods of arranging forced supply ventilation systems, there is a simple but quite effective device - installing a supply valve in the wall. Supply ventilation valves. manufactured by different manufacturers may have different appearances, but their components and basic functions remain the same.
The wall supply valve is equipped with the following elements:
- pipe (plastic cylinder) - usually its length is slightly greater than the thickness of the wall, covered inside with sound-proofing material;
grate – closes the entrance to the pipe, preventing small objects, debris and animals from entering;
Ventilation supply valve design
- filter – cleans the supply air;
- block with a decorative cover (plastic head) - equipped with a supply valve and a knob for regulating the air flow.
Such devices are easy to install with your own hands and work without connecting to an electrical outlet. Installation can be done at any time, regardless of repair work.
Helpful advice! When choosing a ventilation supply valve for the wall, you need to select a model with a suitable operating temperature, the dimensions of the plastic cylinder and the valve cover.
When choosing a wall valve, you need to take into account the thickness of the wall in which it will be installed.
If you do not take into account the dimensions of the pipe, it may turn out that its length is not enough to pass through the entire thickness of the wall. And the dimensions of the plastic cap may not allow it to fit between the window sill and the heating device for installing the supply valve into a heated wall.
Functions and main advantages of the supply valve
The main function of the supply valve is to constantly provide an influx of fresh air from the street, and the air entering through the valve will already be purified. In addition, the valve protects against noise, which is impossible with open windows: inside the plastic pipe there is a gasket made of noise-insulating material. Supplying air in cold weather will not help reduce the temperature in the room if you choose a place to install the supply valve in the wall above the heating radiator.
Insufficient air exchange in the room leads to the formation of condensation on the windows
The wall supply valve has a number of advantages compared to conventional ventilation and window valves:
- the cost of plastic windows does not increase;
- the light transmission of the window does not decrease;
- installed in any external wall;
- does not allow street noise and dust to pass through;
- operates at a fairly low temperature;
- installation time is not limited to repair work;
- operates autonomously;
- provides high-quality air exchange;
- Thanks to good thermal insulation, it prevents the formation of condensation.
The air coming from the supply valve in the cold season will be heated by the heat of the heating radiators
Installing a supply valve into a wall does not require special skills; it is easy to install and simply adjust. In apartments with insufficient heating during the cold season, you can use the damper to adjust the volume of the supplied flow or install the device near heating radiators.
The principle of operation of a supply valve to a heated wall is as follows: air from the street enters through a grille into a pipe mounted into the wall and equipped with sound insulation. Then the air is purified using a coarse filter. Due to the shape of the valve, the noise level and the speed of air flow entering directly into the room are reduced. The flow, regulated by the damper, is directed to the heating radiator and the already warm air is distributed throughout the room. Thus, with the help of a wall valve, air exchange is ensured at any time of the year, even in extreme cold.
Methods for installing a supply valve near a radiator
Scope of application of wall inlet valve
The area of use of supply valves is quite wide. They are used both in private cottages and apartments in multi-storey buildings, as well as in industrial and public buildings, preschool institutions and hospitals. In kindergartens, where it is very important to ensure good ventilation without creating drafts, the use of a supply valve is especially important.
Silent bathroom fan with check valve - device, choice, installation features. Types of exhaust fans, design, choice of bathroom fan, installation features.
Another equally important application of supply valves is their use to create the necessary microclimate in livestock and poultry farms. Installing supply valves into the wall for poultry farming plays a huge role in the climate control of such structures. Valve models are selected according to the requirements of the room and are located remotely from each other.
Natural supply and exhaust ventilation with installed ventilation valves in the walls of the house
Considering that sealed plastic windows are increasingly being installed in houses. the functions of natural ventilation, especially in Khrushchev buildings, are noticeably reduced. Ventilation using open windows leads to a significant decrease in temperature and the penetration of noise and dust from the street into the apartment.
The lack of proper ventilation can be compensated by installing fresh ventilation. In this sense, installing a fresh air ventilation valve in the wall is an effective and affordable procedure. The design of such a device allows you to regulate the air flow and heat it using a centralized heating system. In order to ensure the necessary air exchange, it is recommended to install a valve in each room.
Unlike the supply valve, the exhaust valve in the wall provides for the presence of ventilation channels in the room. Typically, such ventilation shafts are located in the walls of technical rooms (kitchen, bathroom, bathroom). If you install an exhaust valve in these rooms, it will be enough to circulate air throughout the entire apartment or house. It is only necessary to connect the valve device to the ventilation duct and secure the grille.
Exhaust ventilation valve with fan will ensure a healthy microclimate in the bathroom
Distinctive characteristics
The modern market offers different types of supply ventilation valves into the wall, providing additional supply of fresh air.
The design of the valve device is simple, so different models do not have significant differences. Typically, the length and material of the pipe may vary. All valves are necessarily equipped with air flow control, providing up to 40 m³ of inflow per hour, which is quite enough to provide oxygen.
Arrangement of natural supply and exhaust ventilation in a private house and multi-storey building
Manufacturers provide valves with a number of additional functions, including device control. The ability to regulate allows you to select the optimal volume of incoming air under different room conditions. For example, if laundry is being dried in the apartment or food is being cooked on a gas stove. the room needs more fresh air.
The control system can be automatic or mechanical. In the first case, depending on the temperature, pressure and humidity of the air, the automation itself adjusts the desired mode, in the second, this is done manually. Different models of inlet valves can have different diameters and provide different inflow volumes. You can purchase a supply valve by spending from $30 to $100, and the higher the cost, the greater the likelihood that it will have automatic control.
Ventilation valve with manual air supply control
If you intend to purchase this or that model, read the reviews and accessories of the supply valve to the wall (reviews about the operation of the device can be found on the Internet).
Features of installing a supply valve into a wall, video instructions
Before installing the valve, you should check the draft of natural ventilation in the apartment. To ensure effective operation of mechanical ventilation, it is necessary that the doors in the rooms have a small gap (up to 3 cm) between the floor and the leaf. If the doors are installed without an appropriate gap, an aesthetically pleasing ventilation grille can be built into the lower part of the door leaf.
To ensure effective ventilation of rooms, ventilation holes are installed in interior doors
It is recommended to choose a place for the ventilation valve under the windowsill. In this case, the air entering through the valve will immediately be warmed up by the central heating battery and disperse throughout the room while already warm. But you can place the valve in any other place on the outer wall, since the appearance of the device is quite aesthetic.
A through hole with a diameter of 40 mm is installed in the wall. A pipe is installed in this hole and covered with a grill on the outside of the wall. It is recommended to make a slight slope of the pipe towards the outside to prevent moisture from entering the device. Insulation is placed in the gaps between the wall and the pipe. Each supply valve kit comes with instructions and an assembly diagram. After the valve is assembled, a plastic head with an adjustment knob is installed. The valve is ready for use!
Helpful advice! When planning to mount the supply valve into the wall, carefully check the installation location for hidden electrical wiring.
It is recommended to install the supply ventilation valve for apartments on the upper floors on a loggia or balcony.
Do-it-yourself installation of a supply valve in the wall
To install a supply valve in a wall with your own hands, you will need the following tools:
- powerful hammer drill, drill rod with a crown - for drilling a through hole in a load-bearing wall. The diameter of the crown is selected according to the hole;
- yardstick;
- construction level;
- figured screwdriver, construction knife.
Drilling a hole for installing a ventilation valve in the wall
Before you start drilling a hole, you need to make a marking. The hole is drilled with a slight slope to the outside. When the hole is ready, the valve pipe is inserted into it. A prerequisite is to wrap the pipe with insulation. The pipe is installed from the outside flush with the wall, and from the side of the room - with a small protrusion (about 1 cm). All remaining gaps between the pipe and the wall are filled with foam.
Helpful advice! If the external wall where the ventilation valve is planned to be installed faces a roadway or industrial area, installation on it is not recommended.
The principle of installing a ventilation valve in a house with a ventilated facade
After installing the pipe from the outside, it is closed with a protective grille with blinds so as to prevent precipitation from entering it. Next, the filter rings included in the valve kit are inserted, the housing is applied, and the device cover is secured to the wall using dowels and screws.
When the valve is installed correctly, the air flow is adjusted by opening or turning the damper. During operation, it is necessary to change or clean the filters twice a year.
For effective air exchange, it is necessary to monitor the cleanliness of the ventilation grille and periodically check the draft in the ventilation duct
If desired, it is possible to install a homemade supply valve in the wall, which is mounted in the same way and can be equipped with an additional fan for more efficient air exchange. Examples of assembling homemade valve designs can be found on the Internet.
Thus, with the help of an inexpensive and effective device, high-quality air exchange is ensured, eliminating street noise and dust.
Features of the supply valve to the wall
The modern design of window systems made of plastic and wood strives to completely alienate the street space from a comfortable home, protecting it from noise, air and other influences. This disrupts the overall air circulation inside the room.
Soviet construction standards implied that natural ventilation would be supplemented by inflow from cracks and other openings in windows and balcony doors. Modern standards have completely forgotten about the natural ventilation of rooms, more often they save on this, which leads to a lack of fresh air in the room, diseases of the respiratory tract of the human body, as well as unpleasant phenomena with mold fungi on the walls and windows.
In part, under certain conditions, a supply air ventilation system can save you. It consists of a supply valve built into the wall, which brings fresh outside air into the room.
Outwardly, it represents a pipe equipped with a number of filtering elements and soundproofing materials, which are laid through the wall and covered from the outside with a ventilation grille, and enters the room as a mushroom-shaped nozzle with a spray grille.
Function and Application
The main function is the supply of air from the street to remove the negative phenomena that have arisen due to the disorganization of natural ventilation in the apartment, as well as the deterioration of its effect when installing plastic windows. The latter also require significant air exchange with the street.
Otherwise, there will be a constant problem with condensation on their surface and the formation of fungus at the joints, where the flowing water from the glass unit will constantly flow. The supply valve, together with the main ventilation, will create the necessary air circulation into the room and remove all of the above negative phenomena.
If we talk about other negative phenomena with windows, they require constant ventilation. In winter, an open window can quickly cool down the room, which again affects the health of the residents. The supply system does not have such a large opening; the air entering the room has time to warm up.
Bad odors and carbon dioxide are also removed, but only through the exhaust system of the home ventilation. This is true for kitchens without an installed exhaust system above the stove. Also in the pantry, where there is no ventilation at all.
Device
The valve consists of many elements. The main one is the pipe. It acts as a base into which all other units are mounted, and it also acts as the main air intake channel. On the outside of the wall there are two air distributors equipped with a grille and protection against precipitation getting inside the pipe.
On the inside, already in the room space, noise and heat insulation materials, an air filter, and an incoming air flow regulator in the form of a mushroom or block sticking out of the wall are laid through a tube, which is the only aesthetic drawback. A wall supply valve has much better noise and thermal protection than similar systems installed on windows.
The operating power of the valve depends on the diameter of the pipe that is placed at its base. They are capable of passing from 13 to 40 cubic meters of air per hour. The control system allows you to deactivate it completely or enable one of several air supply modes. Modes are switched by switching a toggle switch, a wheel, and also a rope regulator if the valve is located under the ceiling.
Design and dimensions of the KIV Quadro supply valve
Species and type diversity
Species diversity is very narrow. Thus, different variations include the size of the main cylinder, the type and level of insulation from noise and cold, and the filter class according to the main type of pollutant. Also technical parameters of air passage into the room and the presence of regulation of the flow of air passed through.
To this variety you can connect a number of ventilators with forced air intake from the street. They install filters with a greater ability to allow the outside atmosphere to pass into the room. The indoor unit takes up more space in the room, much like a small radiator or air conditioner unit. An installed fan can increase air intake to 100–120 cubic meters.
How to choose where to stop
When choosing, you should pay attention to the length and diameter of the pipe, so that its first dimension is enough to fit the thickness of your walls, and the second dimension is enough to allow access to the required amount of air.
A significant role is played by the presence of air flow adjustment, the presence of several stages of its switching to create a comfortable movement of atmospheric masses into the room. It is especially worth noting the valve outlet, which must be protected from moisture and a grille with a mosquito net to prevent insects from entering through it.
Type and class of noise insulation to remove street noise, especially for buildings located along the red line and near the roadways of large streets, highways and any other roads. The presence of thermal insulation is also important; without it, the main cylinder and the wall will freeze, supercooled air, excess moisture and other troubles will penetrate into the room.
The filter plays an equally important role; its ability to purify incoming air masses from various pollutants improves the quality of the indoor microclimate.
Wall supply valve KIV 125
Do-it-yourself supply ventilation system and its installation
Installation of the supply valve
Making such a system with your own hands is quite difficult, but possible. Here it is worth acquiring some engineering skills to organize all the work.
It is based on a simple pipe made of metal or plastic, a simpler option is a duct for exhaust from air conditioning ducts, and the like. It is made of metal and painted, completely ready for use. We select the length according to the thickness of the wall.
From the street we install a ventilation grill with an installed mesh, insulate the internal walls of a homemade valve, at the entrance to the room you can make the damper itself with adjustment, and if desired, install a fan for forced air movement.
The disadvantages in this system will be obvious. Poor insulation from extraneous sounds, the absence of a filter reduces the quality of the incoming air and other negative phenomena that have already been mentioned more than once.
Purchasing it will give you the opportunity to install it yourself. To do this, you need a hammer drill to make the required hole in the wall. Screwdriver for fixing individual elements to the wall. Polyurethane foam and sealant for sealing formed cracks. For wooden walls, tools and other materials are used that are oriented towards working with them.
The general progress of work looks like this. A place is marked for the hole for the valve; while making it, you need to take a slight slope from the street; this will help protect it from the formation of condensation inside the cylinder. Next, install the pipe and the grille on the outside with all the additions. The next step is to attach the valve itself to the pipe and the wall of the room, and then the filter with the regulator. The last step is to seal the resulting cracks with drops, foam or sealant.
But you should not refuse the services of installers of such forced ventilation systems. Specialists will come to you and quickly install your purchase with maximum aesthetics and accuracy. And they don't charge that much for their work. It is estimated at about one thousand and a half.
Purchase price
Prices for different subspecies differ significantly. The simplest supply system can cost you on average about two thousand rubles. The next product line with a more powerful inflow and simpler adjustments will cost about three and a half thousand.
The most expensive valve with maximum inflow, equipped with an automatic manual control system, will be valued at five thousand rubles or more.
Ventilators equipped with a forced ventilation unit should be placed in a separate price category. Their cost reaches fifteen twenty thousand. The assessment of installing such a system increases significantly.
Reviews from such ventilation are quite enthusiastic. People's main problem with plastic windows – condensation – disappears. A sufficient amount of freshness from the street enters the room. The filter removes unpleasant odors well. But it’s worth paying attention to the quick tips.
Blitz tips
- Before installing the ventilator, check the house ventilation and exhaust hood. If they are faulty, the supply system becomes completely useless.
- Place the valve in the right place near the window and radiator.
- Adjustment is necessary to set a comfortable ventilation flow.
- Leave the installation to the experts. They have a full range of professional equipment.
- How to plaster a wall with your own hands How to plaster walls with your own hands How and with what to plaster walls and is it even necessary...
- How to decorate a wall with photographs with your own hands? For those who are thinking about interesting wall decor using their own photographs, this article can...
- Replacing an socket with your own hands Replacing an socket is necessary in cases when the old one stops performing its functions or is simply broken.…
- Installation of a split system with your own hands (instructions) Stages of installing a split system with your own hands Outdoor unit of the air conditioner
Additional Tips
Advice one. When installing a fan in the bathroom, it is advisable to purchase a system with a humidity sensor. As soon as the air humidity level exceeds the permissible norm, the same fan will automatically start.
Tip two. An exhaust system with a timer is ideal for a toilet. First, the unit starts, and after a while it automatically turns off.
Tip three. For the kitchen, it is advisable to install a fan equipped with a mesh. This mesh will protect the room:
- from the penetration of insects into it;
- from the ingress of debris from the general ventilation system.
Periodically, the mesh should be removed and washed with plain water. This is done very easily.
Tip four. Ventilation systems with useful additions can be difficult to purchase. In addition, they are more expensive, and the family is not always able to allocate additional funds to purchase them. You can choose the regular model.
For example, a fan in a bathroom is connected directly to a light switch. A person turns on the light - the fan works, turns it off - the fan switches on.
Tip five. The fan is installed in the manner specified in the instructions. This is usually done simply: the body and other parts are attached to the wall using self-tapping screws.
Tip six. The efficiency of air exchange can be increased by creating a small gap between the bottom edge of the interior door and the floor. The height of the gap is up to 1.5 cm. A mesh or decorative perforated panel will help to mask the gaps.
On a note. It makes sense to install these gaps everywhere except the bathroom.
Using the recommendations given here, the apartment owner will be able to arrange supply and exhaust ventilation independently without much effort. Then the air exchange in his home will become effective.
Prices for ventilation units
Video: Simple do-it-yourself supply ventilation for an apartment:
(No Ratings Yet)
How to clean the channel
Each vent is checked individually. If the paper behaves differently, it means that contaminants that are causing the passage to be blocked have accumulated in the inner boxes.
To eliminate this nuisance, just stock up on a regular dish brush. This is a brush on a thin, flexible cable. This “chimney sweep” is used to pass through the ventilation duct.
Cleaning the ventilation in the apartment
Next you need to remove the remaining debris. A vacuum cleaner with a long tube is suitable for this purpose. You can insert a regular flexible watering hose to pass it higher into the system. The prepared structure must be sufficiently rigid and flexible.
If there are no changes
Let's say that all the actions taken did not lead to the expected result. Then we can assume that the problem originated somewhere in the main ventilation passage. But it can also be cleaned.
Take a ruff, only a larger one. Other equipment may be needed, such as:
- fiberglass rod;
- hook;
- rod (metal, wood), etc.
It needs to be taken into account. All kinds of living creatures live in such canals, and not just cockroaches. Wasps, hornets, other dangerous insects, as well as bats can live there. So when cleaning the main ventilation duct, you should be extremely careful and careful.
This significant nuance should also be taken into account by the apartment owner. Typically, the performance of the ventilation system in apartment buildings is monitored by a special service (the building is on its balance sheet) or directly by the homeowner. So in most cases, residents are not recommended and even prohibited from climbing into the main ventilation duct on their own.
If such a problem is discovered, it is better to immediately submit an application to the responsible contractor. Then you won’t have to do extra work that the apartment owner is not obliged to do, and participate in unpleasant proceedings.
In addition, the problem may be more serious. The exhaust air may not only not leave the apartment, but also enter it from the general system. The reason may lie:
- or in the installation of powerful exhaust systems by residents of other apartments (the air outlet from an apartment without a fan is blocked);
- or in improper air circulation during the hot season (heated street air masses enter the cool ventilation passage, preventing the exit of exhaust air flows);
- or in the destruction of the upper part of the central ventilation shaft (the wind blows into it).
Only a professional can find out the true cause of improper air circulation, if the system is not clogged.