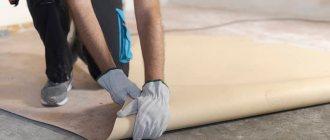
Preparing the base for laminate flooring
Before you figure out how to lay laminate flooring on a concrete floor, you need to study general information about the material: what it consists of, how it reacts to various operating conditions, what requirements are put forward for the base on which it will be mounted, etc. This knowledge is important, since without it it is difficult to understand and comply with the conditions for laying laminate flooring set out in SNiP and consolidated rules (SP).
Laminate, as a material, is a sandwich of several different components. The top layer consists of a laminating film that protects the slats from mechanical stress (abrasion) and ultraviolet radiation, the second is patterned paper coated with a layer of acrylic or melamine resin, the third layer, also known as the body of the laminate, consists of wood fibers (HDF) pressed under high pressure. .
The fourth, protective, also the bottom layer of the floor covering, can be made of paraffin-impregnated paper, plastic or a layer of melamine resin. What a laminate looks like layer by layer can be clearly seen in the figure “Layer-by-layer structure of a laminate.”
Layer structure of laminate.
The laminate panels are connected to each other with special locks, which is the weakest point of the entire floor made of this material.
Connection of slats with Lock.
They are highly hygroscopic and easily crumble under sudden dynamic influence. Hence the requirements for the base on which the floor is mounted. It should be:
- Durable. A base that bends under the weight of furniture or several people in one place will instantly break the locking connections of the slats;
- Smooth. Any unevenness, even a 2 mm bump, will push part of the lamella body (about 1 mm high) outward after a few months of use of the floor. After some time, this point will be erased and the floor will have to be repaired (if the locks allow this);
- Dry. Pressed fibreboard has the highest degree of hygroscopicity. If the surfaces are protected by manufacturers from moisture penetration, then the interlocking joints are open. When installing laminate flooring on a poorly dried base, even standard waterproofing does not help. Additional measures are needed to protect the lamella locks from concrete screed condensation.
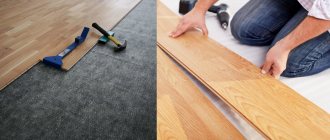
Laying laminate flooring on a concrete floor with a backing begins with preparatory work. This is a series of sequentially performed operations.
1. Furniture is removed from the premises, all household appliances are removed, and the baseboard is dismantled.
2. Use a hammer drill, hammer and chisel to break the old screed. In this case, you should take care of garbage bags in advance so as not to spread dirt throughout the apartment. It will not be possible to throw the bags into containers - the management company will not allow it (unless we are talking about a new building, where a special container for construction waste is placed in the first year after the house is commissioned). To transport them to the landfill, you will need to order a truck.
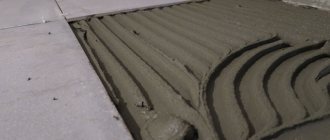
3. The concrete floor freed from the screed is swept and then vacuumed. The remains of the screed are removed with a chisel.
4. The concrete is carefully inspected. Detected chips, peeling and cracks are repaired with “cement laitance” and repair mortar.
Attention: Preparing the base floor for a floor screed with step-by-step instructions can be found in the work “Preparing the base for a floor screed”.
5. Measurements of the room are taken to determine the height difference. A horizon line is drawn on the wall, and then, after measuring the floor height, a screed line. Lines of beacons are determined and applied to the floor. The calculation methodology is described in detail in the work “How to check the floor level in an apartment yourself?”
6. A damper tape is stapled to the wall, and then the beacons are installed. The jobs can be swapped, but when installing beacons, the profiles should not rest against the wall - you need to leave space for the tape. If the beacons are planned to be mounted on piles of mortar, the tape will still have to be attached first - according to the technology, the piles of mortar must lie flush against the wall.
Practice shows that the most convenient way to install beacons is to install them on self-tapping screws. They are screwed into dowels along the entire line of the lighthouse and adjusted in height using a screwdriver, a rule and a level. You can then unscrew them and seal the holes with mortar. It is advisable to screw screws into the corners, onto the tie line, and stretch a fishing line (any string) diagonally to check the height of the tie in the middle of the room. All work on installing beacons is outlined step by step in the work “How to install beacons for floor screed?”
7. Sound and waterproofing of the base are mandatory if a laminate floor is planned. They can be done before pouring the screed; this technology is called “floating screed” or on top of the screed - “floating floor”. Waterproofing can be carried out with special solutions (liquid bitumen, various mastics), roll materials and simple polyethylene film. The main thing to remember when using film or roll materials:
- waterproofing material must be installed on the wall;
- sheets of film or materials should be laid overlapping - overlap each other by 10-15 cm;
- joints (seams) are taped.
Detailed installation technology, types of waterproofing materials, their advantages and disadvantages, prices as of the beginning of 2021 are given in the work “Waterproofing floors under laminate.”
Sound insulation allows you to cut off structural noise from the laminate, which not only conducts it well, but also amplifies it (resonates).
Attention: in some cases, sound insulation cannot be carried out independently as a separate technological operation. It is combined with laying the substrate when the latter has a sufficient level of noise absorption.
The sheets of soundproofing material are laid end-to-end, the seams must be sealed with construction tape. A large selection of materials and an even wider range of prices make it difficult to choose soundproofing elements. To better navigate this diversity, we advise you to look at the article “Soundproofing the floor in an apartment under a screed with your own hands.”
8. The preparatory work is completed with the installation of a screed - with its help, all defects in the concrete floor are leveled. If the height of the room allows, it is made dry, from expanded clay or using plywood sheets (it is also possible, but it is more expensive, and from OSB). For low ceilings, the screed is poured either from a semi-dry mortar (it contains only 1/3 water) or wet (ordinary cement-sand mortar in a ratio of 1:3).
You can lighten the weight of a dry or wet screed using expanded clay when it is used as a filler. The screed must be carried out according to the beacons. In their absence, you will have to use self-leveling floors (self-leveling mixtures) to level the surface of the base.
Attention: for those who are interested in these issues, the technology of floor screed with your own hands, its types, advantages and disadvantages can be viewed on the website in a series of articles on this topic: “How to make a floor screed with expanded clay?”, “Technology of wet floor screed with expanded clay” , “Dry floor screed with expanded clay.”
The effect of an uneven base on the service life of the floor
The connecting locks offered by laminate manufacturers require a very level subfloor. Laminate flooring cannot be installed on an uneven surface. This point is taken into account by both SNiP and the set of construction rules (SP 29.13330.2011). They state that the height difference cannot exceed 2 mm along the length of the room in all directions. Also, a slope of more than 20 mm per room is not allowed, and in a short room - no more than 0.2% of its length, that is, significantly less.
If these rules are not followed, the locks of the laminate panels are quickly destroyed. So, when walking, the floor bends only 1 mm, which is invisible to the eye, but the locks sense it. If the deflection is a little greater, they begin to slowly collapse. The same thing happens under the weight of heavy furniture (bed, closet) - constant pressure on the locking joint destroys it over time. The first sign of lock failure is a creaking sound when walking.
However, as in any matter, there are exceptions:
- The height difference is only important when installing furniture. If it is not planned to be placed (corridor), such a requirement can be ignored;
- For lamella locks, the presence of tubercles and pits is scary. If the floor does not have rare changes, it is wavy, such holes and bumps will not harm it and it will withstand its entire service life.
The worst underlay for laminate is a roll of extruded polystyrene
Having written such a title, I feel awkward describing a low-quality substrate. After all, sellers do not have a bad product and you will have to dispute it with numerous commentators.
However, I encounter it quite regularly when laying and I would like to protect readers from such a purchase. Let me explain my position. Each insulation has advantages and disadvantages; this product has no advantages, except for its relatively low price.
Rolled sound insulation for the floor under a laminate made of extruded polystyrene foam is the most uncomfortable underlay I have come across in my work. The complexity of the flooring lies in the constant rolling of the roll and the fragility of the material.
When the canvas is rolled out, the cut end is bent. You have to press down with improvised objects. The curl is so high that it moves the hammer on the wooden handle. The fragility of polystyrene foam guarantees broken edges, which, however, can be glued with tape. But it will look like a collective farm.
The negative qualities of this chemical industry product include its thickness - it is only 2 mm. I've heard reviews that XPS insulation is better than foam insulation and maintains a stable thickness longer. I deeply doubt this. In my work, I have been involved in the dismantling of floor coverings with a laid polystyrene foam underlay. She became thin, like a sheet of paper. But I came across one in good condition. Apparently, the suitability of the old lining depends on the intensity of foot traffic, the amount of furniture in the room, and the evenness of the floor.
Once, while laying such insulation in a hairdressing salon, I asked: “Why did you buy an extruded polystyrene backing?” To which came the following response: “This lining has fire safety certificates.”
There is probably an incorrect interpretation of the facts here. Since any substrate has a certificate of fire compliance with standards. The conclusion is quite vague, would you agree!? The shock absorption of XPS in terms of flammability class - G4 and smoke generation - D3 is the same as polyethylene foam bedding.
Calculation of material requirements
Any construction work must begin with the acquisition of building materials. Every person who likes to do everything on their own can calculate the amount of material. The floor area is located. The resulting figure increases by:
- 10% on trimmings for direct laying, if the panels are laid along the room,
- 12-15%, if across,
- 20% if the lamella is laid in a herringbone or diagonal pattern,
- 30% when installing with a pattern.
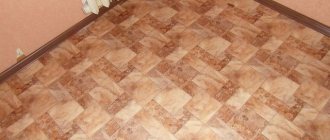
Laying laminate diagonally.
We divide the result obtained by the area of the lamellas in the package (must be indicated by the manufacturer) and buy the required quantity.
Technology for laying laminate flooring on a concrete base
DIY laminate installation
If you are allergic to wool or synthetic coverings, then you should avoid using carpets. In this case, you need to lay laminate flooring on a concrete floor. It is environmentally friendly and practically does not emit dust and volatile substances.
Laminate flooring is very easy and quick to install. It is available in a wide range of colors and is shock and abrasion resistant. Unlike parquet, it does not need to be sanded or varnished.
The service life of laminate flooring from well-known global manufacturers reaches 20 years. Cheaper coatings will last from 3 to 5 years.
Depending on the room in which the laminate will be used, its selection is made. For the hallway, you can use a laminate that is more resistant to abrasion. Small abrasive particles (sand, dirt from shoes) can leave scratches on the coating
Laminate with class 23 has these properties. This class is also perfect for the kitchen. Class 21 laminate flooring can be installed in bedrooms, libraries, and offices.
In such rooms, as a rule, there is a low load on the coating. Children's rooms and living rooms will require class 22 coverage.
Laying the underlay on the floor
As noted above, laying laminate flooring can be done with your own hands. To do this, you need to calculate the material, purchase it and assemble a set of tools for the job.
Material calculation
Laminate flooring is easy to calculate. To do this, multiply the length of the room by its width and get the area that needs to be covered. Laminate flooring is sold by the square meter at any building materials store.
Important to remember! Having calculated how many square meters of laminate are needed, add to this number 10% (when laying using the traditional method) or 20% (when laying using the diagonal method).
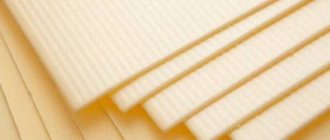
A base will be required for installation. It is made of foamed polypropylene and serves as a shock absorber and sound insulation. Its thickness is from 2mm to 4mm. The most ideal material for laminate flooring is balsa wood.
Cork under the laminate 3mm thick is a very good insulation and sound insulator. True, it costs more than polypropylene. Now you know what to put under the laminate and the choice is yours.
Joining the second laminate plate
The baseboard is calculated according to the length of the perimeter of the room. If there are no protruding pelasters and bay windows, then you will need 4 internal corners and two plugs (they are placed on the baseboard near the door frame).
Tools
To complete the work you will need:
- jigsaw;
- measuring angle;
- measuring tape;
- pencil or marker.
- hammer;
- electric drill and concrete drill with a diameter of 6mm.
Below are step-by-step instructions for installing laminate flooring using the traditional method. Once you familiarize yourself with it, you will easily complete this work.
Step 1
The screed must be perfectly level. The permissible difference is 1 mm per 2 linear meters. Leveling a concrete floor under a laminate can be done using self-leveling mixtures.
Before laying laminate flooring, it is necessary to prepare the base. The floor is cleaned dry with a spatula, and the protruding parts of the cement-sand screed are removed. If necessary, they can be knocked down with a hammer and chisel.
After this, the base of the floor is thoroughly swept. It is best to do a wet cleaning after cleaning the debris and let the floor dry.
Traditional laminate flooring layout
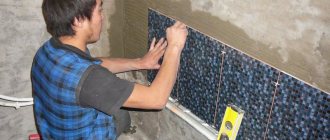
Laying laminate flooring requires careful preparation of the subfloor. Next, you will learn how to lay underlay under laminate flooring.
Step 2
Regardless of the installation method (traditional rectangular or diagonal), it is necessary to lay a substrate before performing work.
The backing for the laminate is made from foamed polypropylene and acts as a shock absorber for the load on the coating, as well as sound insulation. It is laid along the wall. The strips are laid without overlap and joined together with adhesive tape (wide tape or masking tape).
The diagonal laying method is used if it is necessary to visually expand the room. In our example, we will look at the traditional (rectangular) method of laying laminate flooring.
The first strip is laid along the long wall. Before work, be sure to prepare wooden dies from plywood or pieces of laminate approximately 15 mm thick.
We cut the baseboard at an angle of 46 degrees using a miter box
They are inserted between the laminate strips of the first strip and the wall. The installation step of the dies is 1 meter. This gap is necessary to compensate for the linear expansion of the coating when it is heated. If it is not there, the laminate may deform when heated.
In the future, a gap of 15 mm between the walls and the laminate should be around the entire perimeter of the laid coating. After installation, it will be covered with a plinth. The preparation of the concrete floor for laminate flooring is complete.
Step 3
It is important to know! Laminate sheets are always laid parallel to the light source. Open the package with the laminate, take out the first plate and place it in the right corner of the room opposite from the exit.
The laminate plates are joined by end and longitudinal locks (tongue and tongue joint) located on the plate itself. The first strip is joined only at the end locks. Insert a wooden block between the wall and the plate to provide a gap.
The second and subsequent strips are laid in staggered intervals. To put it simply, laying the plates should resemble brickwork. In this case, the coating will last a long time and will be very durable at the joints.
When you get to the wall, you will need to trim the plate. The required size is marked using a tape measure and a marker (pencil) and cut with a jigsaw. Laminate cuts very quickly and evenly. The main thing is that the surface does not need to be sanded.
Corners - templates for plinths
The second strip is laid starting from the pre-cut plate. Next, joining is carried out using end and longitudinal locks. To do this, first join the end lock, and then, slightly lifting the joined plate, insert it into the longitudinal lock in front of the plate lying in front.
Sometimes impregnation for laminate flooring is used to improve moisture resistance. It is filled into the locks and seals the joints. However, over time, impregnation can seep through the seams and dirt sticks to it.
For a better connection, the plate can be tapped along the longitudinal end with a hammer. First, place a board or piece of laminate at the impact site. When the plate is seated in the lock, a click occurs.
Scheme for laying laminate flooring in the traditional way
When using the diagonal laying method, the technology remains virtually unchanged. However, there is greater material consumption caused by trimming the plates.
When performing work, as noted earlier, it is necessary to maintain a gap between the coating and the walls of approximately 15 mm. However, when approaching the doorway, in the places where the door trims (cashing) join, it is necessary to trim the plate so that the gap between the laminate and the wall remains approximately 3 mm. Otherwise the platband will not block it.
After the last laminate plate has been laid, installation of the baseboard begins. To do this, you need to take one plinth and cut it using a miter box at an angle of 45 degrees. The plinth is placed in the guide groove and cut at an angle of 45 degrees using a hacksaw.
Installing skirting boards on laminate can be done in different ways. In our version, we previously prepared a plinth with a groove for a dowel-shaped lock. Therefore, we drilled holes in the wall with a concrete drill with a diameter of 6 mm along the perimeter of the floor to a height equal to half the baseboard in increments of 0.5 meters.
Apply the template for the holes. By inserting plastic dowels into the grooves of the plinth strips and distributing them among the holes, you just need to press them firmly against the wall. You can use a wooden block to tap the baseboard with a hammer.
To decorate the corners, use decorative internal and external corners for the plinth (they are included with the plinth at the customer’s request). Before installing the corners, lubricate them with glue at the joints with the baseboard slats. After installing the baseboard, laying the laminate is completed.
Coating care
Once the laminate flooring is finished, the question arises, how to care for it? Caring for laminate flooring in an apartment is very simple. The surface can be wiped with a damp cloth.
Dowel inserted into the groove for the baseboard
You can use special detergents for laminate flooring. Their use does not leave streaks and adds shine to the coating. What should I use to polish laminate flooring? Like furniture, the coating can be rubbed with a special polish. After this, the coating will become more slippery.
It is important to know! When cleaning laminate flooring wet, do not pour water on it. The rag should wring out well. A large amount of moisture will cause deformation of the coating. A vacuum cleaner is ideal for wet cleaning of laminate flooring.
Substrate - functions and installation method
How to properly lay laminate flooring on a concrete floor when the base is prepared in accordance with the consolidated rules (SP 29.13330.2011)? Don’t rush and perform one more, intermediate, technological operation - lay a substrate under the laminate floor.
The underlay is the most important element in the entire construction of a laminate floor. She:
- eliminates small differences in height of the concrete screed;
- acts as a shock absorber under static and dynamic loads on the laminate;
- provides additional sound insulation;
- retains heat.
Treated with waterproofing mixtures, the substrate also serves as a moisture-protective layer. If not, then it is necessary to lay a polyethylene film underneath to protect the floor itself from condensation moisture from the concrete screed. Work, as a rule, is carried out in parallel with the installation of the floor. The laminate is laid on the rolled out sheet of backing. After the substrate is completely filled, its second row is laid, etc.
The rating of various substrates, their pros and cons, stage-by-stage installation technology, as well as the cost of the most popular materials in 2020 are given in the article “Substrate for laminate.”
Materials and calculations
When choosing a laminate, you need to focus on the thickness of the sheets. It determines the nature of the substrate and the number of thresholds.
Factors to be taken into account include:
- wear resistance of panels;
- their resistance to mechanical damage and scratches;
- moisture resistance;
- environmental friendliness;
- compatibility of slabs with the style of the apartment;
- price.
The amount of base material is calculated based on the total area and increased by 10%. This solves the problem of pruning and possible defects. For independent finishing of rooms with complex geometry, the volumes are increased by 15-20%, depending on the number of bends.
Substrate
The rules for laying laminate flooring require the use of a backing.
Without it, you cannot count on the durability of the floor covering.
The substrate eliminates micro-irregularities, promotes hydro-, heat- and sound insulation of rooms, and prevents friction of the panels with the base.
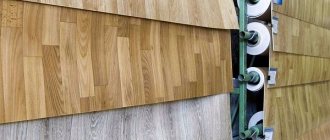
The following coatings are used:
- Foamed polyethylene. This type of substrate is the most economical. The sheets are easily laid and connected to each other using tape. The roll version is fixed to the base without the use of adhesives. When installing a “warm floor” system under a laminate, Isolon is used - a foil version of the foam substrate, designed to reflect the generated heat towards the room.
- More durable polystyrene foam, which has reliable sound and heat insulation characteristics. The thickness of the sheets is 3-5 mm. They are not fixed to the floor, but are sometimes secured with construction tape.
- Cork is a 100% natural, environmentally friendly coating. This type of underlay guarantees the long life of the laminate. It is not subject to shrinkage, can withstand high loads, and has good sound insulation properties. Special impregnation prevents the spread of mold and mildew.
Types of substrates for laminate.
The features of the material include the cost and the need to use additional vapor barriers during installation. Cork substrate is produced in rolls or sheets 2-4 mm thick.
Lay it on a thoroughly cleaned floor, covered with a dense vapor barrier film. To fix the material, special construction adhesive is used. The procedure is carried out according to the principle of gluing wallpaper, i.e., excess sticky mass is squeezed out from under the sheets with a plastic spatula.
Additional material
This category includes numerous connection profiles: transition, straight, corner and threshold. They all have different parameters and fastenings, so you should decide in advance on the estimated size of the coating. In addition, you need to select skirting boards. It is best to purchase plastic parts in the form of a box, which can be used to carry an electrical or television cable.
Laminate installation
How to lay laminate flooring on a concrete floor? The technology for laying laminate flooring on concrete floors has evolved over the years. Its nuances are known to every master.
- You need to buy laminate from one manufacturer, and you should pay attention to the type of lock. It can be different even in packages produced in the same year.
- Work on assembling the floor must begin after the lamellas, freed from the packaging film, have lain for 2-3 days where they will be installed. During this time, they will change their size, adjusting to the temperature and humidity of the apartment.
- Laminate flooring should be laid on well-dried concrete. Its humidity can be determined using a moisture meter. But in private construction it is not always available. The solution is simple: 1 m2 of plastic film is glued to the concrete with tape. If condensation appears on it in the morning, the base must be dried.
- The spines of the lamellas of the first row are cut off. They are laid with the cut side facing the wall.
- Between the first row of the laminate and the wall, at a distance of half a meter, gaskets with a thickness of 10-12 mm are installed to form a technological gap that compensates for the expansion of the flooring under the influence of humidity and temperature. Many builders use purchased wedges for this. Spacers are also placed at the beginning of each row (when connecting the ends of the lamellas, padding is needed so that the floor panel will rest against the wall and remove the technological gap).
Spacer wedges.
- Regulatory documents allow minor changes in the color tone of the laminate. In purchased packs, the color of the lamellas may differ. To avoid noticeable color spots on the floor, you need to take material from different packs one by one.
- In adjacent rows, the end connections of the lamellas should not coincide. They have weaker locks and break when the load increases. Therefore, laminate panels are laid in the following sequence:
- the first line is a whole lamella;
- 2nd line - lamella cut by 1/3;
- Line 3 - panel cut by 2/3.
Laying the lamellas according to this pattern is clearly shown in the photo.
Sometimes they practice cutting not 1/3 of the lamella, but half of it. In principle, except for the pattern of laying the floor, nothing changes from this.
8. Installation should begin from the window. But if the decorative overlays on the door frame are not removed, but are cut, then installation should begin from the wall with the door, since it will not be possible to slide the last laminate panel under the overlay.
Threshold device.
Instructions for laying laminate flooring
How to lay laminate flooring on a concrete floor using the direct method? Technology step by step:
- The substrate is laid in one row. If this is done across the entire room at once, then you will need to walk on it, which leads to deformation that is difficult to restore. The floor assembly begins here. Note that many experts lay three rows of lamellas at once;
- Between the first line of lamellas and the wall, gaskets are installed (thickness - 10-12 mm). After this, the row is pressed tightly against the spacers. A spacer is also placed at the beginning of each row. This way the compensation gap is fixed;
- Already from the second row, the laminate panels are first installed in locking joints along their length, and then they are knocked forward with a wooden or rubber hammer until the end locks are completely connected. The manufacturer prohibits hitting the edges of the lamella - you need to use a mounting bracket or a piece of laminate. In this case, the padding is installed in the lock of the adjusted lamella;
- After covering the base with the floor covering, its second strip is laid. The work continues again in the same order;
- Before laying the last row of laminate, you need to carefully calculate its size so that after closing the lock there will be a technological gap.
Tapping the lamella to connect the end locks.
How to bypass heating pipes
The most difficult moment when laying laminate flooring occurs when passing heating pipes. Here the sequence of actions is as follows:
- The center of the holes for the pipes is located. The first action is to snap the lamella into the lock and move it towards them. At the end, the middle of each pipe is marked with a pencil. Then the lamella is removed from the connection and moved close to both the gasket near the wall and the pipe. Again, a pencil is used to mark the middle of the pipe on the side of the panel. Using a square, lines are drawn from each mark. Their intersection will be the center of the future hole;
- Holes are drilled with a drill. Their diameter should be 2 cm larger than the diameter of the pipes (connecting a laminate panel cut into two parts will reduce the diameter of the hole by the thickness of the cut);
- Using an electric jigsaw or saw, the lamella is cut along the axis of the drilled holes;
- On the outside of the pipes, the lamella is inserted into the lock and moved towards them;
- Between the wall and the pipes, a piece of lamella is glued both from the side and from the end to the adjacent lamellas.
With very careful work, the cut-in is completely invisible.
A few words about the material
1 – protective film, 2 – paper with a pattern, 3 – base, 4 – protection
This is important because it requires compliance with certain conditions during installation. Essentially, laminate is a multi-layer sandwich made of a surface protective film (acrylic or melamine), a pattern on paper and a layer or several layers of base with or without protection.
The top layer can have a relief texture and serves as the main outer protective layer: protection from moisture and abrasion.
The base is compressed and impregnated. It has specific locks along the edges for fastening the panels together. This is one of the weak points of laminate. Forces must be applied carefully to the protrusions of the locks. When hit directly, they crumble easily.
Almost all types of laminates at the junction of locks do not have good moisture resistance. We recommend wet cleaning rather than wet cleaning. Although some manufacturers claim that their products can be used even in rooms with high humidity (bathtub, swimming pool, sauna, etc.). Still, we would not recommend using laminate in them.
Panels are fragile to fracture, regardless of thickness and class. Denser and thicker plates withstand greater instantaneous force. But over time, if the floor is uneven or debris remains under the panels, this advantage will not matter - any panels burst and are pressed through (especially at the joints, forming gaps between the plates). Therefore it is important! Compliance with the requirements for surface preparation for laying laminate.
You should also choose the right laminate class depending on the room:
| Load class | Pictogram | Room type | Application intensity | Examples | Life time |
| 21 | Residential | Moderate (occasionally) | Bedrooms, guest rooms | 10 years | |
| 22 | Residential | Normal (for frequent use) | Living rooms, dining rooms | 10 years | |
| 23 | Residential | Intensive | Stairs, corridors, kitchens | 10-12 years | |
| 31 | Commercial | Moderate (occasionally) | Hotel rooms, offices | 10-15 years | |
| 32 | Commercial | Normal (for frequent use) | Receptions, shops | 15-20 years | |
| 33 | Commercial | Intensive | Shopping centers, schools | 20-30 years | |
| 34 | Commercial | Reinforced (especially difficult conditions) | Industrial facilities | Up to 40 years old |
Types of locks and connection methods
The technology for laying laminate flooring on a concrete floor does not depend on the type of locks and panel sizes. The material is laid sequentially in rows (with rare exceptions). Quite a lot of fastening locks have been developed and new types continue to appear. Divided into two types:
- Lock. The groove and tenon are connected by direct force. The tenon is directed into the groove straight, evenly, without tilting, and is driven inward with a sharp force (by strong pressure or impact). Full insertion is accompanied by a characteristic click (not for all species). This type of lock is typical at the ends;
- Click. The groove and tenon are connected at an angle of approximately 45º. After installing the tenon in the groove, the panel straightens and the lock snaps into place with a characteristic sound (there may or may not be a click). This is how the side edges of the panels are usually connected.
Note! The combination of locks for specific products can be completely different. To strengthen the connection and protect it from environmental factors, sometimes additional glue or sealant is applied.
How to style
Having found out what is placed under the laminate on different types of flooring, I want to share my experience in laying the material. We used 2 types of substrate - foamed polypropylene on a concrete base and pine substrate on a wooden one.
On wooden floors
Before laying the covering, we inspected the old plank floor. It was replaced a few years ago, but it needed some work. The whole process goes like this:
- Inspect every square meter of the foundation. Check it for chips, cracks and unevenness.
- Eliminate all defects: clean out the bumps and holes, coat the base with a special antifungal compound. Wait until completely dry.
- Level the floor with plywood if necessary. We had to additionally level the space for better laying of the laminate. We secured the sheets of plywood with self-tapping screws, the distance between the fasteners was 10 cm. The joints near the walls were puttied and sanded, having previously removed all the old baseboards. Before finishing we used a hand scraper.
- When installing the underlay on wooden floors, do not use steam or waterproofing - this will interfere with normal ventilation.
- Unpack the substrate and leave for 24 hours to reach room temperature.
- It is correct to start laying the material from the corner, placing it in a herringbone pattern at an angle of 45 degrees.
- Use a utility knife for cutting.
Interesting article on the topic: Which underlay for laminate is better and how to choose?
When subsequently laying the laminate, the seams of the substrate should not coincide with the seams of the finishing.
On concrete bases
For the concrete floor, we used the classic version of the substrate - foamed polypropylene. It is sold in large wide rolls. We chose the option with a thickness of 5 mm. The process looks like this:
- Wait until the roll coating reaches room temperature.
- Treat the concrete base: eliminate all defects, fill holes with mortar. If a self-leveling floor is used, there should be no cracks.
- Spread the underlay on the floor perpendicular to the future laying of the laminate.
- Bend the material slightly towards the walls by 10-15 cm. If necessary, secure with tape.
- The substrate is not fixed in any way to the concrete base. It can be laid joint to joint with a slight overlap, which will not affect the thickness of the coating in any way.
- It does not matter which side the polypropylene foam is placed on.
- After spreading the material over the entire surface, proceed to laying the laminate.
Try to follow all recommendations and technological instructions when working with raw materials. When laying laminate flooring, do not allow gaps to form in the seams - this will lead to further damage to the integrity of the coating.
Viewed times: 3,175
Great article 1
Author's rating
Author of the article
Oleg Grishin
Flooring specialist with 10 years of experience. Oleg has something to share with our readers
Articles written
105
- Even more interesting:
- How much laminate do you need for an apartment?
- Which laminate to choose?
- How to choose the best moisture-resistant laminate
Preparing a concrete floor and tools for laying laminate flooring
We make sure to diagnose the floor; it is important to properly prepare it for laminate flooring. The floor must be smooth, dry and preferably treated with hydrophobic agents.
If so, after dismantling the old coating, there will definitely be more chips and holes. Remember that the maximum permissible surface gradation is 2 mm.
Large voids are filled with mortar. But it is best to make a new screed according to the standards and it will definitely extend the life of the flooring.
Most often, a new base is made of concrete, cement or self-leveling mixtures. Many people recommend starting work on installing the laminate within a couple of hours, but we recommend waiting about two days for complete drying.
If you decide to install the laminate yourself, then you cannot do without tools.
You must have:
electric jigsaw (power 400-500 W);- a pencil that will be visible on different surfaces;
- hammer (weighing 0.5-0.6 kg);
- metal squares (25-35 cm);
- plastic padding bars;
wooden wedges to limit the gaps between the floor and the wall;- iron brackets for tamping the end boards;
- hammer drill for working with skirting boards;
- 5 meter tape measure.