There are many ways to build a sewer network on a summer cottage or in a private house. Among the popular options, the leader is a cesspool made of concrete rings, built with your own hands. Installation of such a structure will cost a minimal amount of money and will provide the house with a simple but effective wastewater disposal system.
To install a high-quality sewer system into your home, it is important to know all the nuances of how to build a reliable pit that will last for many years. It is important to choose the right place for the cesspool and materials.
In addition, there are various construction schemes. Therefore, before starting work, it is better to carefully read the information about the construction of such a structure.
Why are drainage pits attractive?
The main advantage of drives is their affordable cost. It is for this reason that many people stop at the simplest device instead of purchasing a more expensive and functional septic tank.
The cesspool is also convenient for those who rarely come to the dacha - only in the warm season or exclusively on weekends.
If there are relatively few sewage drains and regular waste pumping is established, a cesspool is really a suitable option.
But for large volumes of wastewater, it is better to choose a septic tank - a more expensive device that partially purifies waste and reduces pollution of garden soil to a minimum.
The latter is possible if a model with a filter well or infiltrator is selected.
Schematic representation of a absorption well - a cesspool with a filter bottom. Installation conditions: sandy or sandy loam soil, low location of aquifers, crushed stone filter with a thickness of at least 1 m
Disadvantages of a cesspool that may cause refusal to build it:
- limited volume;
- the need for frequent pumping;
- low (or zero) degree of waste treatment;
- a specific smell that is difficult to get rid of.
Those wishing to install a filtering sewer structure should know that from time to time, along with pumping, they will have to clean and even replace the filter - the gravel or crushed stone layer at the bottom of the pit.
Review of popular construction schemes
Even the construction of the two main types of cesspools can have nuances. Let's look at the features of the most popular schemes of concrete rings.
The first scheme is a sealed storage well made of two standard rings and one narrower ring for the neck.
Diagram with dimensions: 1 – concrete blank with a diameter of 1 m; 2 – wooden ceiling cover; 3 – concrete blank with a diameter of 0.7 m; 4 – neck ring; 5 – hatch; 6 – ventilation pipe; 7 – overlap; 8 – concrete bottom; 9 – leveling cement screed
The following diagram clearly shows the difference between a storage tank and a tank with a filter bottom.
A concrete filter well has two fundamental differences: perforated walls of cylindrical blanks forming the walls, and the complete absence of a bottom, which is replaced by a filter load of crushed stone
The third option is a modernized storage tank, a primitive septic tank.
Instead of one tank, two are installed: the first serves for mechanical cleaning of sewage, the second plays the role of a filter well. The anaerobic bacteria treatment process occurs in both compartments
Using a two-section storage tank with overflow is more appropriate, as it increases the degree of environmental friendliness. Sometimes models with three compartments are used - the more there are, the more effective the wastewater treatment.
Common mistakes
Self-arrangement of a cesspool from concrete rings does not cause difficulties. Positive results can only be achieved if all the rules are followed. However, sometimes people still encounter errors that subsequently affect the functionality of the cesspool:
- the pit is not sealed enough. Gaps may form between concrete rings;
- incorrect determination of the volume of the cesspool;
- inaccessibility for access by vacuum trucks;
- non-compliance with SanPin standards.
As for the last two points, even with a high-quality construction of a cesspool, it will still have to be eliminated. So these points need to be given special attention.
Watch the video
Project preparation and calculations
By starting construction without preparation, you risk violating sanitary standards and creating a device with limited functions. In order for the cesspool to work 100%, it is necessary to provide for all the nuances and complexities of construction.
Step #1 - determining the location for the drain hole
When choosing a place for a cesspool, it is important to consider two points: ease of maintenance and compliance with sanitary standards.
Accordingly, to facilitate the installation process and better functionality of the entire sewer system, the tank must be installed as close to the house as possible.
Many do just that - they bury the container 2-3 m from the building, not paying attention to the smell and forgetting about the norms and rules for using drainage pits and various types of septic tanks. By the way, the recommended minimum distance from the pit to the house is 5 m.
A diagram showing how far a cesspool should be from water sources, trees and the road. Unfortunately, the standards are not always observed due to the limited area of the garden plot
The diagram can be supplemented with the following information:
- a sealed container is installed in any type of soil;
- tank with filter - only sandy, well absorbent and permeable to liquid.
The base of the filter structure must be at least 1 m higher than the aquifer.
To determine the depth of aquifers, it is better to seek information from a design or drilling organization that has carried out geotechnical surveys or drilled a water well in the construction area.
Step #2 - calculating the volume of the container
To determine the size and volume of the well, you need to make simple mathematical calculations. If a permanent home has a shower, toilet, and washing machine, then 1 person receives approximately 150-200 liters of sewage every day.
Let's assume that you want to install a sealed cesspool in the courtyard of a house where 3 people live - that turns out to be 450-600 liters per day.
Do not forget that when calculating we take into account at least 3 times the amount, that is, we multiply by 3 again, we get 1.35-1.8 m³. This is the minimum amount.
The dimensions of the neck and parts of the well located above the entrance of the sewer pipe do not need to be taken into account. That is, the resulting volume is the parameters of the part located below the pipeline.
Sometimes they are based on the timing of calling the vacuum cleaners. If the same family of 3 is served every week, then it turns out: 150 l (200 l) x 3 x 7 = 3.15 m³ (4.2 m³). Once every two weeks – 6.3 m³ (8.4 m³).
The barrels on sewage disposal machines are not bottomless; on average they hold about 3.5 cubic meters of waste, so they cannot drain a large container filled to the brim
If a public utility or private company servicing your site has a vehicle in its fleet with a tank of 6-8 m³, it makes sense to install the maximum volume tank.
Step #3 - choosing concrete rings
The volume of the cesspool is calculated based on the size of the rings, so it is easier to purchase models from the range of a company located nearby, since delivery will be required.
Typical ring sizes:
- height – 0.89 m;
- diameter – 1 m.
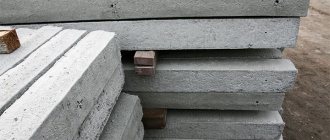
Rings with these sizes are produced by almost all reinforced concrete factories. For a small family, three blanks are enough, plus a neck and bottom.
Reinforced concrete rings (indicating height, diameter and wall thickness) and additional elements for the construction of wells and cesspools (+)
The construction of cesspools is so popular that factories began to produce complete kits for their construction.
The set includes:
- lower element with bottom;
- standard rings from 1 to 5 pcs. – a larger quantity will cause difficulties with cleaning and pumping;
- narrowed neck;
- top floor slab with a hole for a hatch.
Rings can be regular or perforated for absorption wells. The hatch and cover are purchased separately.
In addition to standard concrete rings with a meter diameter, you can find larger blanks.
Preference should be given to rings with a tongue-and-groove locking connection, which guarantees a higher degree of tightness and strength of the finished structure.
Image gallery
Photo from
Reinforced concrete rings for cesspool
Installing a ring using a manipulator
Concrete rings with interlocking chamfer
Handmade concrete ring production
Step #4 - preparing materials and renting equipment
In addition to a set of concrete blanks, the following building materials may be required:
- staples for connecting parts;
- sealant for sealing seams;
- bitumen mastic or other material for sealing the tank from the inside and outside;
- cement to strengthen the backfill;
- crushed stone, gravel and sand for preparing a leveling screed or filter layer.
Don't forget about buckets, shovels and winches for digging.
It is not possible to deliver concrete rings yourself - for large and heavy parts you need to rent a truck.
If the construction site does not have a winch, it is better to order special equipment with a manipulator. One person can't do it. The only thing you can do yourself is to dig a pit.
To install the workpieces, at least 2-3 pairs of workers plus a truck driver are required.
The weight of a reinforced concrete blank with a diameter of 100 cm and a height of 89 cm is about 600 kg, so the installation of concrete rings is carried out using a crane and a team of workers
The ideal option is the help of friends with whom you can negotiate a low payment. If you don’t have special equipment drivers or installers among your friends, you can rent a car and pay for the services of a team of workers.
Often, the help of professional installers is offered by a company that sells rings for wells and drainage pits.
Price
Those who need well rings, also known as reinforced concrete products, are interested in the cost of reinforced concrete rings . It cannot be said that by paying for the rings, you will be able to fully cover the costs of the project estimate. This is not true, since you also need to pay for the services of special equipment, order the bottom, lid, hatch, pipes, sealant and other things that may be required when installing and arranging a septic tank or other structure.
As for the rings, depending on the city, as well as on the task for which they are intended, the price can vary from 2000 rubles per unit. The larger the diameter, the more expensive the product costs. Remember that with an increase in diameter you will be able to deliver a much smaller number of pieces on a manipulator, which will require either renting 2 machines or making several trips.
In any case, rental of special equipment is hourly, so be prepared to pay for the amount of time. The cost of a well made of reinforced concrete rings , taking into account delivery, installation and excavation work, can reach 50 thousand rubles.
Instructions for building a cesspool
The installation of each specific tank has its own nuances related to the characteristics of the landscape, soil, location of the sewer network, etc. We will look at a typical diagram for constructing a cesspool.
Stage #1 - excavation development
The first stage is earthworks. They can be done alone (long, hard and free) or with the help of a team (fast and fun, but for money).
If possible, you can use a mini-excavator, then workers will only be needed to “grind” the walls and level the bottom of the pit.
The shape and dimensions of the pit must correspond to the configuration and dimensions of the tank. Accordingly, the result should be a round well, the width exceeding the concrete rings by 0.3-0.5 m on each side around the circumference.
This gap will be required for sealing/insulating the structure from the outside and subsequent backfilling with compaction.
A pit for a sealed cesspool consisting of 2 concrete rings. The depth of the sewer pipe is about 0.8 m, the finished height of the tank is 2.5 m
There is one nuance that should not be forgotten - this is the level of soil freezing (the information is relevant for residents of central and northern Russia).
The sewer pipe for waste and the main part of the tank must be below this level for the system to function in winter. If you lay the network near the surface, when frost sets in, the liquid will simply freeze.
In this regard, to the dimensions of the working container it is necessary to add the height of the neck, which essentially serves as a technical hole. The neck should protrude 15-20 cm above ground level.
Thus, the tank will be buried, as will the sewer pipe cut into it below the freezing level.
Before the start of construction work, it is necessary to level the base with the walls and dig a ditch leading from the house (bathhouse, summer kitchen, garage) to the drainage pit.
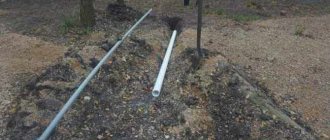
When constructing a ditch, do not forget that in order to avoid blockages, the pipe must have a slope towards the pit - approximately 2 cm per meter.
Stage #2 - arrangement of the bottom
If you are installing an ordinary storage container, the bottom, like the walls, must be sealed. For a structure made of concrete rings, the best option is to make a blank from the same material.
The part is specially designed to decorate the bottom of the well and has a groove around its circumference. The only thing needed for its installation is a flat, dense base.
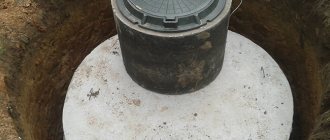
Reinforced concrete element equipped with a bottom. Designed for the construction of sealed cesspools, serves as an alternative to a concrete slab or cement screed
Possible subsidence of the base is eliminated by pouring a cement screed. It is prepared according to a simple scheme: for every part of cement - 4 parts of sand. For strength, you can add fine crushed stone in a ratio of 1:6.
The mass is prepared in a container, then poured over the entire area of the bottom of the pit and leveled. Within a week, the concrete screed is lightly irrigated with water so that it does not become covered with cracks. The lower element of the structure is installed no earlier than a week later.
For those who value time, there is a more practical solution - a pre-fabricated concrete slab. It is placed on a flat bottom, and the first concrete ring is placed on it.
The filter well does not have a bottom as such. Instead, a “cushion” is prepared - a filter made of building materials that retains solid sediment and allows liquid to pass into the ground.
Colonies of anaerobes, bacteria involved in the process of decomposition and purification of waste, settle on the backfill of crushed stone or gravel.
The thickness of the underlying backfill varies:
- shallow pits - from 0.3 m;
- tanks of 3-4 rings - up to 0.6-0.7 m.
The thickness of the filter bed placed in the well shaft must be at least 1.0 m.
The arrangement of layers is as follows:
- bottom layer – sand;
- middle layer – fine crushed stone;
- the top layer is coarse crushed stone.
Unlike a concrete tank, the “cushion” and filter are replaceable elements. When they become clogged with solid waste and stop allowing liquid to pass through, the old backfill is taken out and a new one is placed at the bottom of the hole.
Stage #3 - installation of concrete rings
The first ring, equipped with a bottom, is installed directly on the concrete slab (or screed). Smooth installation of the part guarantees a strictly vertical position of the entire structure, without tilting or distortion. Place a second one on the bottom element and immediately seal the seam.
To seal and waterproof seams, various solutions, coatings and roll materials are used. Using roofing felt glued to a bitumen mortar, joints and cracks are closed from the outside; it is not suitable for interior work.
Ordinary cement mortar is also considered weak: when the soil moves, it becomes brittle, causing it to crack and crumble.
There are many modern modified mastics and solutions that have sufficient strength and elasticity. Some of them can be applied to wet joints or seams that are already under water pressure.
Various methods of waterproofing a concrete septic tank are used to protect the walls from the destructive effects of an aggressive chemical environment, which is often contained in sewage.
Waterproofing the finished structure from the outside with bitumen mastic. Carried out to protect reinforced concrete from moisture in the soil and increase the degree of tightness
Here are some of the effective means for sealing joints and internal sealing:
- Hydroseals , which expand when hardening, tightly closing any cracks. Examples: Waterplug, Peneplug, Hydrostop. Their only disadvantage is their high cost.
- Solutions for application to the entire surface: Antihydron, Hydrotex, Bastion.
- Materials for caulking deep seams impregnated with Kiilto FIBERPOOL fiber rubber - cords and ropes made of jute, flax, hemp.
- Rubber sealing tapes , for example RubberElast.
- Liquid glass added to cement mortar
- Water-based sealants: Peneplag, Penetron, Penecrit.
High-quality waterproofing ensures structural integrity for up to 35 years.
After making sure that the connection between the rings does not allow water to pass through, you can install the next part.
Approximately 20 - 30 cm below the depth of seasonal soil freezing it is necessary to make an inlet for the sewer line. At the same stage, a pipe is laid and connected to the tank. The connection point is carefully sealed.
In the northern regions, pipes passing above the freezing depth are additionally insulated, as is the upper part of the storage tank.
If the pipeline is connected correctly, the outlet of the main should be above the average wastewater level. The top of the tank remains free
The neck is mounted on the 3rd or 4th ring, then the floor slab. The factory-made plate has a round hole for the hatch. Another hole, of a smaller diameter, is needed for the ventilation pipe.
The final touch is backfilling. If you add dry cement to the soil, the reliability of the structure will increase, and the risk of destruction by soil movements will decrease.
Stage #4 - design of the technical hole
The best option for exterior design is a sewer hatch with a tightly closing lid. Its inexpensive counterpart is simply a wooden lid attached to hinges.
The hatch is necessary for servicing the cesspool - pumping out waste or replacing the filter layer.
Plastic decorative cover for a manhole in the form of a large natural stone. Completely covers the entrance hole, looks quite natural against the background of surrounding greenery
Recently, it has become common to camouflage sewer structures, especially if they do not look aesthetically pleasing. For this purpose, decorative products are purchased that imitate green spaces or large stones.
But you don’t have to use purchased decor; you can assemble an elegant flower stand from wooden slats and decorate it with flowering plants.


