Primary requirements
There is no single and ideal value in determining the height for the created floor screed. The choice of this parameter depends on many factors. For each room it is selected individually in accordance with the purpose of the room and the degree of unevenness of the base.
Using screed indoors
The thickness of the floor screed for the finishing coating is determined by:
- type of interfloor covering or soil composition;
- available financial resources;
- mixtures selected for filling, waterproofing, reinforcement options and other materials used during installation;
- requirements for heat and sound insulation;
- the presence of certain irregularities on the base located under the screed;
- the need to organize a slope to one of the walls or an exit;
- the need to fill “warm floor” pipes or other communications.
Choosing window sills based on size is as easy as shelling pears. They should only cover the existing lower slope in the wall opening. In the case of a floor screed, many more points will have to be taken into account.
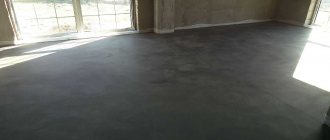
In apartments and residential premises, thin screed is mainly used
SNiP recommendations
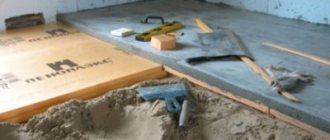
Building codes provide only recommended figures. For example, the minimum thickness of a DSP screed should be 20 mm. But this is a floor option without reinforcing mesh, thermal insulation substrate and communications. If reinforcement is done or insulation is laid underneath (expanded clay is poured), then 20 millimeters will not be enough. The layer height will be much greater.
Material consumption depending on screed thickness
The main requirement of SNiPs for a “subfloor” is strength. If it is made from DSP, then such a layer must withstand at least 150 kg/cm2. If gypsum mortar is used, the hardness index can be reduced to 100 kg/cm2.
However, when pouring self-leveling polymer compounds on top, the bottom floor screed will have to be made with a strength of at least 200 kg/cm2. Such polymer mixtures set quickly, creating strong internal stress. They can simply tear off a not too strong screed from the base. The above requirements should be taken into account when calculating the thickness of a rough coating based on cement or gypsum.
Floor design
Minimum thickness
According to building regulations, the minimum thickness of the screed should be as follows:
- when using fine-grained sand concrete without reinforcement and insulating substrates - 20 mm;
- if there are thermal insulation materials under the screed - 40 mm;
- for water heated floors - 45 mm plus the diameter of the pipes.
minimum permissible screed thickness
It is allowed to make a thicker layer. But if the height of the screed is smaller, it will not be able to provide adequate strength. Then adding a little extra concrete on top will not work. In this case, delamination of the coating will occur. If adjusting plastic windows still allows you to correct something in them after installation, then the concrete or plaster monolith on the floor should be poured all at once.
Disadvantages of a thin screed
How to determine the thickness of a self-leveling floor
As a rule, manufacturers indicate the recommended thickness on the packaging, but its range is quite wide - from 1 to 100 mm. In thick-layer mixtures, the maximum thickness of the self-leveling floor can be increased to 200 mm.
Navigating a large range of products is not at all easy. First you need to select the composition for the purpose and load. It can be for external or internal use, dry or wet rooms, medium or high loads. If the mixture is suitable for installing heated floors, it is reflected on the packaging in the form of an icon or inscription.
The next step is to determine which leveling requires a self-leveling floor. For roughing, the mixture should be thicker and the applied layer should be thick enough. The finishing composition is finely dispersed, it covers small irregularities, so a loose and bumpy base cannot be leveled in this way.
At the third stage, the task is to find the required fill height. To do this, the lowest and highest points are determined on the basis. Using a laser builder, mark the floor level on the walls 3-5 mm higher from the highest point.
If you don’t have the equipment, you can simply screw screws into the base to the desired height. They retreat from the walls by 10-15 cm and install beacons first in the corners, then along the axes of the room in increments of 1 m. The resulting plane sets the horizon, and you can accurately determine the minimum thickness of the self-leveling floor.
Thus, taking into account possible shrinkage, the subfloor mark passes above the highest point at a distance of 3-5 mm. This is true for starting levelers. For finishing mixtures, shrinkage is not taken into account, since they are non-shrinkable. They can be poured onto a flat base with a layer of only 1-2 mm, but if there are differences of up to 20 mm, it is necessary to remove the level using the method described above.
Maximum screed thickness
The maximum thickness of the screed is not regulated by standards at all. The concrete layer can be made as thick as desired. Moreover, if it is carried out with a height of more than 100 mm, then reinforcement must be provided. This can be a mesh for floor screed or fiber.
The main limitation on maximum thickness is money. The thicker the rough layer, the more building materials it contains and the higher its price. This coating should not be made too thick. The estimated costs will be considerable, but the benefits will be minimal. Plus, as the height of the concrete layer increases, its mass increases; the interfloor ceiling may not be able to withstand the extra weight.
Also, you should not pour a concrete screed over water heated floor pipes with a thickness of more than 25–30 mm. This way it will absorb too much heat. An underfloor heating system will have to spend excess thermal energy heating the concrete, instead of releasing it directly to the air in the room.
Screed thickness for different floors
Acceptable dimensions for different types of screed
Based on the thickness of the screed, rough coatings are conventionally divided into:
- Thin - from 2 to 7 cm.
- Thick – from 7 to 15 cm.
Layers less than 2 centimeters are usually made from self-leveling compounds and are not classified as screeds, but as self-leveling floors. And a thickness of more than 15 centimeters is more of a concrete floor with reinforcement.
Design features of screeds for heated floors
Features of arranging a thin floor screed
Thin screeds are used in rooms where there will not be strong point loads when using the floor. Usually these are kitchens, living rooms, bedrooms and other living rooms. Here a layer of 20–50 mm will be sufficient. For corridors and bathrooms, 50–70 mm are already recommended.
Such screeds are poured and leveled literally in one day. Then you still have to wait several days for the concrete to set. But the work itself of preparing the base and mixing the solution, as well as pouring the mixture, is carried out as quickly as possible.
Consumption of sand concrete per m2 of area
Features of arranging a thick screed
Thick screeds are used in areas with higher mechanical loads on the floor covering. Often they are poured not so much to level the floor, but to provide a reliable foundation for this or that equipment. And in fact, it is always a concrete mixture reinforced with steel rods. Gypsum solutions are of little use here.
Thick-layer floor screeds are installed in:
- utility rooms;
- in-house boiler rooms;
- garages;
- baths, etc.
In this case, the time required for pouring the concrete solution and the wait until the floor is ready will increase. A thick layer of concrete takes longer to gain hardness than a thin layer. At the same time, you still have to spend time carefully strengthening the concrete layer with reinforcement. Without it, such a screed will certainly crack when it hardens and will quickly become unusable.
How to calculate the amount of material for different types of screed
Screed and rational planning of apartment renovation
To save time, money and avoid additional delays and costs due to alterations, the apartment owner must adhere to the following procedure:
- Invite a specialist to measure the height difference across the subfloor and determine the minimum screed level.
- Determine the redevelopment plan yourself, or order an interior design from a designer, providing him with data on the minimum screed level.
- Based on the redevelopment plan and the plan for laying communications along the floor, establish (independently or with a foreman) the type of leveling layer, its thickness and the sequence of screed installation in the general plan of work for the facility.
The order of installation of screeds in the apartment
You can level the floors before installing walls and interior partitions, or after. Each approach has its pros and cons.
Advantages of screeding in an open space without walls or partitions:
- Simplicity and accuracy of height markings - all beacons are set at the same level from the same position of the laser axle builder.
- Leveling across open space takes less time regardless of the method used.
- Using a semi-dry and dry method, screeding the entire apartment can be done in 1 day. Wet, too, if you order a ready-made solution delivered to the site by a concrete pump.
- It is economically feasible if frame-plasterboard or any other partitions are erected according to a frame scheme.
- It is easier and more accurate to mark doorways when constructing partitions using a ready-made screed (there will be no errors with the height).
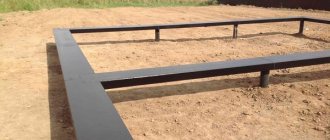
Rice.
7. Screeding in open space allows the use of productive work methods. Advantages of leveling after the construction of walls and partitions:
- There is no problem with the placement of materials, tools, equipment and household equipment during the screed work (rooms can be vacated one by one).
- If you use the dry or semi-dry method, it is permissible to install the screed anywhere on the repair schedule (the main thing is that this should be after the installation of communications covered by the floor, and before the installation of door blocks and floor coverings).
- It is economically feasible if walls and partitions are built from brick, foam concrete and other masonry materials.
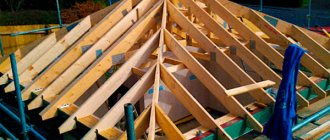
Rice. 8. Semi-dry screed after the construction of partitions.
Minimum screed level and its approximate cost
Of course, it is better to entrust this work to a specialist. But this skill can be useful to anyone choosing an apartment to buy, as well as developers, realtors, and interior designers.
The minimum level of the future screed is the mark of the highest point of the concrete floor plus the MIN technological layer thickness. With rare exceptions, the minimum level will correspond to the actual elevation of the future screed.
Procedure:
- The axle builder (preferably with an evolutionary tripod - for simplicity and speed of work) is installed approximately in the center of the apartment. The height of the horizontal plane it marks is not important. The main thing is that it is recorded.
- According to the light markings, you need to walk through all the rooms with a marker and put marks on the walls (each wall must be marked with at least 2 marks).
- Then the axle builder is installed in one of the rooms approximately in the center, and its plane is aligned with the existing marks. All other piers are marked along the beam.
- We repeat the previous step in all other rooms of the apartment. A single horizontal plane (USP) is fixed at the object.
- We walk around the entire apartment with a tape measure, measuring the distance from the EGP to the subfloor. We record the readings near the corresponding marked points on the site plan.
- Where the distance is minimal is the highest point of the floor (conventionally called “subfloor zero”, “screed zero” or simply “zero”). All other marks, accordingly, must have a minus sign. Among them, one is the lowest. Its value will be needed to calculate the thickness of the leveling layer
- Let's add the technological thickness of the screed to zero MIN - and we get the minimum level of the screed. You can do precise interior design!
- Let's determine the approximate cost of floor leveling. To do this, add the height (from zero) of the minimum level of the screed to the value (modulo) of the lowest point of the ceiling, and divide the resulting amount in half - this is the average thickness of the screed in a new building and an old house. Now, knowing the thickness and area of the screed, you can receive commercial offers with a price from any contractor.