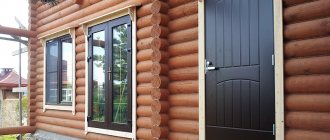
The basement is a fully or partially recessed floor of a building below ground level. As a rule, utility rooms or a garage for a car are equipped in such a room. However, individual house designs include a bathhouse, sauna, gym, swimming pool, etc. in the basement. In some cases, building a basement is an excellent solution, especially if the house is located on a slope. Due to this, you can effectively increase the living area of the entire building. Therefore, if you have not yet started building a house, then it will be useful for you to read the article provided, from which you will learn how to make a basement floor and arrange it, as well as for what purposes it can be used.
Ground floor - usable area
The ground floor can simultaneously serve as the foundation of the entire building and living space. The main feature in its arrangement is the fulfillment of the requirements for size, strength and internal space. Thus, the regulated ceiling height must be at least 2.5 m. However, in some cases, deepening is limited by the presence of high groundwater. Therefore, the basement floor may be higher than ground level. In cases where groundwater is deep, this room is completely hidden in the ground.
Do not assume that the ground floor is a basement. In fact, it can be fully considered a full-fledged floor, but only if it is properly arranged.
Rest room on the ground floor
For example, if groundwater is located at least 1 m from the surface of the earth, then it is not worth digging a foundation pit for the building. In this case, the above-ground part of the base should be covered with soil. In this case, you can artificially deepen the ground floor. However, such a solution will entail large labor costs. It is also additionally necessary to organize high-quality drainage around the building.
So, the ground floor can be used to accommodate the following premises:
- pantry;
- garage;
- wine Vault;
- game room;
- living room;
- bedroom;
- utility room;
- kitchen;
- living room;
- Gym;
- home cinema and more.
As you can see, there are practically no restrictions on how to use this usable area. Another positive aspect of this room is that the thermal insulation qualities of the entire house increase.
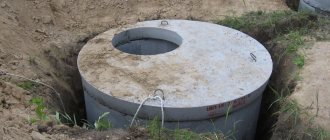
Do-it-yourself foundation for the basement floor.
The basement floor is a room buried 2-2.2 m into the ground under the structure. Typically, this height is quite sufficient for constructing a warehouse, vegetable storehouse, workshop or other technical premises. If it is planned to install it in the basement of a living room, then the height is increased by 40-50 cm.
If the construction of a structure is carried out on unfavorable soils, then the thickness of the walls of the basement in a residential building cannot be less than 20 cm.
The underground room serves as an insulating layer for the above floors. It does not allow dampness from the soil and cold air to penetrate. To do this, when constructing an underground room, it is important to arrange an effective ventilation system.
Types of socles
The base varies in design and comes in 3 types:
- protruding;
- recessed;
- flush with the walls.
If the walls are too thin and the basement premises are below ground level, then the first option is used, since it becomes possible to make it warmer. The recessed base is one of the most common. In appearance it looks quite beautiful. The drainage of water that flows from the facade prevents the presence of high humidity. As for the recessed option, many construction experts do not recommend building it. In this case, the effect of the presence of the basement floor is completely lost, and powerful waterproofing will need to be made on the walls.
The base is flush with the walls.
There are some peculiarities in choosing the thickness of the walls. This will mainly depend on several factors, namely:
- thickness and material of the overlying walls;
- soil characteristics;
- climatic conditions in your region.
So, having decided how the construction will be carried out and what type of base you want, you can begin the preparatory and construction processes.
When to build a basement for a house
Before pouring the foundation and building the basement, you first need to find out the depth of soil freezing, the type of soil itself and its frost heaving. In our case, this is loam, the freezing depth is 90 cm. Since the house will be 1.5 floors of aerated concrete with a wooden floor, according to our calculations, its weight with a maximum load will be approximately 3 kg per 1 cm square, which, in fact, is quite a light house. It is recommended to deepen the foundation under lightweight houses below the freezing level so that the force of frost heaving of the soil does not push the lightweight house to the surface. This leads to deformation of the foundation, cracks in the walls and destruction of the house. That is, it is necessary to build a basement if there is a need to deepen the foundation.
Calculations
The stage of work associated with marking involves the following actions:
- Designing the basement floor, as well as determining the purpose of a particular room.
- Calculations for the bearing capacity of the foundation and walls of the underground floor. Here it is recommended to lay a foundation that is 30% stronger. Thus, it will be possible to have greater confidence in the strength of the entire structure.
- Clearing and marking the construction site. This stage of work is quite important, so it is often better to turn to qualified specialists.
- Removal of the contour of partitions and load-bearing walls.
How carefully you approach each preparatory stage will directly affect the strength of the structure.
Foundation types
It is not possible in all cases to make the foundation that you really want. The reason lies in the characteristics of the soil of a particular region. In some climatic zones, the arrangement of certain types of foundations is generally impossible. Therefore, we will consider several foundation options that can be erected for the basement floor.
- Pile foundation. This type of construction is relevant on heaving soil with high groundwater levels. As for the basement floor, in this case the operation of the ground floor does not present any problems and no fear of any impacts on the foundation. The only disadvantage of this method is the special specificity of the structure of the house.
- Slab foundation. This type of foundation is suitable for swampy soil with weak soil, as well as water-saturated sand. With this design, the ground floor will look like a box, on top of which the main part of the house will be built. In weak soil conditions, a slab foundation will prevent subsidence, since the weight of the building will be evenly distributed over the entire surface of the slab.
- Strip foundation. If the soil on your site is not problematic, then this type of foundation is optimal.
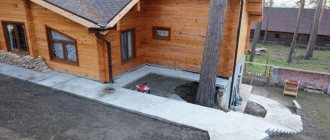
Foundation for a house with a basement.
Building a house with a ground or basement floor is always more expensive than building a completely above-ground structure. However, in the future all expenses are fully justified. The underground room for the upper floors will be an excellent insulating layer through which cold air and dampness from the ground will not penetrate. In addition, a foundation with a basement can significantly increase the usable area of the house.
Experts consider the basement or basement floor to be a room that is buried 200-220 cm into the ground under the house. As a rule, this height is enough to make a warehouse, cellar, workshop and any other technical room with your own hands. If a living room is required, then it is advisable to increase the height by 40-50 cm. Specifically, the “basement” floor means a room that is buried in the ground no more than half its height.
When constructing an underground room, it is necessary to provide an effective ventilation system that will ensure air circulation and allow the removal of radon (a gas that can accumulate in pits and underground rooms).
Turnkey basement foundation.
Plinth foundation width
The width of the foundation of the ground floor depends entirely on the nature of the walls of the main building. Let's take the example of a frame house as a basis. In this case, the width of the foundation can be:
- With a pile foundation – 300–500 mm. Accordingly, the thickness of the walls can be equal to the foundation. At the same time, there is no need to build a foundation for finishing the facade, ventilation gap and exterior finishing.
- With a monolithic slab, the width of the foundation must correspond to the width of the walls of the basement of the building.
- With a shallow strip foundation, the width is equal to the walls of the ground floor. But this is the case when a concrete screed will not be installed on the ground floor.
Be sure to consider the locations of the holes for arranging ventilation ducts. They must be indicated on the general foundation design. According to the standards and regulated norms of SNiP, there should be from 12 to 24.
Selecting a plinth design
The design of the base should be selected based on the design of the foundation, and not vice versa. That is, the priority factor in building a house is still the foundation, and the base has a subordinate, albeit important, significance. If you raise the wall of a house with the help of a foundation to a sufficient height that prevents the wall from being soaked by surface water, the main task of the base has already been solved. This happens when constructing columnar and pile foundations, and the base in this case is assigned the role of enclosing the space under the house, the construction of which does not require special knowledge. In the video you will see how to correctly mark the base and build it.
.
In most cases, you can get by with a decorative partition from pillar to pillar (from pile to pile). Close the space from the bottom of the wall to the ground level - and the problem of the base is solved. The choice of materials here can be very diverse: from vinyl siding to various sheet decorative materials for exterior decoration. It is also possible to attach external finishing materials (decorative tiles) to the base in the form of sheet material.
Decorative plinth
In this case, you should not assign other functions to the base part. A common mistake is to try to use a decorative plinth as a retaining wall for pouring sand or soil inside to create floors “on the ground.”
The base part can perform supporting functions only if it is made in the form of a structure that has its own foundation and has the ability to resist overturning. The construction of such a plinth is a rather expensive undertaking, which will ultimately absorb all the cost savings from the use of pile or columnar foundations compared to strip foundations.
When the base part serves as a load-bearing and at the same time enclosing structure of the house, as in a strip foundation of a house with a basement, it is necessary to do vertical external waterproofing of the base. If the premises below ground level are residential, the material of the basement must ensure normal temperature inside them. This can be achieved by making this part of the base of the house from the same material from which the wall of the house is made or by making additional external insulation of the base. In this case, it should be remembered that if the base part extends beyond the outer edge of the wall, you need to make a canopy that protects the materials of the exterior finishing of the base from direct exposure to rain and snow.
Waterproofing
Waterproofing for the ground floor should be done in 2 layers. The choice of waterproofing material is influenced by several factors:
- wall material;
- climatic conditions;
- soil type, etc.
The entire vertical and horizontal surface of the building must be covered with waterproofing. It is also necessary to cover all points of contact with the ground.
You can use roofing felt or roofing felt. Such waterproofing will cost you relatively little. As an option - bitumen mastic. There are no special rules for applying waterproofing. The main thing is to carefully protect and cover all areas of the foundation from moisture penetration.
Insulation and waterproofing of the basement
Waterproofing and insulation of the basement
The basement belt is one of the most vulnerable elements of a building under construction. It is entrusted with the functions of protecting the house from moisture and cold, therefore special attention is paid to the issues of waterproofing and insulation.
Waterproofing
To waterproof the base, roll and coating materials are used. The main advantage of the rolls is their low price and quick installation. However, they are short-lived and easily susceptible to mechanical stress. These materials cannot be used at utility junctions.
There are two types of roll waterproofing:
- pasting - when laying on the surface of the foundation, it first requires the application of bitumen mastic to the monolith, and then it is pressed and smoothed;
- fused – is a canvas made of polyester or fiberglass with a layer of special mastic applied.
Before installing pasted and surfaced materials, the surfaces of the foundation and base must be thoroughly cleaned of dust and dirt.
The most commonly used coating materials are special mastics (bitumen, polymer and their combinations), cement coatings and astringent plasters. All these materials are applied to foundation and plinth surfaces with a brush or roller. They are given increased strength by fiberglass, which is used to reinforce the first layer of applied mastic. Coating coatings are also short-lived and require additional protection from mechanical damage.
To waterproof a base made of brick, bitumen lubricant and roofing felt are also traditionally used. When using bitumen lubricant, which must be applied in several layers, it is necessary to strictly maintain the temperature regime. If it overheats, the waterproofing coating will be of poor quality. It is necessary to cover the surface of the brick plinth with roofing felt in at least 4-5 layers.
Pasting with euroroofing felt
Impregnation
Treating the base with waterproofing paint
Injection and penetrating compounds, which have recently begun to be used in construction, are free from all of these disadvantages.
- A composition is applied to wet concrete, which, upon reacting with water, turns into crystals that penetrate into the pores of the base to a depth of 25 cm. In this case, the concrete becomes waterproof.
- Liquid for injection penetration is injected into all pores and cracks of the foundation and basement made of concrete, rubble stones and brick. This process is quite expensive and highly labor-intensive, requiring the involvement of experienced craftsmen.
When using solid red brick for laying the plinth belt, external waterproofing work is not required - a layer of waterproofing is applied to its surface during the manufacturing process.
Insulation
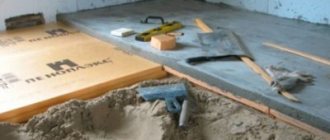
To insulate the basement belt, extruded polystyrene foam is most often used. It is characterized by high strength characteristics, moisture, frost and acid resistance. It is produced in the form of slabs, with a thickness of 3 to 10 cm. These slabs are glued to the surface of the base with an adhesive solution and then strengthened with the help of special dowels.
A significant disadvantage of this material is its flammability. After installation is completed, the surface of the base must be treated with non-flammable material.
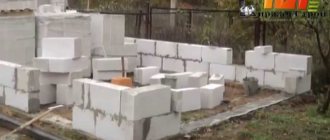
Construction of a basement from concrete blocks
Concrete block plinth
If you are looking for an economical option for arranging a basement, then concrete blocks are better suited to the task. This material is quite strong, repels moisture well, tolerates temperature changes, and is not susceptible to mold and mildew. If we talk about the disadvantages, it is the mandatory use of special equipment for their installation. It is impossible to deal with them manually.
The blocks are installed along the entire perimeter of the future building. They are fastened together with cement. It is imperative to leave recesses between the blocks for communications: water supply, electricity, sewerage, ventilation. As for ventilation, the openings must be at least 150 mm above the ground level. To prevent debris from getting into the holes left, it is better to cover them.
If the ground floor rises above ground level, then take care of space for windows. In this case, the larger the windows, the better. This will provide zero natural light to the room.
So that after installing the blocks you do not have to allocate a lot of money and material for plastering the walls, it is important to install them as evenly as possible. Although the blocks are durable materials, you still need to make an armored belt on top. It is necessary in order to level the entire tier horizontally, since it will still not be possible to install it perfectly level.
Construction materials
Of course, before building a plinth, it is necessary to take a responsible approach to the choice of materials. In addition to the practical side, do not forget that the exterior of the entire building will largely depend on the appearance of the lower part.
Sunken construction option.
If you choose to build a protruding plinth, then the materials for its construction must be durable and not require additional finishing (artificial or natural stone, concrete or brickwork). In most cases, the brick version will look the most aesthetically pleasing.
If the walls of the house are made of brick, then for the plinth it is best to choose concrete blocks, reinforced concrete, solid brick, etc.
Do not forget that in most cases it will be necessary to install a base armored belt. The thickness of the reinforcement and its quantity are determined by the design of the future house.
Monolithic concrete structure.
If you don’t know what to make a plinth from, then you need to take into account that the material for construction must meet the following characteristics: practicality, durability, frost resistance. That is why, as mentioned above, monolithic concrete is often used as a material for the plinth, or it is laid out from brick, blocks or stone.
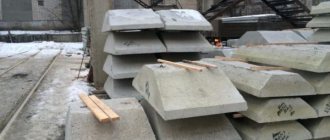
- Building a basement with your own hands from monolithic concrete is the best solution for a private home. It is recommended to do it immediately along the entire length of the external walls without any seams. During construction, formwork will be required, which will subsequently be filled with layers of concrete. In this case, it is best to purchase cement grade M300 or M400. In addition, it is recommended to give the structure additional strength using a reinforcement cage. If the base is wide enough, then its outer part can be covered with stone and covered with a small amount of soil.
- Concrete blocks for the plinth are not used so often. Their installation is carried out with dressing, and the blocks themselves are laid on a solution prepared in advance. There are not many standard sizes of concrete blocks on the modern market, therefore, before making the basement of a house with your own hands, you need to take into account that there will definitely be multiple blocks, and the voids formed due to this in the future will have to be covered with cement mortar.
- If the building stands on a strip foundation, then it is most rational to use natural stones for the construction of the basement. A stone plinth is made from any types of stones that are laid on cement mortar. It is worth noting that such work, as a rule, can only be done by professionals who can not only correctly lay artificial or natural stone, but also carry out the procedure for reinforcing the base in particularly difficult working conditions.
- The brick base is made of solid brick, which has high frost resistance characteristics. Traditional sand-lime brick is not recommended because it is susceptible to moisture. If in winter the temperature in the area drops below -35, then it is recommended to lay 1.5-2 bricks.
From foam blocks
The principle of all preparatory work for installing foam blocks is similar to working with concrete blocks. The foundation is poured with a small thin layer of mortar for laying the first row. To make the material adhere better, it is recommended to moisten the cement with water. To begin with, the corners are laid. Afterwards the walls are leveled vertically and horizontally. A fishing line is stretched between the corners and the main walls of the basement are pulled out.
After the first row, it is necessary to apply waterproofing in a liquid state. Waterproofing is applied in several layers. Each subsequent layer is applied after the previous one has dried. After this, the laying of foam blocks continues with special glue.
Don’t forget, each row, and especially the corner, should be checked for evenness. After finishing the masonry, a trench up to 50 mm deep is dug around the entire perimeter. The fittings are placed in it, which are welded together at the corners. Finally, the trench is filled with concrete. This will happen by strengthening the entire structure of the basement floor.
Design features of the base
What is the base made of? The lower part of the wall is most susceptible to the negative influence of weather factors, and therefore it can only be constructed from materials with low hygroscopicity and high frost resistance.
According to the current building codes, the masonry of this section can be laid from solid plastic molded ceramic bricks of strength grade M 100 with frost resistance Mrz 50, heavy monolithic concrete, concrete blocks or natural stone, with subsequent insulation.
Making a plinth from porous and water-absorbing materials - cellular concrete blocks, silicate and hollow bricks is prohibited.
Relative to the plane of the wall, the base can be recessed, protruding or coincide with it.
The brickwork of the support area is carried out using cement-sand mortar of a grade not lower than M50.
The part of the masonry protruding from the plane of the wall must be protected from precipitation; protection can be a profiled concrete block, a cement-sand mortar with an iron-plated surface, or a drip line made of galvanized steel roofing.
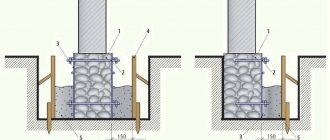
Plinths: 1 – wall structure; 2 – brick base; 3 – waterproofing layer; 4–2nd layer of waterproofing on the foundation or in the body of the masonry; 5 – facing tiles; 6 – blind area; 7 – facing frieze stone; 8 – mesh 150 x 150 x 4 cm, tied to the outlets of the reinforcement; 9 – cladding made of natural stone; 10 – hard cement mortar; I – reinforcement outlets embedded in the masonry; 12 – concrete cushion; 13 – foundation blocks; 14 – foundation (made of prefabricated reinforced concrete blocks, rubble masonry, rubble, etc.); 15 – front brick; 16- plaster; 17 – reinforcing mesh; 18 – air gap; 19 – insulation
Before masonry is completed, waterproofing is carried out along the upper edge of the foundation, for example, from two layers of bitumen-polymer roofing material on mastic.
ATTENTION: Outdated materials such as roofing felt, roofing felt, glassine, and also polyethylene film are not suitable for waterproofing, due to their short service life - no more than 5 years, subsequent replacement is impossible, and repairing waterproofing is a costly undertaking.
If the level of the top of the foundation corresponds to the planning level of the ground, and the floors of the first floor are much higher, two layers of waterproofing are performed: one on top of the foundation, the second at the level of the finished floor.
Individual developers often make the supporting part of the walls from monolithic concrete as a continuation of the strip foundation. This solution can be recommended for the construction of one-story houses without a basement, since the load from brickwork on 2-3 floors requires increased reinforcement, and deepening the foundations of the basement of the house increases the amount of formwork.
Making a plinth from natural stone can only be done by high-class professionals; not every mason will be able to correctly lay the stones and reinforce the masonry, so it is better not to consider this design for independent implementation.
Construction on a slope
As strange as it may sound, the slope only simplifies the construction of the basement. The ideal slope is considered to be up to 9°. So, there is no need to dig a large pit. It is enough to cut out part of the massif from the slope. In such cases, a garage in the basement looks original.
If we talk about technology, the first step is to make a cushion and waterproofing. The further stage of construction is described above.
So, from this article you could learn how to properly carry out work on the construction of a basement floor. If you have personal experience in construction, please leave comments at the end of this article. If you still have questions, you can contact an expert for help.