Today, the popularity of dishwashers (hereinafter also referred to as dishwashers, PMM) is growing: more and more people are installing them in their kitchens. But not all owners know how to connect a dishwasher to communications.
The new dishwasher saves owners from manually washing dishes
Of course, you can call a specialist who, for a fee, will connect the new equipment to the electrical network, water supply and sewerage. But owners who have a minimum set of tools and certain skills can connect the dishwasher to the water supply and sewer system themselves. The connection is carried out in several stages, including preparatory stages. Let's take a closer look at them.
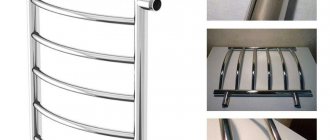
Dishwasher placement
The location for installing the PMM is chosen before purchasing the device. If it is a niche, then measure its dimensions so that the dishwasher can fit in it freely. Other possible placements are in kitchen furniture: under the countertop, sink, hob. Criteria used to determine the optimal location of the machine:
- distance to water supply and sewerage communications – within 1.5 m;
- proximity and availability of an outlet with a grounding contact and sufficient power;
- being near a sink and washing machine.
If the PMM belongs to the category of compact models, it can be installed directly on the countertop, not far from the sink. This option is good when the kitchen is cramped and there are no free niches. At the same time, you don’t have to worry about sewerage: simply lower the drain hose into the sink.
Built-in PMM in the kitchen
The second aspect of rational placement of PMM is to hang cupboards in a handy place. The process of cleaning cutlery will speed up if the operations of removing food residues from plates, loading cups into the washing chamber, and arranging ready-to-use items are performed from one workstation.
Types of models
Compact dishwashers are divided into the following types:
- Narrow. The width of such devices does not exceed 45 cm, but they can accommodate a large amount of dishes.
- Low. The width of such machines can vary from 50 to 60 cm, the height does not exceed 50 cm. Such units are built under the sink or on the table.
Among other things, compact models are divided into:
- free-standing;
- built-in;
- dishwashers under the sink.
Electrical connection
To connect the dishwasher to a 220V network, you will not need many materials:
- three-core copper cable VVGnG-Ls 3*2.5mm2
- 16A socket “Schuko” type with grounding contact
- RCD or diffavtomat 16A with leakage current 30mA
A dishwasher (DMM) is not a particularly powerful consumer of electricity, such as a hob (from 7 kW and above). Its power usually does not exceed 2.0-2.5 kW.
Modern energy consumption models correspond to class “A” or “A+”. That is, in a year, approximately 220 kW will run on your meter.
Despite this, it is still advisable to connect the PMM at the repair stage to lay an independent cable line in a separate groove.
If your renovation has been completed a long time ago, and after purchasing the equipment you don’t feel like scratching the walls again and ruining the wallpaper, then you can make do with the existing outlet. Just be sure to make sure that it is protected by an RCD.
Connecting a dishwasher through a simple modular machine is extremely dangerous.
The socket should be placed at a convenient height - up to 90cm from the floor level.
At the same time, place it on the right or left side of the washing machine, but not behind it.
Please also take into account the fact that the total length of the cord with plug for this equipment rarely exceeds 1.0-1.5 m. Based on this, choose a place for the outlet so that you don’t have to use an extension cord later.
The outlet itself must, of course, be grounded. But not everyone has this same grounding. Especially in apartments in old high-rise buildings. Therefore, many people use regular ones, and everything seems to work fine. However, the level of protection will no longer be sufficient.
Roughly speaking, if there is a grounding contact and there is a current leak, then you will not even be able to turn on the RCD. The consequences of these leaks, even small ones, can be quite lethal.
With a simple socket, the shutdown will occur only at the moment when you touch the body, which is already energized.
And you will still feel this electric shock, at least at the initial moment.
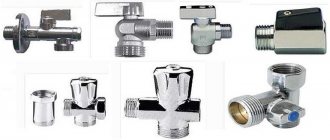
Connection to water supply and sewerage
Connecting the dishwasher to the water supply can be done in two ways.
The first is when you are at the stage of construction or major renovation, and you can afford to lay separate pipes, trench walls, etc.
The second is when your entire kitchen has already been installed and all finishing work has been completed. At the same time, you bought a dishwasher and you need to connect it all somewhere, to the existing water supply and sewerage system with minimal alterations and hassle.
Installation of new pipes
For major installation you will need a varied range of materials:
- polypropylene pipe PPR PN20 with a diameter of 20mm
- water socket
- union nut connectors
- 90 degree connection fitting PPR-90
- HP/HP elbow with ¾" external thread
- FUM sealing tape
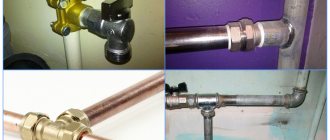
When installing pipes, the socket method is used. To do this, you will need a special apparatus for soldering polypropylene pipes.
The total length of the pipe and the number of fittings are selected individually. This depends on how far the dishwasher is from the cold water collector.
To begin with, mark the route where the pipes will be laid from the distribution manifold to the installation site of the PMM.
Then, use a wall chaser to cut to the required depth.
Next, connect the PPR connectors with a union nut to one of the manifold outputs.
Cut a piece of pipe so that it will last until the first turn or corner. At the same time, do not forget to leave a margin of 15mm for connections on each side.
Connect the pipe and fittings using the soldering method, controlling the position of the elbow.
After connecting all the pipes along the marked area, install a water socket at the very end. Be sure to fix it on the wall.
Next, screw a ¾-inch male threaded elbow into the water socket.
Mount the water supply hose onto the angle.
The AquaControl or AquaStop system with which it may be equipped should protect against leaks in the event of a breakdown and automatically stop the water supply.
Turn on the water and check the entire system. If everything is fine, you can finally seal the groove.
Drain connection and installation in the kitchen opening
All that remains is to connect the drain hose from the PMM to the sewer outlet through an adapter collar of the appropriate diameter.
Do not forget that the drain pipe must be mounted at an angle, allowing for a 1cm height difference per 1m of length.
And the drain hose itself has a bend at 70cm from the floor. That is why it is attached to the top of the dishwasher, and not at all so that it does not dangle.
All that remains is to connect the washing machine to a power outlet and check the functionality of the entire system. Then secure it in a specially prepared opening.
By the way, some models, for example from Siemens, have non-standard sizes. Therefore, think about your kitchen furniture in advance.
When installing in an opening, do not forget about the metal plate that must be nailed to the bottom of the tabletop (for the Bosch model).
This thing is mounted at the very edge and is a vapor barrier, like a screen. With it, the countertop will not swell from steam.
For some reason, many people throw it out and replace it with aluminum tape, securing it both to the table top and to the side walls of the car.
Power Supply Requirements
The main power consumption in the machine is concentrated in a tubular electric heater - heating element. The load value of the device is indicated on the PMM body and in the passport for the household appliance. If the machine consumes 2 kW, the socket must withstand a current of 16 A, and its location and design must satisfy the following conditions:
- Open access for turning on and disconnecting the PMM plug. The socket must not be located behind the body of the machine: only on the right or left.
- Placement for the built-in model is above the countertop (90 cm from the floor) or in an adjacent cabinet. In both cases, the distance to the sink is 0.5–1 m. For free-standing PMMs, the recommended height for fixing the socket on the wall is 40–90 cm, and the minimum is 20.
- Installation of a separate line from the apartment electrical panel. They use a cable with copper conductors with a cross-section of 2.5 mm² and a grounding conductor - its insulation is colored double yellow-green.
- Connection to the electrical network is made through a residual current device (RCD) and a 16 A circuit breaker to protect people from leakage currents (30 mA) and short circuits. Instead of two devices, you can install one that will replace them - a differential machine with the same parameters.
Expert opinion
I work in the household appliance repair industry. Extensive experience in restoring washing machines and dishwashers.
Ask a Question
The readiness of the socket for use should be checked, for example, using a table lamp. You cannot replace the cable laying with an extension cord, surge protector, or tee: excessive load can cause a fire in the socket and wires.
Connection to sewerage
A stable drain can be organized through a siphon or pipe insertion. The features of creating a drainage system are as follows:
- Most connection methods cause an unpleasant odor after washing dishes. This problem can be eliminated by installing an air plug.
- There is a possibility of reverse flow of drains. Therefore, it is recommended to create a loop height of at least 50 cm. When draining the bathtub, there is a possibility of an increase in the overall water level in the system.
- Runoff naturally causes a siphon effect. Abundant discharge of a large amount of fluid in one part of the system causes a fall in another.
Experts categorically prohibit making a direct connection to the sewer. Incorrect connection of the dishwasher to the sewer can cause backflow of waste water; it will not be possible to get rid of the unpleasant odor for a long period. A leak in the drain pipe joint causes an unpleasant odor in the room.
Through siphon
By connecting pipes through a siphon, you can create a complex system that will be highly efficient. Among the features of such a scheme are the following points:
- The sewer outlet pipe is represented by a nozzle, which is used to ensure tightness when tightening a special clamp.
- The design features of the siphon determine the formation of a water barrier. It eliminates the possibility of an unpleasant odor.
- The connected siphon ensures the height requirements for the sewerage system. The upper curve is obtained naturally.
- The drain outlet does not connect directly to the sewer pipe. It is easier to connect the dishwasher yourself, but such a scheme can lead to a siphon effect.
The disadvantage of this connection method is that its use is not possible in all cases. Installing equipment at great distances requires the use of a different method.
Pipe tapping
You can simplify the task of creating a sewer outlet by directly connecting the machine to the pipe. The main reason for creating such a system is that the sink is completely filled only after infrequent large feasts. Connecting the drainage directly to the pipe involves the use of an adapter, represented by an angular outlet from the drain pipe.
Tapping into the pipe when connecting the dishwasher to the sewer ensures precise fitting of all elements. This connection method is selected if household appliances are located remotely from the mixer.
When connecting a dishwasher, you need to ensure that the system is properly powered. To ensure operational safety, the cable is laid in a groove. The building material acts as additional insulation. A mandatory requirement is the presence of a grounding contact that is not connected to communications. The cable being laid must be designed to transmit a current of 16 A.
To avoid mistakes when doing work yourself, you must adhere to the following recommendations:
- When connecting to a device, you must use a machine of appropriate power. It is prohibited to use safety plugs and modular circuit breakers.
- It is prohibited to install the equipment in close proximity to a wall. A slight displacement leads to deformation of the hoses, and the machine will begin to malfunction.
- The device must be positioned strictly vertically. This point is indicated in the operating instructions. The maximum deviation is 2°.
- The socket is located high above the floor. This eliminates the possibility of a short circuit if the kitchen is flooded.
- When creating a long discharge pipeline, it is not recommended to cut the standard hose. This is due to the fact that there may be a signal wire inside, which is an element of the safety system.
- It is forbidden to use flax tow, because... Over time, it delaminates and small particles can enter the system.
The dishwasher is connected taking into account its location. Preliminary preparation of the base will allow you to avoid failures at the time of the cycle.
Connecting the device to the water supply
First of all, you need to decide what kind of water will be consumed by the dishwasher. 3 options: hot, cold, joint source. The installation itself is not difficult if the sink is nearby.
Connection to water supply
Junction point
The design of the dishwasher involves connecting the machine to cold water: this is indicated by a heating element built into the washing apparatus. Due to the constant rise in the cost of electricity, the question arises - whether to connect to a hot main in order to save on kilowatt-hours. To understand which is better, you need to evaluate the advantages and disadvantages of each option and see their features:
- Filling hose for connection to the main line. The sleeves for passing cold water are marked in blue, and the hoses in red for hot water. There are also universal ones - they are marked with a blue-red stripe. Differences in hose design cannot be ignored: there is a risk that the product will not withstand high temperatures.
- Connecting to a hot main seems to make sense because of the potential energy savings. Rinsing will also be performed with heated water, which helps to quickly dry the dishes.
- Reasons to refuse connection to a hot pipe: the temperature for which the PMM parts are designed should not be higher than 60ºC. In the highway, this value is often exceeded, which is not good for the equipment and creates a danger for the consumer. Programs with 50ºС mode may become unavailable for use. The quality of hot water is always worse: cold water is considered drinking water and is purified to the appropriate sanitary standards.
Manufacturers offer PMM models with connection to hot and cold water. To make sure of this, you should look at the technical data sheet of the dishwasher or look at the back wall of the device: there should be two inputs for connecting hoses. Most PMM models around the world are produced for cold water use. This connection option is considered further.
Is a dishwasher profitable?
Oh yes! No
Installation of water distribution fittings
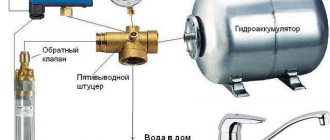
The proximity of the device to the sink ensures a simple connection: at the point where the flexible hose from the mixer is connected to the main line, a tee with two outlets and a tap is screwed in. If the design of the dishwasher does not provide for a coarse water filter, it is built in immediately after the valve. The inlet hose of the machine with the Aquastop device built into it is connected to the fitting at the outlet of the filter system.
Installation of fittings is carried out in the following order:
- Turn off the tap on the apartment cold water riser.
- Disconnect the flexible mixer hose from the pipe and screw in the tee with the valve in its place.
- Connect the mixing device sleeve to one outlet, and the PMM filter and inlet hose to the other.
When there is no place near the sink for a dishwasher, you will need to lengthen the flexible water supply by extending it with an additional hose, but no more than 4 m. The hoses are connected using a tube with two clamps. If the distance of the machine from the connection point is ≥4 m, a rigid section of the water supply system is laid.
How to reliably connect a dishwasher to the water supply: 4 diagrams
Before starting work, I recommend thinking about how to avoid accidentally flooding your apartment and what technical means can save you.
What is important to ensure in matters of safety and reliability
Manufacturers of modern dishwashers provide their products with protection against leakage of tap water, which should prevent flooding in the apartment.
For this purpose, they install a special blocking device called Aquastop at the inlet of the pressure hose. It is made in the form of a tip with a fitting for connection to the thread of a water tap.
The Aquastop system is equipped with dishwashers, washing machines, and other household appliances that are under tap water pressure.
On the reverse side of such a hose an additional housing with water filters and sensors is assembled. They are connected by wires to a common control circuit.
At the exit from the housing, water is supplied through separate hoses into working containers. If the seal of the hydraulic lines is damaged, a spill of water occurs.
It is assembled in the lowest compartment, where a float sensor is located with contacts that operate in the upper position. They issue a signal to shut off the pressure.
Inside the housing of the Aquastop inlet fitting there is an electromagnetic coil with a return spring and an emergency pressure shut-off valve. Water begins to flow into the dishwasher when voltage is applied to the electromagnet, and when removed, it is blocked.
At the same time, the pump is turned on, and the spilled liquid is sent under pressure into the sewer system.
The electromagnet coil is powered by 220 volts. It is supplied to it through wires built inside the pressure hose.
I wrote all this information about Aquastop so that you do not repeat the mistakes that some “innovators” make when they shorten the pressure hose, cut the built-in wires, and grossly violate the logic of the dishwasher.
Useful information about leakage protection:
- the Aquastop system, briefly described above, is not the only technical barrier against a flood;
- The simplest mechanical scheme of this type, Aquawatch, works on the principle of comparing pressures at the inlet and outlet of the device. When the rate of water flow increases sharply to 10-12 liters per minute, the pressure suddenly stops;
- the most advanced leak protection system uses both wired and modern wireless technologies for transmitting information from sensors.
For more detailed useful information about the operation of such systems and options for connecting dishwashers, see the video by Pavel Sidorik.
The simplest option for connecting a dishwasher to a modern water supply
One of the common ways to supply water to a washbasin faucet is to use flexible metal hoses mounted on the threads of a water pipe.
We will need to disassemble this connection and screw an additional tee with a ball valve between the pipe and the nut, which is necessary for emergency shutoff of the pressure.
This adapter and stopcock with a metal handle are sold in all hardware stores. Such a connection will not be difficult even for a novice master.
After installing the tee with a ball valve and Aquastop, apply test pressure to the created hydraulic system, carefully check all connections for leaks. If you see that there are wet places somewhere, tighten the connections or replace the gaskets.
The plastic pressure hose nuts are not designed to withstand the force generated when using a wrench. They may burst. They are wrapped by hand, but as tightly as possible.
2 ways to alternatively install a pressure line
Sometimes it is not possible to install a tee with a shut-off valve for a dishwasher, which is typical for older apartments with welded steel pipelines connected directly to the sink faucet.
In this case, you can use one of the following two methods.
Using a crimp coupling to connect a dishwasher
The crimp coupling is made of a collapsible design from brass parts with a bolted connection.
It consists of two half-clips. At the top there is a flange for connecting a hose. The rubber seal ensures the tightness of the joint being created.
At the site where the coupling is installed, the paint is removed from the pipeline until a smooth and clean joint surface is formed. A hole is drilled above the water drainage point.
A sealing collar is attached to it and a crimp coupling is mounted.
The further hydraulic circuit will be attached to it.
Option for connecting to a water tap mixer
Sometimes it may be useful to install a water drain tee on a dishwasher, mounted between the mixer and the pressure pipe.
In this case, you will need to simultaneously install a sleeve of the same length on the hot water supply pipe.
This method may not be suitable for those owners who are worried about the design of their kitchen. Here the connected hose will stick out.
Features of connecting to hot water supply: myths and reality of the saving method
Most dishwashers are designed to run on cold water only. However, many owners expect to save money by connecting it to hot water supply.
There is no clear answer to this question. To accurately determine the effect of cash savings on operating costs, it is necessary to take into account a number of factors:
- During operation, the dishwasher will not draw cold water, its consumption and cost will therefore decrease slightly, but not significantly.
- Hot water consumption will increase and it will cost more.
- The energy consumption associated with heating water for washing dishes will decrease slightly.
However, it is important to take into account a number of other issues:
- Many manufacturers, especially Bosh, recommend in their instructions to use water with a temperature of about 20 degrees.
- Water for washing dishes is usually heated to 50 degrees, and a temperature of 60 or higher is created inside the hot water supply system.
- Flexible hoses are marked in blue and red colors to work in different temperature conditions. If the optimal regime is violated, they quickly fail.
- Hot water releases more salts and scale. When installing it at the entrance to the system, it is necessary to install effective flow filters. They will start to clog frequently. They will have to be cleaned.
- The increased temperature will affect internal lines, and hoses and plastic will not work in the designed mode.
- Most machines use condensation cooling when drying dishes. It is based on the fact that inside the washing compartment there are heated wet dishes, and the inner walls are washed with streams of cold water. Due to the created temperature difference, heated steam from the dishes passes to the cold walls, condenses on them and drains. If the calculated temperature regime is violated, the drying time will be significantly increased.
- But the load on the heating element will really be reduced.
The conclusion about the need to connect the dishwasher to hot water is up to you, and I will quote a message from a repairman forum on this issue.
One of the forum members gave an example of his calculation, where the effect of saving money for a month was 3 rubles, and for a year - about 100. However, he did not take into account the costs of replacing parts and repairs. I have not verified this data. If you have a desire to tackle this issue, then write the result in the comments.
Drainage from the dishwasher to the sewer
First you need to inspect the drain from the sink. A siphon is attached to the bottom of the sink opening, through which the liquid flows into the sewer pipe. This is the most convenient place to organize drainage from PMM. Also, on the drainage main itself, a backup inlet pipe is installed for connecting plumbing. Both options are suitable for arranging the connection point for the drain from the washing machine.
Connection via sink siphon
It may turn out that the available connection location will be a sewer section without branches. Then a modification will be needed:
- Find a joint on the main pipe, make a connector by removing one element.
- Insert a tee into the resulting gap and increase the length with an additional insert.
- Seal new joints.
Expert opinion
I work in the household appliance repair industry. Extensive experience in restoring washing machines and dishwashers.
Ask a Question
The drain hose can be connected directly to such an outlet, sealing the entrance with a rubber cuff. Connecting through a siphon is simpler: it may have connections for connecting hoses from a washing machine or dishwasher. If there are no outlets, then you need to purchase another siphon model and install it instead of the previous model.
Connection between drain and sewer
If the dishwasher is installed next to a sink, you should pay attention to the siphon, which drains liquid from the sink into the drain. If there are no free outlets in it, you need to purchase a siphon with one additional outlet or two from a plumbing store (if you also need to connect a washing machine).
Siphon with two outlets for washing machine and dishwasher
The bends are equipped with conical fittings shaped like an inverted V (see photo). This form is not accidental. The upward bend prevents the spread of odors from the sewer and also prevents the reverse flow of liquid from the sewer into the PMM.
Connecting the PMM to the sewer through a tee
There is also the option of direct connection to the pipe through a tee with an oblique outlet (see photo). To organize the upper bend of the drainage hose, a special device is used that can be attached to the wall. To prevent unpleasant odors from penetrating into the room, a sealing sleeve made of rubber should be installed at the junction of the tee and the drain hose.
Finally, you should check the tightness of all connections , connect the dishwasher to the electrical outlet and turn it on for the first time. It should be done without utensils. To wash the hopper, you need to use special cleaning tablets or a cleaning and disinfectant for PMM. Only after turning it on for the first time can the dishwasher be installed in a furniture niche.
As you can see, you can connect to communications yourself. We hope that our article will help you complete this job.
Installation of new communication pipes
If the connection point to the water supply or sewerage is far from the dishwasher, you will have to lay new pipes. The route and type of fastening are selected individually for each case. Construction stages:
- A sketch is drawn up with a diagram of the pipeline and its piping with plumbing fittings.
- The route is marked from the tie-in to the main line to the PMM, and a groove is made in the wall using a wall chaser to suit the size of the pipe - propylene Ø20 mm is sufficient.
- Segments of the required length are cut to a corner or turn. You should leave a margin of 15 mm at each end.
- Connect the pipe and fittings by soldering, fix the water socket for the PMM on the wall, screw into it an elbow with a thread for a ¾-inch nut of the water supply hose.
When the pipeline is ready, it is checked for leaks, after which the groove is sealed. In a similar way, but at the bottom of the wall, a sewer drainage system is laid. When installing it, a slope towards the drain is maintained at the rate of lowering the pipe by 1 cm for each meter of length.
Have you set the water hardness in PMM?
Yes, of course. No.
Connection to the drain and installation in the opening
The PMM drain hose can be connected to the sewer pipe through a cuff of the required diameter. In this case, the bend of the machine sleeve is at a height of 70 cm from the floor, for which it is attached to the dishwasher at the same level. Remaining installation steps:
- Insert the appliance cord plug into the outlet.
- Turn on the device in test mode. Eliminate defects if they appear.
- Secure the PMM in the prepared niche or opening.
Expert opinion
I work in the household appliance repair industry. Extensive experience in restoring washing machines and dishwashers.
Ask a Question
At the final stage, attention is paid to the vapor protection of the furniture in which the device is built: a metal plate is attached to the bottom of the tabletop. It will act as a protective screen and will prevent wood elements from swelling.
Preparation
As always, preparation comes first. It’s good when everything fits exactly right. But often the kitchen set is completely unprepared for installing a dishwasher. The problem can be solved simply and radically - you still have to sacrifice something: shelves or drawers. Having prepared the place, let’s evaluate what is missing for a high-quality installation:
- You may need to install an additional partition.
- A door trim or replacement of part of the facade will be required.
- Sometimes the base plate of the headset requires modification.
In general, it often happens that you can’t do without a furniture maker - we invite you, we order. Moreover, the vast majority of them already had repeated experience of similar work. Therefore, it is better to entrust the façade part of the headset to professionals.
Using a siphon and mixer for adjoining
Proximity to the sink is the easiest way to start the dishwasher. There is no need to lay pipelines, the number of alterations is reduced to a minimum. For new houses, such a supply of communications is the rule. To connect household appliances the following are equipped:
- A socket with grounding, designed for the power of washing machines and PMMs.
- Siphon with two additional outlets - for SMA and dishwasher.
- A tee on a cold pipe under the sink with taps and three fittings: 1 for the mixer, 2 for household appliances.
When such equipment is not available, additional plumbing fixtures are installed independently.
Recommendations for individual installation operations
The work on installing the PMM also includes leveling the position of the machine using adjusting screws. Two of them are located in the front of the body, one is located in the back. Built-in models are secured in the opening using bushings and screws. Tips to help you connect correctly and extend the trouble-free operation of your dishwasher:
- installing a drain hose in a sink may risk flooding your neighbors; if the hose falls out of the sink, it is better to connect it through a siphon;
- the grounding wire from the PMM socket is connected to the bus of the same name on the apartment panel - it is prohibited to ground the machine to gas, heating, or water pipelines;
- the gap between the wall and the back panel of the device must be ≥5 cm to ensure air circulation;
- Electrical sockets for each high-power household appliance: stove, washing machine, PMM must have a separate connection to the apartment panel so that there is no overload in the electrical network.
The device comes with a user manual, which includes connection instructions. Each PMM model is individual, but the recommendations are general.
Completing the installation
When the communications are connected, we attach a steam protection on the underside of the tabletop: a metal or plastic plate or glue a film - depending on what is included in the kit. In the desktop version, for example, nothing is provided, so we make it ourselves from scrap materials. Next, we connect the dishwasher to the water supply, sewerage, and electricity. Then we “push” the equipment into place.
Horizontal alignment is required. This stage should be taken seriously; the quality of the wash and the duration of operation depend on the quality of the installation. For this purpose, threaded legs are provided. For built-in models, the front ones are freely accessible, the back is usually one - with an adjusting screw, also accessible from the front. It is implemented on almost all models, from prestigious Bosch to less popular brands. For aesthetic reasons, it is necessary to eliminate the gap at the top - the machine is raised to the tabletop and only after that the set is leveled in all positions and planes.
In principle, that’s all – you can do a test run and evaluate the quality of the connection. The final stage for built-in models is hanging the front door from the set. There is a template for this:
- We put it “in place” on the dishwasher door.
- We transfer it to the back side of the facade door and make markings.
- We mark the holes for the screws with an awl or drill.
- We degrease the areas for the double-sided self-adhesive facade fasteners and attach the seal.
- We combine - we put the facade on the dishwasher door.
- Carefully open it and secure it with 1 self-tapping screw.
- We close it, evaluate the position of the façade, and adjust it if necessary.
- We open it and fasten the façade diagonally with a second self-tapping screw.
- Again, we make sure that the position is correct and tighten the remaining screws - we secure them completely.
After this, we adjust the built-in dishwasher - we clarify the position in the plane of the remaining facades of the set. If the design provides for it, we fasten it with self-tapping screws to the headset and install the base - in most cases it requires trimming it from above.
At this point, the installation of the dishwasher is completely completed. Obviously, you can do everything yourself with a minimal set of tools. Additional difficulties can only be caused by the aesthetics of the kitchen set itself.
Typical installation errors
The first priority when installing a washing machine must be compliance with safety rules and the design of electrical appliances. To avoid having to redo the installation that has already been completed, you need to take into account the experience of the craftsmen who have ever put a dishwasher into operation. Mistakes often repeated by home craftsmen:
- There is no need to simplify the electrical protection of the PMM - you need to connect it through a difavtomatic device or an automatic device + RCD device pair. There shouldn't be any traffic jams.
- Be sure to maintain a gap between the wall and the machine body. The hoses may become pinched and the display will display an error.
- Install the device in a strictly vertical position. Better - using a building level. When adjusting, strive to ensure that the gap between the top of the machine and the tabletop is minimal.
- Putting a 220 V socket under the sink is a bad decision. Leakage may cause a short circuit and fire.
- It is not advisable to connect the device to hot water: saving is problematic, and significant damage to the PMM parts can be caused.
- When extending the drain hose, keep in mind that it must not be shortened: it may contain a leakage protection device. Simply extending the main sleeve is enough.
There is no need to use flax to seal threaded connections - it can swell and tear the nut. It is better and more convenient to use FUM plumbing tape - a fluoroplastic sealing material.
Bottom line: you can connect the dishwasher yourself if you adhere to the stated regulations. Recommendations and warnings from experts about possible mistakes will help you avoid them.