Finishing features
One of the most important requirements for finishing a real fireplace is the fire resistance of the facing material. The structure consists of a hearth (the place where the fire burns) and a portal (the decorative outer part) with a chimney. The item is most often made from clinker - a special heat-resistant stove brick.
The color of the finish also matters. When the fireplace is intended primarily to heat the room, and not to decorate it, the darkest matte tones are preferable. The more textured and embossed the surface is, the stronger the heat transfer, which means the higher the temperature in the room with such a stove.
Using wood as a finishing material
Wood fireplace trim
When carrying out finishing work, wood requires strict adherence to certain conditions:
- The material must be treated with a fire retardant solution.
- It is advisable to finish the parts of the fireplace that are located away from the hearth.
- Be sure to have a protective screen to prevent sparks from flying.
- The work should be carried out using tree species that can withstand increased heat.
Decorating a fireplace with your own hands can be done in different ways, which allows you to realize any fantasies. The main thing is to comply with the necessary requirements and instructions.
Types and methods of finishing a fireplace
There are several options for finishing the portal, each of them has its own positive and negative properties. Most often, the hearth is plastered and then painted, lined with decorative ceramic tiles, natural or artificial stone, and sheathed with sheets of metal. The portal itself is often decorated with fireproof glass doors, heavy cast iron gratings, and steel shutters.
The cramped the room, the smaller the decorative hearth is made, the lighter its decoration.
Plastering: advantages, disadvantages
Finishing a fireplace with plaster is not a complicated or expensive process. Suitable for structures made entirely of brick and concrete. This design does not weigh down the object, so there is no need to further strengthen the foundation. The plaster layer, intended for subsequent finishing, is slightly different from the decorative option. When changing the interior, the structure can be easily repainted in a different color that matches the decor. The disadvantage of this finish is that when applying a thick layer, reinforcement is required, as well as long-term drying.
Tiling a fireplace - pros, cons
Very often, fireplaces are lined with ceramic tiles and porcelain stoneware. The latter is placed both directly on the glue and on metal profiles. Using porcelain stoneware it is easy to disguise uneven brickwork, chips, and other surface defects. The material is durable, resistant to frost, open fire, sudden changes in temperature, humidity, physical damage, and retains its beautiful appearance for a long time. The downside is that the price is not the lowest.
Cladding with ceramic tiles is an inexpensive option, since you can make it yourself or choose from the widest assortment now offered by most stores. In shape it is offered in square, rectangular, figured, corner, etc. The material is fire-resistant, environmentally friendly, and it can be chosen to suit almost any interior style. The disadvantage of the material is low impact resistance.
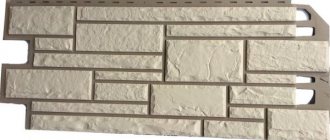
Decorating a fireplace with artificial stone - pros and cons
Artificial stone is cheaper than natural stone and vaguely resembles it in appearance. This material is several times lighter in weight - no additional strengthening of the foundation is needed for it. Frost resistance and resistance to chemicals in most species are also excellent. Fake stone is made from gypsum, stone chips, polymers, imitates granite, marble, onyx, sandstone. The material is easy to install by hand; there are flexible options for curved surfaces. Significant disadvantages - fake stone does not have the thermal conductivity of natural stone, as well as the corresponding characteristics of strength and moisture resistance; it is more fragile.
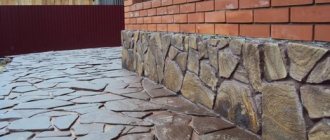
Finishing with natural stone: positive, negative qualities
Real natural stone is a heavy, beautiful, completely natural material. Such finishing always looks luxurious, it is voluminous, quite complex in execution, but extremely durable - the fireplace will last for more than one generation. It is permissible to install the structure even in a room that is not heated. The stone is abrasion-resistant, impact-resistant, and the variety of types, shapes, and colors allows you to choose it to suit different interior styles.
The construction of a structure on the first floor of a private house requires a reinforced foundation underneath; on the second and subsequent floors it is recommended to install the product at the junction of two main walls. Another disadvantage is the high cost of the material. For cladding use:
- marble;
- granite;
- sandstone;
- shell rock;
- soapstone;
- tuff;
- limestone.
Metal cladding - advantages, disadvantages
Decorating the hearth by sheathing it with metal sheets is suitable for many modern interior styles. The most popular finishing techniques are stainless steel, copper and brass, decoration techniques include broaching, embossing (including hand-made), artistic etching, and plasma cutting. Metals can be easily combined with natural or artificial stone and plaster. The undoubted advantages of such finishing are the relatively light weight of the parts, the ability to decorate the fireplace in almost any interior style (retro, classic, hi-tech, etc.) without completely rebuilding it. A free-standing structure made entirely of metal is easy to connect and place anywhere in the space. The main disadvantages are the likelihood of serious burns when touching a metal surface, uneven heating of the room, and rapid cooling.
Material selection
The desire to add zest to the home interior and decorate the hearth according to an individual project should be accompanied by the choice of high-quality material. The requirements that you should consider when purchasing are as follows:
- high temperature resistance;
- good thermal output;
- high-quality adhesion to the solution;
- resistance to mechanical damage;
- aesthetics.
There are many options for covering a fireplace with materials that fully comply with established requirements. The most common types are:
- tiles (terracotta, clinker, porcelain stoneware, majolica);
- natural and artificial stone (granite, basalt, marble, soapstone);
- tiles;
- brick.
We will dwell in detail on the properties and process of facing a fireplace using the first two types.
How to choose plaster for a fireplace
To decorate the fireplace insert, chimney and other parts, you will need to choose the right plaster. The composition is often mixed independently using the following main components:
- clay – added for heat resistance. It is advisable to choose something that is not too “greasy” - it will quickly crack when the structure being designed is heated;
- sand - it is not afraid of high temperatures, the coating is as durable as possible, its volume is approximately twice as large as clay;
- lime is an excellent plasticizer, improves adhesion to the base, and facilitates the application process. It is recommended to purchase ready-made slaked fluff or make it yourself;
- asbestos, fiberglass - increase the thickness, heat resistance, and strength of the coating. It is preferable to add up to 7-10% natural fiberglass to the solution, even less asbestos, since it is very toxic;
- cement - as a binding component, it is added no more than 50% of the total volume of the mixture, since a larger amount will lead to cracking of the surface.
If you have no experience in preparing multicomponent mixtures, it is better to buy a ready-made plaster composition for stoves.
How to plaster yourself
Plastering the structure yourself is not too difficult. It is only important to choose a special composition - fire-resistant, when heated, does not release harmful substances into the surrounding atmosphere, and does not crack under the influence of high temperatures.
How to perform plastering step by step:
- before starting work, the walls of the structure are cleaned of dirt, degreased, slightly heated, and the masonry is moistened with water;
- then reinforcement is made using a special mesh to make the coating as durable as possible;
- then spray with a liquid solution - this allows you to fill the pores in the brickwork;
- when the layer has slightly set, plastering is carried out - a layer of four to six mm is applied. thick. To do this, use a trowel and a trowel;
- then apply another one or three of the same thin layers and dry;
- The covering is made with the same liquid mixture as the spray; it helps to hide the smallest defects. The plane is leveled until it hardens completely, using a wooden smoother;
- It is permissible to heat the stove after three to four days - speeding up the drying process with kindling is unacceptable, since the coating often cracks;
- the textured coating is made very thin - 0.3-0.7 cm, so that the finishing does not weigh down the structure;
- Decorative plaster is rarely tinted, so you will have to add the paint yourself. It is chosen to be heat-resistant - up to +650 degrees; silicone enamel, which almost never cracks, is best suited.
Tile adhesive and mortar for stoves
The quality of adhesion between the tile and the stove surface depends on the solution on which the tiles are placed on the stove. In view of its intended purpose, the adhesive solution must be heat-resistant, fire-resistant, and heat-resistant.
There are three types of mortars for laying stove tiles:
Clay mortar for oven
How to prepare: clay, sand and water are mixed in certain proportions, which depend on the type of clay:
- for oily clay the ratio will be 1 part clay, 4 parts sand, 1 part water. The fat content of clay can be determined in the laboratory or in a traditional way - you don’t feel sand in it, and a ball rolled out of it cracks badly when it dries;
- for normal – 1:3:1
- for skinny people – 1:2.5:1
Cement mortar for furnace
How to prepare: cement and sand are mixed in a ratio of 1:3 and brought to the desired consistency with water. In this case, the cement must be grade M 400 or higher. To improve the properties of the solution, it is recommended to add PVA and asbestos to it. Stove makers advise adding 1 kg of salt. onto a bucket of mixture;
Dry mixture mortar or special adhesives (cement, dispersion, epoxy)
They are ready-to-use mixtures intended for a specific type of tile. They are good because the proportions in them are carefully adjusted, and in addition, various plasticizers are added that improve the properties of the adhesive solution. Such adhesives have proven themselves well: SCANMIX Skanfixsuper (Finland), Plitonit-SuperKamin (Russia-Germany). Budget options: SILTEK T-84 (Ukraine), “Pechnik” (Belarus) and “Plitonit W” (Russia).
Ready-made adhesive solution - adhesive mastic
When choosing this type of glue, you need to pay attention to the markings. It should be intended for lining stoves and fireplaces. Good user reviews for NEOMID SUPERCONTACT (Russia), Terracotta (Russia), “Parad-77” (Belarus). But, in general, the quality of adhesion of the mastic to the surface leaves much to be desired.
In any case, the solution must meet the requirements for heat resistance and coefficient of thermal expansion. Ideally, laying tiles on the stove should be done using the same mortar that was used to level its surface.
All professionals and users agree that it is not worth saving on materials.
Which tiles are suitable for finishing a fireplace?
Basic selection options:
- impact resistance, wear resistance - directly affect the durability of the coating;
- design – the appearance of the fireplace should match the style of the room;
- moisture resistance – if there is water in the room (sauna, bathhouse);
- resistance to temperature changes - very important if the fireplace is the only source of heating in the room;
- thickness - the more the better, it is recommended that the option is no thinner than eight mm;
- porosity – it is advisable to use low porosity, as it is more durable;
- marking tiles - the use of category “A” is more acceptable, since the dimensions of the product are as accurate as possible, the pattern is clear, which is very important when laying out complex patterns.
There are many types of finishing materials based on ceramic tiles:
- terracotta is a strong and durable material, frost-resistant and vapor-tight. The tiles do not split upon impact, are practically scratch-resistant, are suitable for damp, heated and unheated rooms, and can be attached to any surface. A fireplace decorated with terracotta tiles heats up longer than others, and the coating tolerates sudden temperature changes well;
- tiles - used for highly artistic finishing of stoves, most often covered with glaze, almost any design can be applied. The heat transfer of the product is high, it is easy to care for, but the cost of the material is high;
- porcelain stoneware – combines the best properties of granite and ceramics, is resistant to temperature changes, does not crack, does not mold, does not fade in the sun, and is available in various color options;
- clinker tiles - made from several types of clay, with the addition of fireclay powder. The thickness of the material is 9-13 mm, it is easily installed using hot-melt adhesive, but when decorating a summer kitchen, the latter is frost-resistant. Clinker tiles are low-porous, wear-resistant, impact-resistant;
- majolica - has been used since ancient times; its composition is an improved terracotta, with a pattern applied to it, covered with a transparent glaze. The price of the material is high,
- tiles are heat-resistant and tolerate temperature changes well, but in the cold the material quickly deteriorates and crumbles. Matte options are preferable for fireplaces - they do not crack. Installation is carried out using heat-resistant compounds or without glue - in a metal frame;
- fireclay tiles - made from stone flour and refractory clay, are acid-resistant, fire-resistant, can withstand extremely low temperatures, and do not wear off.
DIY tile installation technology
For self-installation, purchase a special composition - tile adhesive. On the back side of the tiles there are usually special notches that increase the adhesion of the parts to the base. It is recommended to reinforce the structure with large-mesh reinforcing mesh, secured with screws or nails. Next, the mesh is covered with a mixture of sand, clay, high-grade cement, with the addition of polymers. The seams are grouted so that they are even; special plastic crosses are used when laying. The evenness of the coating is checked with a level and plumb line.
Tile design options
The tiles in the fireplace surround look stylish and modern. Popular types include majolica, clinker, terracotta and porcelain stoneware. Despite certain similarities, they have distinctive features.
Cladding the fireplace with porcelain tiles brings the appearance of the structure as close as possible to the design of natural stone. This is due not only to the external similarity of the materials, but also to their technical characteristics.
Majolica is a pressed ceramic product with an applied pattern protected by glaze. Thanks to this coating, the fireplace lining has a bright shine and gloss, which harmoniously fits into the classic interior of the room.
A distinctive feature of facing a fireplace with terracotta tiles is the absence of glaze. This finish can successfully imitate torn stone, old Prague brick or a wood surface. The wide color palette of terracotta tiles allows you to choose the most suitable shade for the fireplace for a given interior. The surface of the finishing material has a polished, coarse-grained or smooth texture. Another advantage of the tiles is environmental safety and high heat resistance.
The clinker tile cladding looks original. The basic component of this material is clay, which does not affect the efficiency of the fireplace, although the heating period of the heating structure increases slightly. The use of clinker tiles is another opportunity to imitate different types of finishes: marble or granite, tiles or brick.
As an inexpensive and unique design option for a fireplace, you can use a combination of ceramic tiles and decorative bricks. Combining rough and smooth textures, light and dark tones will create a unique design for your home.
Choosing artificial stone for finishing
Artificial stone is made from gypsum, synthetic materials, most often with the addition of stone chips. Some of its types are externally indistinguishable from the real thing. High-quality design is achieved with the right choice of materials.
Main criteria:
- price - a good stone is never excessively cheap, but foreign products are always an order of magnitude more expensive than domestic ones;
- goods used for finishing residential premises must have a certificate of conformity and hygiene, and not contain harmful components;
- the longer a manufacturing company exists, the more likely it is that it produces high-quality material;
- the stone should not be too porous - this affects the strength and service life of finishing elements;
- The manufacturer's logo must be indicated on the packaging; the date of manufacture is also important - the optimal strength of the artificial stone is achieved within 28-30 days from the date of manufacture. If the period is shorter, the product is of poor quality, it is better to refuse to purchase it.
Features of working with artificial stone when decorating a fireplace
Decorating a hearth with fake stone has a number of features:
- work is performed at a temperature of at least +6 degrees;
- it is important to use the appropriate adhesive recommended by the manufacturer;
- for cutting use a hacksaw;
- the surface of the product is cleaned, a reinforcing mesh is installed on it;
- then plaster is applied to the mesh, the layer thickness is 0.9-1.5 cm, and dried;
- cladding is done from the corner from top to bottom so that the parts do not get dirty;
- a thick layer of mortar is applied to each part with a trowel, pressed to the place to be decorated, and excess glue is removed;
- it is advisable to use long and short parts in turn, adjusting them with a hacksaw or wire cutters;
- all seams are filled with mortar, dried, and excess is removed;
- After complete drying, the structure is coated with hydrophobic compounds to increase the service life of the coating.
How to prepare the masonry surface
The third component of a high-quality fireplace cladding is a carefully prepared base. It is strictly necessary to prime brickwork and the composition for this should be of the highest quality possible. It is recommended to use Knauf Tiefengrund or similar acrylate-based primers Dufa Putzgrung, Marshall Export Base, but only for interior work.
The second step is to secure the plaster mesh. The cell size must be chosen twice as large as the planned thickness of the adhesive seam. You cannot fasten the mesh with dowels in plastic plugs; you should use metal anchor wedges with a diameter of 6 mm. The fastening points are located with a frequency of about 25–30 cm. It is necessary to fasten into the body of the brick, and not into the seam. To prevent the masonry from splitting, turn the hammer drill to low speed.
Additionally, you can “tear” the surface of the masonry by tapping it with a hammer and chisel to form many notches. This will significantly increase adhesion, but this can only be done at the initial stage before priming. At the end of the preparation, the surface must be thoroughly dust-free; you can also open the masonry with another layer of primer from a hand sprayer.
Choosing natural stone for facing a fireplace
Cladding with real stone involves a wide variety of materials. Marble and travertine, sandstone and granite, tuff and limestone are suitable for work. When choosing the appropriate option, you should remember that smooth materials require less maintenance and cleaning from dirt. Stones such as granite and marble have a significant weight, which will require a very solid foundation for the fireplace. It is equally important that the chosen decor fits well into the interior.
Properties of different stones:
- sandstone is layered, has a wide range of colors (from red-pink to dark gray), changes color when the light changes, and is resistant to temperature changes;
- slate - can be red, yellow, green, brown, black, etc., is relatively expensive, requires periodic treatment with dirt-repellent mixtures;
- travertine - usually yellowish-gray in color, porous, not too dense, therefore to improve its properties it is coated with special compounds;
- granite is the most durable, reliable, durable, resistant to impacts, chemicals, and temperature changes. The color range is from white-gray to almost black, from pale yellow to dark burgundy. The price is very high, but the appearance is strict and solid;
- marble looks luxurious, but is expensive. Colors – white, gray, black, variegated. The material easily tolerates temperature changes and physical influences, but is not resistant to aggressive chemicals or household dyes, therefore it needs a special coating;
- Onyx is a semi-precious stone, the presence of which in a room makes it unique. The material transmits light perfectly, comes in yellow, green, orange, brown, is resistant to high and low temperatures, but chemicals are destructive to it, and the cost is about three times more than other stones.
Rules for working with marble and other natural stones
Working with real stone, be it marble, granite, sandstone or others, is labor-intensive. Each tile will have to be carefully adjusted in size and selected according to tone. To work, you will need special grinding machines and stone-cutting devices.
Installation order:
- the surface of the stove is cleaned of dirt, a reinforcing mesh is installed;
- facing elements are adjusted so that all tiles are the same size, shade, thickness;
- installation begins with the largest parts, secured with tile adhesive;
- culling, if necessary, is used in inconspicuous places;
- in order not to confuse the locations of individual tiles, they are marked on the reverse side;
- It is advisable to add compounds to the adhesive that increase its elasticity; the material should not get on the front side of the tiles;
- work begins from the lower left corner, observing the order: left to right, bottom to top;
- for tiles with a thickness of over 10 mm, additional wire reinforcement is used;
- The seams are grouted two days after installation, being careful not to stain the material with grout.
Do-it-yourself tiling of the stove
The technology for tiling stoves involves choosing a laying method, and the progress of the work will vary accordingly. In this case, in any case, installation is carried out from the bottom up and on a heated (at least 30°) oven.
6.1 Tiling the stove in straight rows or offset
Installation of the first row. Covering the stove with clinker, terracotta tiles or porcelain stoneware starts from the corner of the stove. First, the corner elements are installed.
It is worth noting that if tiling work is carried out before the floor is laid, a gap must be left. In this case, the support for the first row will not be the floor, but a strip nailed to the surface of the stove. The support rail should only be attached to the stove, since the floor may deviate from the horizontal. To draw a horizontal line, you need to mark the upper border of the first row and lay the tiles with trimming from the floor side. With this approach, subsequent rows will be laid out in accordance with the level.
Note. A technological gap of 5-10 mm is left between the floor and the tiles. Its presence will compensate for the expansion of the material when heated.
Please note that the lining of the stove with majolica starts from the corner and continues along the installation. If a whole strip hits the corner, great. If trimming is required, then work should begin from the second row. The tile pieces are installed last. It looks more beautiful if whole tiles are located in the corners, and cut fragments are hidden in places where they adjoin the wall.
Next, an adhesive solution is applied to the prepared tile.
How to apply adhesive to tiles
The adhesive composition is applied in two ways:
- using a notched trowel. This method is suitable for flat surfaces. Then the glue spreads evenly on the surface of the tile and air pockets are eliminated;
Note. Air pockets or bags are dangerous because the air in them heats up faster than the tile or glue and expands. As a result, tiles may peel off.
- using a trowel. The method is used when the surface has deviations along the plane. In this case, the glue is applied to the corner of the tile, which is pressed against the surface in a circular motion. The glue fills all the unevenness, and its excess extends beyond the edges of the tile. If you have difficulty installing the tiles in place, you can hit them lightly with a rubber hammer.
Some craftsmen recommend applying glue not to the tiles, but to the surface of the stove. This method is suitable for surfaces of any quality.
The thickness of the glue application is indicated by the manufacturer and is 2-7 mm. To level out unevenness, it is possible to apply glue up to 10 mm thick, however, after laying the tiles, work must be stopped so that the glue can dry evenly.
How to glue tiles to a stove - tips
- Before applying glue to porcelain tiles, it should be wetted. To do this, brush over the surface or moisten it in water. In no case should the tile be completely immersed in water.
- The heavier the tile, the thicker the adhesive layer should be and the greater the distance between adjacent tiles.
- You can level the tiles on the surface within 10-15 minutes. after installation. If you didn’t make it in time, you need to remove the tile, clean it and the surface of glue, and only then continue working.
The second row is laid after the first one is completely laid. Work also starts from the corner. Crosses, templates or pieces of other materials of the same thickness will help ensure an even gap between the tiles
Joint width between tiles (thickness)
The seams between rows of tiles need to be addressed separately. The width of the seam depends on the type of tile, its thickness and weight. And their absence leads to the fact that the tiles have nowhere to expand and they burst. In order for the grout mixture to lay down beautifully in the future, the seams should not be completely filled when laying the tiles, and the excess mixture should be removed using a spatula.
The craftsmen emphasize that it is not worth laying more than three rows in one approach. In order for the glue to set well, it is better to take a break for several hours. The drying time depends on the type of glue and the manufacturer's recommendations.
In addition, after laying each row of tiles, the horizontal position is checked. If a defect is discovered, there is time to fix it.
6.2 Tiling the stove diagonally
With this laying method, the first row is most often laid straight. This will allow the cladding to be leveled relative to the floor. Next, the layout is carried out in one of the following ways:
- triangles are laid out, wide side down. The upper corners of the tile serve as a guide when checking with a level;
- laying proceeds diagonally, then the mooring cord (marking) is pulled at an angle of 45°.
The penultimate row is similar to the second. The last one goes to the first one, which is also usually laid out in a straight row.
Note. During the tiling process, a certain area in front of the stove is often tiled. This technique allows you to protect the floor covering from sparks and deformation from the heat of the stove from below.
The cladding work ends with cleaning the seams (deepening for better grout application) and washing the lined surface of the stove. After the time required for the glue to completely harden, you can begin grouting.
Advice. It is better to stop work for 5-7 days. During this period, the risk of tiles moving is minimized.
Stylistic directions in fireplace decoration
Various types of stoves are built into very different interiors. It is important to maintain the integrity of the interior and select an acceptable color scheme. A fireplace is often a zoning detail that allows you to neatly divide a spacious room into two functional parts. Most often, fireplaces are built into classicism, baroque, loft, Provence, and country interiors.
In English style
The hearth in the English style is U-shaped, equipped with a large firebox and a wide mantelpiece. Suitable finishing materials are valuable wood species (wenge, zebrawood, bog oak, Karelian birch, etc.) or their high-quality imitation, ceramic tiles, metal (forged elements). Most of the lines here are smooth, the corners are strictly straight, all the details have a strictly regular shape.
Provence style
The Provence fireplace has the simplest possible shape, but every detail is worked out to the maximum. The color of the structure is usually white, other suitable colors are pastel, cream, pale pink, bluish, soft green. Suitable materials include decorative plaster, ceramic tiles with floral patterns, and light wood, including painted and artificially aged wood. Forging will also come in handy.
Country style
Country is a style associated with rustic simplicity and comfort, which is why the fireplace here is finished “modestly, but tastefully.” This design is rather heavy and very voluminous, so independent finishing is very labor-intensive. The portal itself is D-shaped; above the firebox there is a thick beam, most often stone. For decoration, artificially aged natural stone (shell rock, sandstone), brickwork, imitation stone, brick are suitable.
Classic style
Classic is usually associated with harmony, symmetry, correct geometry, both of the object itself and of the entire room where it is located. A few stucco elements are allowed here - moldings, rosettes, half-columns, pilasters, corner parts, etc. Forged, ceramic tiles made in light colors with unobtrusive decor, including those imitating wood, are also acceptable.
High-tech style
A fireplace in high-tech style is necessarily smooth and shiny. Rarely is it located against a wall - usually these are located in the corner, island, suspended, rotating structures. The main finishing materials are metal, glass (fireproof, transparent, patterned, partially tinted, etc.).
Fire-resistant glass is characterized by high heat transfer, which is why it is used in structures created specifically for heating.
In ethnic style
Ethnic fireplaces - colorful oriental and strict European designs. Less often, it is an imitation of a “Russian stove” fit into the corresponding interior. Popular finishing methods are decorative plaster, whitewashing with chalk, coating with clay mixed with various dyes, mosaic of colored ceramic tiles. There are no patterns here at all, or they are as winding and multi-colored as possible.
Loft style
A loft fireplace is always decorated in an antique style, finished with brick, stone, dark metal, rough wood, and less often with plaster and stucco. The structure is usually placed near the wall, but island and hanging options are acceptable; the shape is rectangular, round, in the form of a barrel, etc. The chimney here is not disguised, but is made accent. Also, the hearth may resemble a slightly modernized “potbelly stove” located in an empty niche.
What properties distinguish a suitable tile?
When choosing ceramic tiles for a fireplace, take into account the features of its design - basic materials, shape, size. Furnaces also differ in the degree of heating - it varies from low to medium and has its own cycle of heating and cooling time. This indicator determines the purpose of the structure: a cooking stove, a decorative stove or a fireplace. Regardless of these parameters, ceramic materials for lining furnaces must meet the following requirements.
- Heat resistance. From the point of view of creating a decorative effect, almost any ceramic products are suitable, but not all of them can withstand high temperatures. To prevent the tiles from cracking after the first use of the stove, it is necessary to check with the manufacturer about the temperature limit it can support. Also, such information is indicated on the box with the material or in the detailed description of the catalogs. Choose tiles with maximum heat resistance - its surface in the fireplace often comes into contact with open fire.
- The ability to accumulate and release heat. To maintain the required temperature in the oven and additionally heat the room, the tiles must absorb and retain heat, cooling evenly and slowly after the end of the flame.
- Strength. The optimal parameter value is 30 t/sq m. Such ceramics are distinguished by increased wear resistance and bending strength, which guarantees a long service life of the material without chips and cracks. Please note that truly durable tiles will be quite thick.
- Environmental friendliness. When heated, composite materials release toxic components. It is important to use ceramic products whose safety is confirmed by appropriate certificates.
- Low porosity. This parameter will protect the tile from excessive expansion when heated, which will prevent it from deforming, swelling and cracking.
- Expansion coefficient. If the tiles, when heated, expand more than the base material of the fireplace or stove, then the ceramic finishing elements will peel off from the surface.
Attention!
When buying tiles, be sure to ask the seller for certificates confirming the declared indicators of critical parameters. Otherwise, you risk purchasing a short-lived finishing material.
A fireplace lined with light tiles is a solution for a classic design
Finishing options for false fireplaces
Not every private mansion will be able to install a real fireplace; in a city apartment, to install it, you will have to visit several authorities, draw up a project, and with a high degree of probability receive a refusal. Therefore, where it is impossible to create a real hearth, they create a portal for a fake one. The fire in it is painted or made of fabric, driven by air, which is sometimes accompanied by the sound of crackling firewood.
Artificial fireplaces are made one-sided, three-sided, less often - viewed from all four sides. By type they distinguish wall, corner (convex and concave), island pseudo-foci; by shape - square, cylindrical, “pyramids”, etc.
The finishing of such a design is simpler than that of a real one - the false fireplace does not heat up and is completely fireproof, therefore the requirements for finishing relate, first of all, to the appearance of the product. The portal is decorated with plasterboard, wood, various types of ceramics, and stone.