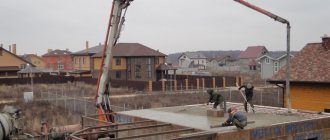
Houses made of aerated concrete blocks are very popular today. The material is easy to install because it is not as heavy as concrete blocks and has good thermal insulation properties. But the load-bearing capacity of aerated concrete is lower than that of brick and concrete blocks. For example, for brick this figure is 125 kg/cm?, for aerated concrete a maximum of 30. Therefore, when choosing the design and materials for the floor, it is necessary to take this factor into account. And, as practice shows, wooden floors in a house made of aerated concrete are the best option.
What is a wooden floor
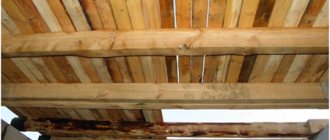
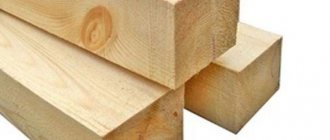
This structure is assembled from lumber. More often it is called by the load-bearing beams. This is when beams are laid between the walls of the building at the upper ends of the masonry, resting on these walls. Boards are already laid and fastened on them as a subfloor.
The name "beams" is not specific. That is, this is the name of the elements that are assembled in the form of a base and bear the main loads. You can use timber, logs, double boards as them. If we are not talking about wooden structures, then they use metal profiles, reinforced concrete lintels, etc.
Installation instructions
Beginning craftsmen are offered the following step-by-step instructions, according to which you can independently, quickly and inexpensively cover the first floor of a new building:
- Carry out markings in accordance with the previously drawn up diagram, cut out beams of the intended length. It must be taken into account that the depth of their support must be at least 15 cm. Accordingly, the beam must be 30 cm longer than the distance between the walls.
- Treat the wood with an antiseptic, fire retardant and hydrophobic agent.
- Make waterproofing. Rolled, coating materials or a combination of both are selected. The most popular products are roofing felt, roofing felt, linochrome, bitumen, waterproofing. The disadvantage of coating is that it can be pressed through and lose its solidity.
- Laying end beams on both sides of the building. Indentations of 3-5 cm are made from the outer edge of the walls. After installation, these openings will be filled with thermal insulation.
- Installation of intermediate beams. The step between them can be equal, but it is advisable to reduce it in places of increased load, which are the centers of the rooms.
- Fixing the logs on an armored belt or support beam. For this, corners, studs or pins are used, which will serve as fasteners for the first layer of blocks of the next floor.
- Filling the remaining openings between the beams with foam concrete. Leveling the surface. Arrangement of the next layer of waterproofing.
Finally, communications are laid, the subfloor and ceiling are installed, insulation is installed, and finishing coatings are installed.
Advantages and disadvantages of wooden floors
Speaking about the advantages of interfloor and attic floors using wooden beams, it is necessary to note their low specific weight. On average, the payload is 300-400 kg/m?. For a concrete floor slab, this parameter is twice as large. Therefore, by equipping a wooden structure, you can reduce the size of the foundation and wall masonry. And this is a clear saving.
The design of the wooden floor itself is simple; assembling it with your own hands is not difficult. The main thing is to take into account the requirements of the technological process and the nuances of assembling elements.
The small specific weight of beams and boards makes it possible to construct floors without the use of special equipment. That is, all building material can be lifted, for example, under the roof manually. And this is again a good saving of money.
As for the disadvantages, here, first of all, it is necessary to note the property of lumber to dry out and warp. That is, their deformability indicator is quite high. Hence all the other problems:
- vibration of the floor while walking on it;
- creaking floorboards;
- the formation of cracks on the plastered ceiling of the lower floor, often the plaster peels off, so this finishing option is not recommended;
- violation of the heat and sound insulation layer.
In addition, there are other disadvantages: low fire resistance of the structure, the possibility of infection by harmful microorganisms. It should be added that the modern standard is a beam length of 6 m. And if the span length turns out to be longer, then the labor intensity of the process increases due to the extension of beams.
Metal and wooden floors in an aerated concrete house on load-bearing beams
Beam technology allows you to quickly construct floors in small aerated concrete buildings based on the following elements:
- wooden beams;
- metal profile.
The technology for constructing a beam floor includes:
- Laying beams on the supporting surface of the walls.
- Placement between the insulation beams.
- Formation of sheathing on opposite sides of the beams.
- Laying waterproofing material.
- Construction of finished floor and ceiling.
Advantages of beam flooring:
- ease of installation;
- accelerated pace of construction;
- low cost.
- the ability to perform work independently.
Disadvantages of technology:
- possibility of use in buildings no more than two floors high;
- reduced fire resistance in fire hazardous situations;
- reduced service life compared to reinforced concrete structures.
Despite its shortcomings, the beam method is popular in private housing construction.
Calculation of the dimensions of a wooden floor
If we talk specifically about the construction of a wooden floor, then most often it is timber that is used for this. Its cross-section is selected based on the size of the span and the loads that will act on it. And since the wooden interfloor floor is the basis for the floor, the loads are not easy to calculate. After all, it is impossible to say exactly what furniture and in what quantity will be installed in the rooms. The same goes for household appliances and people.
Therefore, experts take the so-called average value of 400 kg/cm?. And based on this, the dimensions of the beams are calculated. There is an easier way to determine the parameters of a timber floor; this is the so-called tabular option. That is, calculations have long been carried out experimentally and are included in tables. In them, as already mentioned, the determining factors in choosing the section of beams are the span length and the installation pitch.
| Span length, m | Beam cross-section, mm | |
| Installation pitch 60 cm | Installation step 100 cm | |
| 3 | 75x200 | 100x175 |
| 4 | 100x200 | 125x200 |
| 5 | 125x200 | 150x200 |
| 6 | 150x225 | 175x250 |
| 7 | 150x300 | 200x275 |
In the table, the span length indicates the distance between the internal planes of aerated concrete walls. Accordingly, the beams must extend onto the walls themselves by a minimum of 15 cm, and a maximum of 30. This means that the length of the beams consists of the length of the span and two approaches to the walls. For example, the span length is 6 m, which means the beam length is: 7+0.15+0.15=7.3 m.
How to install floor beams between floors in a house made of aerated concrete with your own hands
The general layout of the interfloor overlap looks like this:
- Basic structure. These are single beams - matitsa, or a lattice with short purlins - exchangers, as the builders say.
- The bevel between the beams is transverse boards laid on the cranial bars.
- Skull bars are longitudinal slats screwed along the lower border of the beams.
- Vapor barrier and insulation - rolled or panel materials laid on the roll.
- Joists are cross beams, the basis for floor boards.
- Finish floor - boards on joists.
- Finish ceiling - panels, hemmed from below to the runway.
In special cases, some elements may not be in the overlap. For example:
- When installing from below, rolling is not necessary. It is more advisable to install only logs and lay insulation between them.
- If the ceiling is mounted on top, then there is a reason to fix the roll, but you can refuse the lags.
Important: a vapor barrier must be added to sandwich structures. This is an air-impermeable film that is fixed to the outer surface - on the side that is in contact with the colder environment.
Technology of work execution
- Any practical work begins with calculations and planning.
We choose the most reliable floor scheme - the beams are located parallel to the short wall. Beams should be selected such that each square meter of floors can withstand a load of 400 kg.We select the cross-section and installation interval of the beams in accordance with the data in Table 1.
A rule of thumb: it is better to install fewer beams of larger cross-section than many small-gauge boards.
The optimal section is considered when the height is related to the width by a factor of 1.5.
Based on this data, we calculate each type of material.
- Preparing beams and wall surfaces for installation.
- We coat the ends of the beams with antiseptic and fire-retardant materials.
- Walls: first you should carry out leveling - checking the levels of marks. The support platforms for all beams must be in the same plane.
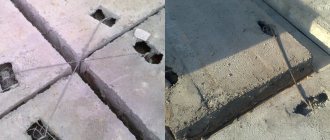
- The next task is to thoroughly clean the seats in the wall and install waterproofing gaskets.
- Installation of the first pair of beams.
This is a lighthouse couple. Beams are installed first at the extreme points - at opposite walls. Installation should be performed so that there is a ventilation gap of 3–5 cm between the ends of the beams and the wall.The beams are secured with dry gravel backfill; their edges are trimmed as indicated above.
- Installation of all floor beams.
- The intermediate beams are placed at the same level as the lighthouse beams. The gap between the wall and the end is a rule mandatory for all beams.
- The ends of the beams are filed at an angle, the edges are wrapped with roofing felt.
- The ends are secured. The gaps are sealed with a heat insulator, and CBR is poured into the free cavities.
- Further operations depend on the selected technology.
- You can install logs on the top. Insulation and vapor barrier are placed in the resulting grooves. Then the finished floors are laid.
- The second option is to attach longitudinal bars to the beams - cranial ones, the builders say. These slats run on each side at the very edge of the bottom rib. The slats are covered with bevels - transverse boards. Insulation and vapor barrier are laid on the ramp. Then the floors are installed on the upper surface of the beams, and the finishing ceiling is installed on the lower surface.
Preparation of materials and tools
Materials and tools are purchased after calculations have been made. The logistics technology is as follows:
- Based on the drawn laying diagram, a list and quantities of required materials are formed.
- Based on the analysis of the technical process, a list of tools and equipment is drawn up.
It is obvious that in addition to the basic materials - timber, boards, plywood, waterproofing, etc., you will need:
- auxiliary – primers, impregnations, paints (for metal and wood), crushed stone, etc.;
- hardware – screws, screws, hooks, various brackets, chucks, etc.
Tools and equipment: drills, angle grinders, winches, mixers for preparing CPR, clamps, saws, pliers, hammers, axes, grinding wheels.
Installation of floors made of wooden beams
Before making an interfloor ceiling made of wood, it is necessary to pour an armored belt around the entire perimeter of the house made of aerated concrete. This is a reinforced concrete structure, the main function of which is to evenly distribute the loads from the ceiling and filling of the upper floor rooms onto the walls of the building.
How to properly support wooden beams on aerated concrete
There are two documents approved by Gosstandart that regulate the depth of support of beams.
- One GOST establishes requirements for the use of wood, in particular beams. It defines the minimum support heel - 15 cm (when laying beams on wooden walls - 7 cm).
- The second GOST regulates the amount of support for floors on walls made of aerated concrete. It sets the size to 200mm.
In our opinion, when building a house from aerated blocks, there is a reason to be guided by the norm approved by the second standard.
There are technological subtleties when working with wood:
- a waterproofing, vapor-proof material should be placed under the beams to prevent dampness and damage to the wood;
- the ends of the beams are cut obliquely - at an angle of 70° to ensure ventilation of the internal fibers.
The cavities formed between wood and aerated concrete are filled with insulating material.
How to fill an armored belt
There are two options here:
- Into the formwork.
- In special U-shaped blocks.
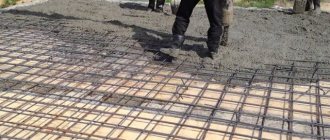
The first method is traditional. Formwork is assembled with fastening to the walls of the building, into which a reinforcing belt will be poured with a thickness of 20-25 cm. A reinforcing frame made of steel mesh or reinforcement is first placed into it.
The second option is to use special blocks that are laid on the walls in the same way as regular ones. Only they have grooves that form a common groove along the entire perimeter of the building. Two or three steel reinforcement bars are placed in it and filled with concrete mortar.
If you haven’t found U-shaped blocks, you can make them yourself from solid blocks. You just need to cut the groove using a regular saw.
To cover the first floor, formwork technology is used to fill the armored belt.
Features and types of floors for an aerated concrete house
Each type of interfloor covering has its own characteristics.
For a building built from aerated concrete blocks, the following options for overlapping structures are used:
- Made. For installation, ready-made reinforced concrete slabs produced at reinforced concrete factories are used. The fixed length of the panels limits the possibility of their use for forming floors of buildings of non-standard configuration. It is important to focus on the spacing between supports when choosing the length of the panel. Given the increased weight of the slabs, installation is carried out using lifting equipment. The products are laid on a planned surface and fixed with anchors. After this, the end seams are sealed with cement mortar.
When choosing floors, materials with less weight are preferred - Monolithic. The main feature of the one-piece flooring option is that there is no need to use lifting equipment. To construct a solid slab, it is necessary to install formwork made of plywood, wood or sheet metal. A reinforcement grid is placed inside the formwork structure using special clamps. After preparing the concrete mixture, it is poured into the formwork. The solution is evenly distributed over the entire area of the formwork and then compacted using vibration equipment to remove air inclusions.
- Monolithic prefabricated. The process of constructing a prefabricated monolithic floor structure is similar to the method of forming prefabricated floors. The panels delivered to the construction site are laid on the supporting surface of the walls using a crane. After anchoring the slabs, a reinforcing mesh is installed and concrete is poured, the thickness of which reaches 10 cm. After the concrete mass hardens, a monolithic structure is formed, characterized by increased thickness. The ceiling consists of standard panels and concrete poured on top of them.
- Beam. To construct the beam structure of the floor, wooden beams or rolled metal with a profile section are used. The choice of beam material is carried out based on the results of strength calculations. Beam-type overlapping structures have a reduced load capacity compared to reinforced concrete floors. They are built in aerated concrete houses with a distance between walls not exceeding six meters. Beam floors are popular among developers due to the ease of their construction.
Let us dwell in more detail on each overlap option.
Installation of timber
There is nothing complicated in this operation, you just need to take into account some requirements.
- All beams are treated with antiseptics and fire retardants before installation.
- After drying, the ends of the beam, which will rest on the aerated concrete wall, are coated with bitumen mastic or wrapped in roofing felt.
- Laying begins on either side of the ceiling. Install two beams taking into account the pitch. They are aligned with each other in the horizontal plane, and each additionally along the horizon. Then all the others are installed one by one, with each one leveled.
- Between the laid beams along the wall, the openings are filled with gas blocks. The main requirement is to leave a gap between the blocks and the lumber within 5 cm. This space must subsequently be filled with insulation.
- A boardwalk made of edged boards is laid on top of the timber, which is subsequently covered with a vapor barrier. Logs are installed on it, between which insulation is laid. On top is a layer of waterproofing membrane and a finished floor in the form of boards, plywood, OSB boards and other sheet or panel materials.
As for attaching beams to the reinforced belt, there is a huge choice. Today, fastening angles and metal dowels are most often used. If you think through and take into account the step of installing the beams in advance, then even at the stage of pouring the reinforced belt, you can install anchors into it, onto which the beams will be mounted. Experts note that this is the most reliable mounting option.
Stages of work to create a floor from beams
Wooden floors have many advantages, including lightness, affordability, environmental friendliness and speed of installation. However, it is important to correctly follow the sequence and installation rules.
At the first stage, power beams are laid. The direction is perpendicular to the longest walls of the cottage. The laying step is approximately 1 m, the beams approach the wall from 15 cm. First, the beams are attached to the walls along the edges, then the rest are installed, controlling the level and horizontality. The beam is attached to the armored belt using anchor plates. Wood is treated with prepared impregnations. Sections of beams that extend onto the wall are coated with bitumen mastic and wrapped with roofing felt.
Advice: the ends of the beams are not treated or painted, otherwise the process of evaporation of moisture from the wood will be disrupted.
The second stage is the insulation of the beams. The process consists of filling the voids with gas blocks or bricks (the former are preferable due to their low weight). From the beam to the gas block there should be gaps of 2 - 3 cm, where mineral wool is driven.
The third stage is the arrangement of the run-up. To insulate the structure, a bead is made - 5x5 cm bars are attached using self-tapping screws along the bottom of the beams, and boards made of boards are placed on top, then insulation with a thickness of 10 cm or more is placed.
The final stage is laying the joists and floors. Impregnated logs are placed and secured perpendicular to the beams. The laying step is about 50 cm. Floor boards are laid on top. The bottom of the floor is sheathed with plywood, plasterboard and other materials.
Provided a competent approach to the selection of building materials and compliance with the sequence of work, the finished interfloor covering will last quite a long time, like the house itself.
Attic floor
The ceiling between floors in a house made of aerated concrete is sometimes a horizontal structure between the main house and the attic. There are no distinctive features when constructing the ceiling in this place if the attic is partially assembled from gas blocks. But if this is a different material, then you will need to take into account some of the nuances of the process.
Often an attic is built from timber, because when choosing which is better - aerated block or timber, many people give preference to the latter. The process of installing and fastening wall beams is no different from standard technology. They are laid around the perimeter of the building, but attached to the load-bearing beams of the interfloor floor.
The gas block and the attic beam are not fastened together. Here we are talking about blocks that are laid between the floor beams. But even in this case, the former are still a support for the latter. That is, the attic beams should fit tightly on both the gas block and the floor beams.
Interfloor covering arrangement
We list the procedure for performing work on creating an interfloor floor made of wood.
Approximate diagram of a wooden floor. Designations: 1 - floor; 2 - waterproofing; 3 - insulation; 4 — counter rail; 5 - beam; 6 - rough ceiling; 7 - vapor barrier; 8 - internal finishing.
Laying beams
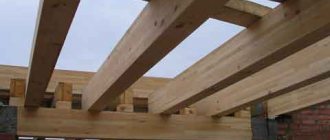
The formation of the floor begins with the laying of power beams on the walls. They are laid perpendicular to the long walls of the house. The laying step usually does not exceed 1 m. The beams must extend onto the walls at least 15 cm. First, the outer beams are installed, which are leveled by means of a long and even board placed at the end. There should not be a tight connection of the outer beams to the walls. A gap of about 3–4 cm should be left between them. Subsequently, this gap will be filled with insulation.
Installed wooden beams
The outer beams are attached to the wall, after which the remaining beams are installed. Not only their level is controlled, but also the horizontal position. If the length of the support beams is insufficient, they can be extended with the same material. To do this, two beams are connected with an overlap of 0.5 m to 1 m, after which they are bolted. This connection is considered quite reliable.
The timber is attached to the reinforced belt using anchor plates in the following order:
- The ends of the beams are cut at an angle of about 70 degrees to ensure moisture removal.
- The wood is coated on all sides and ends with antiseptic and heat-resistant impregnations.
Advice: the ends of the beams should not be coated with oily impregnations or paint. In this case, the evaporation of moisture from the wood will be disrupted.
- The parts of the beams extending onto the wall are coated with a layer of bitumen mastic and wrapped with several layers of roofing felt.
- The beams are attached with anchor plates to the reinforced belt.
- The outer ends of the beams on the outside of the walls are insulated with polystyrene foam.
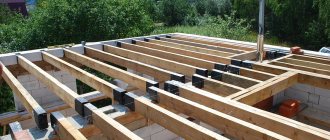
Insulation of beams
The voids between the laid beams are filled. This can be done with bricks, but preferably with gas blocks. It is necessary to leave 2-3 cm gaps between the blocks and the wood. These voids are tightly clogged with mineral wool. This prevents the formation of condensation and dampening of the wood from contact with the walls.
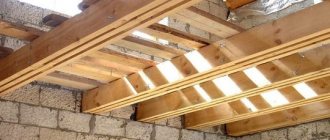
Laying beads and insulating the floor
To insulate the ceiling, it is necessary to make a roll-up. 5x5 cm bars are attached along the bottom of the laid beams. They can be secured with long self-tapping screws. Boards made of boards are laid on them, but individual cut pieces of boards can also be used. Insulation (mineral wool or expanded polystyrene) is tightly placed on the boards. The recommended insulation thickness is from 10 cm.
Laying joists and flooring
On top of the created structure, perpendicular to the beams, logs are laid, which are also pre-treated with special impregnations. Logs usually have a smaller cross-section than beams. The pitch of laying the logs is 50–70 cm. The logs are attached to the beams. Floor boards are laid on top of the fixed joists. The bottom of the floor is sheathed with OSB boards, chipboard, plasterboard or multi-layer plywood.
Overlappings: what they are and how they differ
Reinforced concrete floors: pros and cons
For houses made of aerated concrete, there are two most suitable types of floors - reinforced concrete and wood. Naturally, each of them has its own characteristics, its own advantages and disadvantages, which must be taken into account when choosing the most suitable one for you.
Reinforced concrete flooring is considered by many to be the most modern and durable. As the name implies, one of the types of reinforced concrete slabs is used in its arrangement. They provide a high level of fire resistance, they are very strong and durable, and there are practically no restrictions on length. Plates made of this material do not particularly suffer from high humidity. And, importantly, they have a low price.
Although, of course, this type of flooring also has its disadvantages. This is, firstly, the high weight of the slabs. They are heavy and large, which must be taken into account when laying the foundation and erecting walls. Due to the same weight, it is difficult to lay them on your own - you practically cannot do it without special equipment and assistants. In addition, if you do not make an additional concrete or brick distribution belt under the slabs, they may compromise the integrity of the walls. Reinforced concrete requires additional insulation.
Based on the type of slabs, reinforced concrete floors are divided into:
- Made from ordinary hollow reinforced concrete slabs;
- Monolithic.
Floors made of hollow reinforced concrete slabs
Hollow reinforced concrete slabs add greater lightness to the structure of floors.
Hollow reinforced concrete slabs are made from heavy grades of concrete, but are made lighter with the help of special air void chambers, usually cylindrical in shape. Sometimes these voids significantly reduce the weight of the slabs.
Among their advantages it is worth mentioning:
- Greater lightness of the entire structure. As already noted, air chambers make it possible to reduce the weight of each slab, which has a positive effect on the level of load on the foundation and walls;
- Greater strength. Voids not only have a good effect on the weight, but also on the strength of concrete. They create a frame that increases the durability of the material;
- Simplified installation. Due to their lighter weight, these slabs can be installed quickly and with minimal effort;
- No restrictions on the shape of the bases. Thanks to hollow core floor slabs, even the most complex shapes can be created in your home;
- Aesthetics. One of the important problems is the location of communications so that they are less visible. In hollow core slabs they can be placed inside chambers.
The main disadvantage of these slabs in comparison with other options for reinforced concrete floors is precisely their strength. However, they are less durable than, for example, monolithic slabs and are more susceptible to humidity and temperature changes.
Monolithic slabs
Floors made from monolithic slabs have the highest load-bearing capacity
. Monolithic floors have the greatest strength, but the price for this is heavy weight, the largest of all reinforced concrete slabs. The strength of monolithic slabs is achieved through the use of stiffeners and two-layer ligaments.
Among the advantages of monolithic reinforced concrete slabs it is worth noting:
- High strength. Their load-bearing capacity is the highest of all types of reinforced concrete slabs;
- Ease of manufacture. In order to make such a slab, you do not need special shapes or special technological skills. They are often made right on the construction site;
- Easy installation.
But all these advantages come along with disadvantages, which may seem significant to many:
- The need for formwork and supports. Although they can be rented, it is still an additional cost. In addition, both the formwork and the supports are quite cumbersome;
- Stopping construction at low temperatures. Monolithic concrete cannot be produced when it is cold, which in the domestic climate significantly reduces the time when it is possible to build a house;
- It hardens for a long time. Pauses in construction will also have to be made due to the fact that monolithic slabs require a long hardening period;
- Low level of sound insulation. The sound permeability of such slabs is very high;
- Expensive. The production cost may be too high.
Wooden floors: what is it?
Wooden floors can be erected without the use of expensive equipment.
Wooden floors are the most traditional type. When constructing them, we use a material that is widely available in our country, environmentally friendly and quite durable - wood.
They are lighter than reinforced concrete. And this eliminates the need to build a particularly powerful foundation, which is not needed in itself when using aerated concrete as the main building material. Their undoubted advantage is that you can build them yourself, and there is certainly no need to involve expensive equipment.
Wooden floors: construction
The arrangement of interfloor floors requires a particularly careful approach to calculating the cross-section of beams. The fact is that the load on them can be quite high - these are people, furniture, and communications - and it must be taken into account. I-beams are often used as the main material of the load-bearing base. In addition to them, regular or laminated timber is used.
Beams are laid in increments of 60 cm to 1.2 m. It all depends on their cross-section - the smaller it is, the smaller the distance between them. The optimal length is considered to be one that does not exceed six meters, otherwise the deflection may be greater than the required 1/300 of the span length.
When calculating the parameters required for beams, do not forget that their length should be approximately 30 cm greater than the span, since they extend into each wall by 15 cm.
In addition to beams and boards, the construction of a wooden floor in an aerated concrete house requires the presence of a reinforcing belt.
Wooden floors: fastened to the walls
Beams need to be laid in niches on a reinforced concrete belt, doing this perpendicular to the load-bearing walls. Before fixing the beams in the niches, the latter are covered with waterproofing material. The waterproofing layer can be either ordinary roofing felt with bitumen mastic, or a modern self-adhesive membrane.
Ordinary roofing felt can act as a waterproofing layer
The beams are attached to anchor plates or studs, which are installed when the reinforcing belt is poured. It is also permissible to use steel corners on screws and dowels instead. Between the ends of the beam and the walls of the niche in which it is laid, there must be a gap of at least 2 cm, but no more than 3 cm. This gap is necessary in case of thermal expansion.
Make a 60–70 degree cut at the end ends. It is done so that the wood “breathes” and does not retain moisture.
These ends are coated with an antiseptic for a length of at least 75 cm, but it is important that it is not oil-based. All seams are filled with sealant to prevent rotting. And insulation is placed in the remaining space between the end of the beam in the niche and the wall.
Beams running along the walls cannot be placed close to them. Between them and aerated concrete blocks you need to leave a gap of up to 3 cm, which is filled with sealant and insulation.
Wooden floors: space between beams
A layer of insulating and insulating material is laid on the roll.
The space between the beams is filled only after all work on installing the beams has been completed. Boards up to 50 cm thick are suitable here. For rolling, they are nailed from below to the beams. You can use such boards to make shields along the skull bars, but if you use I-beams, then there is no need for them.
A layer of insulating and insulating material, at least 10 cm thick, must be laid on the roll. It is not only a matter of heat preservation, but also sufficient sound insulation.
After which you can begin arranging the floor. For the floor, wooden logs are first nailed to the beams. The rest depends on the type of flooring. If it is planned to be made of wood, then the boards are placed directly on the joists, but if we are talking about linoleum, laminate or parquet, then first you should install a continuous leveling coating. Plywood or chipboard is suitable for it. The slope from below can also be hemmed with plasterboard, clapboard or some other material, depending on what the ceiling should be like.
Monolithic reinforced concrete belt: something you can’t do without
One of the most important parts of the floor structure is a monolithic reinforced concrete belt.
One of the most important parts of the floor structure in a house made of aerated concrete is a reinforced monolithic belt. The main task of this belt is to distribute the load from the floors and roof. Due to the special importance of this belt, it is sometimes also called a ring beam.
To construct the belt, reinforcement and concrete of grade M200 are required. It is best to use steel rods and staples as a reinforcing element. The diameter of the rods should be about 8 mm, and the staples - 6 mm.
Staples for connection, rods are installed at a distance of 15 cm from each other. After this, they are placed inside the formwork.
I use U-shaped aerated concrete blocks as formwork. The exact position of the reinforcement inside the blocks is ensured by spacers. Once they are installed and secured, it is time to pour the concreting. But before it you need to wet the walls of the formwork.
Concrete for a monolithic belt must be laid in layers, each of which is well compacted with a trowel. The metal, especially at the bottom, must be tightly filled with material. Once the ring beam is completely ready, all excess concrete should be removed as quickly as possible. If there is protruding gravel, it is buried in the filler. The concrete will take about three days to harden. To build walls, a thin layer of mortar is applied to the belt.
General requirements for the construction of wooden floors
The construction of floors is a responsible undertaking. It is necessary to monitor their strength and ability to withstand loads. Additionally, different types require different approaches. But, if we are talking about a house made of aerated concrete blocks, then there are a number of requirements that must be taken into account:
- Floors can only be laid on a reinforced monolithic reinforced concrete belt to distribute the load;
- They should not lie on either internal structures or external walls. For this purpose, the first must be below the external load-bearing walls;
- To hold the load-bearing structures of the floor, reinforcing bars are installed and anchored. The length depends on the type;
- A gap is left between the floor beams and the blocks in the niches, which is filled with waterproofing materials;
- The length of the beams should not exceed 6 m, and the height and width are calculated based on the span length and the expected load.
Wooden floors for a house made of aerated concrete blocks are the most suitable option both if you build with your own hands and if you hire builders. Their installation is much simpler than reinforced concrete ones. As a result, the cost is lower. In addition, due to the lightweight design, you do not have to spend money on a strong foundation.
Choosing wooden floors is a choice in favor of affordability, strength and durability. This is a modern choice, because wood is a natural material. It’s not for nothing that today they are increasingly preferred again. Reviews about wooden floors can be read on the forums.