Quite often, the happy owners of a wooden house are concerned with the question: why does it feel cold from somewhere for no reason, and why do the walls freeze in winter? The source of drafts is often thin walls made of low-quality wood, as well as cracks at the joints. Insulating the outside of a wooden house will help eliminate this problem and transform the facade.
It is a rare house that does not require comprehensive measures aimed at preserving heat. To properly insulate a wooden house and avoid many mistakes, we recommend reading this article.
What requirements must the insulation meet?
External insulation is carried out according to a single scheme. This is a multilayer structure in which all materials work in duet and complement each other’s thermal insulation qualities.
To insulate facades, use material whose storage conditions meet the necessary requirements. The quality of the material is confirmed by technical documentation.
The insulation must meet the necessary parameters and standard technical specifications. Namely:
- absence of allergens and toxins, complete safety for people and the environment;
- operation of thermal insulation material for a long time without loss of properties;
- affordable price and ease of installation.
The heat transfer of the insulation must ensure an optimal microclimate, maintain the standard temperature inside the residential building, and eliminate the formation of condensation in places of cold bridges. If the insulation does not sufficiently meet the necessary requirements, additional elements are installed: waterproofing, vapor barrier or wind protection.
Thermal calculation of the walls of a timber house
Looking ahead, let's say that ZlojGenij considered it sufficient to increase the heat transfer resistance coefficient of walls to a value of 3.4 (m²*°C)/W (for Perm, according to the new SNiP, the required heat transfer resistance of enclosing structures should be 3.64 (m²*°C)/W ). To do this, the user decided to insulate the 15 cm thick beam with 10 cm thick stone wool.
For clarity, we will make a simplified thermal calculation and find out what thickness of thermal insulation is required for a wooden house built from timber sawn from pine or spruce for the Moscow region.
So, let's set the initial values:
- The thickness of the timber walls is 150 mm.
- The thermal conductivity coefficient of pine or spruce across the fibers is 0.14 W/(m °C) (operating conditions A - “normal”).
- The required heat transfer resistance for the Moscow region is 3.28 (m²*°C)/W.
Important nuances: in the tables, the thermal conductivity coefficient for wood is indicated in two directions - along the fibers (along the length of the timber) and across the fibers. The thermal conductivity coefficient of pine/spruce along the fibers is almost 2 times higher than across them (0.29 W/(m °C), versus 0.14 W/(m °C)). This must be taken into account when calculating, because the lower the thermal conductivity coefficient of the material, the warmer the walls .
In addition, the thermal conductivity coefficient of a wooden wall is affected by the amount of moisture contained in the material. Wood has a natural moisture content due to its structure. Freshly sawn wood has a higher percentage of moisture than dried wood. Let us also remember that during the operation of a wooden house, the walls are constantly exposed to the negative effects of negative weather conditions - snow and rain. This means the thermal resistance of the walls decreases.
Moreover, fluctuations in the thermal conductivity coefficient of wood occur seasonally. For example, prolonged autumn rains will lead to additional moisture saturation of the unprotected walls of a timber house, which directly affects the thermal insulation properties of the enclosing structure.
Conclusion : additional insulation and protection of wooden walls from atmospheric factors is required. For comparison, we present the thermal conductivity coefficients of pine/spruce across the fibers for three states: (1) in dry, (2) normal operating conditions (we use them for calculations), (3) in a moisture-saturated state:
- 0.09 W/(m °C).
- 0.14 W/(m °C).
- 0.18 W/(m °C).
We perform thermal engineering calculations using the formula:
R= d/λ, where:
- d—material thickness;
- λ is the thermal conductivity coefficient of the material.
We find:
Rph = 0.15/0.14 = 1.071 (m²*°C)/W
Let us recall that the required heat transfer resistance for the Moscow region is 3.28 (m²*°C)/W.
Now we find the difference between the actual (Rph) and normalized (Rн) values of the thermal resistance of a timber house.
Rt = 3.28 - 1.071 = 2.209 (m²*°C)/W
Those. timber “cold” walls do not reach the norm by the value found above. There are two options for getting out of this situation: do nothing and simply pay more for heating, essentially throwing money out into the street, especially in the absence of mains gas. The second is to insulate the walls and install a hinged ventilated façade.
Choosing insulation for the facade of a wooden house
Finishing the facade of a private wooden house requires a preliminary technical calculation, on the basis of which the type of material and its brand are selected. The fundamental factors influencing the choice of insulation are:
- financial capabilities and personal preferences of the homeowner;
- season intended for finishing work;
- climatic features of the area.
The following materials are in great demand in suburban construction:
- extruded polystyrene foam;
- mineral wool;
- Styrofoam.
Each has features and disadvantages. It is necessary to assess all the risks and choose the most acceptable option.
Styrofoam
One of the inexpensive and common thermal insulation materials is polystyrene foam. It is a cellular plastic mass of varying density and strength. Low cost, light weight and small size make polystyrene foam very popular in construction. But is such a choice always justified? Let's look at the main characteristics.
Polystyrene foam has a number of positive qualities:
- has excellent thermal insulation properties;
- provides sound insulation of the room;
- in its normal state it does not release toxins into the environment and is allowed for finishing not only outside, but also inside;
- resistant to moisture when operating within permissible temperature limits;
- is not susceptible to the effects of microorganisms, but is often the cause of their appearance.
Polystyrene foam also has a number of disadvantages:
- easily destroyed as a result of the action of various technical liquids and vapors;
- when burning, releases toxic substances;
- does not withstand heavy loads and is easily destroyed under the influence of gravity;
- moisture and exceeding permissible temperatures lead to destruction of the material;
- unstable to ultraviolet rays;
- It is characterized by low vapor permeability, due to which, during operation, moisture stagnates between the wall and the heat-insulating layer, promoting the development of fungus and mold.
As you can see, polystyrene foam is not the best insulation for a wooden house. Violation of technological stages during the installation of polystyrene foam and subsequent operating conditions often causes irreparable damage to the wood. When insulating a house with this material, it is necessary to take all measures to prevent destructive moments.
Extruded polystyrene foam
Country houses are often insulated with extruded polystyrene foam. Its main advantages are:
- light weight;
- resistance to moisture;
- excellent ability to retain heat;
- increased strength, resistance to loads and damage.
A huge disadvantage of polystyrene foam is its flammability. At high temperatures it melts and emits acrid smoke.
Due to low air permeability, insulating wooden houses with polystyrene foam is not always justified. If there are no other options, you will have to take care of organizing good ventilation.
Mineral wool
The most commonly used material for insulating wooden houses is still mineral wool. She:
- resistant to chemical elements;
- allows steam to pass through and is not saturated with water;
- ensures free air circulation and helps create optimal temperature conditions;
- is an excellent sound insulator;
- resistant to high temperatures.
Wall insulation is performed with mineral wool in rolls or mats. Since it perfectly absorbs moisture, when insulating it is necessary to install a vapor and wind barrier layer. A wooden house is insulated with mineral wool at any time of the year, including in winter.
Materials
Nowadays there is a large selection of thermal insulation materials on sale. Some of them are the most popular, others, on the contrary, are used in construction extremely rarely.
Below are the most popular materials used as insulation:
- Mineral wool. It is the most popular and frequently used material because it combines good functionality and reasonable cost. There are several types, the most popular of which is stone (basalt) wool. This insulation is considered environmentally friendly and fireproof, and its main advantage is an increase in the heat-saving parameters of the building. When insulating a house externally with mineral wool, it is advisable to use mineral wool with a density of 35-50 kg/m3.
- Foam plastic and penoplex. Foam insulation is the cheapest way to energy protect a home. However, in the case of a wooden house, experts do not recommend this insulation. It is practically vapor-tight and does not allow the log house to “breathe”. Penoplex insulation, on the contrary, will be the most expensive. However, it is also of little use for log walls for the same reason of vapor permeability. These materials can only be used in conjunction with good ventilation throughout the house.
- Polyurethane foam. It is a mixture of several components that are mixed using high pressure. When interacting with air, polyurethane foam expands like polyurethane foam. The decision to use polyurethane foam as insulation for a home is quite effective and can reduce heat loss to a minimum. However, it also prevents steam from escaping from the house.
- Natural insulation. They exist in the form of a variety of mixtures and slabs made from natural fillers, including sawdust, straw, clay, and so on.
There are also less traditional insulation materials. For example, various mixtures and slabs made on the basis of natural fillers, such as sawdust, straw, clay, etc. The price of natural insulation materials is usually small, however, in order to lay such material you need to be prepared for great difficulties . The easiest natural insulation to use can only be called flax fiber.
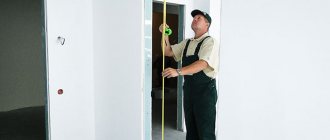
How to insulate a wooden house from the outside with your own hands
Regardless of the type of thermal insulation material, the technology for insulating the facade of a wooden house is standard and consists of several mandatory technological stages:
- laying a vapor barrier layer;
- assembly of a wooden or metal frame;
- installation of heat-insulating material;
- surface waterproofing;
- external decorative cladding of walls and pediment.
Strict implementation of each technological stage will allow for high-quality insulation of an old wooden house and create an optimal microclimate inside. Thanks to these operations, the service life of the structure will significantly increase.
Preparatory work
High-quality insulation of a house with your own hands and its decorative finishing are inextricably linked and form a single technological process. Only as a result of comprehensive work performed by qualified specialists will an optimal climate balance be created in a wooden house.
The outer walls are first cleared of unnecessary items: drainpipes, cables, lamps, and scaffolding is installed.
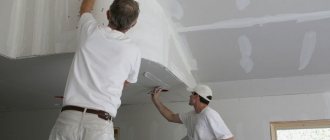
When working with plastering materials, it is best to cover windows with protective screens
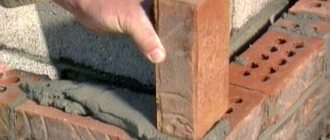
Before insulating an old house, the walls are cleaned, the old peeling coating is removed, and dirt is removed. Large longitudinal seams and cracks are eliminated using tow, sealant or putty. If necessary, the surface is completely leveled. Cleaned walls are treated with protective antiseptic agents and fire retardants.
Vapor barrier and waterproofing
Vapor barrier materials are used to ensure natural circulation of moisture and protect the wooden surface from steam penetration and condensation. The construction market offers many options in the form of various films and membranes.
When insulating country houses, a vapor barrier membrane is most often used. It makes it difficult for condensation to form on load-bearing walls, prevents the appearance of fungus and extends the life of the wood.
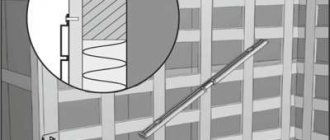
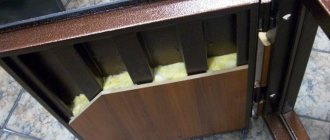
When insulating a wooden house made of logs and installing a vapor barrier, it is not necessary to leave ventilation gaps. But in houses made of timber, the sheathing is first installed using small thickness bars. The sheathing pitch is 10 cm less than the width of the vapor barrier material. The vapor barrier is laid from bottom to top, overlapping and secured with a stapler. The joints of the material are carefully sealed.
Waterproofing the structure will help protect the thermal insulation material and load-bearing walls from the penetration of water and moisture. Depending on the type, the installation of waterproofing membranes may differ slightly. Waterproofing membranes are cut into strips of the required length, unrolled along the wall, secured and sealed seams.
Installation of sheathing
The sheathing for insulation can be assembled in two ways - from timber or a metal profile. Installation of wooden sheathing is much cheaper than a frame made of profiles. However, working with the profile is much more convenient and better - this is a definite advantage for beginners.
First of all, markings are carried out and the contour elements of the sheathing are installed. The sheathing pitch depends on the size of the vapor barrier material. Using a level and plumb lines, the timber is installed and securely fixed with screws.
When installed on an uneven surface, the sheathing is leveled with the help of substrates so that its external elements lie in the same plane
Installation of heat insulator
Thermal insulation material is placed in the space between the wooden sheathing. In suburban construction, the most common and familiar insulation material is mineral wool.
The material is laid tightly together, avoiding the formation of cracks. In cold regions, multilayer insulation is practiced, when mineral wool is installed in several layers.
Occasionally, metal brackets are used instead of lathing for insulation with mineral wool. Siding is used as a decorative finish. Facade panels with insulation not only perfectly retain heat, but also provide an effective finish.
Laying windproof film
Installation of a windproof membrane guarantees heat retention in the room and ensures the durability of the structure. It protects the thermal insulation material from moisture, while perfectly allowing escaping steam to pass through, preventing condensation from settling and creating all the conditions for a wooden house to breathe.
The windproof membrane is laid on top of the insulation layer with the smooth side facing down. Installation is carried out in horizontal rows, slightly stretching the film and not allowing the material to sag. The membrane is overlapped and secured to a wooden sheathing. The joints of the material are firmly taped.
How to insulate a log house from the inside?
Internal insulation of residential buildings is performed extremely rarely. This option significantly reduces the usable area of the premises. But this is not the only drawback.
Installing insulation inside shifts the dew point towards the main structure, which leads to the accumulation of moisture in the wood and its rapid destruction.
It is enough to insulate the floor, roof and ceiling from the inside. This will significantly reduce heat loss and will not lead to negative consequences. Each element of the structure has its own characteristics of installing insulation.
Thermal insulation of roofs and ceilings
Any work inside the house begins from above. Thus, the treated surfaces are not subject to mechanical damage and stress. Therefore, let's start with the roof.
- First, a waterproofing membrane is laid. It will protect the insulation from getting wet and precipitation.
- Next, the space between the rafters is filled with mineral wool slabs. Make sure that the material lies tightly but evenly. The gaps will become cold bridges, as will the protruding areas.
- The insulation is covered with a vapor barrier film on top, which will protect the insulator from moisture from the premises.
- If the attic is not residential, you can cover the mineral wool with OSB boards or plywood. For living rooms, wooden lining or other breathable finishing material is suitable.
Now let's start protecting the ceiling from heat loss. This insulation is carried out from the attic side.
- They start with a vapor barrier membrane; it will protect the insulation from vapors escaping from the rooms. It is laid on a rough ceiling, that is, boards placed on beams.
- The selected material for thermal insulation is laid on top. Make sure that the layer is smooth and uniform.
- Protect the insulation with a plank floor in the attic. A ventilation gap of 1–1.5 cm is left between the insulating material and the boards.
Thermal insulation of walls
Professionals generally do not recommend insulating the walls of a wooden house from the inside. But if for some reason it is not possible to do this from the outside, then all internal work is carried out strictly according to the instructions. Correct execution of all actions will not reduce the technical characteristics of the wood.
- Check the crowns of the log house. If it is necessary to update or add material that was used for caulking.
- Treat the walls with antiseptic impregnations and fire retardants (substances that protect against fire).
- A frame is made from wooden blocks treated with the same protective compounds.
- On the frame we fix lining or slab material for internal wall cladding.
- Mineral or ecowool is chosen as insulation. Thermal insulation slabs are laid on the wall, protected with membranes on both sides up to the sheathing. The cavity is filled with ecowool as the wall is sewn up.
At the last stage, the treated surfaces are decorated. The lining is sanded and coated with paints and varnishes. The slabs are puttied, rubbed, wallpapered or painted.
Floor
To protect your home from the cold, the floor is also insulated. To do this, perform the following list of actions:
- Careful requirement of the soil inside the foundation.
- Laying sand or a mixture of sand and gravel 20-40 cm thick.
- Compaction of the bedding.
- Arrangement of waterproofing. A special membrane is laid over the previous layer.
- Another layer of backfill insulation is gravel or perlite. Thickness from 40 cm. The material does not reach the upper edge of the joist by 2-3 cm.
- A layer of waterproofing film.
Be sure to leave free areas of the joists so that the wood can freely pass air.
Installation of lathing for fastening finishing materials outside
A horizontal or vertical sheathing is installed on top of the windproof membrane. The type of lathing depends on the size of the material that will be used for exterior decorative finishing. The lathing also creates a ventilation gap, making it easier to remove escaping steam from the structure. This measure will protect the load-bearing walls from air stagnation, mold formation and extend the service life of the wood.
Installation of the sheathing under external decorative finishing is carried out in the same way as installing the sheathing under the insulation. The diameter of the bars for sheathing depends on the size and weight of the finishing material.
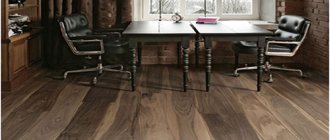
Exterior wall decoration
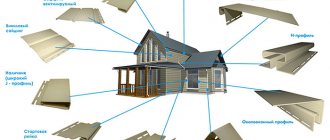
The final step in insulating a wooden house is the installation of decorative trim. The most commonly used materials for cladding a wooden house are:
- various types of siding;
- easy-to-install lining;
- block house in the form of a rounded board;
- dry edged board.
The technology and installation features depend on the selected facing material.
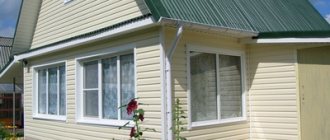
External wall decoration creates an additional thermal insulation layer, perfectly absorbs external noise, and protects load-bearing walls from premature destruction. With the help of decorative finishing, you can not only efficiently insulate the house, but also decorate the facade in an original way.
Rules for floor insulation in an old house
In old buildings there are often uninsulated floors. And if they are not thermally insulated, the effectiveness of all previous actions will be reduced.
Installation of lags
Before installing the logs, they must be treated with an antiseptic composition. This element is a supporting element in the floor structure, and therefore needs protection from rotting and biological factors. Treatment is carried out with impregnations and film-forming agents.
Logs are beams used as support.
The logs are installed on supporting posts or beams.
Installation of subfloor
Initially, a lathing made of beams with a section of 50×50 is installed on the logs. Next, subfloor boards 20 mm thick and 200 mm wide are filled. Nails are used to secure them. The boards used must be of identical thickness to eliminate height transitions. The permissible size of the cracks cannot exceed 1 cm.
Laying waterproofing
When insulating the floor in a wooden house, it is allowed to use only a membrane film that does not let moisture out. When laying, leave 10-15 cm of free space on each side. These cracks are then sealed with moisture-resistant tape.
Waterproofing will rid the room of moisture.
Finishing logs
Beams with a cross section of 50×50 or 75×150 are used as finishing logs (for rooms where large-sized furniture or appliances will be installed). The distance between the elements is 1 m. Before installing new joists, you need to indicate the placement of the rough joists using marks on the floor. Fixation is carried out with long screws and a screwdriver. A gap of 2-4 cm is maintained between the wall and the finishing joists.
Laying insulation and installing the finishing floor
Mineral wool, polystyrene foam, penoplex or other insulator is placed on the waterproofing layer in the gap between the joists. It is allowed to combine materials, but it is necessary to insulate the seams.
No additional fixation is needed. The main thing is that the insulator completely covers the voids between the lags.
Features of pediment insulation
In suburban construction, attic-type houses have become increasingly common, when the attic space is insulated and equipped for living space. To create comfortable conditions on the attic floor, high-quality insulation of the gables from the outside and inside is required. Most often, the external gable is insulated with the same material as the main part of the house.
Before insulation, all wooden elements of the pediment are treated with any antiseptic. Insulation is carried out following the step-by-step instructions for insulating walls given above. The ventilation system is arranged in such a way as to ensure free circulation of air through the ridge.
Exterior finishing of a wooden house, made according to the generally accepted insulation scheme, will help get rid of drafts, create an optimal indoor microclimate, instantly transform the facade and help significantly save on heating.
External wall insulation with mineral wool for siding
To effectively insulate walls with mineral wool, you should prepare the surface for subsequent installation work : clean it of debris, seal cracks, remove gutters and other decorative elements, apply markings, attach hangers.
Next, install the elements in order:
- laying mineral wool slabs from bottom to top between the guide posts end-to-end, placing the material on hangers and attaching with dowel nails;
- seal the cracks with pieces of insulation;
- cover the vapor barrier membrane in the same way as insulation;
- attach racks to hangers;
- then proceed to cladding.
Metal sheathing
This method is suitable for metal profiles.
If wooden beams are used, then insulation with mineral wool is somewhat different:
- Attach the beams to the prepared wall with corners at a distance of the width of the mineral wool slab;
- the insulation is laid end-to-end between the studs, secured with a pair of dowels, and the cracks are sealed with polyurethane foam;
- if a second layer of insulation is needed, then counter-battens are attached to the racks and mineral wool slabs are laid between them;
- a diffusion membrane is attached to the frame with staples;
- install a counter-lattice, which serves as the basis for fastening the siding panels and creates an air gap in the wall pie.
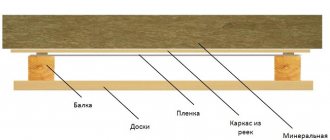
Wall cake for siding
Fastening mineral wool to the wall with dowels
Reviews
When I insulated my old house made of timber, I was advised to use mineral wool. Metal siding was laid on top. I have no previous experience in insulation. I insulated it myself. Finished it in a month. Let's see how much warmer the house gets.
Due to drafts, the floor in the house was constantly cold. I decided to insulate the house. I used mineral wool and lining. The house has changed a lot both inside and outside. The temperature in the house has noticeably stabilized. Insulation also had a positive effect on the cost of heating.
Possible problems with insulation
Before insulating an old wooden house, be sure to check how strong the structure is. If necessary, the walls and foundation need to be strengthened. For those who have never done such a thing, it is better to take care of the construction team and not start experiments.
And those who still decide to do everything themselves should strictly adhere to the instructions and not let anything slip out of sight. It is important to properly prepare the base, choose insulation and finishing.