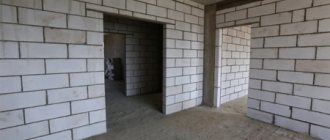
The reinforcement of aerated concrete partitions is similar to the reinforcement of load-bearing walls, the only difference is the amount of reinforcement per row. Next we will look at some of the stages of construction and reinforcement of partitions.
Stages of construction of partitions:
- Marking for the project.
- Installation of the guide profile.
- Waterproofing on the floor.
- Laying the first row on the solution.
- Reinforcement.
- Bandaging with walls.
- Sealing damper joints.
For the construction of partitions indoors, a thin aerated block is often used. Its thickness is minimal, as a rule, it reaches only 100-150 mm. If you try really hard, you can find a block whose thickness will reach 75 mm or 175 mm. These blocks are identical in width and height and have standard dimensions, namely:
- width 600 mm and 625 mm;
- height can be 200 mm, 250 mm, 300 mm.
A little about the practicality of GPP
Manufacturers of gypsum boards guarantee that this material provides reliable fastening of standard elements of a modern interior. This means that gypsum plasterboard partitions can withstand loads comparable to those on walls made of other standard materials. Wall cabinets, household appliances, suspended ceilings - all this can be mounted without problems on a tongue-and-groove gypsum partition. You can expand the functionality of a wall partition made of PGP by installing metal-plastic water pipes (with a diameter of no more than 16 mm) and electrical wiring elements into its body.
Grachev68FORUMHOUSE user
You can also install doors in the tongue-and-groove without additional fittings, install electrics without any problems, and hang shelves and TV more reliably.
Rules for working with gas blocks
Before making a partition from aerated concrete blocks, you need to decide on the parameters of the stones that will be used in construction. The minimum thickness of masonry up to 250 cm in height should be 10 cm. If the ceilings in the house are 300 or 400 cm high, then you need to use stones 15 and 20 cm thick, respectively. You should choose aerated concrete blocks with a declared density of 500-600 kg/m³. Material with a lower specific gravity is considered insulating and is not suitable for the construction of interior partitions. The dimensions of aerated concrete blocks should be chosen so that they can easily be used to lay a wall alone. The best option is to choose stones with a width of 600 mm, a height of 400 mm and a thickness of 100, 150 or 200 mm. Their weight varies between 9-18 kg.
Tongue-and-groove slabs - what are they?
Standard PGPs come in two types: solid and hollow. The construction of solid slabs is more durable, but this material is significantly heavier than its hollow counterpart. For this reason, it is not recommended to be used as part of partitions mounted on floors with wooden joists.
Hollow PGPs provide high sound insulation (43 dB) without overloading the floor structure. Some people believe that all kinds of insect pests can live and multiply intensively in the internal space of hollow slabs. But such an opinion has not yet found serious confirmation.
Conventional (solid and hollow) tongue-and-groove slabs are used to construct partitions or wall cladding in rooms with dry and normal humidity levels. If you plan to install the partition in a room with a high level of humidity, then preference should be given to moisture-resistant boards that have a peculiar greenish tint. Keep in mind that such PGPs are slightly heavier than regular solid products.
Types and features of products
Partitions made of tongue-and-groove slabs (hereinafter referred to as GSP) are a prefabricated large-block structure. The blocks are made by molding. They are distinguished by increased accuracy - the deviation of the working surfaces is no more than 1.5 mm from the specified one. Depending on the raw materials used, they are divided into two types:
- Silicate. Produced by silicatization of quartz sand and lime in an autoclave under high temperatures. This technology allows us to obtain durable, moisture-resistant, non-flammable material.
- Plaster. The main raw material is gypsum. To achieve the desired characteristics, plasticizers and other chemical additives are introduced into it. This makes it possible to obtain the necessary strength and moisture resistance. Depending on this, products are divided into types. The environmental safety of raw materials makes it possible to use them without restrictions, even in children's rooms.
Photo: Instagram @kladka_penoblokov
The sizes of tongue-and-groove blocks for partitions may vary from manufacturer to manufacturer. We list the most common options:
- 667x500;
- 250x500;
- 300x900;
- 599x199.
Partition slabs of all sizes are produced in thicknesses of 70, 80 and 100 mm. Depending on their design, they are divided into two types:
- Full-bodied. They are solid monolithic elements. They are used if you need to ensure high strength, for example, to hang heavy shelves or cabinets.
- Hollow. They have round perforation holes. This makes them lighter and therefore easier to install. Thanks to the voids, the products have increased sound insulation. They can also be used as channels for electrical wiring.
Depending on the purpose of the premises, the internal wall can be made single or double. If you place mineral wool insulation between the gypsum panels, you can achieve 100% sound insulation between adjacent apartments.
Photo: Instagram @verysamara
Between double partitions you can lay not only insulation, but also communication networks. In this case, it is necessary to provide free access to them for maintenance, for example, install inspection hatches.
Preparatory work
List of tools for working with tongue-and-groove slabs:
- Marking cord:
- Hacksaw with a wide blade and large teeth;
- Roulette;
- Putty knife;
- Drill with a nozzle for stirring mixtures;
- Bucket;
- Construction level and plumb line;
- Rubber mallet;
- Square;
- Screwdriver.
In accordance with the recommendations of the manufacturers, the length of the wall partition made of PGP should not exceed 6 m. The maximum height of the structure is 3.5 m. It is possible to increase these parameters, but the maximum strength of the partition is ensured only if the specified dimensions are observed.
The base for the wall made of tongue-and-groove slabs must be level, stable and completely free of dust. If the floor is concrete and there are differences in it exceeding 3 mm, then before starting installation work it is necessary to level it; create a leveling layer. For this purpose, a mortar based on sand and cement is suitable (grade of mortar is not lower than M50).
Alignment of the wall from PGP.
The solution is applied to a clean, damp floor. To obtain an ideal surface, you can create some kind of formwork and fill it with mortar precisely at a horizontal level. After complete drying, the base must be coated with a concrete primer.
If it is possible to do without a leveling layer, then the base for the future partition, as well as the junction of the partition with the enclosing walls, are covered with 2 layers of primer.
If the partition is mounted on a wooden floor, then the base must be reinforced with a strong, even beam.
Kirill147FORUMHOUSE user
According to the technology, gypsum tongue-and-groove panels require a flat base - a screed or a separate non-sagging beam under the partition.
When the base is ready, you can mark the locations of partitions and doorways. This is done using lacing, a plumb line and a level.
Installation of the PGP can be carried out at temperatures from -10 to +30°C. Construction material must be brought into the room in advance. This will help it “get used” to the desired temperature regime and insure the partition from deformation (when the temperature changes, the slabs may slightly change their volume).
Preparing for the construction of a plasterboard partition
To build walls from gypsum plasterboard, you will need to purchase the necessary materials and prepare the appropriate tools. In order to correctly calculate the amount of material, you must first draw a diagram of the future partition.
Let's calculate a plasterboard partition using the example of the one we will consider in this article.
Here is a diagram of the future wall:
As you can see, the length of the partition is 5.8 meters and the height is 2.5.
First of all, let's count the number of sheets . To do this, divide the length of the partition by the width of the sheet: 5800/1200 = 4.8. Since the wall needs to be sheathed on both sides, we multiply this number by 2: 4.8*2=9.6. The store sells only whole sheets, so we round up to 10. Thus, we will need 10 sheets of drywall.
Now let's calculate how many racks are needed. For normal operating conditions, the racks are installed in increments of 600 mm (half a sheet) along both edges and in the center of the sheets. At the junction of sheets, the rack profile is common to two sheets. Also, one rack is attached to the main walls at the beginning and at the end of the partition. And two more will be needed for the doorway. Our scheme requires 11 full racks with a length of 2500 mm. The store sells profiles 3000 mm long, so there will be 500 mm trims. We will use them to make small racks above the doorway.
guide profiles
Installation of elastic gasket
To ensure that temperature changes and deformation of the load-bearing elements of the building do not lead to the destruction of the partition over time, the structure made of PGP should be isolated from the base and adjacent walls with a special elastic (damper) tape. Damper tape for PGP protects the wall from mechanical damage and increases the soundproofing qualities of the partition. The elastic tape is a special cork backing (at least 75 mm wide), which we will glue to the base and walls in accordance with the markings made. The boards and tape are fixed with the same mounting adhesive.
Consumables intended for installation work (building mixtures, gaskets, dowels, hangers, etc.) should be selected based on the recommendations of the PGP manufacturer. At sub-zero temperatures, the installation of PGP is carried out using a frost-resistant adhesive gypsum mixture.
Apply a thin layer of glue to the prepared surface using a spatula. The tape is rolled out from above and pressed lightly with your hands. The glue sets within one hour. After this period, you can begin building the partition.
Pros and cons of using tongue-and-groove blocks for partitions
Advantages:
- Availability. The use of the material is economically justified. Prefabricated gypsum structures are lighter than ceramic bricks and stronger than plasterboard and foam gas silicate. At the same time, their cost is 10-30% lower.
- Safety. The raw materials for the production of PGP do not contain any harmful impurities. The products themselves are highly fire resistant.
- Soundproofing. If the installation technology is followed, the wall prevents loud sounds from penetrating into adjacent rooms.
- Easy to install. Thanks to the connection of individual elements according to the tongue-and-groove principle, even a person without experience in carrying out such work can cope with the construction of the PGP. The main thing is to correctly mark and constantly monitor straightness as a rule.
- Ease. The material is almost half the weight of brick, which reduces the load on the interfloor ceiling. At the same time, you get thinner interior partitions, which gives additional usable space.
Flaws:
- Hygroscopicity. Standard tongue-and-groove slabs absorb moisture well, but during the drying process they can become deformed. Therefore, it is important to install them after completing all wet processes in the room.
- Fragility. Under high loads, the material bursts at the point of greatest stress. Therefore, before installing a wall on a wooden floor, it must be well strengthened. In new buildings that may shrink, it is imperative to use damping tapes.
- Demanding requirements for the foundation. The large-block structure does not allow the adjacent surfaces to be leveled during the construction of walls, as can be done, for example, with bricks. This means that you first have to carefully align all planes.
Installation of PGP
The damper gasket under the tongue-and-groove slabs is covered with a layer of assembly adhesive, onto which the lower, first row of the PGP is laid. The plate can be positioned with the groove up or the groove down - it doesn’t matter. But if the groove is at the bottom, then the ridge will not have to be sawed off to make the slab level. It is allowed to install the top row of slabs vertically (if this becomes necessary due to material savings).
When laying the first row, the vertical groove of the tongue-and-groove slab and the base of the floor are coated with glue. Particular attention should be paid to maintaining vertical and horizontal levels. The slabs should be set using a mallet.
The thickness of vertical and horizontal seams should not exceed 2 mm. After installing the next slab in its place, use a spatula to remove excess glue at its joints.
Additional elements for filling gaps between solid slabs, walls and openings are easily cut from PGP using a hacksaw.
The relative displacement of vertical joints in the PGT masonry must be at least 10 cm. This is a prerequisite for ensuring the strength of the structure.
At the intersection of two partitions made of gypsum tongue-and-groove slabs, as well as in the corners, the slabs are laid in such a way that their joints overlap each other. Tongue-and-groove elements that interfere with proper dressing should be cut off with a hacksaw.
After the partition is ready, its outer corners must be strengthened with a perforated metal profile and puttied.
People often ask whether it is necessary to glue tongue-and-groove partitions with serpyanka. Yes, the inner corners are glued with serpyanka and coated with putty.
Marking
Before installation, it is necessary to carry out measuring work.
- To do this, you need to determine the place in the room where the partition will be located. Markings can be applied using a marker or pencil, but it is easier to do this using a special thread (marking cord), which is stretched between the walls and leaves a noticeable stripe on the surface.
Don’t forget to mark the locations of future doorways.
- On the wall, floor and ceiling it is necessary to mark a vertical plane on which the guides will be fixed. You can determine the vertical using a plumb line. If you have a laser level at hand, this is even easier to do: place the laser level mark in place of the partition, and then project the vertical onto the wall and make the appropriate markings.
Fastening the partition to the wall
The strength of the connection of the tongue-and-groove partition to the walls and base is ensured by the installation of additional elements: mounting angles, fittings or hangers. It is more convenient to use mounting angles or hangers. After all, they are attached to the slab using ordinary self-tapping screws, and to the walls using dowels. The slabs of the 1st, 3rd, and 5th rows are attached to the side walls. It is possible more often, but there must be several (at least three) fastenings. A strong base connection is created for every second slab.
During installation, direct hangers can be installed directly into the groove of the slab, having previously cut them to the required dimensions.
Between the top row of masonry and the ceiling of the room you will need a technological gap of at least 1.5 cm. It must be left and foamed with polyurethane foam. After drying, excess foam must be cut off and the seam must be puttied. Between the top row and the ceiling, additional fasteners are installed at the same frequency as below.
Gap between partition
To avoid cracks in an aerated concrete wall, it is necessary to leave a compensation gap of up to 20 mm between the ceiling and the partition. It must be filled with mineral wool, polyurethane foam or low-density polystyrene foam. This will fully protect against mechanical influences when the floor deflects.
To prevent cracks from appearing in the corners in the future, a special damper seam is made between the wall and the partition. Various materials are used for its manufacture, the most popular are mineral wool, thin polystyrene foam, and damper tape used when laying heated floors. To avoid moisture getting into this seam, it is necessary to treat the seam with a vapor-proof sealant upon completion of the laying of the blocks.
Creating Doorways
For the construction of door or window openings whose width does not exceed 90 cm, masonry can be made without additional reinforcement. In this case, an auxiliary structure made of wooden beams is mounted above the opening, which is removed after the slabs of the top row are laid and the mounting adhesive has set.
If the opening width exceeds 90 cm, then a wooden or metal lintel should be installed above it. The ends of the lintel should protrude 50 cm beyond the opening on each side. This will ensure even distribution of the load on the partition.
The door (window) frame is attached to the partition using frame dowels and mounting foam.
Creating a plasterboard partition
Often a plasterboard partition is installed using a frame. The following materials are used for the frame:
- wooden beam;
- metallic profile.
First stage. A beam of such a cross-section is selected that would suit the homeowner planning to install a partition of a certain thickness.
Second phase. When the frame is assembled, the guides will be fixed along the marking line. They will be controlled horizontally and vertically. You need to use a plumb line and a building level.
First you need to secure the guide to the ceiling surface. The most suitable type of fasteners is used, taking into account the type of ceiling. Fasteners can be:
- "butterflies";
- anchors;
- regular dowels, etc.
It is necessary to observe a step of 15-17 cm.
Third stage. The profile will fit tightly into the surface if you attach a seal - glue double-sided adhesive tape to it. After this, sections of guides are attached to the floor. And this is where double-sided tape with a polyethylene foam seal comes in handy.
Fourth stage. Vertical guides are attached to the wall. Then the lower profile is connected to the upper one. Vertical elements are mounted directly on the wall, but special hangers can also be used.
CD and UD drywall profiles
Fifth stage. The doorway is being installed. Racks are made from a metal profile, and a timber beam is inserted into its cavity. Insert the profile and secure it in the upper and lower guides using special screws.
Fastening plasterboard sheets, joints
Sixth stage. After this, a transverse profile is installed to the vertically fixed profiles corresponding to the width of the doorway. He will also determine the height of the opening. To increase the rigidity of the structure, the horizontal bar is fastened to the upper guide with additional metal profiles. One or two segments are enough.
Seventh stage. All other vertical elements of the frame are exposed, then they are screwed. The step is 60 cm.
Sometimes the dimensions of the cladding sheets of material are smaller than the height of the ceiling. In this case, in the places where they join with the inserts, transverse sections of the profile are fixed between the vertical posts. To do this work, you will need to cut the ends of the profile and bend them at right angles to the sides.
Fastening drywall to a metal profile
Eighth stage. You can sheathe one side of the frame with plasterboard. Canvases with maximum density are joined to each other in the middle of the vertical posts. Black self-tapping screws are used for screwing. Their caps should be recessed into the skin by about a millimeter or a maximum of two.
Ninth stage. After the installation of drywall is completed, a material that enhances sound insulation is installed between the vertical profiles on one side of the frame. It is installed between the vertical posts quite tightly.
Tenth stage. You can start covering the second side of the frame.
Eleventh stage. Install a door frame into the partition. There is an opening for it. The box is mounted on the vertical posts of the frame.
Twelfth stage. The structure of fixed plasterboard has seams. It is also easy to notice all the recesses with recessed screw heads. All these areas should be treated with putty (the base is gypsum, like the base material). But before applying the putty compound, you will need to glue a fiberglass sickle mesh to the joints of the canvases.
Puttying plasterboard joints with sickle mesh
Should be considered. There is a serpyanka with an adhesive composition already applied. But you can drown the mesh in a thin layer of putty.
After the putty has dried on the seams and in the recesses, they proceed to preliminary cleaning of the partition. Next will be priming the structure. Then - putty again, only this time completely - on both sides.
Sealing drywall joints with putty
Prices for plasterboard sheets
Installation of communications
The design of partitions made of PGP allows for the installation of hidden electrical wiring. Gypsum boards are strong enough to allow vertical grooves to be made into them and are thick enough to install distribution boxes. Technological cavities inside hollow PGP can be used as horizontal grooves.
If the channel chosen for laying the wire is expanded with a crown with a diameter of 45 mm, then the cable will pass through it without difficulty. The main thing is not to clog the side hole of the slab with glue during installation work.
To make it more convenient to pass the wire through horizontal channels, blind mounting holes can be made in the side surface of the partition.
Some doubt the safety of vertical gating of plaster walls. But, according to manufacturers (and the builders themselves), there is nothing to be afraid of.
RoaromaFORUMHOUSE user
7 – typical thickness of tongue-and-groove slabs. I personally dug and installed sockets. Everything is still standing.
Yura52FORUMHOUSE user
I used a long drill to drill a hole through the entire slab (to the socket). In the next row, I marked where the wire should go and also drilled, trying to ensure that all the holes matched. There are already horizontal holes in the plate, so the wire passes through them easily. We lay the plates up to the vertical drilled holes and, using steel wire, stretch the wire to the socket.
In a similar way, metal-plastic pipes with an outer diameter of up to 16 mm can be laid inside the partition made of PGP.
The distance between the grooves must be at least 10 cm, and the depth of the pipes must be at least 1 cm (this rule applies to both electrical wiring and water pipes).
The grooves and technological holes made in the partition can be easily sealed with mounting mortar after completion of the work.
Parameters of aerated concrete blocks
The parameters of the aerated concrete block allow it to be used as a building material in the construction of interior structures.
Advantages of aerated concrete partitions:
- Easy to install. Due to its ease of processing, the material can be given almost any shape using available tools. Due to its low weight, it can be erected independently.
- Speed of work completion. Also, insignificant mass affects the speed of wall construction. In addition, this is facilitated by the small size of the blocks and ease of installation.
- Accuracy. Precise factory dimensions allow you to build perfectly level structures. When laying, an adhesive solution is used, which reduces the thickness of the seam, which means the aesthetics of the finished structure increases.
- Environmental friendliness. Aerated concrete uses cement, sand and gas-forming components, which are environmentally friendly. Therefore, walls made of aerated concrete blocks can be mounted indoors.
Attachment Mounts
Wall-mounted furniture is attached to the plaster partition using universal plastic dowels. The main difference between universal dowels is that when they get into a cavity, they are able to twist, providing reliable fastening in this position even with large load-bearing loads.
To fasten heavy plumbing fixtures, use universal plastic dowels and stud screws. If the partition is double, then the best option for attaching plumbing fixtures is through spring dowels.
Chemical anchors are also suitable for heavy structures.
Preparing for wallpapering
Preparing the partition for wallpapering comes down to cleaning the seams, leveling and priming the surface. If scratches or scratches appear on the wall during the installation of tongue-and-groove slabs, they should be repaired with putty before applying the primer.
You can discuss the advantages and disadvantages of materials used for the construction of wall partitions in the corresponding FORUMHOUSE section. If you are looking for fresh solutions for quickly building walls, pay attention to the article about houses made of wood concrete panels. A master class on the construction of partitions from gas silicate blocks will introduce you to all the intricacies of this construction technology.
Thickness of aerated concrete partitions
For the construction of partitions indoors, special gas silicate blocks are produced that have a smaller thickness. The standard thickness of partition blocks is 100-150 mm. You can find non-standard ones in 75 mm and 175 mm. The width and height remain standard:
- width 600 mm and 625 mm;
- height 200 mm, 250 mm, 300 mm.
The grade of aerated concrete blocks must be at least D 400. This is the minimum density that can be used for the construction of partitions up to 3 meters high. Optimal - D500. You can also take denser ones - grade D 600, but their cost will be higher, but they have better load-bearing capacity: you can hang objects on the wall using special anchors.
Without experience, it is almost impossible to determine the brand of aerated concrete. You can “by eye” see the difference in density between the thermal insulation blocks. D300 and wall D600, but between 500 and 600 it’s difficult to catch.
The lower the density, the larger the “bubbles”
The only available control method is weighing. Data on the dimensions, volume and weight of partition blocks made of aerated concrete are given in the table.
Parameters of aerated concrete blocks for partitions
The thickness of aerated concrete partitions is selected based on several factors. The first is whether it is a load-bearing wall or not. If the wall is load-bearing, in an amicable way, a load-bearing capacity calculation is required. In reality, they are made the same width as the external load-bearing walls. Basically - from wall blocks 200 mm wide with reinforcement in 3-4 rows, like external walls. If the partition is not load-bearing, use the second parameter: height.
- For a height of up to 3 meters, blocks 100 mm wide are used;
- from 3 m to 5 m - the block thickness is already taken to be 200 mm.
You can more accurately select the thickness of the block using the table. It takes into account such factors as the presence of a connection with the upper floor and the length of the partition.
Choosing the thickness of a partition made of aerated concrete blocks