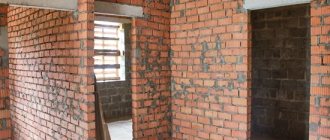
When building a country house or during renovation of an apartment, the need arises to erect a partition from foam blocks. This large-sized material is lightweight, durable, as well as has good thermal insulation and sound insulation qualities. In our article, we will get acquainted with the technical characteristics of foam concrete, find out the overall dimensions of the blocks for partitions, and also consider the process of constructing the enclosing structure.
What foam blocks are used
To understand which foam blocks to install partitions from, a little information about the material as a whole.
Foam concrete is made from sand, cement and a foaming agent. The more binding component, the stronger the product and the greater the weight. However, this deteriorates the thermal insulation properties. Depending on the density, foam concrete blocks are of the following types:
- structural;
- structural and thermal insulation;
- thermal insulation.
Products of the first type are the most durable. These include brands D 1000-D 1200. It makes no sense to use such a foam block for partitions.
The most common is structural and thermal insulation material. D 500-D 900. It has low thermal conductivity and sufficient strength characteristics. It is used both for the construction of walls and for the installation of partitions made of foam blocks.
And thermal insulation. D 100-D 400. Take closer to the upper limit. The construction of partitions from just such foam blocks is most common.
Actually, when choosing foam concrete blocks, it is easier to focus on gradation depending on the scope of application:
- thermal insulation;
- wall;
- partition foam block.
Regardless of the purpose, the length of the block according to GOST should not exceed 600 mm. The standard product has dimensions 600x300x200 mm. For laying interior walls, partition blocks measuring 600x300x100 mm are used.
Well, the last thing I want to say about the material is that depending on the manufacturing method, molded and cut products are distinguished. The first ones are obtained by pouring foam concrete into molds, separately, piece by piece. The second ones are cut from foam concrete mass.
Sliced ones, as a rule, are of higher quality both in size and composition. In other matters, this is, of course, important, but not as much as when building load-bearing walls.
The construction of partitions from foam blocks is often carried out from tongue-and-groove blocks. It is convenient and more reliable.
Advantages and overall dimensions of blocks
The main advantages of foam blocks compared to other wall materials are:
- Relatively low price.
- Simplicity of loading and unloading operations (if special equipment is available).
- Minimum thermal conductivity coefficient, excellent acoustic qualities.
- Sufficient strength, long-term operation of partitions made of foam blocks.
- Low weight of individual material.
- High speed of building a wall from blocks compared to ceramic bricks and other products.
- Even an inexperienced builder can work with foam concrete; it can be cut into pieces of the required length using a regular hacksaw.
- When laying interior partitions, a minimum amount of mortar is used. To reduce the effect of cold bridges, the construction mixture can be replaced with glue for foam blocks.
- The enclosing structure does not require additional insulation.
- You can screw screws or drive nails into foam concrete.
- Foam blocks are made from natural materials; they do not pose a threat to human health.
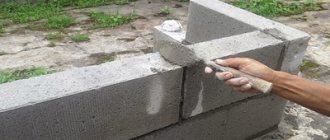
Advice! It is recommended to use special glue for laying partitions made of foam blocks. The consumption of this mixture does not exceed 15 kilograms for each cube of wall, which is much more profitable than using cement-sand mortar. To install interior partitions, it is best to use products with dimensions of 60*30 centimeters.
The overall dimensions of the blocks for partitions are as follows:
- 60*30*5 centimeters;
- 60*25*7.5 centimeters;
- 59.5*19.5*7.5 centimeters;
- 60*25*12.5 centimeters;
- 60*25*10 centimeters;
- 60*30*10 centimeters.
From the indicated overall dimensions it can be understood that the width of the foam block for the construction of an interior partition can be size 5; 7.5; 10; 12.5 centimeters. So, to construct a wall in a bathroom or toilet, blocks 5 or 7.5 centimeters wide are used. It is advisable to make partitions for the remaining living rooms from wall products 10 centimeters wide. The required dimensions of foam blocks can be made to order from the manufacturer, which will allow you to erect a building or carry out repair work according to a pre-designed project.
How to calculate the required quantity
The easiest way is to use a calculator on some construction site. A reliable site to eliminate the possibility of errors. I'll try to get one in the future.
But doing the calculations manually is not that difficult. Everything you need to know:
- foam block size for partitions;
- total length of walls (m);
- average height (m);
- total area of window and door openings (m²).
The algorithm is simple.
- We multiply the height by the length of all future partitions.
- We subtract the area of the designed openings (windows, doors).
- We calculate the area of one partition foam block.
- We divide the total area from the first point by the area of one block.
- We add 10 percent. Definitely. Since there will be both forced halves and an unforced fight.
How to build a partition with your own hands in stages
To carry out the work efficiently, we will need the following tools and building materials:
- the estimated number of foam blocks plus 10-12% for possible damage during transportation, as well as during loading and unloading operations.
- cement-sand mortar for leveling the first row of blocks or a special adhesive mixture for products made of cellular concrete.
- container for the solution, as well as metal notched spatulas for applying it4
- polyurethane foam;
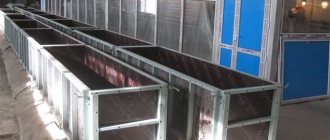
- metallic profile;
- grinder or metal scissors;
- solution to improve the adhesion of the base surface (deep penetration primer);
- paint brush or spray bottle for applying primer;
- metal rods for reinforcing masonry areas near window and door openings. To increase the load-bearing capacity of the wall, reinforcement is placed in every third row of foam blocks.
- a regular construction or laser level;
- an electric drill with a special whisk attachment for mixing the solution;
- a marker, marker or pencil for marking the surface of the partition.
In addition to the specified tool, a construction vacuum cleaner is used to remove dust, as well as a pry bar, a rubber mallet and a hacksaw. Watch the process of constructing the partition in this video
The work can be divided into the following stages:
- Using a tape measure, measure the required distance from the load-bearing wall to the partition. Take a tapping cord and draw a line on the floor. We transfer the markings with a laser level to the walls and ceiling, and connect all the points with a paint cord. In this way, a spatial diagram of the future partition will be obtained, in the form of a rectangle. During masonry work, it is not recommended to protrude beyond the marked marking lines.
- At the next stage of work, the base is cleared of construction debris. All recesses and cracks in the concrete floor are sealed using cement-sand mortar. You need to hammer reinforcement into the wooden base for better fixation of the blocks.
What do we need
Materials:
- building blocks themselves;
- adhesive for foam concrete;
- polyurethane foam;
- fittings for lintels (at the rate of two pieces per opening);
- reinforcement bars or metal mesh;
- fastening corners (they can be replaced by a galvanized perforated strip);
- boards.
Tools:
- construction mixer (as a simplified version: a hammer drill or a drill with an attachment);
- gun for working with polyurethane foam;
- a hacksaw or grinder with a cutting disc for stone or concrete;
- building level;
- roulette;
- hammer with rubber striker;
- trowel;
- spatula-comb (do not neglect the comb; among other things, it significantly saves solution).
Auxiliary equipment:
- container for adhesive solution;
- brush (broom);
- beacons;
- cord (line);
- dyeing thread for marking.
Personal protection:
- protective glasses;
- respirator;
- gloves.
Because When sawing blocks, a lot of dust is generated, I strongly recommend that you carry out the work in a respirator and safety glasses.
Technology of laying partitions from foam blocks
For installation, foam blocks with a thickness of 100 mm are usually used. Interior partitions made of foam blocks most often have exactly this thickness. If the work is carried out in a private house and the foundation has not been poured for the partition, then it is necessary to make a shallow foundation 30-40 cm deep. In order for the partition in the apartment made of foam blocks to be stable, the floor covering is removed up to the floor slab and a screed is made under the level.
Vertical beacons (profiles) are installed on opposite walls so that the partition made of foam blocks is strictly vertical.
To make the interior partition made of foam blocks stronger, and for fastening to adjacent walls, pieces of reinforcement with a diameter of 10-12 mm and a length of 40-50 cm are placed in them through 2-3 rows into blind holes with a depth of 100-150 mm. These works can be carried out both during the process of reinforcing the partition from foam blocks, and separately.
Step-by-step instructions for constructing a partition from foam blocks
The construction of partition walls is carried out similarly to masonry from any other piece materials. The construction of partitions from foam blocks involves ligating the rows to separate the vertical seams. This increases the strength of the structure being built.
Construction of partitions from foam blocks step by step.
- Removed debris and removed dust.
- A primer is applied to the ceiling area, load-bearing wall and floor.
- Surfaces are marked. Draw a straight line with chalk. An alternative option is to use a strong cord or thin twine for marking. First you need to make marks on the ceiling. For the correct geometry, before erecting a partition from foam blocks, the remaining boundaries are pre-marked by level.
- If necessary, before installing the foam block partition, a soundproofing floor covering is installed. You can lay a layer of roofing felt or other rolled material with similar properties.
- Lengths of steel rods are driven into the floor to support the first course of masonry.
- A layer of adhesive is applied to the wall and floor surfaces. This can be a cement-sand mixture or assembly adhesive.
- The partition foam block is mounted flush against the wall. At the same time, binding with reinforcement is carried out. Half of the rod, 25 cm long, is inserted into a hole drilled in the supporting structure. The remaining part is laid between the rows of masonry material.
- When installing foam concrete blocks, in subsequent rows it is necessary to maintain an offset relative to the previous horizon. The minimum deviation is 25% of the length of a separate partition foam block.
- A prerequisite is reinforcement of the masonry.
- If an opening is planned, then after the 7th row for the lintel, 2 reinforcement rods are laid in grooves prepared in advance in the blocks. After this there is a laying of at least two rows. There should be a gap of 20-40 mm between the ceiling and the foam blocks of the partition. After two days, the glue will dry and the gap can be filled with construction foam.
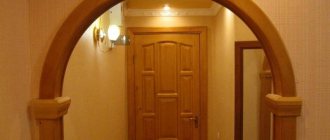
- The dimensions of the doorway are adjusted using a grinder, removing excess bulk and controlling verticality.
- If the construction of a partition from foam blocks is carried out during construction, a gap of 15 mm is left between the top row of interior foam blocks and the ceiling. It is blown out on both sides of the wall with polyurethane foam. This thermal gap compensates for the likely shrinkage of the building.
About the mandatory gap between the ceiling and the top of the partition in a little more detail. The fact is that over time the building shrinks. Load-bearing walls can sag, but partitions cannot. If there is no gap, the ceilings can be pushed through and damage the foam concrete partition. Well, polyurethane foam, which, as a rule, is poured between the partition and the ceiling, absorbs such movements.
The need for reinforcement
There is an opinion that increasing strength is only necessary if construction is carried out in a seismic zone. But if the site is located on low-moving soils, this is not necessary.
However, in a private house, especially if the partition made of foam blocks is not interior, it is better to do reinforcement. When it separates the toilet and the pantry, for example, having only one point of contact with the main wall.
For reinforcement, metal mesh or reinforcement is used.
In the first case, strengthening is carried out as follows:
- Glue is applied to the row of masonry, on which the mesh is laid.
- The reinforcing material is pressed into the mixture, and excess glue is removed with a spatula.
The mesh should not protrude above the surface of the binder solution, because this will lead to a decrease in the quality of the combination of masonry rows.
In the second option, the reinforcement is placed in previously prepared grooves and filled with glue. Rods with a diameter of about 8 mm are used.
Stages of work
Everything is ready for work: foam blocks, glue, tools.
- Marking. Appropriate markings are applied to the floor, ceiling and adjacent walls. For precise drawing of lines, laser devices and construction dyeing thread are used. The partition must be smooth and have no bends, otherwise the wall will gradually collapse, and the aesthetically crooked hay will look unsightly. It is recommended to install additional guides. The design can be made from a profile; guides are also made from wood. A rope stretched in the middle will allow you to lay aerated concrete blocks smoothly.
- Preparing the surface for subsequent masonry. The surface of the floor and adjacent wall must be thoroughly cleaned, leveled and protruding parts and grease contamination removed. It is recommended to treat the surface of the floor and walls with a primer. Glue dilutions must be made strictly according to the instructions; the glue must be of a certain consistency.
- Laying out the partition. Work begins with laying out the first row, with a solid block laid first. Further, in each row the laying is done with an offset, that is, in a running start. This gives any masonry special strength. When laying each block. Since they are large, it is recommended to use a level to check the horizontalness of the masonry and its verticality. The glue is applied in a layer of 2 mm onto a clean surface. Since the blocks have excessive moisture-absorbing properties, it is recommended to moisten the foam blocks first. The blocks are placed tightly on the surface; if necessary, you can use a rubber hammer. For better adhesion, it is not recommended to lay out the entire wall at once. The work is carried out in two to three rows, allowing the adhesive mixture to dry thoroughly.
- To ensure reliability of the structure, blocks adjacent to the wall should be additionally reinforced with metal spikes, which are previously driven into the wall surface.
- Laying out the top row. When the partition is almost ready and there is only one row left to the ceiling, you need to let the structure dry thoroughly. In order to avoid deformation of the self-supporting wall, the top row must be lined with an elastic material, this can be polyurethane foam. The foam layer should not be too wide as long as the gap remains large enough. It can be laid with a layer of brick, but so that there is a small space for polyurethane foam.
Recommendations for beginners
Experts advise beginners to adhere to the following rules:
- prepare the adhesive composition or cement-sand mixture in small portions;
- lay the partition foam block no later than 10-15 minutes after applying the glue;
- work should be carried out at a temperature of +5...+25 °C, at a higher temperature - the block must be wetted;
- It is better to apply the mixture with a notched trowel, the seams will be even and of the same thickness;
- apply the binding solution to the horizontal and end parts of the foam block for partitions;
- the laid block must be settled and leveled vertically and horizontally;
- reinforcement should be carried out through 3-4 rows;
- remove uneven surfaces with a pick or grater, remove dust from the surface;
- use block halves for bandaging.
The installation process is shown very clearly in this video:
Possible mistakes
What mistakes can there be if the installation of partitions from foam blocks is carried out for the first time?
- A poorly laid first row leads to a deviation from verticality, which is unacceptable not only for the walls of the building, but also for partitions made of foam concrete.
- The strength of the structure is reduced if the masonry is carried out in the rain, as well as at negative temperatures, if a non-frost-resistant mortar is used.
- Incompletely filled seams negatively affect not only the strength of the partition, but also the heat and sound insulation between rooms.
- If you do not sweep away dust from the blocks during laying, the adhesion between them decreases, which can even lead to the formation of cracks.
- The lack of reinforcement significantly reduces strength and reliability.
Main characteristics of foam blocks
The light weight of the block and its dimensions will incredibly speed up the installation of the wall.
Let us specify the main advantages of these blocks:
- Cellular concrete gives low heat transfer, which means we do not need to spend additional money on thermal insulation and expensive insulation materials.
- Foam blocks perfectly muffle sounds - so additional sound insulation is no longer needed.
- The air cells of foam concrete almost do not absorb moisture. This is the most important requirement for any building material, guaranteeing the reliability and durability of the building. Such a foam block wall in an apartment is absolutely not subject to shrinkage.
- Foam concrete does not burn and does not even support combustion.
- Foam concrete blocks are environmentally friendly, which is very important for our health. Such blocks are in 2nd place after wood in terms of environmental safety: they do not emit toxins.
- The price of a cubic meter of foam blocks is 40% cheaper than the same amount of brick.