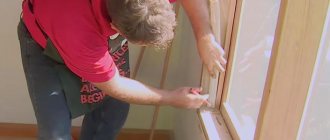
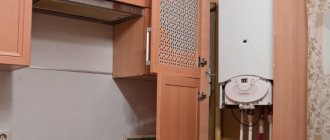
Removing the old frame
Once the room is ready for dust and debris to appear, begin dismantling the old window frame.
The sashes are removed from the window. Window casings are dismantled. If necessary, the slopes are dismantled (knocked down).
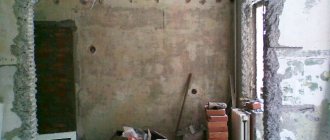
The old window frame is dismantled, which usually causes serious damage. If you want to use old windows, for example in a country house, you should specify the option of preserving the old windows when ordering.
The old sill and the old window sill are dismantled.
Is it possible to install the window yourself?
There is an opinion that installing windows in a house or apartment is a rather complicated procedure. It must be said that this is not so. What do you need to know during installation? To perform these works, you do not need special professional tools and equipment, or vast experience. The procedure includes two main points:
- dismantling the old window block;
- installation of a new window.
Dismantling an old window takes an average of 1.5 hours.
If we talk about the time required to complete the work, then the first stage will take about an hour and a half. Installing windows yourself will take less than three hours. It must be said that if you nevertheless decide to opt for the services of specialists, then you should demand certain guarantees from them.
If you installed the tilt and turn windows yourself, this will void your warranty. In this case, it is necessary to purchase structures directly from a manufacturer who has been working on the market for a long time and has good reviews from customers. If you decide to buy single-chamber or double-chamber windows in winter, you can always count on a significant discount.
When a window is purchased from a company that also carries out installation work, the customer has a warranty on the fittings for about 5 years. If you install it yourself, you can get a warranty directly from the manufacturer, that is, at the place of purchase.
In order to install windows in a brick house, cinder block house, gas block house or apartment, you must first order a tilt-and-turn or blind structure from the manufacturer, and this requires accurate measurements.
PVC window installation
The sashes are removed from the plastic window and the glass unit is removed. The window frame is inserted into the prepared opening and secured with anchor bolts or mounting plates. In this case, it is necessary to strictly ensure that the frame is level, and not along the opening (in houses there are often cases when the horizon line of the window opening is far from ideal; the frame should also be aligned vertically). Otherwise, the window will not function properly.
The gaps between the wall and the frame are foamed with polyurethane foam. Foam performs both an insulating function and is a fastening element. The overall result largely depends on the quality of this installation stage. The foam should be applied evenly and fill all the recesses and cavities of the opening, and the degree of expansion of the foam must be taken into account.
Installing a plastic window in most cases means that along with the new window a new window sill and a new sill will be installed. An exception is the case when the apartment (house, room) is undergoing renovation work and the window sill can be installed on its own.
If the window being mounted opens onto a balcony (as in this case), then it is quite practical and functional to install a window sill instead of a low tide (on the outside of the window).
If you have a good old sill, you can save it for a new window, but in this case you will need to restore it (restoration) - a paid service, the cost of which differs slightly from the cost of a new sill.
The window sill is cut to fit the opening and attached to the window (to the stand profile). If the opening under the window sill is small, then it foams. Otherwise, masonry or sealing of the opening with mortar is necessary. When installing a window sill board, make sure that it has an inclination from the window within 5 degrees, and that the overhang beyond the inner surface of the wall is no more than 60 mm.
When installing the window sill, you should take into account that its edges extend beyond the finishing of the internal slope to a depth of at least 15-20 mm.
Advice:
when choosing the width (depth) of the window sill, it should be taken into account that the window sill is “recessed” under the window frame by 2 cm, so the width of the installed window sill will be 2 cm less)
All gaps between the window and the opening are filled with foam, and when it dries, they are insulated. The outer layer of insulation is designed to protect the insulation layer (which is a layer of foam) from the penetration of moisture into it, as well as from the damaging effects of the sun.
So, the main part of the work is finished. However, to finish the opening there are not enough slopes (which are both a decorative addition, under which you can hide the mounting foam, and a functional element - increasing the thermal insulation and sound insulation of the window opening). Plastic slopes will give the window a finished look, moreover, this is the best combination with plastic windows.
Installation Technology Guide
The finished plastic window is brought into the opening, placed on support blocks and aligned horizontally. After this, using a level, the window is aligned vertically and secured in this position with spacer blocks.
Installation of both fixed windows and opening sashes is the same. There are two options for installing windows: with and without expansion of the structure. When using the first option, holes are drilled through the frame through which anchor bolts are driven into the wall. This method is more complex and more reliable.
When installing a window using the unpacking method, holes are drilled in the frame and wall, into which anchors are then driven in.
Places for attaching anchors and support blocks
If the installation is carried out without unpacking the frame, the window is secured using special anchor mounting plates, which are attached to the profile and then to the wall. This option is faster. However, it must be taken into account that under significant wind loads, the frame structure may warp or it may sag. If you decide to mount it on a plate, you should choose thick, wide options. Please note that if the region in which you live has a strong wind load or windows will be installed at a height, then you should use the option of unsealing the frame.
Mounting on anchor plates
Layout of anchor plates
There are nuances to placing a window in the opening. If the walls are made of foam blocks, brick, cinder block, gas silicate or concrete, then the frame is placed 2/3 deep from the internal thickness of the opening. If the walls are insulated with foam plastic, then the fastening must be done before the insulating layer. When insulating and facing with bricks, the window is installed in the insulation zone.
It is very important to choose the correct installation depth
The installation sequence must be followed:
- Having inserted the frame, level it using support and spacer blocks;
- then attach it to the wall;
- after installing the structure, it is necessary to assemble the window;
- then you need to check the normal operation of the shutters and all mechanisms; to do this, open and close the window;
- after everything has been checked, the doors must be tightly closed and the gap around the structure must be sealed. For this purpose, polyurethane foam is used.
However, it must be remembered that in direct contact with sunlight and the external environment, the material loses its properties and is destroyed. To protect it, it is necessary to create a reliable barrier on both sides of the foamed gap; this can be a special film that must be glued to the outer and inner parts of the window. After the foam has dried, it is necessary to finish the slopes on both sides (external, internal) of the structure. You can open the window a day after blowing the gap with foam .
To ensure proper installation of both window sills and window sills, follow these simple rules:
- we install the ebb from the outside in a special slot in the frame or attach it to it with self-tapping screws;
- the window sill is installed as follows: it is necessary to trim it from the edges so that it fits the width of the window opening and rests against the end of the stand profile;
- the level is leveled using special pads, after which the space under the window sill is blown with foam or filled with mortar.
According to the principle described above, windows are installed on a balcony or loggia, in brick or concrete walls. However, keep in mind that the entire weight of the window structure will be carried by the parapet, so you need to strengthen it.
Installation of plastic slopes
Plastic slopes are installed on the same day as the window for panel and block houses and on the second day for Stalinist houses.
The slopes are either a Belgian sandwich panel (in the image) or German VEKA plastic slopes with removable trims.
The differences between the various plastic slopes are not significant, but you should know them.
The Belgian sandwich panel can be installed at dawn (not at a right angle to the window), which visually increases the window opening. The choice of VEKA plastic slopes is justified for more accurate wallpapering with already installed slopes. Thanks to the removable casing, the edges of the wallpaper will be neatly hidden under it.
Advice:
If you are renovating your apartment, then it is better to install platbands on the slopes from a Belgian sandwich panel after gluing the wallpaper yourself - it will turn out neater and prettier).
Features of installation of plastic windows
- There is an opinion among builders that anchor plates are not reliable enough. But manufacturers prescribe such fastening with the obligatory use of polyurethane foam, which, when hardened, creates a reliable fixation of the window in itself. But the use of mineral wool or any other sealants is unacceptable.
- Anchor plates are produced for a specific plastic window design by each manufacturer according to their own standards. This must be taken into account when purchasing fasteners. Using plates, for example, from Rehau, to fasten windows of a different design can create a problematic situation.
When choosing fastening elements, take into account the design features of windows and walls. This will help you make the right choice for installing a specific model.
If necessary, you can consult with specialists at a window company, who with their advice will make it easier for you to install PVC windows yourself.
Source: okna-systems.pro/articles/poleznoe/kak-vybrat-krepezh-dlya-plastikovogo-okna-sovety-stroitelya
Installing accessories on windows
At the final stage, a double-glazed window is installed in the window frame and the sashes are hung. Additional accessories are installed, additional fittings and components are attached, such as: step ventilator, clamp, mosquito net, blinds, etc.
The window is ready. Upon completion of all work, a work acceptance certificate is signed. In it, if necessary, the customer indicates his comments on the work performed, if any.
Almost immediately after all the work is completed, the PVC window can be used. The exception is windows with large opening sashes, which are not recommended to be opened within 24 hours after installing a PVC window.
In terms of functionality, a plastic window is much better than old wooden windows. If you follow simple instructions for its care and use, it will last you forever.
Preparing a new plastic window for installation.
At this stage, the pivoting sash of the plastic window is removed and the glass unit is removed from the blind side of the window.
To remove the window sash, you need to make sure that the window is closed. This is necessary so that the sash does not tip over when we pull the rod out of the upper canopy.
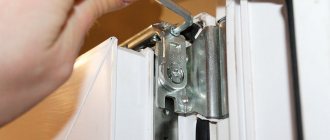
Then you need to remove the decorative plastic trim from the window awnings. This can be done using a knife, using it to pry up the pad and remove it by hand.
Removing the decorative trim from the canopy.
Now you need to remove the rod from the upper canopy. To do this, you need to press the upper edge of the rod with something so that the rod moves and its lower edge comes out of the canopy. All that remains is to use pliers to pick up the edge of the rod and pull it out of the canopy.
We remove the rod from the upper canopy.
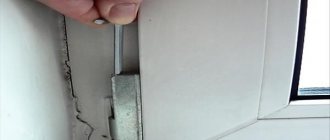
After this operation, the sash will be supported by the lock and the lower canopy. Holding the sash with your hand, open the window lock and lift the sash, thereby removing it from the lower canopy.
Lower window awning. The window sash has been removed.
The back sash will be installed according to the same principle, only in reverse order.
To remove a double-glazed window, the window must be installed vertically with a slight slope, for example, rest it on the wall.
Now you need to pull out the plastic beads. They must be pryed with a thin knife or spatula and then pulled out of the window frame. Beads should be removed in a certain sequence. First, the long vertical beads are removed, and then the horizontal ones. Moreover, in order to avoid the glass unit falling out, the top horizontal bead is removed last.
In order for the glazing beads to fall into place later, they should be numbered.
After removing all the glazing beads, the glass unit is removed from the window frame. Be careful when removing the glass unit. As a rule, the edges of the glass are very sharp, so it is better to make the recess using rubberized gloves.
Before installing the window, do not forget to remove the protective stickers. If they are not removed immediately, then after installation it will be quite difficult to do this from the street side of the window.
Use a spatula to pry up the glazing beads of the plastic window.
Don't forget to remove the protective film from the outside of the PVC window!
According to GOST 30674 “Window blocks made of PVC profiles”: Removal of the protective film from the front surfaces of the profiles should be done after installing the products and finishing the installation opening, taking into account that the duration of exposure to sunlight on the protective film should not exceed ten days.
If renovation work is still underway in the room where the windows were installed, the protective film may remain on the product until completion. However, on the outside, the film should not be exposed to sunlight for more than 10 days.
The adhesive base of the protective film loses its properties when exposed to heat and UV and can spoil the aesthetic appearance of the plastic profile.
The following are comments from a specialist who participated in the development of GOST for window installation - A. Spiridonov.
GOST 30971-2002. Assembly seams of junctions of window blocks to wall openings. PDF, 1.26 MB
Types of pigtails
The casing in the opening is always fastened according to the same principle: it is a “tenon-to-groove” connection, but the very methods by which the sliding fastening is created can be different.
Zack75FORUMHOUSE user
The existing frames seem to be inserted into another frame between them and the timber. Is this a pigtail? With an internal “tooth” in the timber?
A handbook for all self-builders, “How to Build a Rural House” by A.M. Shepelev, tells in detail about the main methods of constructing sedge frames.
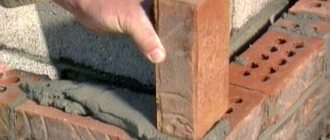
The pigtail is made from durable, dry material. This can be an edged board with a thickness of 50-60 mm (but not 15-20 mm). The width should correspond to the width of the opening.
The most common type of okosyachka, the classic okosyachka has a U-shaped appearance from the end (side posts and a crossbar on top), carpenters have been making it in huts and towers for centuries, and called it “deck” or “frame”. On the side of the window in the casing, choose a quarter for the window profile (not always).
As FORUMHOUSE experts say, a casing frame is not a standard product, what is needed, this can be done - with a quarter, with a reverse quarter, without a quarter.
On the casing with a reverse quarter, the plastic frame is simply fixed in the resulting wooden opening; the frame is pressed against this back quarter, and everything is closed from the outside with platbands. This is the easiest way to install plastic windows in a wooden house with your own hands. The design does not prevent the walls from shrinking, but ensures the stability of the wall at the opening.
In houses made of timber with walls 100-150 mm thick, casing is made in the shape of the letter T. This type of casing became popular due to house kits made of profiled timber: the supplied structures already had selected grooves in the window openings. In a high-quality T-pipe, the tenon is glued into the body, or it is integral with the base, and therefore the rigidity of the product increases several times. The window is attached to such a casing with screws. The groove in the opening is selected in the center of the cross-section of the log, but it can be shifted slightly to the outer edge, but so as not to affect the strength, no closer than 50 mm from the edge.
According to the second classification, there are rough and finishing sockets.
IPaltusUser FORUMHOUSE
Finish – when all elements are planed/sanded and remain visible, that is, not covered by finishing. This type of window frame is installed in houses made of polished timber/round timber.
Roughing - when the entire opening is then covered with finishing. There is no need to plan/sand the casing material.
The finishing casing is made from very high quality wood and forced drying. For it they take solid cedar, larch, Karelian pine. It itself is a decorative element. Euro casing is a variant of finishing casing, but is made not from solid wood, but using the glue-type method from dry bars.
General installation requirements according to GOST
GOST 30971-2002 “Mounting seams of junctions of window blocks to wall openings. General technical conditions" was put into effect by order of the State Construction Committee of the Russian Federation on March 1, 2003.
Due to the need to adjust design documentation for design and construction organizations, the transition period for the development of GOST is set until 07/01/2003. The republics of Azerbaijan, Kazakhstan, Kyrgyzstan, Moldova and Uzbekistan have joined the Russian standards.
What's new?
New standards bring significant formalization of window installation and require numerous documents. Among them, it should be noted the need for each installation room to have a window approved by local authorities, the need to develop window installation units for each facility under construction and coordination of units with the customer, it is recommended to analyze thermal fields, and also provides for the execution of acceptance certificates for window openings before installation, acts of hidden work and acceptance certificates of completed window installations.
Of particular interest in the standards are the Annexes:
- Appendix A (recommended) contains drawings with examples of window installation;
- Appendix B (recommended) sets out requirements for fastening windows in openings;
- Appendix B (mandatory) represents the actual requirements for the installation of windows as a whole and is essentially the main working document;
- Appendix D (recommended) describes the requirements for the method for calculating thermal fields (isotherm analysis).
In general, Russian installation standards bring us closer to the standards adopted in Europe, and, in particular, in Germany.
GOST requires a large number of formalities from window companies and has more requirements for testing joint designs and materials used for them.
Formalization is justified by the fight against Russian negligence.
Testing of materials and seams is generally justified by the fact that until now in Russia there were no detailed standards for installation at all, there is no accumulated scientific experience in determining the properties of installation materials and the quality of seams. Of course, there is no need for the consumer to know all the provisions of this GOST; this is the responsibility of professionals.
Without delving into the subtleties, we can talk about three basic principles for installing windows, to which you need to pay the closest attention.
Mistakes you can make when installing windows
There are a number of points that you should pay attention to when installing the structure so that it has a long service life:
- you cannot install the window with the glazing beads facing outward, as this reduces the structure’s burglary resistance, since the glazing bead can easily be pulled out and the glass unit removed;
- you need to be careful about leveling the structures when installing the window, otherwise opening and closing the sashes will be difficult;
- It is imperative to protect the mounting foam from direct sunlight to avoid its destruction;
- It would be wrong to choose to fix the frame structure only with mounting foam: it is absolutely necessary to attach it to the wall, otherwise it may simply fall out.
By following all the installation rules, you can successfully install the window structure yourself, and if you seek the services of professionals, you will be able to monitor their work at any stage.
Three layers of seam sealing
The content of the main part of the standards is devoted to the rules for filling the installation gap between window blocks and openings according to the principle “the inside is tighter than the outside.” Each installation unit must have three layers of sealing: on the outside - protection from climatic influences, in the middle - insulation, on the inside - vapor barrier. You can use different materials for the outer layers and different mounting foams, but, in one design or another, these three sealing planes must be present.
Outer layer
is designed to protect the insulation layer from moisture penetration into it, and must be vapor permeable in order for the insulation to be ventilated through it. That is, the outer layer must be waterproof and vapor permeable.
These requirements are due to the fact that when moisture penetrates into the insulation, its thermal insulation qualities decrease. PSUL (pre-compressed sealing tapes) best meets modern requirements for the outer layer. These are special mounting tapes that are glued to the window frame before installing it in the opening, and then, expanding, they fill all the leaks in the quarter in the opening.
Despite serious advantages: optimal construction physics and technological simplicity, they also have disadvantages. It is convenient to use these tapes in new construction when the opening has good geometry. But when replacing windows in old houses, when the slopes are uneven, and even more so, plastered, their use is difficult. Another drawback is that PSUL cannot be covered with plaster.
To a limited extent, silicone can be used outside. In this case, certain rules must be observed: the thickness of the silicone layer must be half the width of the seam being filled, and the silicone must be glued only on two sides and work in tension, the remaining sides must remain free.
Sealant can be used when insulating the installation seam. Although it is not clearly stated in GOST, there is no ban on its use, no matter how much the supporters of mounting tapes might want it. An example of using silicone outside and inside a room is shown in node A.14 in GOST 30971-2002. It is unacceptable, of course, as can sometimes be observed on objects, to simply spread silicone on top of the foam - this is an imitation of seam protection, but not the protection itself.
Central layer
– thermal insulation. Currently, polyurethane foams are used for its implementation. It is best to use foams designed specifically for window installation. Such foams fill the joint evenly and do not need to be trimmed after hardening. After installation, other foams hang in clumps from the side of the room, and they are cut off, breaking the protective outer crust.
Inner layer
– vapor barrier. Its function is to protect the insulation (foam) from the penetration of moisture vapor from the room. For these purposes, when plastering slopes, vapor barrier tapes, mainly butyl-based, are used, as well as paint-based vapor barriers for moisture-resistant plasterboards. It is possible to use silicone according to the rules mentioned above.
How to measure a plastic window.
Any replacement of windows begins with determining the size of the window unit. For this stage, it is better to call a measurer who has the necessary experience in this matter. Basically, measuring services from window manufacturers are free. But if you decide to take measurements yourself, then you need to know that there are two types of window openings. And the window is measured differently for them. Therefore, before taking measurements, you need to remove the plaster from the window opening and determine what kind of window opening you have.
Dismantling old plaster is also necessary to increase the accuracy of measurements.
The first type of window opening is a quarter window. A quarter is a special protrusion on the window opening, against which the window frame is pressed during installation. This protrusion is located closer to the street, and the window frame from the inside of the room is pressed against it.
Picture 1.
Determine the internal width of the window opening: C = B1 + A + B2
Determine the height of the window opening. To do this, you need to measure the dimension H from the ebb at the point of contact with the frame (point M) to the upper quarter. Using a feeler gauge, take several control measurements of the upper quarter (size B3) (Fig. 2).
The height of the window opening will be equal to: U = H + B3
The second type of window opening is a regular rectangular opening. It's a little easier to take measurements here. Don't forget to remove the layer of plaster before taking measurements.
Window block width = A – (2 × 20) mm, where 20 mm is the optimal installation gap (Fig. 4)
Height of the window block: = H – 25 mm (Fig. 5).
The last stage in the measurements is measuring the low tide and window sill.
Window sill length = window opening width + 200mm. In the case of an opening with quarters, this is C+200mm. In the case of a regular opening, this is A+200.
The width of the window sill should be such that its edge overlaps the heating radiator located under the window by approximately 70%. The window sill should not completely cover the battery. Warm air from the battery should rise freely along the window.
Length of ebb = maximum width of window opening on the street side +100mm.
No cold bridges
An assembly seam is a node where the joining of wall and window structures, which have completely different properties, including in terms of heating technology, occurs. And it is important to make the knots in such a way that there are no cold bridges on the window slopes.
Basically, the problem of cold bridges is a problem of single-layer wall structures that were used in houses of past years (solid brick, expanded clay concrete, etc.). In this case, the weak area is the wall itself around the window frame due to its low heat transfer resistance. An area appears on the slope with a surface temperature below the dew point. In this area, firstly, high heat losses occur, and secondly, condensation occurs on it. If moisture condensation on a slope occurs frequently, then fungus (mold) may subsequently form in these places. The same applies to openings without quarters. In their absence, the danger of cold bridges seriously increases, and here the heating engineering of the junction units should be especially carefully considered.
An important recommendation is that if quarters are missing, use window frames with a width of at least 130 mm. With a narrow window frame, high-quality sealing of the seam is difficult and the likelihood of cold bridges is high. The options given in GOST with false quarters from the corners or from the platband are possible only with external plaster, and still remain problematic from the point of view of heating engineering.
If there is effective insulation in the wall (mineral wool or non-flammable polystyrene foam), the window should be placed either in the plane of the insulation or behind a quarter of the insulation. In walls where aerated concrete is combined with external cladding and brick quarters, as a rule, cold bridges also do not occur due to the good thermal properties of aerated concrete.
Preparing the window opening
Work begins with preparing the window opening.
This process consists of several stages:
1. Dismantling old windows
2. Removal of all types of seals and insulation;
3. Cleaning up construction waste.
4. Alignment of the walls of the opening.
Correct installation of plastic windows according to GOST is possible only if they are manufactured using industrial equipment and fully comply with previously taken measurements. Even at the stage of preparatory work, it is necessary to take into account the fact that the opening must be 2–5 cm wider and higher than the window structure, so that a full-fledged installation seam consisting of 3 layers can be formed there.
The easiest way is that if windows are installed in new buildings, one of the most difficult stages - dismantling - is eliminated. But in case of window replacement, it is mandatory. Removal of the old window begins with the removal of the sashes. As a rule, there are no difficulties at this stage if the frame is not completely rotten. In this case, you must first remove the glass so that it does not fall out when removing the sash.
The frame itself can be removed in several ways, including some that are very gentle, but time-consuming, allowing you to keep the frame intact and suitable for further use, for example, in a country house or as a load-bearing element of a greenhouse. Most often, the old frame is simply cut with a circular saw and removed piece by piece.
The opening is thoroughly cleaned of debris and remnants of old sealant. If there are recesses, potholes and cracks with a diameter of more than 2 mm on the walls of the opening, then GOST requires them to be sealed with plaster or putty mortar. Few people adhere to this point due to the fact that the plaster completely dries within 5 - 8 days, which is not entirely convenient. All this time the opening will be open. But you can use quick-drying gypsum or polymer mixtures, which will reduce the waiting period to several hours.
Fastening the window block in the opening
The specificity of plastic windows is that they have significant thermal linear expansion. That is, when windows are heated by the sun's rays, the bars of the frame and sashes increase in size. The calculated thermal expansion values for white windows should be 1.5 mm per 1 linear meter, for colored windows - 2.5 mm per 1 running meter (the difference in thermal expansion is due to the fact that white window profiles heat up significantly less than colored ones).
In accordance with this factor, the window is fastened to the wall. The corners of plastic windows must remain free; the outer fastening elements are placed at a distance of 150 mm from the inner corners of the frames. The remaining fasteners are placed around the entire perimeter with a pitch of no more than 70 cm for white profiles, and no more than 60 cm for colored profiles. Near the imposts, the fasteners are also placed at a distance of 150 mm from the corner. The gap between the frame and the wall must be at least 15 mm. This is due both to the thermal expansion of windows and to the fact that a thinner seam is very difficult to fill evenly with foam insulation.
Bearing blocks are placed under the lower corners of the box and under the imposts. The blocks are also placed on the sides as follows: if you look at the window from the inside, then with one turning sash, the blocks are placed on the side opposite the hinges at the top and on the same side as the hinges at the bottom. With two doors, four blocks are installed, respectively.
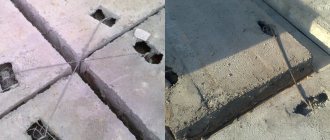
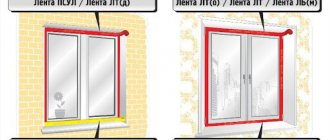
Schematic diagrams of junctions between window frames and walls
1 – window sill board; 2 – foam insulation; 3 – vapor barrier tape; 4 – flexible anchor plate; 5 – support block for the window sill board; 6 – plaster mortar; 7 – dowel with locking screw; 8 – liner made of antiseptic lumber or leveling layer of plaster mortar (recommended only for the lower unit); 9 – waterproofing, vapor-permeable tape; 10 – noise-absorbing gasket; 11 – drain; 12 – insulating self-expanding vapor-permeable tape (PSUL); 13 – thin layer of sealant
1 – foam insulation; 2 – insulating self-expanding vapor-permeable tape (PSUL) or vapor-permeable mastic; 3 – frame dowel; 4 – sealant; 5 – vapor barrier tape; 6 – panel for finishing the internal slope; 7 – plaster leveling layer of the internal slope.
Thermal gaps must be taken into account especially carefully when designing large-sized glazing elements: when making bay windows, shop windows, glazing to the entire height of the floor. These are the three main principles when installing modern windows, although, of course, there are many nuances and subtleties that depend on the different wall designs and on the materials used for sealing the seam. And - as we already said at the beginning of the article - the human factor is very important - responsible and high-quality work of installers.
Do-it-yourself installation of plastic windows: step-by-step instructions
Let's describe both methods: suddenly you need a method with mounting on plates. It is used in buildings made of foam blocks, the load-bearing capacity of which is low and the load from the windows has to be distributed over a large surface. This method of installing plastic windows is also necessary if the building is built using “layered” technology. For example, there is concrete in front and behind, and a layer of insulation between them. If the window must stand in the soft layer, then it will need to be secured with plates. Installation of PVC windows in brick, cinder block, panel, etc. the house is desirable on the anchor.
Installation and unpacking
Do-it-yourself installation of plastic windows begins with measurements. Measure the frame and window opening to make sure they are compatible. Afterwards you can start working. The process begins with disassembling (unpacking) the PVC window. Here are the steps:
- Removing the window sash:
- Close the window (the handle is turned down).
Remove the plastic covers on both hinges. They are pryed off with a screwdriver.
- There is a pin on the top hinge that provides a movable connection. It is located in the center and protrudes slightly. They press on it until it sinks (you can take a metal plate, rest it against the pin and lightly tap the plate). The pin will slide out from below. Now you can grab it with side cutters or pliers and pull it down and pull it out.
- Hold the door up and open the lock. To do this, place the handle in a horizontal position. Having tilted the upper part towards you slightly, lift the sash, removing it from the lower pin.
The entire sash has been removed. To make it clearer, watch the video. It describes in detail how to remove and install the sash on a plastic window.
On the wood grouse, remove the glass unit. It is held in place by glazing beads. They need to be removed, then the glass unit itself will be removed without any problems. Remove the glazing beads like this:
- Something narrow and strong is inserted into the gap between the bead and the frame. If you don't have a special tool, it's best to use a small spatula. Disassembly begins from one of the long sides.
- The spatula is carefully pushed into the crack with a corner and the glazing bead is gradually moved away from the frame.
- Without removing the tool, move along a little, again pushing the glazing bead to the side.
- This goes along the entire length. As a result, the glazing bead is almost separated; it is simply removed.
- With the short side, everything is simpler: you pry up the free edge and, by turning the spatula, remove it from the groove. Grab the free edge with your hand and pull up.
Now you can try to remove the glass unit. Just be careful: it's heavy. If that doesn't work, remove another one of the beads. Just make sure that the window is tilted and the glass unit does not fall out. Now, if necessary, you can replace the double-glazed window yourself. Watch a video on how to remove glazing beads from PVC windows.
- The freed frame is covered with a special self-adhesive tape along the outer perimeter. Its installation is recommended by GOST. With it the window doesn't get so cold. Where to glue the tapes when preparing a plastic window for installation
- Remove the protective tape with the campaign logo. If you leave it, it will fuse too much with the frame under the influence of the sun and it will be problematic to remove it.
- The prepared frame is inserted into the window opening. Mounting wedges are used to position it. They must be installed in the corners and under the impost. The rest are arranged as needed. By placing them, the window is set strictly level in three planes. The position of the window is pre-fixed. This is what you can use mounting plates for. Layout of mounting wedges and distances between fasteners
- Take a drill and a drill bit that matches the diameter of the anchors. Make holes for fasteners. 150-180 mm retreat from the top edge. This is the first hole. The bottom one is approximately the same distance from the bottom corner. Another anchor is installed between them in a standard window: the maximum distance between two fasteners should not be more than 700 mm.
- Having made a hole, check whether the frame has moved (level in all three planes), then hammer in the anchor and tighten it. You cannot overtighten: the profile should not sag. Repeat this operation the required number of times. It is necessary to constantly check the correct installation
- Install ebb tides outside. To do this, first a vapor-permeable waterproofing is glued to the outer part of the frame (it is self-adhesive). Small grooves are made on the sides of the window opening, into which the edges of the tides are then inserted. Installation of waterproofing tape under the ebb of a plastic window
- A layer of foam is applied to the part of the window opening from the outside, where the ebb will rest on the wall. Sometimes, if the height difference is large, a lining profile is installed here. and then an olive is attached to it. The ebb, cut to size, is placed under the projection of the frame and there it is attached to the frame with self-tapping screws. How to install ebb and window sill on a plastic window
- Along the lower edge the ebb also foams. Foaming ebb from below
- Next, foam the opening. When installing plastic windows in the summer, the gap between the frame and the window opening is sprayed with water from a spray bottle. This is necessary for better polymerization of the foam.
- A vapor-permeable heat-insulating strip is glued along the contour of the frame - it is also recommended by GOST.
- Take a balloon with foam and fill the existing gaps to 2/3 of the volume. If the gap is large - more than 2-3 cm - foam is applied in several stages. A time interval of 10-15 minutes is required between two layers. When the first layer is partially dry, it is also sprinkled with water and the second is applied. This is repeated until the volume is 2/3 filled. When installing PVC windows with your own hands, foaming can be done in several stages - depending on the size of the gap
- Without waiting for complete polymerization, the free edge of the heat-insulating tape is glued to the window opening. Just note that when using tape, the slopes will need to be made of plastic: the plaster and mortar will not “stick” to it.
- Assemble all parts of the window. All that remains is the finishing work, and they are not a hindrance.
- A vapor barrier tape is also installed under the window sill in the lower part (also GOST recommendations). The window sill rests on support blocks made of hard wood treated with impregnation. The distance between them is 40-50 cm. They are made in such a way that the window sill is slightly inclined towards the room (about 5°).
Mistakes when placing the window sill and slopes of PVC windows and their correct installation
Watch the video to learn how to correctly install a window sill when installing a plastic window. There are many secrets.
The last to be installed or sealed are the slopes. One more video on this matter.
Installation without unpacking
The main details are described above, so this chapter is short. Installation for this option begins with the installation of mounting plates. They are of two types: U-shaped and linear. It is important to choose the most reliable thick metal ones.
Two types of plates for mounting plastic windows
They are installed at the same distance as the anchors: 150-250 mm from the edge and no more than 700 mm between the middle ones. They are simply screwed to the profile with self-tapping screws.
Attaching the plate to the profile
Then installing plastic windows with your own hands with mounting plates is identical to that described above, starting from the moment the window is leveled in the opening. Only they attach not the frame, but the plates, and not to anchors, but to dowel-nails. Drill a hole, bend the plate, insert a dowel, put the plate in place and tighten the dowel. Further all actions are identical.
Now it’s clear why installers prefer them: a decent amount of work is spent on disassembly, anchoring, etc.: screws are much easier to tighten. True, if you take powerful plates, they will hold tightly. No worse than an anchor. For example, like in the video.
Deviations from vertical and horizontal
According to GOST 30971-2002 “Mounting seams of joints connecting window blocks to wall openings. General technical conditions", pp. 5.6.4 Deviations from the vertical and horizontal of the mounted window units should not exceed 1.5 mm per 1 m of length, but not more than 3 mm per product height.
In the updated version of GOST 30971 from 2012, the maximum deviations of the window and door unit from the vertical and horizontal levels are the same (clause 5.2.4) - no more than 1.5 mm per 1 m of length, and no more than 3 mm per height of the entire product .
Installing and aligning the window in the opening
After proper preparation of the opening, further installation continues with the installation of the frame. It is necessary to take into account that the structure is installed plumb and not along the edges of the opening. In most old Soviet-built apartment buildings, and often in private houses, the side walls of the opening are far from vertical, and the bottom and top are far from horizontal.
If you take one of them as a guide without first checking the level, then you can install the frame, but with the sashes it will be more difficult - all the fittings are designed to strictly comply with the level.
When installing plastic windows according to GOST, the instructions require compliance with certain tolerances - vertical deviation no more than 3 mm/m. (less than 4.5 mm over the entire length of the structure). The correct installation of the frame is checked using a water or laser building level.
Before foaming the seam, you can check the plumbness of the frame in another way - simply open the sash more than halfway. If it spontaneously opens further or begins to close, then the window is not installed vertically and the position of the frame must be adjusted. If this is not done, there will be no proper sealing, which threatens not only a lower temperature in the room, but also damage to the window structure due to the appearance of ice.
The frame is fastened to the wall using anchors or special mounting plates, if provided. Naturally, before fixing the frame, it is necessary to dismantle the double-glazed window and remove the sashes. This will make aligning the frame and installing it much easier. Usually, a PVC window correctly manufactured on industrial equipment is very easy to disassemble into its component parts (except for the frame) and then put back together, having the necessary skills, of course.
For fastenings in the frame, holes for anchors are made from the inside using a drill - three on the vertical walls and two on the horizontal. Their diameter is 8–10 mm, depending on the hardware used. When drilling, use a regular hammerless drill; a hammer drill is needed when preparing holes in wall material. If the wall is wooden or made of cellular concrete, then you can only use a drill.
The sequence of fastening is the lower anchors on both sides (not screwed in completely), then the upper and middle ones. At each stage, the plumbness of the structure is rechecked. When tightening the anchors, moderation should be observed - the frame, especially in the middle part, is very easy to deform.
After fixing the frame in the opening, the supporting pads from the bottom are not removed; they act as a holding structure, partially relieving the load on the anchors. During installation, support pads must be installed along the edges of the frame and at the point of contact of the vertical middle post (impost) with the horizontal lower part of the frame.
How much does it cost to install windows according to GOST?
The cost consists of two components: the cost of work (hours) and materials.
The installation seam will comply with GOST for the installation of windows, when using both expensive and economical materials. The use of one or the other will affect the stages (duration) of the work and the final cost of window installation.
| Cost of installing a window unit, rub./sq. m | Cost of installation with finishing, rub./sq. m |
| from 900 rubles | from 1500 rubles |
Calculate by size
How to attach plastic windows to wood?
The ideal option for fastening windows for wood is anchor plates. And no one can convince me of this. Frame houses or timber, plates only.
From my bitter experience, I’ll tell you how I fastened windows with screws to the top of the frame in a house made of timber. And there was a casing, and a gap of about 4 cm. A year later, the timber began to shrink, and these screws, together with the timber, went straight into the double-glazed windows.
As a result, several double-glazed windows were replaced under warranty. Got the money. After this incident, if I use screws, then only in exceptional cases, and only in the side parts of the window frame.
By the way, even when building frame houses, professionals do not recommend using hardened screws. Wood is a living material and when moved, screws break, and a nail, for example, bends. The same principle applies to the anchor plate.
Anchor plates for wooden houses are good for the following reasons:
- Quick installation;
- Compensates for thermal expansion;
- They do not affect window structures during shrinkage.
Dismantling works
Read also: How to hang roller blinds on plastic windows without drilling: everything about installation and product selection (Photo & Video) + Reviews
Dismantling works
Once the new window has been delivered, dismantling work should begin. Removal of the old window should be carried out in dry and windless weather. If there is a need to replace the frame in the winter, then the plastic frame should be installed only using frost-resistant polyurethane foam.
When removing an old window, a large amount of dust is generated, so it is recommended to cover all furniture in the room with plastic film. Dismantling the old window is carried out in the following sequence:
- The frame is freed from glass
- Plaster is removed from slopes
- The window sill is dismantled
In order to significantly speed up the process of removing the old frame, you can use a hand saw for wood . To perform dismantling, it is usually enough to make a cut in the middle and bottom of the frame.
Installation rules
The correct technology for installing window structures in a brick house is regulated by GOST. This document allows a deviation of no more than 1.5 mm per meter of structure. The assembly seam should be made in three layers. The distance between the fastenings is no more than 70cm. How the structure will be used and how it will behave over the years depends on compliance with the installation technology.
Additional installation rules:
- Polyurethane foam is used regardless of whether the house is panel or brick. It performs several functions - it seals joints, imparts rigidity, insulates, and fixes.
- Polyurethane foams have different parameters, among which the key is the hardening temperature (indicated in the instructions on the package). Craftsmen choose foam according to the season; the purpose (for a brick or panel wall) is not taken into account.
- The foam should be applied in small portions, thanks to this it is possible to work out small cracks more thoroughly and waste less material.
- The gap between the brick and the plastic must be protected from condensation. For this purpose, waterproofing is used on the outside, and vapor barrier on the inside.
- Installation of window structures is possible at any time of the year; it is especially beneficial in cold seasons. The main problems (freezing, fogging, leakage, blowing) are observed in winter and autumn. They can be quickly noticed and eliminated during the cold season.
- An opening in a panel or brick wall may crumble. Correct installation of a plastic window when crumbling is observed begins with strengthening the opening. If the crumbling of the walls continues, cracks will form, which will lead to classic problems in the operation of window structures.
The technology for installing PVC windows in a panel house is generally similar to a brick house; it is important to follow the rules and listen to the advice of professionals.
Features of work
To prevent moisture from accumulating inside, you can use bentonite or cat litter for backfilling.
Making windows at home has a number of features that need to be taken into account during the work.
- Double-glazed windows must be made completely sealed to avoid fogging. It is first recommended to pour sorbent into the connecting profiles, which will absorb moisture.
- Wood is prone to drying out and deformation. To prevent this from happening, you need to regularly treat the frame with protective agents. Another option is to purchase laminated veneer lumber or lumber from valuable wood species (oak, cedar, larch).
- In any case, there is a gap between the frame and the box for free opening. To avoid drafts, rubber or foam rubber seals should be installed in such places.
- Don't forget about the window sill. You can also make it yourself by gluing it together from several boards or bars, then processing it to match the window.
- During work, safety precautions must be observed. Electrical appliances must be grounded, and when using them, a rubber mat must be laid. Hands should be protected with gloves, and eyes with goggles or a visor.
Even without professional skills, you can make a beautiful and strong window yourself. To do this, you need to carefully carry out each stage of the work, take your time, and double-check all measurements and calculations.
Tools and materials
Read also: Choosing which plastic windows are better in terms of quality, durability and heat retention. Review of manufacturing companies + Reviews
Tools and materials
If you plan to install plastic windows yourself, then you cannot do without using the following tools:
- Knife
- Foam gun
- Dispenser
- Glazing spatula
- Clamp for mandrel
- Chisel set
- File
- Scrap
- Hand saw for wood
- Set of spatulas
- Compactor knife
- Roulette
- Electric drill
- Set of drills for metal and concrete
To perform adjustment work after installing windows, you may also need: screwdrivers, pliers and hex keys.
Read also: Popular options for finishing window slopes outside and inside: materials and technologies (Photo & Video) + Reviews
PVC window installation tool
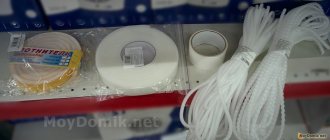
In addition, before starting installation work, you should purchase the necessary materials, including:
- Polyurethane foam
- Sealing tape
- Mounting spacers
- Waterproofing tape
- Diffuse tape
- Silicone sealant
Polyurethane foam
Also, for reliable fixation of the structure, one cannot do without the use of high-quality fasteners. Self-tapping screws, dowels and anchor bolts must be correctly selected in length and diameter; only in this case can quality window fastening be guaranteed.
All materials used must be of proper quality, so after purchase they should not be stored for a long time. In addition, you should give preference to products from well-known manufacturers, which, despite their higher cost, are more popular among professional builders.
Tools can be purchased new or rented. The second option allows you to save a lot of money.
Preparatory stage
Preparing the room for the installation of a plastic window - covering the furniture with film
As soon as the ordered windows have been delivered, preparations for their installation can begin. The workplace should be completely free of unnecessary items.
For your information. The work is dusty, so it is advisable to cover all furniture with plastic film.
The glass unit is removed from the window if required. The glazing bead is carefully lifted with a staple and removed. First of all, you need to remove the vertical beads, then the horizontal ones. Each one should be numbered, otherwise there may be gaps after installation.
Now you can tilt the frame and remove the glass.
How to remove a glass unit
The plugs are removed from the canopies, and then the bolts are unscrewed. You should turn the handle to the “ventilation” mode, that is, in the center. Open the window and take it off. It turns out that only the frame with imposts (special jumpers that are introduced into the structure to separate the sashes) remains in place.
Markings are made for anchors followed by drilling holes:
- bottom - 2;
- top - 2;
- left - 3;
- on the right - 3.
Anchors are used - 1 cm in diameter, as well as a corresponding drill.
The wall material may not be dense (for example, cellular concrete). Then the fastening is done using anchor suspensions. They are fixed to the frame and wall using self-tapping screws (8 pieces each are required).
It needs to be taken into account. A thermal bridge may form. In order to prevent this negative from occurring in the window sill profile, before installation (one day before), the specified area is filled with polyurethane foam.
Time to assemble the window
When the anchors are strengthened, the glass unit is inserted back. First, the glass is inserted and secured with glazing beads. They snap into place by tapping them using a rubber mallet.
After this, the doors are opened. You need to check how tightly they fit. When the window can be installed level, the sash will not be able to open/close arbitrarily in the open position.
PVC window assembly
Now the installation seam should be sealed in the side areas. Polyurethane foam is designed to provide reliable waterproofing; with its use, the glass will not fog up. Before and after sealing, the seams are sprayed with water to improve polymerization.
It is advisable not to forget! The seams are filled to 90%, no more. Otherwise, the structure will “drive.” After drying, the foam should protrude out a few centimeters. This excess is trimmed off.
Finally, the perimeter of the window is sealed with a special-purpose vapor barrier tape. From below, a material whose surface is foil-coated should be used.
How to place an order for window manufacturing
Order for window production
There are measurements. The finished drawing is provided to the window manufacturer, then the owner will be offered options for suitable fittings.
Prices for popular window brands
Installation methods
Method one. Through the frame in the installation plane. The package is removed from the frame, which is inserted into the window opening. Then the glass is put in place.
Flaw
Possibility of damage to the package when it has to be removed and reinserted.
Method two. With the use of supporting reinforcement, which is equipped during the manufacture of the window. The structure is inserted entirely and secured.
Flaw
The window is heavy and inserting it entirely is extremely inconvenient. Something can be damaged and it is difficult to adjust the insertion accuracy.