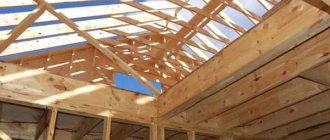
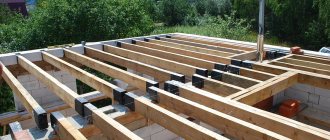
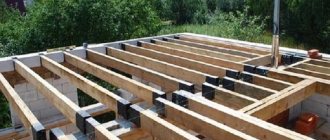
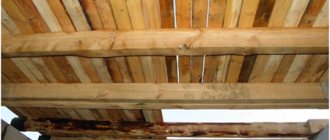
For modern technologies of construction and repair of low-rise buildings, the use of techniques for strengthening second-floor structures is used quite often. Thanks to the accumulated experience and the use of new materials and technologies, many works, including strengthening the second floor joists, have become one of the ordinary operations of repair and restoration work. However, even with this seemingly emerging simplicity, the process requires detailed study and calculation of literally all parameters and operations and selection of the optimal method of carrying out the work.
Beams and logs: what is common and what is the difference between these concepts
In private low-rise housing construction, two-story houses are quite widespread. As a rule, these are houses of separate two- and three-story projects and buildings converted by arranging an attic floor. In any case, such houses are equipped with an interfloor ceiling and flooring on the second floor.
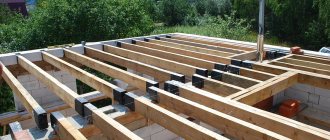
For houses built using frame-panel technology, and, in fact, all other buildings, except those where reinforced concrete slabs are used as interfloor floors, the basis of the structure is beams and floor joists.
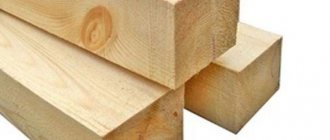
Beams are used as load-bearing structures for the ceiling , the floor itself and the basis for installing floor joists. But the logs are nothing more than beams of reduced size, onto which the plank flooring and the finished floor of the second floor or attic itself are attached.
Differences between beams and joists
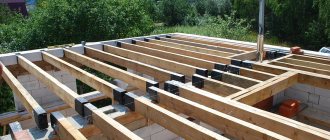
Floor beams are usually installed perpendicular to the internal load-bearing wall; the beams are supported by the external load-bearing wall of the house and the internal load-bearing wall or pier.
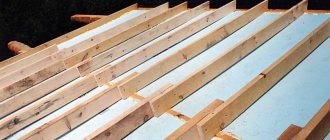
The second floor joists are laid perpendicular to the interfloor floor beams. They can be laid directly on beams or have an additional structure that forms an additional volume of interfloor flooring.
The following beams are usually used:
- Solid wooden beams;
- Wooden beams;
- Metal beams made of T-beams, channels, pipes or I-beams;
- Metal beams in the form of composite trusses;
- Reinforced concrete beams from structures of different profiles;
as joists :
- Wooden beams;
- Beams made of glued laminated structures;
- Combined structures made of metal and wood;
Thus, despite the general similarity and the same principle of use in the construction of a building, beams and logs have different purposes, sizes and, accordingly, different, although largely similar methods of reinforcement.
Reinforcement of floor beams: when it is necessary
The basis of any construction is accurate and scrupulous calculation. It guarantees consistently successful operation of the building, the longest service life of any wooden, metal and concrete elements, and comfortable living within the walls of the house for its inhabitants. But life, as we know, is unpredictable and likes to make its own adjustments to our plans. As a result, we are faced with the fact that it becomes urgently necessary to strengthen the floors. The following points are recognized as the most common reasons for such a step.
Beam construction
- The wooden structure of the floor has lost its quality. Simply put, it's worn out. The humidity turned out to be unexpected, a lot of time had passed, pests showed increased activity, walls and other components were subject to unexpected temperature changes - there can be many options. A special case is the initially low-quality wood used to make beams. Unfortunately, this option is not that rare. The result is the same: the load-bearing capacity of the structure is reduced, and the structure needs to be reinforced with wooden floor beams. Checking for the urgency of manipulation is simple: if a beam with a length of 2.5 meters bends under its own weight by 1 centimeter, this is the norm. If the deflection exceeds this indicator, the structural element must be strengthened.
- A timber beam needs reinforcement according to “personal” requirements. For example, you decided to make an attic or even a full-fledged living room from the attic. The loads on the ceiling of the second floor will certainly increase. This means that a change in the cross-section of the wooden beams holding it is required.
Separately, we note: even if redevelopment is not in your immediate plans, you need to check the condition of all load-bearing wood structures in the house annually. And floors should be the first item on this list. Unless, of course, you agree that someday the top floor will simply collapse onto the bottom.
Strengthening a beam structure can be done in different ways. Let's get acquainted with the most common ones.
Watch the video:
Deformation of beams and joists
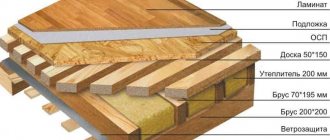
In the classic case of using interfloor beams and floor joists on the second floor, the structure will look like this:
- Floor beams made of solid wood, rectangular in shape, without joints (the cross-section depends on the length of the span - the width of the room) are the basis for the design of the interfloor floor;
- The ends of the beams are fixed into an array of opposite load-bearing walls and fixed with metal studs or with self-tapping screws and metal perforated fasteners;
- The second floor floor joists are installed on top of the beams. They are installed perpendicular to the beams at the same distance and have a shape and cross-section that ensure reliable fastening of the finished floor boards;
- The space between the beams and joists is filled with insulation for noise and heat insulation of the premises.
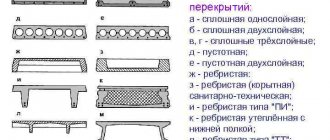
Interfloor slab design
In such a design, designed for a payload of 400-450 kg per 1 square meter, a deflection deformation of 1/300 of the beam length is considered natural. Simply put, with a beam length of 6 meters, the maximum deflection of the beam can be about 2 cm . If the beam bends to a greater extent, the structure requires additional reinforcement and strengthening.
The beams themselves can withstand two types of load: the first is the static load from the weight of the remaining floor elements and the furniture and equipment installed on them. The second - dynamic load - arises from the movement of people along the floor surface of the second floor and the temporary installation of furniture in the central part, when beams and joists have the greatest load.
Properly selected materials, their quality, and installation method, including the distance between beams and joists, help to withstand various types of loads and not succumb to deformation of the interfloor structure.
Dependence (in millimeters) of joist sections and steps between them on the thickness of the floorboards
The I-beam shape of composite joists for the floor and the composite shape of beams for the interfloor floors
are considered optimal At the same time, for any types of logs and beams, the main type of deformation affecting the entire structure of the house is the deflection in the central part. And that is why beams and joists located in the center are most often reinforced.
Visual ceiling lift
The answer to the question of how to visually raise the ceiling in a wooden house is needed if none of the methods listed above are suitable, or if the room is located in an apartment building.
In this case, the following methods of visual expansion of space are used:
- If ceiling skirting boards are installed around the perimeter, they are painted to match the color of the walls or dismantled completely. This makes the ceiling surface appear higher.
- Glossy light ceiling coverings and mirror surfaces visually expand the space. That is why, when choosing a ceiling finish, take this nuance into account.
- Low pieces of furniture visually raise the ceiling, so decorate the interior in an oriental style.
- If part of the ceiling surface along the perimeter is painted the same color as the walls, then the boundary between the planes will be smoothed out and it will seem that the ceiling is higher. To do this, apply masking tape to the ceiling at a short distance from the walls (15-25 cm), after which the area from the tape to the wall is painted with the same paint as the walls. After this, the tape is removed, and ceiling decor (fillet or plinth) is glued along the border of the color difference.
Rules for visual expansion of space
In addition to knowing how to visually increase the ceiling in a wooden house, you need to know the rules for visually expanding the space of a room:
- Choose the right finishing color scheme. Light pastel colors expand the space, while dark and rich colors narrow it.
- Choose a coating to match the color of other finishes, textiles and furniture. The more color spots that differ in tone and color, the more cramped the space seems.
- Do not clutter the interior with small objects, things and decor. Remove anything that is rarely used out of sight.
- A well-lit room seems more spacious. Do not cover the windows with thick curtains and install additional sources of artificial light in the room.
- The traditional opinion that small-sized furniture is placed in a small room is wrong. Narrow high furniture up to the ceiling, a large sofa or wardrobe will make the room more spacious.
- A large mirror on a closet door, a mirrored table or a wall - all this makes the room taller and wider.
When choosing wall decor, give preference not to one large picture, but to several small framed images. This will add visual volume to the room. Tall furniture allows you not to lose its functionality and save additional space.
When it is necessary to strengthen the logs
In construction practice, reinforcement of second floor joists is used in several cases, most often at the stage of construction and reconstruction of a building. At the construction stage, it is easier and more convenient to do reinforcement, especially since several methods can be used for this, choosing the most suitable one. During reconstruction, reinforcement can be done after complete or partial dismantling of the floor covering and insulation, while there are very few methods for installing additional structures.
Strengthening work is usually carried out:
- To prevent deformation of interfloor beams and floors of the second floor during the construction phase;
- To correct defects made during the construction process and identified during the construction of the building;
- To replace wooden building structures that are deformed or damaged by natural pests or structures made of other materials as a result of exposure to third-party factors.
- To strengthen the joists when repairing the floor.
Methods and methods for strengthening the structure in such cases are selected depending on the volume of work and the degree of deformation of the floor and the interfloor ceiling itself. In some cases, simply strengthening the joists will not have the desired effect without significant work to restore the beams, because, having leveled the floor of the second floor, sooner or later the ceiling of the first floor will have to be leveled.
When assessing the floor, you need to objectively assess its condition, because in many cases it is necessary to replace deformed floor boards or level them, rather than strengthen the joists.
Techniques for increasing ceiling height
Before starting work, you need to determine the reasons for the decrease in height. If the house was originally built with low ceilings, only the roof raising technique will do. In all other cases, you need to look for a problem - errors at the design stage, shrinkage of the structure, incorrect choice of finishing materials.
If there is an error in the design, then radical alterations will be required, and with natural shrinkage, all decisions are made only after examining the soil by a professional, otherwise it can cause distortion and the appearance of cracks on the wall panels and base.
The simplest option is to replace the ceiling finish, but even here a step-by-step work is required with preliminary preparation of tools, materials and the premises of the house itself.
Preparatory stage
First you should inspect the walls and roof. This is necessary to identify defective, deformed and rotten logs, areas that could cause a decrease in the height of the ceiling plane. Then the foundation is inspected to determine the level of shrinkage and the strength parameter of the base foundation. If the foundation is cracked, then raising the ceiling in an old wooden house by increasing the height of the entire structure will not work; the base will not support it.
The next stage of preparation is studying the technical passport of the house (project) or inspecting the design features of the object. In this case, you need to eliminate the possible risk of skewing window openings and door groups, and only then choose a way to increase the ceiling height in a private house.
Advice! When inspecting the attic space, special attention is paid to floors and beams. The absence of a load-bearing load on the elements, a non-residential attic - advantages that will allow you to raise the height of the rooms by a significant distance.
Lowering the floor level
If the foundation is strong and high, by lowering the floor you can increase the height of the rooms to 25 cm. Before starting work, the room is cleared of furniture, objects, and equipment.
How to make a ceiling with your own hands in a private wooden house
Then the work is performed in the following order:
- Use a crowbar or nail puller to remove the fixing hardware on the old floor;
- Unscrew and remove the cover;
- remove old logs by cutting them out with a saw or hacksaw;
- carefully remove pieces of joists extending outside the room;
- use a mixture of cement and sand to seal holes from old logs in the walls;
- for new logs, cut openings below the level of the previous ones by 20-25 cm;
- prepare new logs, insert them into the recesses;
- lay thermal insulation materials on the new floor (mineral wool insulation, which is laid between the joists, is suitable);
- lay subfloors on top of the insulation.
After completing all the work, you can sew up the floors with finishing materials.
Important! Wooden elements are pre-impregnated with fire retardant, antiseptic and other compounds to repel pests. After impregnation, the wood must be dried and only then used for work.
Method with changing ceiling cladding
Let's look at how to increase the ceiling height in a wooden house, where the ceilings are lined with frame structures. The work requires complete dismantling of the old coating and finishing of the plane without a frame at a level above the beams. The method is simple, accessible to a master without experience.
The operating algorithm is as follows:
- Remove the old decor. If the finish is in good condition, remove the sheets carefully, using a sharp knife to avoid damaging the panels.
- Disassemble the sheathing. You will need a screwdriver.
- Inspect the beams on the ceiling. Remove rotten, damaged pieces, and treat the timber that has retained its quality with a fire retardant, antiseptic, prime and dry.
- Now choose the material with which the ceiling will be finished. Most often, owners use lining. And the plane should be sewn above the level of the beams.
On a note! Light wide tiles visually raise the plane, and if you take narrower lamellas in light shades, they will not only raise the ceilings, but also visually expand the space.
If the beams are dark in color, then light lining or trim made from another material will look especially aesthetically pleasing. Beams should be treated with antiseptics, you can sheathe them with boxes or sheets of plasterboard, paint them or cover them with tinting or varnish.
Replacing ceiling beams
When considering ways to make the ceiling higher in a wooden house, sometimes it is enough to replace massive beam elements with lighter ones. The method is suitable only if the structures do not carry loads and are not the main units of interfloor floors. The work will not take much time. You should first disassemble the covering on the ceiling, then secure the ceiling structures with ties or supports, and then cut the beams at the walls.
Advice! To avoid warping the entire structure, it is easier to ask an assistant to hold one end of the beam while the other is cut. Otherwise, the cut end may hang and the second cut will be oblique. If the beam is long, it is cut out in pieces, starting from the middle of the premises.
After cutting out the beam, the tie rods are fixed to the rafter system at the required height level (the height of the future ceiling is determined). The entire structure is covered with finishing material in the form of sheets of plywood, plasterboard, and then decorated.
House raising technique
The work cannot be done alone; the help of several people is required. Before starting work, it is important to assess the lifting height so as not to cause the entire object to skew. Several jacks with high lifting capacity will also come in handy.
Important! At one time the house rises to a height of no more than 50 mm. If you need to raise it higher, then the work is performed in several approaches. Each stage of raising the structure is accompanied by the subsequent fixation of the house on bars and supports - they need to be prepared in advance.
The work is performed as follows:
- place jacks around the perimeter of the object;
- distribute the load across all units;
- raise the house to a height of 50 mm;
- you can fix the position of the structure with wedges;
- after raising the structure, build a concrete foundation under the house;
- As soon as the new base has set and dried, remove the supports and jacks.
After the base base has completely dried and the lifting equipment has been removed, new floors can be formed. The work requires a lot of time and effort.
Leveling the ceiling and do-it-yourself plaster for painting
Advice! When raising a structure to a height of more than 50 mm in several stages, the supports are not removed until the very end of the process. Each time you need to replace the old wedges with new ones with increased thickness. The larger the area of the house, the more jacks there should be.
How to raise the roof
The method is performed only after careful preliminary calculations. It is necessary to involve a specialist who can calculate the lifting height without compromising the integrity of the wall panels or increasing the load on the load-bearing elements.
Important! Before raising the roof, the structure is strengthened around the perimeter by installing a connecting timber frame along the base of the roof.
Once the piping is completed, you can begin dismantling the old ceiling. After removing the covering, you can place jacks around the perimeter of the roof and lift it, as in the case of lifting the entire structure - no more than 50 mm at a time. It is extremely important, after increasing the height, to place a reinforcing belt or additional crowns of wooden beams, treated with fire retardant, impregnated and well dried, into the opening.
As soon as the work to increase the height is completed, the additional space is insulated, isolated from water and wind, and you can begin finishing the ceiling plane.
Strengthening the structure with additional lags
This method is applicable for strengthening the floor structure of the second floor, when the beams do not have a deflection, and the logs themselves, based on calculations, can withstand the design load. The essence of this method is to install additional logs in the central part of the room, thus ensuring the distribution of the load more evenly, over a larger number of supports.
Installation of an additional beam to strengthen the second floor floor
Most often, installation of additional logs is carried out in the center of the room by reducing the distance between the logs by 25-30%. So, if it is necessary to install logs every 0.5 meters, in the central part the distance is reduced to 0.4 - 0.35 meters.
For reinforcement, standard logs used in the structure are used. For strength, additional spacers are installed between the lags from solid sections of boards or metal rod prostheses installed crosswise.
Rod metal prostheses for strengthening joists
Reinforcing wooden joists with additional pads
The method of installing additional overlays and reinforcing the joists is possible both at the construction stage and during repair work. For logs made of timber, reinforcement is most often used with wooden overlays and overlays made of plywood or OSB boards.
Wooden overlays are used:
- To strengthen mechanically damaged areas of lag;
- To strengthen the joint or joint of the log;
- To create additional strength along the entire length of the joist.
a, b, c - reinforcement of joists with wooden overlays on bolts, d - reinforcement with rod prosthesis
Overlays made of OSB boards and plywood are mainly used at the places where sections join each other and in places where defects are visible or there are minor mechanical damages.
Metal plates can be applied to areas of damage and joints as a method of local solution to the problem.
Full reinforcement with overlays
Installation of overlays on joists along the entire length is carried out using a bolted connection through the body of the overlays and the joist, using self-tapping screws along the entire length or using a bundle with several bundles of mounting wire.
Installation of the linings is carried out alternately with temporary fixation of the linings using clamps or self-tapping screws to the body of the log.
Reinforcement of joists with self-tapping screws and washers on both sides
Holes are drilled along one line. The distance between the connection holes is usually no less than ¼ of the log length. The holes are drilled like this: one in the center, and from the edges at a distance of 1/3 of the log height from the edges of the log. This arrangement of holes will not allow beams and joists to split along their length. Bolts must have washers on both sides - both under the bolt head and under the nut. The tightening is carried out gradually, until the wood has significant resistance, and the final tightening is done one by one, starting with the outer bolts. In this case, the tightening is done evenly by ¼ turn.
Reinforcing the log to its full length
If the joists have fixed edges in the brick wall, a hole must be made so that the edges of the beams are also fixed in the wall. Additional beams are treated with an antiseptic before installation on the joists.
If it is necessary to straighten sagging joists, use wooden wedges or a regular automotive hydraulic jack, pressing the joists to the desired level.
Partial reinforcement of logs with wooden overlays
Local reinforcement of joist structures is used mainly at joints or joints of joists. To strengthen these areas, the method of installing overlays on one side or installing overlays on both sides of the beams is used. For the one-sided method, wood without knots and visible damage is used, in which case the width and height of the additional element must be equal to the width and height of the log itself.
Partial reinforcement of joists (on both sides) at joist joints
Fixation is carried out using bolts, screws and nails. The length of the element must be no less than the distance between the two floor beams. Bolted connections are made through, the washers should be 3 times wider than the nut and bolt head.
Reinforcing the joists with a wooden overlay
To fix the joint of the joists with double-sided overlays, it is allowed to use a beam narrower than the joists. Typically, boards 1/2 the width of the joist are used for this. The length of the overlays is usually taken to be at least 1 meter. The screed is also done using bolts or self-tapping screws.
Carbon fiber reinforcement
A popular modern material, carbon fiber has amazing strength characteristics. It is this property that allows this material to be used as a simple and effective method of strengthening wooden structures. For installation, you will need to glue several strips of this material onto the area to be strengthened.
The gluing scheme is simple: several strips of carbon fiber are glued along the length of the lag on top of each other until the required strength is achieved. The edges of the glued strip are overlapped with several more stripes across. It turns out a U-shaped clamp on each side of the glued long strip. In this way, structures that are not too damaged or sagging can be strengthened.
Reinforcing joists using plywood or OSB boards
For logs made of glued material or structural wooden I-beams, overlays made of plywood or OSB boards are most often used. Such overlays are also installed in the form of double-sided overlays or one-sided lag reinforcement. This connection is fixed using self-tapping screws. The thickness of the plywood element or OSB board element should be no less than 10-12 mm. The size of the overlay for a structural I-beam must correspond to the height of the central part.
Reinforcing joists with plywood
Fixation with self-tapping screws is done on both sides of the linings. It is important that the screws pass through the thickness of all elements being fastened.
Reinforcement of logs with metal overlays
Metal linings used to strengthen the joists of second-floor houses can be:
- Piece elements made of perforated sheet metal with a thickness of at least 5 mm;
- Made from metal strips of various widths with a thickness of at least 5 mm;
- From a shaped pipe of square or rectangular cross-section with perforation or welded fasteners;
- From a corner or brand.
Piece elements made of sheet metal are used to strengthen the joints of the joists. The dimensions of such overlays can be either standard or selected depending on the specific connection case. Fixation for the joints of beams of small height is carried out using self-tapping screws, and if the logs have a height of more than 10 m, then using a bolted connection. Metal plates are used for double-sided installation.
Reinforcement of logs with steel sheets
A metal strip usually reinforces long logs, and if the width of the strip used for installation is greater than or equal to 50 mm, then fixation can be either using self-tapping screws or bolts.
Reinforcement of logs with metal strips and channels on both sides
shaped metal pipes of square or rectangular cross-section are used as structural elements The installation location for such elements is the central joists of the premises, where the defects are most pronounced. The pipes are simply fixed to the joists along their entire length on one or both sides. Bolts are used to tighten reinforcement beams with a height of 80 millimeters or more. For smaller lags, fixation is carried out using self-tapping screws.
Shaped metal pipes can be used to strengthen wooden joists
Corners are most often used for installation at the bottom of the log, strengthening it from deflection on the bottom side. To do this, corners measuring 30*30, 45*45 or 60*60 mm are inserted under the joists from below and fastened with self-tapping screws into holes drilled in the corner.
Reinforcing joists with corners
A brand of various sizes can be attached both to the side and to the bottom of the joist. The fastening method depends on the width and height of the joist.
Taurus can also be used to strengthen lags
If you can't raise the ceiling
Sometimes you have to do things not as they should be, but as they turn out. In old buildings, it is often not possible to raise the ceiling surface and you have to be content with not the most popular methods. In the case of the height of the walls, this will lower the floor.
Of course, you can lower the floor. Here, the owner of an old house will benefit from the fact that in old houses the flooring was done at the level of the junction of the first two crowns. This means that there is approximately 25 - 30 centimeters of unused space under the floor.
You will have to completely cut off the old joists that were used to construct the old floor. After their removal, a new floor is installed along joists installed directly on the foundation. If the height is not enough, there is a more complex option for increasing the free space.
In such a situation, you will have to remove the beams completely, to a state where the house rests almost exclusively on the walls, under which the entire foundation remains.
In the resulting space, the floor level is deepened until the lower edge of the supporting foundation appears - there is no need to go deeper. If you do this, you can deprive the house of support, which will lead to deformation of the walls and destruction of the building. When the required depth is obtained, the entire range of work related to the construction of the insulating layer and preparation for the installation of floor beams is carried out.
"load...
Old wooden houses, like modern ones, were built according to a specific design. Since there were no known technologies today, the ceilings of most houses barely reach 2 meters. Of course, for a modern person this is low, especially considering that many men are between 175 and 190 cm tall.
What to do in the case when you get an old house, but there is not enough budget for capital construction yet? The answer will be some ways in which you can raise a low ceiling, both actually and visually. In any case, staying in such a house will become more comfortable.
