TISE piles
The main disadvantage of the classic pile foundation is that with severe heaving, the support can simply be pushed out. But since the idea itself is very attractive - it can be built quickly with a minimum of costs - on difficult soils they began to make a base at the bottom of the pile - a rectangular reinforced plate. But with this option, the volume of land work immediately increased significantly: for each pile it is necessary to dig a pit larger than the planned base. But the building stands normally even on soils with severe frost heaving.
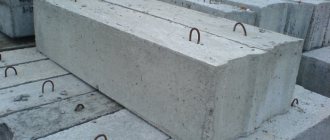
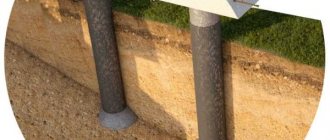
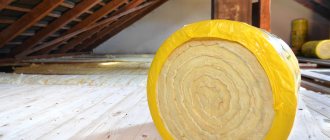
The pile foundation using TISE technology has a dome-shaped thickening at the base of each support
Under piles made using TISE technology create a similar thickening. But there is no need to dig pits. This extension is formed using a special knife, which is attached to a proprietary drill. This knife forms the extended dome. Further, the entire technology almost exactly repeats the process of constructing a pile or pile-grillage foundation.
Previously, expansions were also practiced, but they tried to do them using micro-explosions or by picking with a blade on a long pole. The main innovation in TISE technology is a drill with an opening adjustable blade. With its help, it is much easier to expand the sole.
How to work with a TISE drill
Advantages and disadvantages
TISE foundations are quickly gaining popularity: with minimal additional costs, a more reliable foundation is obtained. So, its advantages:
- increased resistance to heaving forces;
- the load from the house is transferred to a larger area, which reduces the possibility of uneven subsidence;
- low cost with good characteristics;
- can be designed for houses made of different materials, up to 3 floors in height;
- small amount of land work.
The procedure for making a TISE pile
If a pile or pile-grillage foundation is recommended for your house, it makes sense to make TISE piles. With a small increase in workload, you get a significant increase in reliability. After all, designers do not like pile foundations because it is impossible to find out what kind of soil is under each support. Therefore, it is impossible to predict how reliable and stable the foundation will be. And the TISE foundation has a wider support, which reduces risks. As before, nothing can be predicted, but a large load distribution area is always good.
However, there are also disadvantages. The main thing: the heel of a TISE pile cannot be well reinforced. You can lower the reinforcement cage to the very bottom, but expansion cannot be reinforced. Therefore, there remains the possibility that this thickening will collapse.
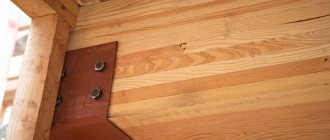
TISE piles are the basis of the TISE pile-grillage foundation
There is one more drawback, but this is from the practice of using a drill: it is not easy for them to work. The design itself is interesting. This is not a blade wrapped around a rod, but some kind of container with a composite bottom. Four blades set at an angle are welded on the plates that form the bottom. When you spin the drill, they loosen the soil. Since the bottom is not solid, the soil gets into the body, from where it needs to be removed.
The order of work is as follows: rotate the drill several times around its axis, take it out, and shake out the soil. They lowered it into the hole again, turned it several times, etc. The technology is not complicated, but the work is tedious. The device itself weighs 7-9 kg, plus soil. It needs to be raised and lowered frequently. Overall, it's tiring. Plus, no mechanisms are needed. The downside is that the work is not easy physically. Especially if the soil is rocky or dense clay.
Tools for TISE technology
R. Yakovlev, along with the technology, also proposed a special tool that is used to drill wells for bored piles. This is a TISE-f drill. Purely structurally, this is an ordinary drill with a soil receiver, in the lower part of which a manually operated folding plow is installed.
This device is located along the drill rod. And when the main wellbore is drilled, it does not interfere. Having reached the required depth, usually below the freezing level of the ground, the plow handle is released, and its free end, under its own weight, begins to move from a vertical position to a horizontal position relative to the hinge, which is located next to the drill blades. That is, the plow moves along a segment of a circle equal to a quarter. In this case, the free end moves from top to bottom. As soon as the blade reaches a horizontal position, the sole can be considered selected.
This is the simplest design invented by an engineer. Today, drills are improved models with minor changes and improvements that make drilling easier. The standard length of the rod is 1.1 m. A 2-meter extension is added to it in case the level of soil freezing is more than 2 m.
Installation of bored piles
Load-bearing capacity of a bored pile
Bored strip foundation
Where can I use it?
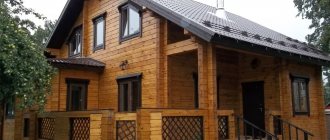
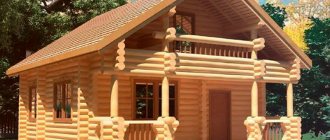
There are no restrictions on the types and materials of buildings: you can make a TISE foundation for wooden, frame, brick and block buildings. Number of storeys - up to three.
The restrictions on soils are the same as when using pile foundations: it is necessary that the piles transfer the load to the soil with normal bearing capacity. To decide whether it is possible or not to use TISE, a geological study of the site in the place where construction is planned is necessary.
What does a TISE pile consist of?
Since the base of the pile is expanded and the resistance to buoyancy forces is greater, this technology can be used on heaving soils. But at the same time you need to consider: there is no point in placing piles closer than 1.5 meters. If placed closer, one extension of the sole will overlap the other. On the other hand, you can’t make a pile larger than 30 cm in diameter either - there is no such drill. If the load-bearing area with such parameters is not enough, you need to use a different type of foundation.
Bored piles without expansion
Bored foundation is a subtype of pile foundation. This foundation received its name for a reason, but due to the principle of implementation - the installation of piles is carried out by pouring concrete into holes drilled in the ground. To do this, holes are initially drilled across the area of the future building into which new concrete piles are poured. The load-bearing capacity depends on the diameter of the pile; the larger the pile, the better it is. The diameter is selected in accordance with the load of the future home.
Bored foundations in the Moscow region are actively used in low-rise private construction - for frame, Canadian SIP panels and wooden houses and other buildings.
Bored piles can be installed in hard-plastic soils. The use of a bored foundation makes it possible to reduce the cost of construction. Exceptions for this type of foundation are rocky, stony soils.
Advantages of a bored foundation:
- The installation time is less than the installation time of a strip foundation.
- High quality, reliability. This is a durable foundation with a service life of about 100 years.
- Possibility of use on difficult soils.
- No special equipment required.
- Low cost.
Cost - from 2500 rubles. for 1 pile. (Diameter 200mm, depth 1700mm, reinforcement, M300 concrete).
Reviews of the branded drill
The main questions for developers are related to how realistic it is to drill wells manually using a proprietary drill. Looking at the video, it seems that this task is not easy. But here are some reviews.
The soil on my site is different: some are loam, some are dense clay, and such that you can only chop them with an axe. At first I thought about renting a motor drill, but I decided to try it straight away with a drill. And nothing, not very hard. As a result, I decided that a motor drill would not speed up the process much, so I made all 40 pieces by hand. During the day, 5-6 2-meter wells were produced. They drilled easily, but with expansion it was difficult: I already had dense soil there, and it was difficult to turn with the blade open.
Oleg, Kharkov
I modified the TISE drill I bought: I welded additional teeth, instead of a rope that opens the blade, I adapted a rod - now you can put pressure on it, and not just pull. And most importantly, I lengthened the handle so that two people could turn it. While they were drilling the extensions, they twisted it 90°, but the work became much easier. In general, I'm pleased.
Nikolay, Krasnoyarsk
Calculation of the TISE foundation
The calculation method is no different from the calculation in the general case. The load from the house is calculated and then compared with the total load-bearing capacity of the planned number and diameter of piles.
First, place the piles on the house plan. They must be in the corners and at the junctions of the walls. If the distance between the piles is more than 3 meters, intermediate ones are placed between them. So you place all the supports on the plan, adhering to the rule:
- minimum distance - 1.5 meters;
- maximum 3 m.
Then calculate the load from the house. To do this, you first need to calculate the weight of the house (all building materials + furniture, plumbing, heavy household appliances).
Average loads from different types of house components
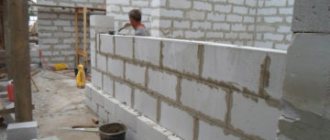
Speaking on average, for buildings made of brick or shell rock, 2400 kg can be taken for each square of area, for light building blocks (foam concrete, aerated concrete, etc.) - 2000 kg, for wood and frames - 1800 kg. These average standards can be used as a preliminary guide. If you decide to take everything seriously, you will need to follow the entire methodology: counting materials of walls, ceilings, roofing, finishing, etc. Since the technologies and materials used may be different, the discrepancies can also be significant.
We multiply the resulting value by a correction factor - 1.3 or 1.4. This is a safety margin. The resulting figure is the load that will need to be transferred through the piles.
Now, using the table, you select what diameter the pile should have so that it can transfer the required weight.
Load-bearing capacity of piles of different diameters in different soils
If the planned number of columns with an expansion of the selected diameter can transfer the required load, you do not need to redo anything. If the transferred mass is too small, it is necessary to either increase the number of piles or make a “heel” of a larger diameter.
TISE foundation: work order
The TISE technique itself has some recommendations:
- The piles should be buried approximately 20 cm below the freezing level for the region.
- To reinforce the pile, four rods of ribbed reinforcement with a diameter of 10-12 mm are used. The rods should be placed no closer than 4 cm from the edge.
- If the slope of the site is more than 10%, the release of the reinforcement must be connected to the grillage.
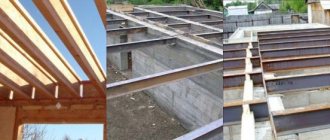
- Use either a high grillage - raised 150 mm above the ground, or make a pile-strip foundation with a shallowly buried strip. The second option is used for heavy buildings, the weight of which cannot be transferred through piles; then a tape is made that increases the transfer area.
Scheme of reinforcement of a pile-grillage foundation with a reinforced concrete grillage (pile-strip)
- You should not make sand bedding at the bottom of the well: it will not have normal density and will not work.
- To ensure reliable support, use concrete vibrators. Manual vibration using a rebar is ineffective. If your farm does not have such a device, rent it while the foundation is being poured: the strength increases significantly.
- The formwork for the pile is made from roofing felt, roofing felt or glassine rolled into a tube. It is better that it has several layers (2-3). There is no need to fasten them with anything: they twisted them slightly smaller than the diameter and inserted them. The height of this formwork is 15 cm above the ground level, regardless of whether there is a slope on the site or not. It is advisable to sprinkle this protruding piece with sand or soil and compact it around it. This will prevent the roofing paper from falling apart when pouring concrete.
TISE foundation is a subtype of pile-grillage foundation. And the technology for its production is no different. The whole difference is in the drilling process. No others. The work procedure and technology for manufacturing a pile-rosvet foundation are described here. And in this article we’ll better give some practical advice.
Difficulties during drilling
If the soil is very loose - fine sand - the walls of the well may crumble. To prevent this from happening, add water. The sand will compact and hold its shape. Water will also help if the soil is very dry and dense. After drilling a few tens of centimeters, fill the well with water. It will soften the soil, it can be chopped with a shovel or other device, and then removed with a drill.
Drilling wells for the TISE foundation with your own hands is not easy, but it is possible even alone
Difficulties are created by the powerful roots of trees and bushes. They need to be chopped. To do this, the ax handle is welded (attached) to the handle. By sharply lowering it into the hole, the roots are crushed.
How to create an extension
After reaching the design depth of the well, a plow is attached to the drill. It can be fixed in two positions: to form a heel of 50 or 60 cm. The plow is tied to a rope.
This is a plow that forms a dome-shaped extension
You lower the drill down, the rope is taut, the plow is pressed. The rope is released, and he falls down under his own weight. You start to rotate (it’s hard - the cutting surface is large), the blade cuts the soil, forming a thickening.
You can rotate both clockwise and counterclockwise. If clockwise, then try not to press down: there is no need to go deeper. When rotating counterclockwise, only the soil is cut without deepening, but another problem arises: the soil is poured under the drill, pushing it upward.
The optimal order of work is as follows: scroll counterclockwise several times. As soon as you feel that the blade has rested against the arch, make a few turns clockwise, collecting cut soil into the drill body. Take out the drill and pour out the soil. Repeat several times until an extension is formed (the soil stops building up).
On hard soils, working with the plow open can be problematic. Then you can create the expansion in stages. First set the plow to the smallest distance, then increase it to the desired size.
Construction technology
The technology for constructing a foundation using TISE technology is, in principle, no different from the technology for constructing a conventional pile foundation, but has a number of features. Therefore, we should take a closer look at how to make a TISE pile foundation.
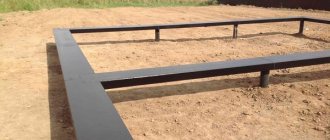
The upper parts of the supports are connected to each other by a common concrete grillage. It serves to impart rigidity to the pile structure and at the same time to support the load-bearing walls of the house. Before starting work, you need to carry out planning - leveling the area and removing the top organic layer of soil.
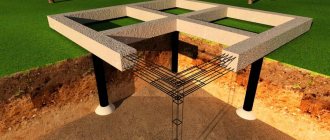
TISE foundation design
Marking
The first step is to mark the site in accordance with the construction project. To do this, stretch three center lines of twine or wire for each wall. The central twine serves to mark the installation locations of the piles, and the two outer ones are the boundaries of the grillage formwork. The axial lines are stretched using castoff posts, which are horizontal boards with two posts buried in the ground.
Cast-offs should be installed at a distance of at least 1.5 from the future wall so as not to interfere with work. For the same reason, their height should be 10–20 cm higher than the future poured structure.
The distance between supports is usually taken as 1 - 1.5 m, but when constructing small buildings, it is quite possible to increase this step up to the installation of supports only at the corners of the structure. At the drilling sites, using a bayonet shovel, leader holes are outlined into which the drill will be buried.
Drilling
The next stage is the construction of wells according to the Yakovlev system. In accordance with soil freezing indicators, the required length of the drill rod is set. As a result, its length should be at least 0.5 m greater than this indicator. The tool is inserted into the leader holes and begins to deepen with a clockwise rotational movement. From time to time it should be lifted out to remove soil from the well.
This needs to be done quite often, since after too much cut soil has accumulated in the well, it will be difficult to remove the drill out.
Once the desired depth is reached, the folding plow is released and drilling continues. When installing an expanding heel, the plow should also be folded from time to time, and the tool should be raised and the storage unit released. The expansion depth should be from 40 to 50 cm. Thus, a cylindrical recess with a diameter of 60 cm and a height of half a meter is formed in the lower part of the well.
The principle of operation of the Yakovlev drill
Reinforcement and filling
Before pouring concrete, the well is reinforced. For greater rigidity, it must be voluminous - consist of 3 or 4 rods connected to each other by jumpers. For reinforcement, you can use both steel and fiberglass rods with a thickness of 10 - 16 mm. The upper part of the frame should rise above the pouring level - the grillage frame will be attached to it in the future.
After installing the frame, you should proceed directly to pouring the concrete solution into the well. To do this, you need to use concrete of at least M-400 grade. It is not recommended to use concrete with lower strength values for pile supports.
Each pile must be thoroughly vibrated immediately after pouring. This will make it possible to remove air bubbles from the concrete thickness and compact the solution. As a result, the composition fills the entire space of the well and becomes more durable.
After the pile supports harden, the formwork for the grillages is installed on top of them. The grillage is a monolithic concrete beam that connects all the piles of each wall. A volumetric frame is also mounted inside the grillage formwork and connected by welding to the reinforcement of the supports. The last step is pouring the grillage with concrete.
By following the described technologies, each individual developer can build a pile foundation using TISE technology with his own hands. This will allow you to build a reliable load-bearing foundation on the most difficult soils with a minimum of financial and time costs.