Fencing on support elements driven into the ground
Sooner or later, any owner of a suburban area faces the question of fencing his land. The fence not only performs a protective function, but also gives the area with buildings a finished look.
Naturally, the structure of the fence must be strong so that it does not have to be adjusted or completely rebuilt every year. The reliability of the building primarily depends on the correct installation of the fence frame, the basis for which is the pillars that hold the entire structure.
Installation methods
Metal pipes used as supporting elements of fencing
Supports for fences are made of metal, brick, concrete. The most common option is metal poles, which are made from profiled pipes of different diameters and lengths. Metal elements do not require complex installation, and fence sections made from a wide variety of materials can be easily attached to them.
The price of such poles is very affordable, and their durability makes their use quite attractive.
To figure out how to drive fence posts, you need to familiarize yourself with the existing methods and figure out which one is the most suitable. Supports are installed in three ways: driving, concreting, backfilling. The simplest and most accessible method is the usual method of driving pipes into the ground.
Types of fence posts
Fences can be temporary or permanent, located in an area not visible from the street, or precede the entrance to the site in front of the main facade of the building. Fence posts must be consistent with the purpose and overall design of the structure.
In private housing construction, fence supports are made:
- from a metal profile pipe of round or square section;
- concrete;
- bricks;
- asbestos cement pipes;
- tree.
Profile pipes are the most versatile and common material in the construction of fences. They are durable, lightweight, and fairly easy to install. You can attach sections made of metal, wood or plastic to them. A serious drawback is instability to corrosion. Regular anti-corrosion treatment and adherence to installation technology help to avoid this.
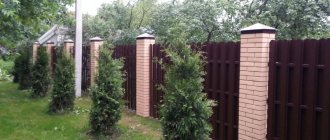
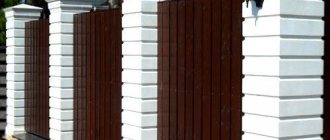
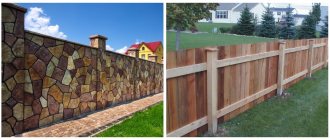
Brick or concrete pillars are reliable and massive. They are installed on a solid reinforced foundation. To reduce weight, manufacturers produce hollow blocks with imitation stone, tiles, and bricks. The elements are attached to the metal internal frame using embedded parts.
A budget option is asbestos cement pipes . They are moisture resistant, do not corrode, are quite strong and durable. Due to their low decorative qualities, they are used for fences in places where there are no requirements for appearance.
When constructing fences in summer cottages, wooden posts are still relevant. They are inexpensive and can withstand loads well from light picket fences, boards or mesh. Protective impregnation and waterproofing of the base immersed in the ground helps to extend the life of wood.
Hammering techniques
Sketch of the correct driving of a metal pipe into the ground
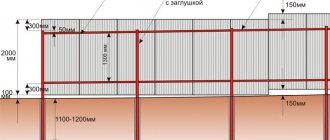
Before starting work, you should outline where the posts of the future fence will be located. Please note that the distance between the supports should be 2-3 m.
Drilling is carried out using three methods:
- Using a sledgehammer.
- Installation using a headstock.
- Installation using a pile driver.
Regardless of the driving method, the following conditions must be observed:
- the lower part should be buried 1.2–1.4 m into the ground;
- you need to start installation with the corner support elements, then stretch the cord between them to set the height level of subsequent supports;
- When driving, try not to hit the top of the pipe too hard so that it does not go into the ground more than required and become deformed. Raising an excessively hammered pole to the required height will be much more difficult than hitting it again;
- Before installing the supports, it is recommended to cover the part that will be underground with bitumen or an anti-corrosion compound. You can also just paint it.
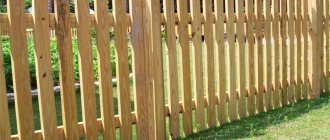
The hammering method is used to create lightweight structures. This can be a fence made of chain-link mesh, profiled sheet or picket fence. When installing a fence made of corrugated sheets, it is also necessary to take into account the windage, and bury the pipes at least 1.5 m.
Why is it worth hammering in pillars?
Hammering support structures is less reliable than screwing and concreting. The work saves time and reduces the amount of building materials. It is recommended to hammer in pillars in several cases:
- when creating a lightweight structure intended for decoration;
- if the fence is not used for a long time. Durable products that can be used for a long time must be concreted;
- for certain types of soil. The posts are driven on sandstone, clay or peat soils.
In dense soils with a stable composition and uniform relief, the elements of the supporting frame are concreted.
Hammering with a sledgehammer
Hammering a fence support with a sledgehammer
Low fences are installed on small poles (up to 1.5 m long). More often, a sledgehammer is used to construct such structures. For driving, a wooden spacer is used between the pipe and the sledgehammer. The person driving the prop in this manner must be positioned above the top edge of the prop to have the ability to swing and hit hard.
The technique is, of course, cheap, but at the same time labor-intensive, requiring great physical effort. When using a sledgehammer, there is a risk of skewing the pillars, so it is recommended to perform this work in pairs. One holds the pipe vertically, the other hammers it in. Moreover, the verticality of the driven support elements should be checked with a level.
Installation using a headstock
"Grandmother" for driving pipes
The “grandmother” is a simple homemade mechanism for driving pipes into the ground and is suitable for installing support elements up to 3 m long. The tool can be made independently:
- Take a piece of pipe 1 m long. The diameter of the pipe should be greater than the diameter of the pillar. This is necessary so that the pipe fits freely on it.
- Weld a metal circle to one end of the pipe, add additional weight (metal scraps, lead). The heavier the “grandmother” is, the easier it will drive the post into the ground. The mass of the “grandmother” should be from 10 to 30 kg.
- The mechanism is weighted using a metal circle welded not to the very end of the pipe, but with an indentation of several centimeters inward. The resulting container is filled with molten lead.
- To make the process easier, you need to weld two metal handles about 1.5 m long to the pipe on the edge opposite to the weighting.
The post is installed in a pre-designated place, and the headstock is put on it. The mechanism is lifted by the handles half a meter and lowered with force. The pipe slides along the pole and, due to its weight, quickly drives the support into the ground.
For greater convenience and ease of work, you can install a tripod, which is attached to it using a strong rope or chain and a headstock block (a hook is welded to the headstock for this purpose). To drive in, pull the free edge of the chain or rope, raising the headstock, and then release it.
Due to the fact that the post is located inside the headstock pipe, the accuracy of striking increases and the possibility of the support deviating from the vertical line is significantly reduced.
How to make a “baba” yourself?
Before driving pipes onto your fence, you should familiarize yourself with the method of constructing the “headstock” itself. Initially, a circle is inserted into the pipe, which will be comparable in diameter to the pipe itself. Next, the circle needs to be weighted to about 20 kg by welding scraps of metal and other things. For convenience, make handles from dense rods up to 1 m long or weld thin tubes in the form of handles to a circle. Such a homemade handle can be wrapped with electrical tape before use.
That is, shortly before hammering pipes onto the fence, take up the issue of preparing improvised means that you will choose yourself, based on your strengths and knowledge. You can also hammer pipes into any fence with a sledgehammer if it is not possible to build a “headstock”, but with this method, we repeat, you will need to hammer them in for a long time and carefully, wasting your strength. You can't do without frequent breaks.
The length of the pipes for the proposed fence is also significant. If the supports are at least 2.5 m, then driving them in with a sledgehammer is not rational, so it is recommended to strengthen any pipe onto the fence using a popular hammering device, which helps to bring the support to the required depth faster and easier. Overcoming soil resistance is much more effective if there is a “grandmother” that deepens the support step by step firmly and reliably.
Installation using a pile driver
Installation of fence supports using a pile driver
A more expensive, but reliable way to install supporting elements is to use technology. But it may not be suitable for every site owner, since there is not always the possibility of free access for equipment.
A pile driver is a special construction equipment that can install poles into the soil and pull them out. It is used when installing and dismantling fences. It can be manual, self-propelled or non-self-propelled. With the help of a piledriver you can install and dismantle any fence in a short time.
Construction pile driver
A pile driver is a special machine that lifts and installs a fence support into a immersion location. This device can drive a pile into the soil or pull a pole out of it. The principle of operation of the machine is that it drags the pole to the installation site and ensures its immersion in the design position. After fixing one pile, the machine moves to the next working point.
The pile driver greatly facilitates the driving of supports or their removal in case of fence replacement. It easily works even with pillars installed by concreting, which helps to redo or remove the fence in a short time. Such devices can be self-propelled, non-self-propelled and manual.
Return to contents
Pros and cons of the driving method
The fence can be installed in this way independently in a relatively short time and for little money due to the fact that:
- no need to dig holes to install supports;
- the cost of the structure is reduced, since there is no need to buy materials for concreting the pillars;
- installation does not require the use of complex machinery and equipment.
Therefore, if the groundwater runs deep enough and there is no risk of the support being loosened due to ground movement, a fence with posts driven into the ground will be quite stable and durable.
When installing a fence using the drive-in method, it should be taken into account that:
- If the soil is not dense enough, the pillars may warp. The situation is aggravated by increased windage. Therefore, before deciding on the method of installing supports, everything should be carefully calculated.
- Only lightweight fences are installed using the driving method. If the weight of the fence is high enough, then the entire structure may shrink.
- The poles are driven only into finely stony soil to prevent the pipe from hitting an obstacle in the form of a large stone.
- Impacts may cause the upper part of the support to become deformed.
If the owner of the site decides to install fence posts using the driving method, he must clearly determine the type of soil on the site and calculate the windage, as it affects the recommended depth and method of installing the supports.
Backfill materials
Let's figure out what to use to ram fence posts. The best bulk material is granite or gravel crushed stone with a fraction of 20–40 and a strength (crudibility) of M600 (for tall structures it is advisable to use M1000).
Table of crushed stone grades by crushability
It is worth paying attention before butting to the content of needle-shaped or flat stones (flakiness). According to SNiP, this figure should be 5–15%. A large number of irregularly shaped grains will prevent high-quality compaction of the backfill and the butting of pillars. To compact it (uncling), sand, fine gravel or screenings are additionally used.
When installing fence supports for temporary buildings or low fences, it is permissible to use:
- crushed pieces of concrete: the disadvantage of this type of backfill is the impossibility of using fragments of the same size and shape, as a result of which significant voids can form in the soil;
- gravel, a product of natural weathering of rock; The disadvantages of this material include low frost resistance and strength;
- crushed brick: structures made from it will last only a few years, and then collapse under the influence of negative temperatures and moisture;
- slag: has low frost resistance, some of its types have too high a degree of moisture absorption.
Schemes for butting a rack for crushed stone fencing and concreting
New to the building materials market are liquid polymer aggregates used to strengthen the soil. They are quite durable, do not rot, are insoluble in water and are able to seep into the smallest voids. However, the cost of polymer masses is quite high, plus special equipment is required to work with them.
It is not difficult to calculate the required amount of crushed stone for butting pillars. You can use an online calculator for this. You will need to enter three values – the height of the hole for the fence post, its radius or diameter. The result is then multiplied by the number of fence posts. The resulting figure must also be multiplied by a compaction factor of 1.3.
For insurance, it is better to add another 10–15% to the final result.
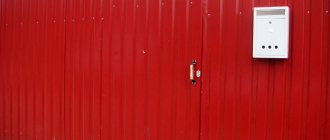
The photo shows a fence made of corrugated sheets of a private house.
Backfilling with crushed stone
Required Tools
To install support posts with your own hands you will need: