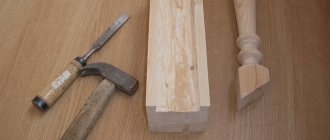
Stock up on tools and materials
When laying linoleum you will have to measure, mark and cut it with something. In certain cases, the coating will also need to be glued. Before you begin, prepare everything you need:
- linoleum (Lifehacker has already talked about how to choose it);
- tape measure and pencil;
- sharp knife or scissors;
- rule or long ruler;
- drill or hammer drill;
- screws or dowels;
- skirting boards and thresholds;
- double-sided tape or glue (if necessary);
- paint roller (if necessary);
- cold welding for joints (if necessary).
Selection of material and preparation of tools
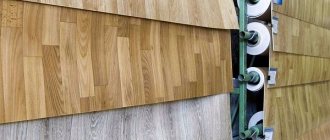
To lay this coating you will need not only a number of tools, but also the material itself. And his choice must be taken with full responsibility. There are many types of linoleum, but among them the following main ones can be distinguished:
- made of PVC . It is characterized by its low cost and good quality, but it still tolerates loads worse than natural coatings and does not like the effects of aggressive chemicals. Also, PVC linoleum is afraid of sub-zero temperatures, which is why it is important to transport it very carefully in winter;
Polyvinyl chloride linoleum (PVC)
Different types of polyvinyl chloride linoleum (PVC)
- made from natural materials . It costs a lot of money, but is very durable and does not get pressed under furniture even for a long time.
Natural linoleum
Examples of natural linoleum
When choosing linoleum, its thickness is taken into account, as well as the presence of an insulating layer. You should not buy very thin linoleum even for an apartment with little traffic - it can quickly lose its appearance.
The material can be homogeneous, that is, without a base, or heterogeneous, equipped with a backing on the reverse side. If you purchase the first option, then experts recommend laying an additionally purchased substrate for finishing coatings underneath it. Heterogeneous is available on two types of substrate - foam or fabric (jute). The latter option has excellent thermal insulation properties, while the first is considered more durable and durable.
Commercial homogeneous linoleum
Advice! You need to choose linoleum according to its performance characteristics based on the conditions under which it will be used.
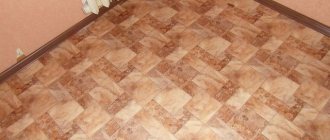
Linoleum in the apartment
As for the external data of the coating and its color scheme, here you need to focus on the interior design. You can also think about your taste preferences and buy the color of linoleum that you like most. But if you need several of them, it is recommended to purchase rolls from the same batch - then the stripes will not differ in color and shades.
The purchased material is stored in a vertical position. It is recommended to immediately place it in the room where the repairs will be carried out. This is especially important if the material was transported outside in winter.
Wear resistance and abrasion classes of linoleum
Important! Linoleum cannot be laid at temperatures below +18 degrees.
Also for installation of linoleum covering you will need:
- tape measure - for taking measurements and marking the material;
- long metal ruler – for convenient cutting of the coating;
- linoleum knife - for cutting material;
- marker – for marking;
- glue and a notched trowel - in case of installation of the coating using the adhesive method.
Tools for linoleum flooring
Double-sided tape can also do a good job. In some situations, it can even replace the adhesive composition. And for joining individual linoleum sheets, special cold welding is purchased.
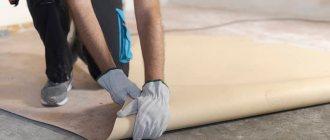
Prepare the base
Leveling an old concrete screed using a leveling mixture / dekoriko.ru
Since linoleum is quite an elastic material and follows all the unevenness of the floor, it is worth approaching the preparation of the base with special care. Carelessness will not only result in an unaesthetic appearance, but will also accelerate the wear of the coating.
The surface for laying linoleum must be clean, dry and level. Height differences of no more than 2–3 mm per 1 meter are allowed. Otherwise, the base must first be leveled.
How to prepare a wooden floor
- Check the parquet or board for sagging and squeaks. If necessary, further strengthen the coating with screws and replace bad areas.
- Make sure that differences in the base do not exceed the permissible limit. If this is not the case, level the floor using a scraper or lay a layer of plywood or CSP (cement particle board) on top.
How to prepare a concrete floor
- Clean the surface of the old coating and remove all debris.
- Make sure that differences in height are acceptable. If necessary, level out unevenness by sanding and self-leveling flooring. Small depressions and damaged areas can be repaired with tile adhesive.
How to lay linoleum correctly: a step-by-step do-it-yourself process
Linoleum can hardly be classified as the most modern type of flooring - its production and practical use began at the turn of the 19th and 20th centuries. However, this material is by no means going to lose its position, since in many respects it successfully competes with innovative types of floor coverings, and in some respects it even surpasses them. In addition, its popularity can be explained by the relatively low price, speed and ease of flooring, which can be done independently.
How to lay linoleum correctly
It is this criterion that very often becomes decisive - homeowners opt for such material. But in this case, they inevitably face a problem: how to lay linoleum correctly? The purpose of this publication is to try to give the most comprehensive answer to the main questions regarding the installation of this type of coating.
The entire “art” of properly laying linoleum can be divided into three important components:
- It is necessary to make the right choice of material, based not only on decorativeness, but also on its operational and environmental characteristics.
- You need to take the correct measurements to purchase the right amount of linoleum.
- The third and final stage is compliance with the recommended installation technologies.
This article will be structured in this order.
What kind of linoleum is used in the apartment?
You can probably bet that when most people hear the word “linoleum,” they immediately have a direct association with something artificial, synthetic. Apparently, this is why there remains a persistent prejudice towards this material as unfavorable from the point of view of the environment and the creation of a healthy micro-atmosphere in apartments.
Surprisingly, the very concept of “linoleum” contains a definition of the naturalness of the material. This term was introduced back in the 19th century, and it comes from two Latin words - “linum”, which means “linen” or “linen cloth”, and “oleum”, translated as “oil”. This is exactly how the prototypes of this modern floor covering were produced - thick linen or jute fabric was soaked in processed vegetable oil, and then small cork chips were pressed into it. By the way, almost the same technology, in general terms, is used in our time.
Classification by type of base material
- So, the first representative of modern linoleums is natural. For its production, exclusively natural materials are used: purified linseed oil, flax or jute textiles, crushed wood, including cork, wood resins, natural dyes, etc. The return to the technologies of the past, despite the wide choice of synthetic materials, was caused by an increase in people’s interest in natural materials, which occurred in the 80s and 90s of the last century.
Natural linoleum - the technology for its production has practically not changed.
What, in addition to its high environmental friendliness, is good for natural linoleum:
— It is very durable, resistant to wear, and can withstand significant mechanical loads.
— The material is not flammable, that is, it is safe from a fire point of view.
— An interesting feature is that the linseed oil it contains gives linoleum antibacterial properties.
— The material is very easy to clean, since its surface does not absorb dirt.
— Natural linoleum does not accumulate a static charge on its surface.
— Natural dyes used to decorate the coating do not fade over time under the influence of ultraviolet rays.
However, a number of factors still do not allow such linoleum to become a market leader:
— One of them is a very high price, which is comparable to the cost of high-quality parquet.
— Some people are put off by the somewhat specific smell from such a coating. This deficiency goes away over time.
— This material is very “picky” about the microclimate of the room - it does not tolerate high humidity, which can cause rotting of the natural base.
— Laying such linoleum is a rather complicated procedure, due to its low elasticity.
— Its production technology does not allow the creation of complex original designs and ornaments - as a rule, it is monochromatic.
However, for residential premises, natural linoleum is an excellent floor covering, especially for bedrooms or children's rooms. But it is not recommended to place it in the kitchen or hallway.
- PVC-based linoleum is the undisputed leader among all other types of this coating. It is very diverse in its structure:
– It can be on a fabric basis (natural or synthetic) with a top, quite thick, up to 5 mm, layer of PVC.
— PVC linoleum is also produced on a non-woven, for example felt, base. It has significantly higher soundproofing and insulating qualities, but it cannot withstand humidity or intense loads. You can't put it in the kitchen or hallway.
— The most popular is linoleum on a foamed PVC backing. It not only withstands serious mechanical stress, but can even hide some minor defects in the floor surface.
Homogeneous homogeneous linoleum
PVC linoleum can be uniform throughout its entire thickness - then it is called homogeneous. It is not afraid of abrasion, but you cannot achieve variety in decorative design with it - usually these are monochromatic coatings with splashes of color. It is good for rooms with high traffic intensity and heavy loads. It can be placed in an apartment, for example, in the kitchen or hallway. True, the cost of such material is quite high.
Heterogeneous material has a rather complex structure
Heterogeneous linoleum has a complex multilayer structure. The quantity, component composition, and thickness of layers can vary, and the use of modern photo printing technologies as a decorative layer practically does not limit the design possibilities of this coating.
In general, PVC linoleum is most suitable for residential premises:
— It has excellent elasticity, and this greatly simplifies the process of laying it.
— The protective coating of the surface makes cleaning the premises a very simple task.
— The price range and variety of decorative designs can satisfy any buyer.
— If you purchase high-quality material from a well-known manufacturer that has received a certificate of hygienic compliance, then there will be no problems with the environmental friendliness of the material - it is completely harmless.
PVC linoleum also has certain disadvantages, and the main one is a fairly large coefficient of linear expansion. With significant temperature changes, it can go in waves, especially if it is not laid very carefully.
- Glyphthalic or alkyd linoleum is produced exclusively on a fabric basis. It is distinguished by excellent sound and thermal insulation qualities, it is durable and resistant to external loads. But there is no need to talk about thermal resistance - when temperatures drop, such a coating becomes brittle and inelastic.
Glyphthalic linoleum is no longer as popular as it used to be.
In addition, it is not as fire-safe as PVC. Laying such a coating requires highly qualified craftsmen. All this together predetermines the not so high popularity of alkyd linoleum, but it is still quite suitable for use in apartments. However, more often it is installed in public buildings or even in vehicles - buses, passenger cars, etc.
- You don’t need to dwell too much on colloxyl linoleum - its nitrocellulose base is an extremely dangerous material from a fire point of view, and such a coating is not used in residential or public buildings.
- Relin, a rubber-based linoleum, is also of little use in everyday life. Its scope of use is technical, warehouse, and production facilities. Despite its high performance characteristics, it cannot be laid in an apartment or residential building - it is not environmentally friendly and can emit fumes that are unsafe for the human body.
Classification by coating strength class
The material used to make linoleum is by no means the only selection criterion, since most mid-price models offered for sale are mainly PVC. But you need to pay special attention to the strength class of the material.
In everyday life, there is a well-established “colloquial” division of linoleum into household, semi-commercial and commercial. If we take a deeper approach, we should focus on the EN 685 classification adopted in the European Union. It clearly defines the permissible operational parameters of the material, and it is divided into several classes. There are also established pictographic symbols that directly indicate the purpose of the coating:
Pictograms indicating the class of flooring
The class of linoleum is indicated by a two-digit number. The first number indicates the main purpose of the coating, and the second indicates its resistance to dynamic load.
- Classes 21 to 23 – household linoleum, intended exclusively for residential buildings.
Its density is, according to existing standards, 1.25 ÷ 2.25 kg/m². The thickness is usually within 3 mm, water absorption should not be higher than 1.5%. The bending radius at which the integrity of the coating is not compromised is about 22.5 mm. Noise reduction ability is about 15 - 18 dB. The permissible level of shrinkage is about 0.2 mm per linear meter.
This linoleum usually does not have a very high price - the most expensive, from leading manufacturers, rarely costs more than 10 euros per square meter.
- Linoleum of classes 31 to 34, which is often called “semi-commercial”, is probably more appropriate to call “service” or “office”. It is also perfect for store floors.
It is thicker, stronger and even more elastic than household ones. It has higher sound insulation capabilities, resistance to abrasive loads, and temperature changes. The shrinkage of such linoleum is less - up to 0.1 mm per linear meter.
If earlier the improvement of performance qualities was carried out by reducing environmental properties, then modern semi-commercial linoleum in this matter is practically no different from household linoleum. Its price is slightly higher, but not so much that you cannot afford to purchase it for rooms with heavy traffic - for hallways, kitchens, balconies or loggias. Thus, classes 31 and 32 are quite often purchased for residential construction. The strength of classes 33 and 34 will be clearly excessive for an apartment.
- Material of classes 41 ÷ 43 is called commercial, although, of course, the name “industrial” is more suitable for it. It is intended for industrial enterprises, warehouses, assembly shops, workshops, etc. It makes no sense to use it in residential buildings - it will be too expensive, and the highest performance characteristics will simply remain unclaimed.
For greater clarity, it is worth giving a table that shows the main areas of application of linoleums in accordance with their classes:
| linoleum class | degree of wear resistance | general characteristics of the premises | optimal use in practice | |
| Living spaces | 21 | low | rooms with low traffic volume or rarely used | bedrooms, separate home offices |
| 22 | average | Apartment premises constantly used during the day with an average intensity of people movement | living rooms, children's rooms | |
| 23 | high | rooms with a pronounced load on the floors | hallways, kitchens | |
| office and public premises | 31 | low | room with low intensity of human flow | separate rooms in offices, hotel rooms |
| 32 | average | premises with constant but low-intensity movement of people | reception areas, offices, classrooms, small boutiques | |
| 33 | high | premises characterized by a constant flow of people | corridors of educational and medical institutions, public places, busy offices, shops | |
| 34 | very high | buildings with pronounced intensive movement of people | premises of airports and train stations, halls of large supermarkets, concert venues, etc. | |
| industrial premises | 41 | low | production premises where the technology provides for the sedentary work of people without their active movement and without the use of loading equipment or vehicles | shops or workshops for the production or repair of electronics, precision mechanics, laboratories |
| 42 | average | premises where work is carried out mainly while standing and the movement of specialized vehicles is allowed | assembly shops of electrical engineering enterprises, warehouses | |
| 43 | high | industrial premises with an increased level of load on the floors | large warehouses and logistics complexes, production workshops |
In many ways, the strength qualities of linoleum depend on the thickness of the protective transparent layer.
- With a thickness of up to 0.15, the material is suitable only for bedrooms or home offices.
- 0.20 mm - linoleum can be laid in the living room or children's room.
- The thickness of 0.25 mm makes the material suitable for kitchens, hallways, and passage corridors.
- A layer of 0.30 mm is usually used for linoleum, which is installed in office spaces with heavy traffic.
- A coating with a thickness of 0.50 mm and even higher is for rooms with very intense traffic or very high other mechanical load on the surface.
How to buy linoleum correctly
- Before you go to the store to buy material, you need to carefully measure the room in which the linoleum will be laid. You should be interested not only in the length and width of the room - all niches, doorways, difficult areas must be taken into account in order, if possible, to cover the covering with one sheet.
- The most reasonable solution would be to draw a diagram of the room - this will give maximum visibility of the front of future work. Perhaps there is no point in purchasing extra material if, for example, a deep niche requires a significant overconsumption of linoleum - it would be more profitable to make a joint between two sheets.
It’s also a good idea to check the perpendicularity of the walls - here you can also make a mistake when purchasing material. It is clear that you should purchase with a reasonable margin, about 100 mm in each direction, but with a large curvature of the walls, this precaution may not be enough. It’s better not to risk it, and also measure the room along two diagonals, comparing the results. If they are approximately equal, then there is no reason for great concern.
It is best to take this diagram with you to the store. In good salons, sellers will not only be able to help in selecting the required amount of material, but also make a pattern of the required fabric. By the way, it is quite possible that for a small room or for additional areas in the cabin there will be already cut fragments - they are usually given a significant discount. In any case, if several canvases are purchased, they must be from the same batch, otherwise there may be a noticeable difference in the saturation or brightness of the shade or pattern.
- Linoleum is produced in rolls ranging from 1.5 to 4 meters wide, and in most cases this is enough to cover a standard room with one sheet. If circumstances force the flooring to be made of two or more pieces, then it is wiser to make the joint parallel to the rays of natural light - from the window.
- When purchasing, you should not show unnecessary modesty - do not hesitate to ask for certificates proving the “branding” of the product and its compliance with hygienic standards.
- The cut piece must be rolled out to its full length in front of the buyer, so that the integrity of the coating can be checked.
- It is worth paying attention to the pictograms printed on the back of the material - they can tell about the features of this model:
| Applied pictogram | Special qualities of the material |
| Pronounced antistatic qualities of the coating | |
| High fire resistance | |
| Increased resistance to abrasion | |
| Resistance to surface scratching | |
| Anti-slip coating effect | |
| Linoleum is easy to clean | |
| The material has reinforced polyurethane outer protection | |
| Double base material | |
| Manufacturer-guaranteed service life subject to compliance with the rules of installation and operation of the coating | |
| The highest class of environmental friendliness - the presence of a “Leaf of Life” certificate |
- The purchased linoleum must be rolled into a cylindrical roll with smooth edges. No folding in half, quadruple, “envelope”, etc. not allowed. Before starting work, the roll is stored only in a vertical position. If you keep it horizontally on the floor, the roll will certainly jam into an ellipsoidal shape, and this will give difficult-to-smooth waves when laying.
- Before laying, linoleum should be stored only in a heated room, preferably in the same temperature and humidity conditions as in the installation room. No sheds, garages or balconies are allowed - if there is no storage space, there is no need to purchase the material in advance at all.
Find out what methods are used to clean stains on linoleum in our new article.
Prices for various types of linoleum
Linoleum
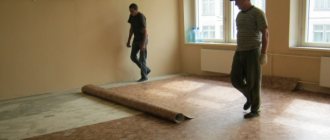
The process of laying linoleum with your own hands
Preparing the base
Any floor covering requires preparation of the base before work can begin. But while some materials can “forgive” minor imperfections in the base surface, this does not happen with linoleum. All, even the most seemingly insignificant flaws of a poorly prepared surface will inevitably be transmitted over time through the new coating, no matter how thick it may be. Neglecting preparation can render both monetary costs and all efforts made meaningless.
- If linoleum is planned to be laid on a concrete surface, then there should be no relief on it. All protrusions must be knocked down, all recesses, crevices, and cracks must be completely sealed with repair mortar, so that an almost ideal, flat surface is obtained.
Repairing the concrete base is a prerequisite for high-quality linoleum flooring.
Moreover, even too large a fraction of the concrete screed filler can spoil the appearance of the finishing coating. If you want to do everything perfectly, it is recommended to add a leveling screed using self-leveling building mixtures.
The finished concrete base is subjected to the most thorough cleaning, so that no small fragments or dust remain. It is impossible to do this manually - you will need a powerful vacuum cleaner.
In any case, after cleaning the concrete surface will require mandatory priming with a penetrating compound. The goal is to ensure good adhesion to the glue and completely eliminate such a characteristic phenomenon of concrete as the formation of dust. If this is not done, squeaks will soon appear, and dust will eventually begin to penetrate into the room.
- When laying linoleum on a wooden base, the problems are no less. The floor is checked for stability - there should be no unstable, “playing” areas. You may need to raise boards, repair or renew joists, or replace weak floorboards.
The wooden floor is subjected to a thorough inspection and, if necessary, repair.
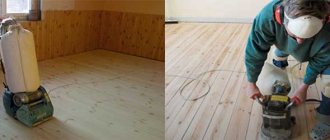
If you plan to lay it directly on the floorboards, then there should be no gaps between them - they should be sealed with inserts or thoroughly putty. Glue may not adhere to painted boards, and in addition, the paint may begin to peel off. The solution is to clean off the old coating using special washing liquids or by heating the surface with a hair dryer. Be sure to check that the heads of the nails do not rise above the surface anywhere - it is better to recess them and then seal the holes with putty. Ideally, it is best to go through a plank floor with a sanding machine.
It is best to level the old wooden covering and reinforce it with plywood
Another option is to cover the old wood floor with plywood. The sheets are laid staggered on glue and fixed with self-tapping screws at intervals of 100 mm. The heads of the screws must be recessed into the material - then they, as well as the remaining gaps between the sheets, are tightly sealed with putty. After the putty has hardened, the surface can be sanded using a belt or disk machine, or even manually.
- You can often hear the question - is it possible to lay new linoleum on old? In principle, of course, this is quite acceptable - this will make the coating even warmer and “quieter.” But, firstly, if both lay on too thick linoleum, then the overall coating will be excessively dented under mechanical influence. And secondly, the new coating will exactly repeat all the flaws of the previous one, if any. This means that this approach is acceptable only if the old linoleum did not have surface defects (with the exception of an erased or faded pattern).
However, most craftsmen are unanimous in the opinion that for high-quality linoleum flooring, it is still better to dismantle the old coating.
Once the base is completely prepared, you can proceed directly to installation.
How to lay linoleum correctly - several options
First of all, in the room where installation is carried out, optimal temperature and humidity conditions must be created. You should not start work if the temperature in the room is below + 15° C, since the material will not have the required elasticity, and may ripple when the temperature rises. Excessive heat is also undesirable, above 30 - 35 ° C - a sheet fitted in such conditions can subsequently shrink so much that it comes out from under the baseboards or causes delamination of welds.
This is the result of neglecting the basic rules of laying linoleum
The roll must be “acclimatized” in the room where it will be laid - stay in it for at least 2 ÷ 3 days so that the material is equal in temperature and humidity to the conditions of the room.
The next step is to roll out the roll on the floor surface. As we remember, linoleum was purchased with a length reserve of at least 100 mm. This “reserve” is temporarily left by the allowance on the walls of the room. True, here you also need to know when to stop. If, for example, with a room width of 3.2 meters, a 4-meter sheet was purchased, then leaving 300 - 400 mm on the walls on each side is not worth it - this will interfere with the normal straightening of the linoleum. A certain part should be removed, leaving about 80 ÷ 100 mm on the walls.
If there are two adjacent walls in the room - even throughout, without heating pipes, protrusions, niches and other obstacles, then you can roll out the sheet with support on them. Only in this case, a gap of about 10 mm from the wall must be left - under no circumstances should the linoleum rest against an obstacle, this will prevent it from taking its normal shape.
Linoleum should rest and completely straighten out.
The period of “aging” of linoleum may vary, but not less than 1-2 days. The duration depends on the specific room conditions, the type and thickness of the material, the degree of its wrinkles and other factors. The main thing is that the main task is achieved - the sheet is completely stretched, straightened, all the waves are straightened. Sometimes you can “help” him a little - for example, by pressing down particularly protruding irregularities with wide boards or other weights with a flat surface. But heating linoleum with a hairdryer is extremely dangerous: with one awkward movement you can overheat and melt the protective layer, and the coating will be irrevocably damaged.
If the installation involves the use of two sheets, then during the initial laying it is necessary to consider the matching of the pattern (if required) and also to leave a small overlap, up to 100 mm - here the finishing trimming of the mating fragments will then be carried out.
After the sheet has completely rested, they move on to what is probably the most important stage - the final trimming of the resting linoleum to the size of the room. It is at this stage that he makes more mistakes.
Trimming and fitting is the most critical stage
There should be one principle - a small compensation gap must be left along the walls, about 8 ÷ 10 mm. In principle, this is the main difficulty - linoleum resting against the wall can subsequently give rise to a wave, and too large a gap or, for example, a crooked cut due to a trembling hand will look out from under the baseboard.
First of all, you need to trim the sheet correctly at the corners. First, release the outer corners, if any. In internal trimming, it is best to do two neat cuts diagonally with a sharp construction knife - this will free up both surfaces adjacent to the walls, and it will be easier to trim them evenly.
Rushing during the pruning process is absolutely unacceptable.
The allowances left along the walls are pressed as close as possible to the corners - this way you can achieve a visible cutting line. Some craftsmen prefer to draw a line with a marker - this is a matter of habit. But everyone is united in one thing - you should not drag the “tail” of a long cut strip along with you - it is better to remove the excess in small sections, 250 - 300 mm each. Rush in this matter is completely unacceptable - it is better to spend a little more time than to spoil the material. To achieve an even cut, you can use a long steel or wooden ruler, or even a wide, about 500 mm, spatula. And one more thing - the knife should always be as sharp as possible - do not forget to change or break off the replacement blade more often.
Video: possible mistakes when fitting and laying linoleum
If this stage went well, we can say that the hardest part is over. All that remains is to fix the linoleum on the floor surface. They do this in several ways.
1. Very often, linoleum is not attached to the surface at all, except by pressing it along the perimeter of the room with baseboards or transition strips (thresholds). It is better to use flexible plastic skirting boards - they will press the material well and hide possible irregularities. They are attached exclusively to the wall (in no case to the floor), using self-tapping dowels or special brackets included in the delivery set.
The positive qualities of this approach are speed and no need for additional materials. The main disadvantage is the remaining instability of the coating. If by chance the linoleum is moved even a little (for example, when rearranging furniture), it will be extremely difficult to remove the wave, and perhaps even impossible without completely lifting the entire flooring.
2. Laying linoleum with double-sided tape. In this case, the adhesive tape is glued to the prepared base in advance without removing the top protective film. The place where adhesive tape must be placed is around the perimeter, at the joints of individual fragments; you can arbitrarily add several strips in the center of the room.
Gluing linoleum with double-sided tape
After the linoleum has rested and straightened out and been trimmed, all that remains is to lift it in the places where the tape is glued to the base, remove the protective film, and put the covering back in place - it should stick securely to the floor.
3. And most craftsmen consider laying linoleum with glue to be the optimal method. There are always many varieties of such compositions on sale, intended specifically for PVC products. It is quite possible to use the usual PVA.
Adhesive for laying linoleum
- To apply the glue, a section of linoleum is folded inside out. The glue is usually applied with a spatula, spreading evenly over the surface.
Applying glue to the floor surface
- Then a coating is laid on the coated area, ensuring that air bubbles are completely released, so that the linoleum is completely adjacent to the base. For these purposes, you can use a homemade smoothing iron - a flat bar or board covered with soft fabric. Air acceleration is carried out from . If you have a heavy roller, rolling it will give the best results.
If you have a heavy roller, the work will be much easier
- After this, they move to the opposite area, where the procedure is completely repeated. The linoleum is bent outwards to the already glued area, glue is applied and the air is expelled.
In rooms with a large area, you can do it differently - after trimming, the linoleum, carefully so that there is no displacement in direction, is freely, without tension, rolled to one side into a roll. Gluing begins with a small area from the wall. Then they go from the laid fragment in the opposite direction, sequentially coating the base with glue and unwinding the roll.
An important feature is that after laying linoleum on glue, movement on the floor should be limited or even completely eliminated until the composition has completely dried.
This scheme can be useful for a novice master
Flooring adhesive prices
Flooring adhesive
What to do with joints
If you had to lay linoleum in two or more fragments, then the problem will inevitably arise of how to smoothly and correctly fasten the joint between adjacent sheets. Often, a craftsman who welds such a coating and has the appropriate equipment is invited for this purpose. However, it is quite possible to make a strong connection yourself.
As already mentioned, adjacent sheets are laid overlapping - this will allow you to make a perfectly even joint.
- If linoleum is laid on concrete, then a spacer made of thin plywood or thick cardboard should be laid at the bottom of the cut. With a plywood subfloor this will not be necessary.
- But a ruler fits the intended line. Using a sharp knife, make a cut along it so that both sheets of linoleum are cut simultaneously.
Cutting two adjacent sheets of linoleum
- The swatches are removed, both from above and below, and the sheets must match perfectly. Now you need to fix them in this position. Initially, this can be done with the same double-sided tape, but you cannot leave it like that - such a connection will not last long.
This measure is only good for temporarily fixing the joint.
The best option is to use the so-called “cold welding” technology. To do this, you need to purchase special glue and regular masking tape.
Using this glue you can make a strong and even joint between linoleum sheets
Video: “cold welding” of laid linoleum joints
- A strip of masking tape is glued along the entire length of the joint. Then a neat cut is made in it with a knife, right at the site of the future seam.
- A narrow nozzle is put on the tube. Then the glue is carefully squeezed into the cut slot - it will go exactly where it is needed and securely connect the two sheets with an almost imperceptible seam.
Applying “cold welding” exactly along the seam
- After the time specified in the instructions for using the glue has passed, the masking tape can be removed. The seam is checked and, if necessary, minor defects are eliminated or drips are cut off. Such a seam should last a very long time. The only condition is that such “cold welding” is carried out no earlier than one day after laying the linoleum.
Here, perhaps, are all the main secrets of independent linoleum flooring. If the owner of the apartment is willing and careful, the process is not at all something unimaginably complex and difficult to accomplish. Good luck with your work!
Video: visual lesson on laying linoleum
Prepare the linoleum
shkolapola.club
Bring the purchased roll indoors. Unroll and leave on the floor for about a day to allow the material to level out.
During the cold season, purchased linoleum cannot be rolled out immediately. A frozen coating becomes brittle and can break at the bends. To avoid this, let the material sit for about 12 hours and warm up to room temperature.
What to glue
To understand the best way to glue a specific type of linoleum to the floor, it will be useful to know the compositions of fixing mixtures and the mechanism of their action.
Water-dispersion adhesives
Dispersion adhesive contains water-insoluble inclusions of tiny particles of adhesive resins. In solution they are contained in the form of suspensions. The consistency of such glue can be from liquid to paste.
The main performance properties of water-dispersion adhesive compositions for linoleum:
- viscosity - 25000-40000 mPa s (milipascal second);
- Viability in the open state is 10-60 hours.
To work with linoleum, three types of glue are mainly used:
- Bustilat.
- Acrylic glue.
- Gumilax.
Bustilat is a long-liver in the construction market, but until now, it is universally in demand.
Bustylate glue
It is based on a polymer thermoplastic resin. The additives used are latex, chalk and carboxymethylcellulose (CMC), which forms the viscosity of the solution. High viscosity is a feature of this composition.
Characteristics of bustylate:
- application layer depending on the base - 3-7 mm;
- glue consumption - 400-600 g/m2;
- The total drying time under the flooring is 72 hours.
This adhesive is applicable to almost all types of rolled floor coverings and insulating underlays in medium- and high-traffic areas.
Acrylic glue
This type of glue is a mixture of acrylic resins and various additives. It contains no toxic or pungent odor-emitting inorganic solvents.
Glue characteristics:
- application layer thickness - 3-6 mm;
- glue consumption - 250-300 g/m2;
- Complete drying time - up to two days
After applying the acrylic composition to the surfaces to be glued, you must wait 15-20 minutes until they are firmly connected.
Acrylic adhesive Carpet
, commercial and household linoleum can be laid on acrylate in rooms with high loads.
Humilax is a viscous pasty mass. The main components of the composition are rubber and latex.
Characteristics of Humilax:
- application layer - 1-2 mm;
- consumption - 200-300 g/m2;
- Setting time: 72 hours.
The paste is used mainly with marmoleum and other natural coatings. The composition also works well with felt and fabric bases.
Mastic
The main types of adhesive mastics for linoleum:
- bitumen-rosin;
- bitumen-latex;
- bitumen-rubber.
All types of coatings can be glued to mastics, but there are preferences. So, the first two compositions fix PVC linoleum well to a wooden base and concrete. Rubber-bitumen mastic is quite suitable for fabric-based coatings.
Mastics for linoleum
Properties of mastics:
- application layer - 3-4 mm;
- consumption - 100-200 g/m2;
- gluing time - 24 hours.
Attention! The downside of some mastics is the long time it takes to gain strength until the flooring is completely ready for use. Therefore, it is advisable to avoid heavy loads on the coating for 7-10 days.
Reactive polymer mixtures
Reaction adhesive is a complex chemical substance that includes polyurethane and epoxy resin. When it is combined with the linoleum base, a chemical reaction occurs, which results in the creation of a durable intermediate layer. This connection is called cold welding.
Cold welding
Due to the rigid adhesion, the floor covering acquires useful qualities:
- water resistance;
- resistance to loads;
- durability.
Reaction-polymer mixtures used to work with linoleum may differ in consistency, depending on the purpose of application.
This glue has an advantage over other compounds in terms of adhesive strength, but it is also more expensive. Therefore, its main use is fixing linoleum joints.
Carefully! Reaction adhesives, as well as compositions based on synthetic resins and rubbers, are flammable and even explosive!
Select installation method
Laying with double-sided tape is one of the most common options / ksv.org.ru
Depending on the area of the room, linoleum is laid without any fastening to the floor or fixed with double-sided tape or special glue. Each option has its own advantages and disadvantages.
- Without fixation is the simplest method. Suitable for rooms up to 12 m² with low traffic. The downside is the risk of waves and folds.
- Double-sided tape is a quick and reliable method of fastening. Used in rooms from 12 to 20 m² with average traffic. Reduces the likelihood of waves and makes it easy to remove old linoleum.
- On glue - the most labor-intensive, but also the most reliable option. It is used in large rooms from 20 m² with high traffic. The only disadvantage is the difficulty of dismantling.
At home, as a rule, laying linoleum without fixing is used, when it is held only by the baseboards around the perimeter, or a method with fastening with double-sided tape. Special adhesives are used less frequently.
Requirements for the base for laying linoleum
Linoleum is a flooring material that is not only practical, but can also be used for installation in any room and on any surface. There are practically no restrictions on the flooring of this covering - it can be laid on wood, concrete, and old coverings of various types.
Structure of synthetic linoleum
Pros and cons of linoleum
Table. Possible types of bases and recommendations for laying the material.
| Base type | Recommendations |
| Concrete base | As a rule, concrete floors are a regular cement-sand screed. If it is done correctly, it is already a fairly smooth type of subfloor. The main thing is that there are no dents, potholes, or protrusions on the screed. If a new screed was poured, then it is important to wait until it is completely dry (28 days). Linoleum can be laid directly on such a base. For softness, you can put a special backing underneath it. A self-leveling mixture will help make such a base perfectly even. |
| Plywood | A great way to make your floors even. The material can be laid on joists or directly on top of the old wooden floor, depending on its condition. Laying linoleum on plywood floors is easy, and it lays very smoothly. It is recommended to use mastic with waterproofing properties as an adhesive so that the plywood is not afraid of moisture and does not deform. |
| Wooden floorboards | If linoleum will be laid on such a base, then it is recommended to first putty and sand the plank floor in order to remove the gaps between the boards and obtain a perfectly flat surface. The nails or screws that secure the boards to the base should be sunk into the wood as much as possible, otherwise their heads will protrude and leave marks on the linoleum. It is also important to make sure that all floorboards are intact, strong and well secured to the joists and do not “walk”. |
| Old linoleum | Laying new linoleum on old can be done if the coating, which has already been used, is in relatively good condition - not worn out, not damaged, and well fixed. |
| Self-leveling mixture | An excellent option for laying linoleum, since such mixtures usually create a perfectly flat surface. By the way, it is on this subfloor that absolutely any finishing finishing material for the floor can be laid. |
| Tile | Linoleum can even be laid on old tiles without removing them. The main thing is that it is smooth, intact, and all the tiles are in place. To fix the linoleum on the surface of the tile with glue, you will have to sand the tile a little and make shallow cuts on it - this will increase the tenacity. |
The most important thing to remember about the base for linoleum is that it should be as even as possible. This type of coating is soft, flexible, easily takes on different shapes, and all surface irregularities will be immediately felt and appear on it. It is also important that the base is clean and dry. If the subfloor is wet, then due to the characteristics of linoleum - it is not a breathable coating - mold may form under the material.
If installed correctly, the wooden base will not creak or “walk” underfoot while moving around the room
Attention! Linoleum cannot be laid on carpet. It will sag greatly, furniture legs will easily leave dents that may not even out, even if a heavy piece of furniture is moved to another place. In this case, if you do not want to remove the carpet, you can cover it with sheets of plywood. This method will improve the thermal insulation qualities of the floor, and extraneous noise will not penetrate through such a layer of materials.
Schematic illustration of laying linoleum on top of an IR heated floor
Lay linoleum
market.kz
- Spread the coating on the floor and distribute it in such a way as to align the canvas along one of the corners of the room, and leave a margin of 5-10 cm around the perimeter on the remaining walls. It’s better to lay it out along the longest wall, so you’ll have to cut less.
- Consider allowances for niches near windows and doorways. Measure linoleum from them, and not from the edges of the walls.
- If there is a pattern, align the material so that the pattern runs along the walls without distortion.
Calculation of material and first laying of linoleum
You should purchase linoleum in the required quantity, which will be equal to the area of the room being decorated with a small margin added to the value (about 10%, 10-20 cm on each side of the measured piece). It’s easy to find out the area of the room - measure the length and width of the walls with a tape measure, and multiply the values.
Attention! The calculation of the area must be made taking into account all the niches and gaps that are in the room.
It is important to remember that the walls in a room may be uneven - in fact, in rare cases, rooms have ideal geometry. All these nuances must be taken into account when calculating the amount of coverage.
Calculation of room area
Also, the store immediately purchases the missing tools and adhesive composition (for the adhesive installation method). If the linoleum will be fixed with skirting boards, then they will also be purchased immediately. The color should be in harmony with the topcoat and other elements of the interior design. To join linoleum between two rooms, thresholds are purchased, which can be made of wood, aluminum and other materials.
Calculator for calculating the area of a quadrangular room
Go to calculations
Cut out the linoleum
remoo.ru
Using a sharp utility knife or large scissors, adjust the dimensions of the canvas so that there is a gap of 5–10 mm at the perimeter walls. It will allow the linoleum to straighten out and at the same time be hidden by the baseboard.
To avoid mistakes, make adjustments in several passes, separating the material in small strips. For more precise cutting, mark and cut the fabric along the squares and lines on the reverse side.
How to join an internal corner
- Fold the canvas, making a fold of linoleum, and cut it first at one and then at the second wall. Separate a little at a time and repeat the procedure until you get the desired gap.
- If the seam allowances are large, cut the fabric slightly in the corner to fold in the loose ends and create a more even fold.
How to join an external corner
- Straighten the linoleum by rolling the loose piece onto the wall. Step on the lower part with your foot, pressing the material as far as possible against the wall, and make a mark on the edge of the canvas opposite the protruding part of the corner.
- Fold the covering, bring the fold as close as possible to the edge of the corner at floor level and mark with a pencil.
- Connect both marks by drawing a line between them and cut the linoleum along it.
- Fold the resulting flaps on both sides one by one and make marks along the walls to create cutting lines.
How to make a connection to pipes
- Attach the canvas to the pipe. Make a pencil stroke on the back side to mark the cutting line, or immediately cut the linoleum vertically with a knife.
- Press the cut pieces against the pipe and gradually cut 5–10 mm along the contour until you get a hole of the desired diameter.
- If necessary, unscrew the fabric and use scissors for a more precise fit.
How to make an adjoining door frame
- Wrap the free part of the canvas onto the wall and press it with your foot in the baseboard area.
- Make marks on the underside to create a cutting line, or immediately cut the linoleum with a knife from the edge of the canvas to the floor.
- Lower the separated flap towards the door and trim the second part along the wall.
- Do not try to cut the canvas in one go. Leave small allowances and gradually adjust the coating along the contour of the wall to achieve a gap of 5–10 mm.
How to glue correctly: step-by-step instructions
Laying linoleum with glue in a room being renovated or a house under construction is carried out upon completion of all finishing work. General requirements for such premises:
- air temperature not lower than 15°C;
- humidity of the base base: concrete - less than 5%, wood - up to 10%.
Before starting work, you should make the correct calculation of the material based on the area of the room.
Calculation of the amount of material
This is necessary in order to know how much material is needed and determine the locations of the joints of the canvases.
Preparing the base floor
A common mistake made by some “masters” is the desire to lay linoleum on any, even unprepared, surface, hiding its imperfections. But you need to remember that the technology for installing linoleum using glue on any type of subfloor requires preparation of the base.
It is believed that the best base floor option for linoleum is a concrete screed. It is a solution of sifted river sand and cement (1 part of cement + 2.5-3 parts of sand).
Before gluing any linoleum to a concrete base, you need to assess the condition of the screed to ensure there are no defects critical for laying the sheets. These include:
- open cracks;
- potholes;
- detachment of the upper cement layer;
- increased base moisture.
To increase the adhesive effect, the concrete base is primed.
One of the ways to install linoleum on concrete is to use a self-leveling self-leveling mixture.
Self-leveling screed device
Self-leveling forms a strong and level base for adhesive flooring. This option is simple to implement, and the resulting surface can be ready for laying the final floor.
The algorithm for preparing a wooden base for linoleum is as follows:
- Defect the floor and, if necessary, strengthen all wooden elements with nails or screws.
- Sink and fill the fastener heads.
- Use a plane or sander to remove any protruding irregularities.
- Fix all large cracks in the wood and gaps between the boards with putty.
- If necessary, scrape the surface.
- Remove all debris, dust and wash the floor clean.
In case of obvious and irreparable defects of the wooden floor, additional flooring made of multi-layer plywood, fiberboard sheets or OSB boards is laid on top of the boards.
A more modern material used to prepare any base floor for linoleum is gypsum fiber sheet (GVL).
GVL for flooring
This is a homogeneous material with high density and has significant advantages over flooring made from other materials - moisture resistance, environmental friendliness, heat and sound insulation.
The final stage of preparing any base floor is checking and eliminating possible defects at the junctions of the floor and walls. All cracks must be plastered or foamed.
Linoleum fitting
Before adjusting the linoleum, you need to decide where to start laying the first sheet - from one of the walls or from the center. But it should be remembered that a joining seam in the center of the room will not add aesthetics to the room.
There are basic rules for fitting linoleum:
- If the pattern of the canvas requires selection, then the material is cut taking into account the coincidence of the pattern, shifting the next sheet relative to the previous one.
- For complex configurations of protruding structures and recesses, cardboard patterns are made, according to which cutouts are made on the canvas.
- The first panel is laid against the wall with a gap of 5 mm.
- Each subsequent sheet fits tightly with the one already laid.
- The last canvas is overlapped onto the wall and trimmed.
Wall overlap and trimming
Fitting the panels to the wall is an important step and precise trimming requires some skill. Therefore, it is advisable to practice this procedure a little on scraps of material.
Two methods of cutting linoleum are shown in the video
Trimming linoleum
Gluing
The step-by-step process of gluing the canvases looks like this:
- Taking into account the recommendations of the instructions for the adhesive composition, apply it evenly to the base.
- Press the linoleum and roll it.
Attention! It is necessary to prevent movement on the coating until the period recommended by the manufacturer for the adhesive surface to be completely ready for use.
How to glue the edge
The most effective and easy-to-use method of fixing sheets at joints is cold welding.
Joining a seam using cold welding
The algorithm for working with joints is as follows:
- thoroughly vacuum the edges of the canvas;
- to protect the joints from melting, seal them with masking tape;
- cut the tape along the seam;
- Having immersed the needle of the tube as deeply as possible into the seam, begin to lay glue into it so that no more than 3 mm of the reagent remains above the surface;
- After 15-20 minutes, remove the tape.
Carefully! When using reaction compositions, safety precautions must be observed.
PPE for working with reaction mixtures
You should wear gloves and safety glasses, the room should be ventilated.
Secure the linoleum
Fastening commercial linoleum with glue / stroimass.com
If you are laying the coating without additional fixation, proceed to the next step.
How to secure linoleum with double-sided tape
- Wrap one half of the sheet up to the middle of the room and vacuum the floor.
- Apply strips of double-sided tape in increments of 70–100 cm. Smooth the tape well with your hands or a paint roller.
- Remove the protective film from the top.
- Carefully spread the linoleum, returning it to its intended place.
- Repeat the procedure for the second half of the canvas.
How to fix linoleum with glue
- Wrap some of the material and fold it in half.
- Degrease the floor and apply adhesive appropriate to the type of surface.
- Straighten the canvas and level it. Roll out the linoleum well with a roller to remove any possible wrinkles.
Laying linoleum on any type of floor
- On glue. The most popular and easiest option for installing flooring. The glue is distributed over the entire surface of the canvas, and gluing is carried out overlapping, after which the material is left to dry for 72 hours, during which it is prohibited to walk on the canvas.
- Dry. to lay linoleum dry in small rooms, for example, in a bathroom, hallway, or partition. In this case, to secure the material, nails, screws and other fasteners are used, which are selected for the surface material.
- For mastic. A more complex and expensive method that involves preliminary priming of floors using several types of mastic.
Weld the seams
Glue with a needle nose for cold welding linoleum / rmnt.ru
If you are laying a whole piece of linoleum, proceed to the next step.
When the canvas consists of several pieces, they need to be connected to each other. This is done with a special soldering iron or using glue. The second option is simpler and does not require additional equipment, so let’s consider it.
- To get a perfectly even joint, place one piece of linoleum on the second with an overlap of 3–5 cm.
- Press down with a rule or a metal ruler in the middle and at the same time cut through both pieces with a sharp knife in one go.
- Remove the separated flaps and place double-sided tape on the floor exactly in the middle of the seam. Remove the protective film and connect the ends of the sheets, fixing them.
- Place masking tape over the joint and then carefully cut through it with a sharp knife.
- Insert the nozzle of the glue tube into the seam and run along the joint. Hold the tube with one hand and press on it with the other so that a strip of glue about 5 mm wide forms on the tape.
- Wait 10 minutes for the glue to harden and carefully remove the masking tape.
How to install on wood
Of course, you can entrust this work to specialists, but why spend money if you can lay linoleum yourself? With the right approach to business, you can transform the floor beyond recognition and get emotional pleasure from this process. Conventionally, the process of laying a floor can be divided into three stages: preparing the floor, tools and laying itself. Let's consider all these stages separately.
Stage No1. Floor preparation
It is necessary to strengthen the flooring in those rooms where the floor is plank. Working with a weak or moving base can lead to subsequent deformation of the coating. To avoid this, experts recommend taking precautions. You need to lay the plywood on the plank flooring, after which it is fixed with self-tapping screws. As a result, you should have a perfectly level base. Make sure that the upper parts of the screws (caps) do not protrude.
We remove the baseboards and inspect the condition of the floor
Sawing plywood
Only saw plywood on a rigid base
Laying plywood sheets
Fixing the sheet
Leave a gap between the wall and the plywood
The best base for laying linoleum is concrete, but the labor intensity of the process does not depend on this - you still have to work hard. Check the base for unevenness or slope. To do this, use a building level. If the floor is curved, you need to level it by making a screed. To do this, it is enough to fill the base with sand-cement mixture to a depth of 5-7 cm. Then apply the finishing screed. This will make the floor as level as possible, so there is no need to return to this issue anymore.
Another good thing about a concrete floor is that if after a few years you want to remove the old linoleum and lay down another floor covering, a strong and reliable base will allow you to do this.
Installation of concrete screed on beacons and without them
Stage No2. Required Tools
To quickly and efficiently lay linoleum, you need to take care of the following tools:
- roller;
- tape (preferably double-sided);
- glue;
- scissors;
- stationery knife;
- putty knife.
Tools for linoleum flooring
Having prepared everything you need for work, as well as counting and purchasing the required number of linoleum rolls, you can begin laying. If you strictly follow the instructions, this process will not seem very difficult. The main thing is perseverance, desire and hard work.
Prices for double-sided tape
Double-sided tape
Stage No3. Laying
As soon as you deliver the linoleum, let it sit for a while in room conditions. Many manufacturers recommend following a certain styling regime (air humidity 60-70%, and temperature from 18 degrees). Failure to comply with these requirements may lead to deformation of the linoleum.
Sequence of laying linoleum
There is one more nuance. Before laying linoleum, you need to unroll it on the floor and let it lie for 24 hours. This will allow the material to level out so it can take the shape of the coating. This procedure can make the work process easier. Next, you should follow the step-by-step instructions below.
Step 1. Using a tape measure, measure the length and width of the room, taking into account all doorways. Add about 7-8 cm to the resulting dimensions. This type of tempering is done for the curvature of the walls.
First, all necessary measurements are taken
Step 2. Cut the desired piece of linoleum. To get an even cut, you need to cut along a ruler, as shown in the photo.
Cutting linoleum
Step 3. If there is a flat wall in the room, then linoleum can be laid flush with it, close to it or with a slight gap. The excess part will be cut off.
It is recommended to lay linoleum along a flat wall
Step 4. Before installing linoleum on the wall, you need to secure the canvases so that when trimming they do not converge and do not move in one direction or another. To do this, place double-sided tape on the floor.
Gluing double-sided tape
Step 5. At the junction of the canvases, make adjustments to the drawings. Roll out the second roll of linoleum from the side of the joint, making an overlap between the sheets by 2-3 cm. Make sure that the pattern of one part of the linoleum matches the pattern on the second piece.
The pictures must match
Step 6. Trim the linoleum after fixing it to the base. Cut off the material a little at a time so as not to spoil it (cutting linoleum is easy, but adding it will be problematic).
Trimming linoleum along the wall
Step 7. Using a spatula, apply glue to the base. It is better to start application from the joint. To see the boundary of the glue application, use a pencil to draw a line along the base.
Applying glue to the base
Step 8. Carefully roll out the linoleum, leaving no air under the sheet. After this, you can make the final trim at the junction of the linoleum. After this, the joint also needs to be rolled. The main work on laying the linoleum has been completed; all that remains is to install the joining profile after the glue has dried.
Rolling linoleum
All air must be removed from under the linoleum
Prices for popular types of linoleum adhesives
linoleum glue
Mount the thresholds
Attaching an aluminum threshold to dowels / o-remonte.com
They are needed to fix the edge of the linoleum at the doorway. There are different thresholds, and in addition to their appearance, they differ only in the type of fastening. Some are held on through dowels, others on hidden ones. There are thresholds with a special mortgage, which is fixed with a latch, as well as completely self-adhesive options.
The nuances of installing one type of threshold or another are always indicated on the packaging. In general, the procedure is as follows:
- Measure the required length of the threshold and cut off the excess part.
- Distribute the fasteners evenly across the entire width of the opening.
- Drill holes using a hammer drill or hammer according to the marks.
- Secure the threshold - all the way through, inserting screws into the groove or through the mortgage.
- If the fastener is not through, tap the threshold through a soft guide until it is completely seated.
Choosing linoleum for a wooden base
When choosing a material, you need to pay attention to several parameters:
- performance;
- softness and elasticity;
- appearance.
The coating must have good heat and sound insulation properties, not be afraid of moisture and have a high level of wear resistance. It is also important that it harmoniously combines with the overall design and style of the room.
The choice of linoleum for a wooden base is wide:
- With fabric base. Has 2 layers: upper protective and lower. It is recommended for use in residential premises.
- On a polyvinyl chloride base (PVC linoleum). It is considered the most suitable coating for wood. It can be laid in any room.
- Alkyd. It consists of resins combined with mineral substances and has a low level of plasticity, which is why it often becomes covered with cracks and creases during operation.
- Four-layer foam. Due to its strength and durability, the material is suitable for use in areas with high traffic or high humidity levels.
- Based on sound and heat insulating materials. The top layer is PVC film, the bottom layer is felt or foam. Such linoleum is not cheap, however, according to many builders, this is the best option for apartments and houses.
- No basis. It is characterized by a homogeneous structure, resistance to abrasion and moisture.
- Natural. The coating is based on wood flour, linseed oil, cork chips and other substances. This is the most environmentally friendly material that does not emit harmful substances.
- Colloxylline linoleum. It is made on the basis of nitrocellulose. The material is known for its flexibility, fire safety and unusual shine.
Install skirting boards
Drilling holes for dowels / domsdelat.ru
The final touch is the baseboards. They also come in different variations: plastic, MDF or wood. The most common are PVC skirting boards with a cable duct inside. This finish is practical, affordable and looks good.
Installation of all skirting boards is carried out approximately as follows:
- Measure all sections of the wall and cut the required pieces of baseboards.
- Using a hammer drill or drill, drill holes in the wall directly through the baseboard at a distance of 50–60 cm. If mounting brackets are used, install them in the same way.
- Route the cables and put on the corners.
- If the length is large, join the strips with special connecting inserts.
- Install plugs if provided by the design.
Price for laying linoleum in Moscow
The price of laying linoleum per square meter is indicated in the price list on our website. The final cost is announced by our master after assessing the field of work and drawing up a detailed estimate.
The cost of laying linoleum per square meter depends on:
- Type of selected coating;
- Floor materials: concrete, wood, plywood;
- Dimensions of the room;
- The need to select a complex pattern;
- Master qualifications;
- Time spent
If you want to find out how much it costs to lay linoleum in Moscow from our company, then just call the contact number on the website and our consultants will help with preliminary calculations and also send a specialist to you. We travel anywhere in Moscow absolutely free of charge.
How to properly prepare different types of surfaces for laying linoleum with your own hands?
Surfaces made of wood materials - planks or parquet
Is it possible to install the coating on wooden surfaces without fear of the wood underneath rotting? It is possible if the base is dry, without signs of mold infection.
Before laying linoleum, carry out the following work:
- Using a sanding machine, all irregularities and sagging old paint are removed.
- If there are areas with signs of rotting, they must be removed.
- Depressions and crevices are sealed with elastic putty intended for wood.
- For reliability, the surface can be treated with an antiseptic composition.
- If the wooden base is severely damaged, then its repair is a long and labor-intensive undertaking. In this case, it is advisable to consider the option of leveling the base surface using plywood (preferably moisture-resistant) or OSB (oriented strand board).
Preparing a wooden floor for laying linoleum - sanding
To prevent water from getting onto the wooden base through the baseboards, the edges of the panel are glued with self-adhesive sealing tape.
Rough concrete floor
One of the options for obtaining a level base is to lay wood boards with preliminary laying of a vapor barrier underlay. You can level a concrete floor by making a cement-sand screed.
Old carpet or linoleum flooring
The carpet is removed before laying new material. If the linoleum flooring is in good condition, it can be left. A necessary measure is degreasing the entire surface. Many experts consider laying new roll material over old material to be an undesirable option. This is explained by the fact that between the new and old coating there is a gap into which moisture can penetrate, causing the appearance of mold and fungi. It is also a great place for insects to breed.
Old ceramic tiles
Installation of a new roll sheet on an old tile is possible only if several conditions are met:
- the tile must be intact;
- linoleum should be thick, multi-layered.
Linoleum flooring
The whole process will take a couple of days. But first, to prevent possible questions, let’s clarify some points, in particular:
See also: Laying tiles with your own hands
— The need to glue linoleum is due to high traffic in the room and improper preparation of the base. In our case, gluing linoleum is not necessary at all. And that's why. In an apartment, traffic is not even taken into account; this is not a place of public access. Guests will come several times a year, neighbors will come by several times a week. Such cross-country ability is not considered. And with proper preparation of the base, the slope of the floor will be leveled. This criterion is more significant. After all, linoleum is a soft coating, and during operation, on a sloping surface, a phenomenon called “sliding” can be observed. Which leads to the formation of swelling.
— Tracking of linoleum cannot be accelerated. At normal room temperature, this process takes 24-36 hours.
— All materials are subject to temperature deformation. Therefore, a gap of 5-8 mm between the canvas and the wall is necessary.
Now you can start laying. But first, prepare your tools:
- Knife for linoleum (you can get by with a construction knife);
- Roulette;
- Pencil or marker;
- Double-sided tape;
- Square;
Work progress:
- Linoleum should be at room temperature. It is rolled out in the room so that it fits tightly against two walls. Thus, there is no need to trim it on these sides. After this, the material is left in this position for a day.
- After 24 hours, you can start pruning. Before doing this, adjust the two smooth sides again so that there is a gap of 5-8 mm thick between the floor covering and the wall. The most convenient way to control this is with a small piece of plywood of the required thickness.
Pruning is carried out by moving the knife towards you. This allows you to avoid sweeping movements and prevents the occurrence of incorrect cuts. Many soft floor coverings have a grid on the back side. If you follow it, the cutting will be perfectly even.
Getting around protruding corners does not cause any difficulties. It’s a little more difficult with niches in the walls. To accurately fit the material into such a niche, it is necessary to trim it on both sides of the entrance. Then make a strict vertical cut.
A special case is the joining of two canvases. Regardless of whether the pattern is large or small, it is necessary to combine the canvases by laying them overlapping. After this, both canvases are cut simultaneously. It is best to do this using a ruler or rule.
The cut off parts are removed. And then, exactly under the point of contact of the canvases, double-sided tape is glued to the base, rolled with a paint roller, the protective coating is removed and linoleum is laid. For an apartment, such fixation is sufficient.
- Gluing of canvases. This point is not necessary for everyone, and yet we present it. To work you will need:
- Masking tape;
- “Cold welding of linoleum”;
- Construction knife.
See also: Tile adhesive
Painting tape is glued along the joint. Then, using a knife, exactly along the joint, make a slit in the tape. A needle is screwed onto a tube of glue, inserted into the gap and a droplet with a diameter of 2-3 mm is carefully squeezed out. After this, smoothly, with even pressure on the tube, the needle is passed along the entire joint.
Waiting for 30 minutes is enough, after which the tape is removed. Excess glue remains on the masking tape. It takes 2-3 hours for the glue to completely harden (see on the package). The resulting seam is quite strong and is not afraid of water.
The option of sealing the joint with thresholds is currently very little used. Firstly, it does not have such tightness, and secondly, the thresholds clearly catch the eye, giving away the place where the panels join.
- Fixing linoleum is highly desirable. Please note that fixing and gluing in relation to linoleum are different processes . To do this you will need:
- Double-sided tape;
- paint roller.
On one side of the room, the linoleum is rolled up a little further than the middle. Double-sided tape is glued crosswise onto open sheets of plywood in increments of 60-80 cm. The result should be a lattice. Roll the adhesive tape with a roller, remove the protective layer and carefully lay the rolled-up part of the floor covering. Then a similar operation is carried out with the other half of the room.
This step avoids the appearance of air bubbles.
Preparing the base
The quality of all work depends 50% on this stage. And the goal here is simple - a smooth and even surface without a slope.
First, absolutely everything that is on the floor is removed from the room. And even large-sized furniture is highly desirable (if there is a new floor covering underneath). Skirting boards are removed and the floor is cleaned. IMPORTANT! It is better not to remove the tiles .
See also: Substrate for linoleum
In the future, if you have a concrete base, then it must be leveled using a self-leveling and quick-drying screed. Modern mixtures acquire the strength declared by the manufacturer within a day after pouring. To work you will need:
- Self-leveling screed;
- Capacity 25-40 l;
- Mixer (or drill with a specialized attachment);
- Flat spatula;
- Primer;
- Brush.
Work progress:
The floors are swept and thoroughly primed. After about an hour (time for the soil to dry), the mixture is diluted following the instructions on the package and immediately poured. You can spread it across the floor with a spatula.
The quick-drying screed gains technological strength within 24 hours. After this, the base is primed again. But this layer of soil is necessary to remove dust from the surface.
Now you should reduce the thermal conductivity of the base. The best option is plywood flooring with a thickness of 8-10 mm. The principle here is quite simple. The thermal conductivity of plywood is approximately 9 times worse than that of screed. In other words, a multi-layer floor cake will be formed in the room.
Plywood is laid without fixing to the floor. The reason here is the pre-leveled base. But the fit between sheets must be as precise as possible. IMPORTANT: place the edges of plywood that you will saw off at home against the wall. Carefully check the fit of the sheets to each other. There should not be a sheet of paper between them . The plywood is fixed to each other using reinforced plumbing tape.